When choosing between heat-activated and cold lamination, the decision boils down to your project’s needs:
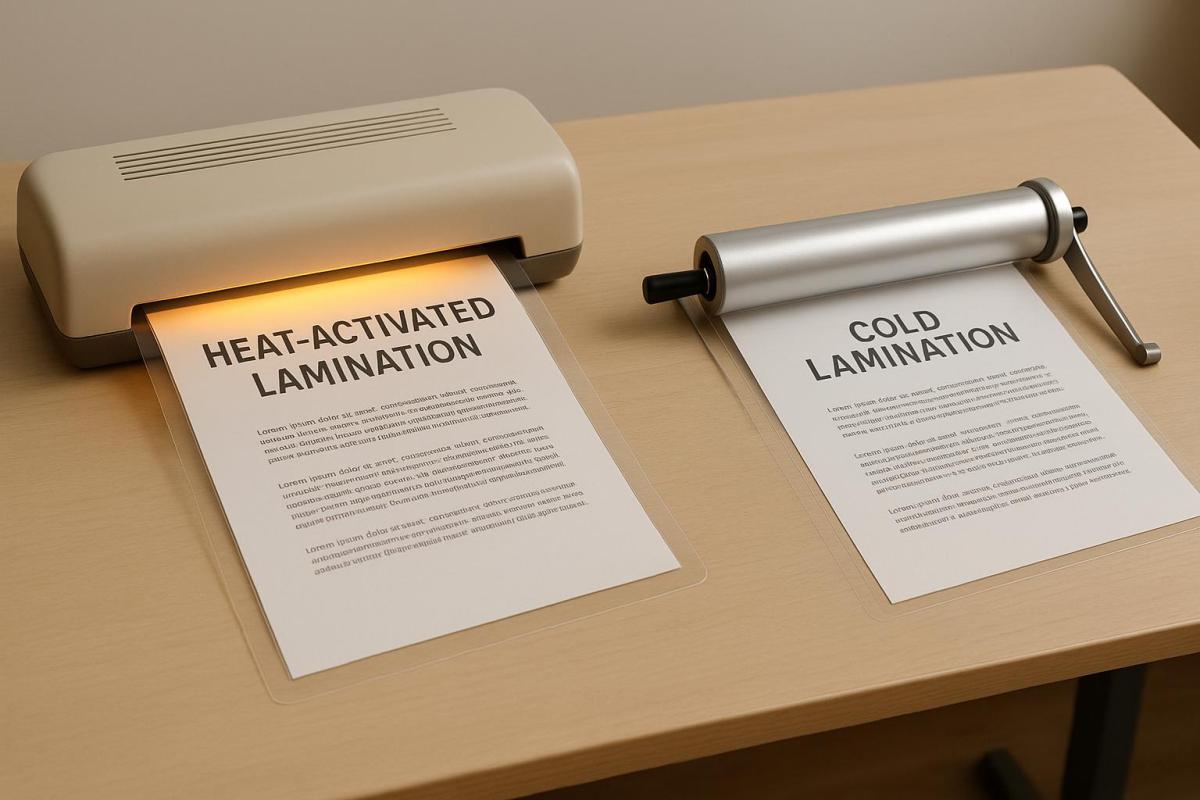
- Heat-Activated Lamination: Uses heat to bond film, offering a strong, durable, and glossy finish. Best for high-volume jobs and materials that can withstand heat, like posters, business cards, or manuals.
- Cold Lamination: Relies on pressure-sensitive adhesives, making it ideal for heat-sensitive items like photos or thermal paper. It’s quicker to start, safer, and better for smaller or delicate projects.
Key Differences:
- Heat Lamination: Stronger bond, lower film cost, glossy finish, but requires warm-up time and isn’t suitable for heat-sensitive materials.
- Cold Lamination: Safer for delicate items, no warm-up needed, but has higher film costs and a weaker bond.
Quick Comparison:
| Feature | Heat-Activated Lamination | Cold Lamination |
|---|---|---|
| Process | Heat and pressure | Pressure only |
| Setup Time | Requires warm-up | Instant |
| Bond Strength | Strong and durable | Weaker |
| Finish | Glossy and clear | Matte or textured |
| Material Suitability | Not for heat-sensitive items | Perfect for delicate items |
| Cost | Higher upfront equipment cost | Higher film cost |
Choose heat lamination for durability and large-scale projects, while cold lamination works best for quick, delicate, or heat-sensitive tasks.
Cold Vs Hot Lamination Machine: Which Is More Effective?
Heat-Activated Lamination
Heat-activated lamination relies on heat and pressure to activate adhesives, offering clear and durable protection. It’s a great choice for materials that face frequent handling or need to last a long time. Below, we’ll break down how this process works, its best applications, and its advantages and drawbacks.
How Heat-Activated Lamination Works
This method uses thermal laminators equipped with heated rollers or shoes to apply both heat and pressure. The laminating film typically consists of a polyester base coated with an adhesive resin layer. As the material passes through the laminator, temperatures between 210°F and 240°F melt the adhesive, allowing it to bond firmly to the document. The polyester layer then acts as a protective shield.
For best results, make sure the laminator is fully heated before starting. Always load the film with the adhesive side facing away from the rollers to avoid damaging the equipment.
There are two main types of laminating films used with hot laminators: standard films for general purposes and low-melt films designed for materials that require lower processing temperatures.
Best Uses for Heat-Activated Lamination
This type of lamination is ideal for high-volume projects that demand durability. It works well with paper and cardstock that can withstand high temperatures. Common uses include:
- Business materials: Training manuals, reference guides, posters, and signage.
- Publications: Magazine covers, inside pages, and advertising inserts, offering protection against tearing, creasing, and moisture while enhancing color vibrancy .
- Commercial and educational items: Menu covers, ID badges, reference charts, and other frequently handled documents.
Heat-Activated Lamination Pros and Cons
Heat-activated lamination has several advantages, particularly for professional settings.
Benefits:
- Provides a strong, permanent bond and excellent protection.
- Enhances image clarity and offers various finish options, including glossy, matte, satin, and soft-touch surfaces.
- More cost-effective for large-scale projects compared to cold lamination.
- Versatile enough to handle different material types and thicknesses, from thin sheets to heavier cardstock.
"Hot laminators are exceptional machines for laminating pressure-sensitive materials with a crystal-clear finish." – Martin Yale Machines
Drawbacks:
- High temperatures can damage materials like photo prints, water-based inks, or archival documents.
- Requires a warm-up period, which can slow down the process when quick turnaround is needed. Cold lamination might be a better fit in such scenarios.
- The initial cost of thermal laminators is higher, though lower film costs can balance this over time.
- A steady power supply is necessary, making it less portable compared to cold lamination.
While heat-activated lamination excels in durability and clarity, it isn’t suitable for all materials or situations. Up next, we’ll dive into cold lamination to see how it compares.
Cold Lamination
Cold lamination takes a gentler route to protecting documents by using pressure instead of heat to create a protective layer. Unlike heat lamination, this method is ideal for delicate materials or when you need quick results. Let’s break down how it works and where it shines.
How Cold Lamination Works
This process uses a pressure-sensitive adhesive to bond a clear protective film to your document – no heat involved. The film, typically made of transparent PVC with an adhesive coating, is protected by a release liner until you’re ready to use it. When the material passes through a cold laminator, pressure activates the adhesive, securing the film to the surface instantly.
For smaller tasks, it can be done manually, but larger projects often require a laminating machine. To get the best outcome, make sure the document surface is clean and apply even pressure to avoid bubbles or wrinkles.
Best Uses for Cold Lamination
Cold lamination is perfect for materials that could be damaged by heat, such as photographs, thermal paper receipts, or delicate artwork. It’s also great for projects where speed is key, as there’s no waiting for equipment to heat up.
Here are some common applications:
- Protecting important documents like certificates and reference materials.
- Preserving photographs and fine prints.
- Laminating business items like menus, price lists, and promotional materials.
- Creating durable signage and labels for both indoor and outdoor use.
- Enhancing classroom posters and instructional charts for educational purposes.
This method is especially handy for quick, on-the-spot projects that need to be completed without delay.
Cold Lamination Pros and Cons
Cold lamination has its advantages, particularly for specific applications, but it’s not without its challenges.
Benefits:
- Safe for delicate materials: Since no heat is used, sensitive items like photos, thermal receipts, and artwork remain unharmed.
- Immediate results: No warm-up time means you can start laminating right away, and the finished product is ready to handle immediately.
- Cost-effective equipment: Cold laminators tend to be more affordable than heated ones, making them a great option for small businesses or schools.
- User-friendly: The simple process requires minimal setup and eliminates risks like burns or overheating.
- Portable: Many cold laminators don’t need electricity, making them a convenient choice for fieldwork or areas without reliable power.
- Cutting flexibility: You can cut through laminated materials while keeping the edges sealed.
Drawbacks:
- Higher material costs: Cold lamination films are generally pricier than thermal options, which can add up for larger projects.
- Less durable bond: The adhesive bond may not be as strong or long-lasting as heat lamination, especially for items that are frequently handled.
- Finish limitations: The finish is usually matte or slightly textured, lacking the glossy clarity that heat lamination can achieve.
- Thickness challenges: It doesn’t work as well with very thick or uneven materials.
- Adhesive challenges: A strong adhesive improves bonding but makes repositioning difficult if errors occur during application.
Choosing between cold and heat lamination depends on the material and the project’s needs. Cold lamination is the go-to for sensitive items and quick turnaround times, while heat lamination often provides a more durable finish for heavily used items. Up next, we’ll dive into a direct comparison of these two methods.
sbb-itb-ce53437
Heat-Activated vs. Cold Lamination Comparison
Here’s a side-by-side look at how heat-activated and cold lamination stack up against each other.
Comparison Table
| Feature | Heat-Activated Lamination | Cold Lamination |
|---|---|---|
| Process | Uses heat to melt adhesive and bond film to material | Relies on pressure-sensitive adhesive without heat |
| Equipment Cost | Roll laminators start around $1,200, with commercial models exceeding $20,000 | Generally more affordable equipment |
| Film Cost | Lower-cost films | Higher-cost films |
| Setup Time | Requires a warm-up period | Ready to use immediately |
| Speed | Faster processing, ideal for high-volume jobs | Slower processing |
| Bond Strength | Strong and durable bond | Weaker bond overall |
| Finish Quality | Glossy and clear finish | Matte or slightly textured finish |
| Material Compatibility | Unsuitable for heat-sensitive materials | Perfect for heat-sensitive items like photos and inkjet prints |
| Safety | Requires electricity, with potential burn risks | No electricity needed, safer to operate |
| Best Applications | High-volume printing and durable documents | Outdoor signage, delicate materials, and quick projects |
Key Factors to Consider
The table highlights the major differences, but let’s break down a few key points to help you decide which method works best for your needs.
Material Sensitivity
If you’re laminating heat-sensitive items like photographs or inkjet prints, cold lamination is the safer choice as it avoids potential damage from heat. However, if your materials can handle heat, either method could work.
Project Volume
For large-scale operations, heat lamination usually makes more sense. It’s faster and uses lower-cost films, making it more cost-effective for high-volume jobs. On the other hand, if you’re handling smaller batches or occasional projects, cold lamination’s lower equipment costs and instant setup might be a better fit.
Durability Needs
If you’re working on items that will face frequent handling, heat lamination’s stronger bond is a better option. Cold lamination is more suited for temporary or lightly used items.
Time Constraints
Cold lamination is ready to go right away since it doesn’t require any warm-up time. While heat lamination takes longer to get started, it processes faster once warmed up, which can be a big advantage in busy settings.
Finish Preferences
Heat lamination produces a glossy, polished look that’s great for professional documents. Cold lamination, on the other hand, offers a matte finish that works well for certain design styles but may not deliver the same level of shine.
Outdoor Use
For outdoor projects like banners or vehicle wraps, cold lamination is the better choice. It works well with vinyl-based media and holds up in exterior conditions.
Ultimately, the best method depends on your specific needs – whether it’s the type of material, the volume of work, or the desired finish. Use these insights to guide your decision.
Choosing the Right Lamination Method
Selecting the right lamination method depends on the specific needs of your project. To make the best choice, it’s important to weigh several key factors.
Decision-Making Factors
- Material Sensitivity: For delicate items like photographs, thermal paper, or inkjet prints, cold lamination is a safer option since it avoids heat damage. If your materials can handle heat, either method could work.
- Durability Needs: Heat lamination forms a stronger bond, making it ideal for items that will be handled frequently. Cold lamination, on the other hand, provides a lighter bond, better suited for display items or materials with minimal handling.
- Finish Preferences: Heat lamination produces a sleek, high-gloss finish, while cold lamination often results in a matte surface that minimizes glare – perfect for outdoor signage or items viewed under bright lighting.
- Project Size and Budget: For large-scale projects, heat lamination is more efficient once the machine is warmed up and can be cost-effective for regular use. Cold lamination is better for occasional, smaller-scale projects due to its lower upfront costs.
- Safety Considerations: Cold lamination eliminates the risk of burns, making it a safer option. If you opt for heat lamination, proper safety training and precautions are essential.
- Equipment Maintenance: Cold laminators are easier to maintain and require less upkeep. Heat laminators, while effective, may involve higher maintenance costs and more frequent servicing.
By carefully evaluating these factors, you can make an informed decision that aligns with your project’s needs.
How Miro Printing & Graphics Inc. Can Help
At Miro Printing & Graphics Inc., we understand that choosing the right lamination method is about more than just technical specifications – it’s about achieving the perfect balance of quality, budget, and timing.
Our team has extensive experience with both heat-activated and cold lamination techniques. Whether you’re looking for durable materials for high-traffic use, weather-resistant outdoor signage, or gentle handling for delicate photographs, we’ll help you find the best solution.
We use top-tier equipment for both methods to ensure precise results that meet your exact specifications. This attention to detail is especially important for branding materials, where the finish and color accuracy can directly influence your company’s image. Plus, we offer a variety of custom finishes and specialty effects to meet your unique needs. Let us help you bring your vision to life with the perfect lamination method.
Conclusion
To wrap things up, the choice between heat-activated and cold lamination boils down to your material’s needs and the project’s demands. Heat-activated lamination relies on a heat-melting adhesive, creating a strong and durable bond. This makes it perfect for items that will endure frequent handling or exposure to tough conditions. On the other hand, cold lamination uses a pressure-activated adhesive, making it the go-to option for heat-sensitive materials or when you need quick processing.
"The primary difference between hot vs. cold lamination depends on how the plastic is applied to the document by the laminating machine." – Martin Yale Machines
For delicate items like photographs, thermal paper, or certain inkjet prints, cold lamination is the safer choice. Meanwhile, heat lamination is better suited for sturdier materials, offering a high-gloss finish that stands out, while cold lamination provides a matte look that reduces glare in bright settings.
Cost considerations also play a role. Cold lamination is more affordable upfront and requires minimal maintenance, making it ideal for smaller projects. Heat lamination, despite its higher initial costs and longer setup time, becomes more economical for larger volumes.
With lamination used in 80% of premium packaging worldwide, choosing the right method can directly influence the quality and longevity of your project. Factors like technical requirements, environmental conditions, and the intended purpose of the laminated material will help you decide which approach aligns best with your goals.
FAQs
What should I consider when choosing between heat-activated and cold lamination for my project?
When weighing the choice between heat-activated and cold lamination, here are some important points to keep in mind:
- Material sensitivity: Heat-activated lamination involves high temperatures, making it a solid choice for sturdy materials. However, if you’re working with heat-sensitive items like photographs, vinyl, or certain types of ink, cold lamination is the safer option.
- Project size and durability: Heat lamination excels in handling large-scale projects, delivering a polished and long-lasting finish. Cold lamination, meanwhile, offers more flexibility and works well for smaller tasks or delicate materials.
- Ease of use: Cold lamination stands out for its simplicity and safety. Since it doesn’t require heating equipment, it’s a convenient choice for quick or DIY projects.
By considering the specific needs of your project, such as material type and desired finish, you can choose the method that delivers the best outcome.
What are the cost differences between heat-activated and cold lamination, and how do they affect long-term budgets?
The cost differences between heat-activated and cold lamination boil down to the equipment and materials involved. Cold laminators are typically less expensive upfront since they don’t include heating components. However, the films they use are often more expensive. On the other hand, heat-activated laminators come with a higher initial price tag due to their more advanced machinery, but their materials – like thermal pouches and films – tend to be cheaper.
When considering long-term expenses, it really depends on how you plan to use the laminator. Cold lamination may lead to higher material costs over time but offers lower equipment costs, making it a practical choice for occasional use or small-scale projects. In contrast, heat-activated laminators are better suited for high-volume tasks. Their lower material costs and quicker processing speeds can translate into noticeable savings over time.
When should I choose cold lamination instead of heat-activated lamination?
Cold lamination works perfectly for heat-sensitive materials like photographs, inkjet prints, or stickers. Since it doesn’t use heat, you avoid problems like warping, melting, or fading colors, making it a safer option for delicate items.
It’s also a time-saver, especially if you’re on a tight schedule. Unlike heat lamination, there’s no need to wait for the machine to warm up. This means you can get your project done faster without risking damage to your materials – ideal for quick, small-scale tasks.
Related posts
- Foil Stamping vs Metallic Ink: Key Differences
- Die-Cutting vs Laser Cutting: Material Differences
- UV Printing vs. Lamination: Which Protects Better?
- Foil Stamping Techniques for Cardstock Printing
https://app.seobotai.com/banner/banner.js?id=688992490e97e74a2fac42b6
