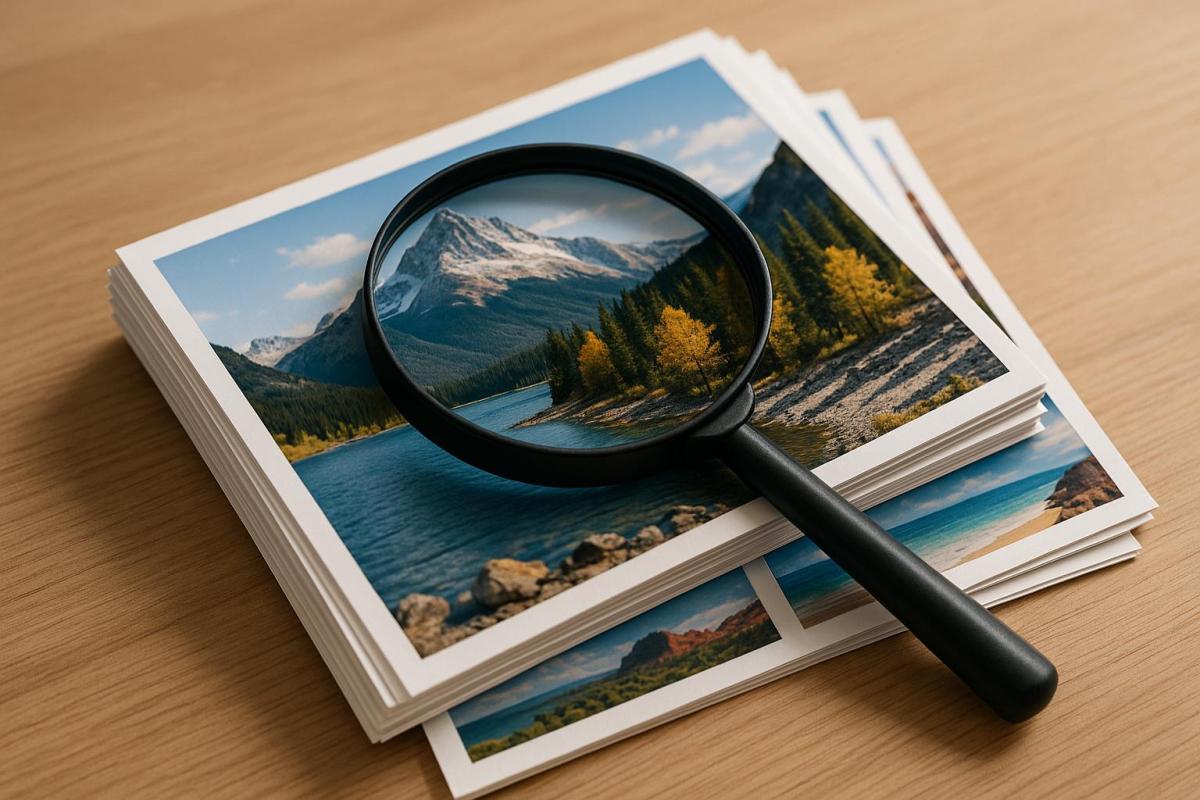
When it comes to printing, resolution is everything. The clarity and sharpness of your printed materials depend on two key factors: DPI (dots per inch) for printers and PPI (pixels per inch) for images. A mismatch between these can result in blurry, pixelated prints. Here’s the key takeaway:
- Higher DPI = sharper, more detailed prints.
- 300 DPI is the standard for most projects like business cards and brochures.
- 600+ DPI is recommended for detailed illustrations and photo-quality prints.
However, resolution alone isn’t enough. The quality of your prints also depends on image scaling, paper type, and file formats. For example:
- Glossy paper enhances sharpness, while textured paper can soften details.
- Use TIFF or PDF formats to preserve quality, and convert colors to CMYK for accurate reproduction.
To avoid common pitfalls like pixelation or poor color output, always align your image resolution with your printer’s DPI and choose materials that complement your design. Professional services can streamline this process and ensure your prints look polished and professional.
300 DPI Doesn’t Matter Unless You Know This One Thing – Why 300dpi Alone Means Nothing
The Science Behind Resolution and Print Quality
The connection between resolution and print quality is backed by clear scientific principles. Studies consistently demonstrate that higher DPI settings result in sharper, more detailed prints. This technical relationship explains why some printed materials look polished and professional, while others appear blurry or pixelated. These findings form the foundation for the resolution standards used in professional printing.
How DPI Affects Print Clarity and Detail
DPI, or dots per inch, determines how many tiny ink dots a printer applies to each inch of paper. Think of it like building a mosaic – more dots create smoother, more detailed images. Higher DPI means more precision and better detail.
The differences in DPI levels are easy to spot. At 72 DPI, images look pixelated and rough; at 300 DPI, text and graphics appear crisp and clean; at 600 DPI, even finer details emerge; and at 1200 DPI, smooth gradients and subtle transitions make high-end prints stand out.
This improvement happens because additional dots allow for more accurate color blending. Instead of abrupt shifts between colors, you get seamless transitions that look natural to the eye. This aligns with how human vision processes detail – our eyes can perceive small differences when they’re presented clearly and consistently.
Industry Standards for Print Resolution
Over time, professional printing has developed resolution standards based on research and real-world experience. 300 DPI is the go-to resolution for general printing, such as business cards, brochures, and magazines. This ensures sharp, professional-quality images and text.
For projects that demand greater precision, 600 DPI is ideal for detailed illustrations where intricate lines and graphics need to remain clear. For premium projects, such as professional photo prints or high-quality graphics, 1200–2400 DPI is recommended to capture every subtle detail.
Interestingly, larger prints like banners or posters often use lower resolutions – 150–300 DPI – because they’re typically viewed from a distance. From several feet away, the human eye can’t discern the same level of detail, making higher resolutions unnecessary and more expensive for these applications.
| Print Type | Recommended DPI | Viewing Distance | Quality Outcome |
|---|---|---|---|
| Business cards, brochures | 300 DPI | Close inspection | Sharp, professional appearance |
| Detailed illustrations | 600 DPI | Close inspection | Finer detail, smoother gradients |
| Professional photos | 1200+ DPI | Close inspection | Maximum detail, photographic quality |
| Large format (banners) | 150-300 DPI | Several feet away | Acceptable from viewing distance |
These guidelines highlight the importance of matching resolution to the intended use and viewing distance.
Modern Printing Technology Improvements
Advances in printing technology have completely transformed what’s possible with high-resolution output. Modern inkjet printers now achieve resolutions of 1200 DPI or higher, thanks to improved printhead designs that allow for precise ink placement and smoother gradients.
Laser printers, on the other hand, excel at producing sharp, consistent text and graphics at 600 DPI or more. Their precision makes them ideal for text-heavy documents where clean edges are critical. Innovations in printhead technology, ink formulations, and control systems have further pushed the boundaries of what high-resolution printing can achieve.
These advancements aren’t limited to hardware. Software plays a crucial role, too. Enhanced color management systems and sophisticated algorithms ensure printers maximize their resolution capabilities, making every dot contribute to the final image quality.
Professional printing services, like Miro Printing & Graphics Inc., take full advantage of these technological improvements. With advanced equipment and expertise, they deliver consistently high-quality results, tailored to the specific needs of each project. Their ability to pair the right resolution with the right materials ensures clients benefit from the very best in modern printing technology.
Print Quality at Different Resolution Levels
As mentioned earlier, the science of resolution plays a crucial role in determining the quality of printed materials. The differences between DPI (dots per inch) levels are not just technical – they’re immediately visible when you compare prints side by side. Understanding these differences helps you make better decisions for your printing projects.
Side-by-Side Resolution Comparison
When you compare printed materials at different DPI levels, the visual differences are striking. Let’s break it down:
- 72 DPI: This resolution is only good for drafts or web images where quality isn’t a priority. Prints at this level appear pixelated and blurry.
- 150 DPI: Offers moderate clarity but with noticeable softness, especially if viewed up close. It works for large posters or banners meant to be seen from a distance but isn’t suitable for detailed or close-up materials.
- 300 DPI: This is the standard for professional printing. Text is sharp, images are clear, and the overall quality meets business-grade expectations. It’s the sweet spot for most commercial projects.
- 600 DPI and above: At this level, the improvements are more subtle but noticeable in fine details. Small fonts, intricate line art, and smooth gradients are rendered with exceptional precision. This resolution is ideal for fine art prints or detailed illustrations.
Here’s a quick comparison of DPI settings, their visual clarity, typical uses, and processing demands:
| DPI Setting | Visual Clarity | Typical Use Cases | Processing/File Size Requirements |
|---|---|---|---|
| 72 DPI | Pixelated, blurry | Web images, draft prints | Very Low |
| 150 DPI | Moderate clarity, soft edges | Large posters, banners (viewed from a distance) | Low |
| 300 DPI | Sharp, professional | Business cards, brochures, photos | Moderate |
| 600 DPI | Extremely sharp, precise | High-end photo prints, fine line art | High |
| 1200+ DPI | Maximum detail | Archival prints, fine art | Very High |
For example, a business card printed at 72 DPI will look unprofessional, with fuzzy text and logos. The same card printed at 300 DPI will appear crisp and polished. Similarly, a large-format poster at 150 DPI may look fine from several feet away, but up close, the text and images will lack sharpness. On the other hand, photographs printed at 600 DPI or higher will showcase smooth gradients and fine details, perfect for gallery-quality prints.
Choosing the Right Resolution for Your Project
When deciding on the resolution for your project, consider the viewing distance, content type, and print size. Striking the right balance between quality, file size, and processing time is key.
- For close-view materials like business cards, brochures, and photo prints, 300 DPI is the ideal resolution. It ensures professional quality without creating unnecessarily large files or slowing down processing times.
- For large-format prints like banners or posters viewed from a distance, 150 DPI is usually sufficient. Since viewers are standing several feet away, the human eye won’t notice the finer details that higher resolutions provide. This approach saves time and reduces costs without sacrificing noticeable quality.
- High resolutions of 600 DPI or more are best for specialized applications, such as fine art prints, archival materials, or projects with intricate details that will be closely inspected. These settings deliver exceptional quality but come with trade-offs, such as larger file sizes and longer processing times.
Higher DPI settings significantly increase file size and can slow down file transfers, require more storage, and extend print processing times. For example, text and line art benefit greatly from higher DPI to avoid jagged edges and ensure readability, especially at smaller sizes. Photos and graphics also improve with higher DPI, as they display smoother gradients and finer details. However, for most standard applications, the improvements level off beyond 300-600 DPI.
Professional printing services, such as Miro Printing & Graphics Inc., can guide you through these decisions. Their expertise ensures you choose the right resolution for each project, avoiding problems like pixelation or unnecessarily large files that don’t add visible quality.
Optimizing DPI improves clarity while maintaining efficiency. For the majority of print jobs, 300 DPI strikes the perfect balance between quality and practicality, making it the go-to resolution for business printing needs.
sbb-itb-ce53437
Factors That Affect Print Resolution Results
While DPI settings lay the groundwork for print quality, several other elements influence the final outcome of your printed materials. These factors, when understood and managed properly, bridge the gap between your digital designs and their printed versions. Paying attention to these details can help avoid common issues that compromise even the sharpest high-resolution files.
Image Scaling and Resolution
Always begin with high-resolution images that match your intended print size. Why? Because you can’t create detail that doesn’t exist. Enlarging a low-resolution image for print often results in pixelation, blurriness, and a noticeable loss of detail. When you stretch a small image, the printer has no choice but to spread the existing pixels over a larger area, leading to blocky visuals and softened edges.
For instance, if you’re printing a 5″ x 7″ photo, make sure your digital file is sized at 5″ x 7″ with a resolution of 300 DPI. This approach eliminates the need for upscaling and ensures crisp, sharp results.
Manually resizing images in professional design software before printing offers better control over quality. These programs use advanced resampling methods to minimize quality loss. In contrast, automatic scaling – whether by a printer or less sophisticated software – can introduce unwanted artifacts and blur.
But image resolution isn’t the only factor at play. The type of paper you choose also plays a major role in how sharp and vibrant your prints appear.
Paper and Material Considerations
The paper or material you select significantly impacts how well your high-resolution designs translate to print. Different surfaces interact with ink in unique ways, which can either enhance or soften the final output.
- Glossy paper: Its smooth, reflective surface keeps ink on top, making details sharper and colors more vibrant. A 300 DPI image printed on glossy stock will often appear exceptionally crisp and vivid.
- Matte paper: While smooth, matte paper lacks the reflective quality of glossy finishes. This can slightly diffuse fine details, giving your prints a softer, more understated look.
- Textured or uncoated paper: These rough, absorbent surfaces scatter ink, which can reduce sharpness. For such materials, using a higher resolution image can help retain detail.
| Paper Type | Surface Quality | Effect on Resolution |
|---|---|---|
| Glossy | Smooth, reflective | Enhances sharpness and color vibrancy |
| Matte | Smooth, non-reflective | Slightly softens details for a subtle effect |
| Textured/Uncoated | Rough, absorbent | Reduces sharpness; higher resolution helps |
Research also indicates that smoother, glossier papers provide better color accuracy and a wider color range. This means pairing high-resolution files with premium paper can deliver sharper images and more vibrant colors.
Once you’ve considered your materials, the next step is ensuring your file format and color settings are up to par.
File Formats and Color Space Conversion
The digital file format and color settings you use directly influence the quality of your printed materials. Choosing the right format ensures that your resolution and design are preserved during the printing process.
TIFF and PDF formats are ideal for printing because they support high-resolution, lossless data and maintain color profiles. These formats ensure that your designs look as sharp and vibrant on paper as they do on your screen.
On the other hand, JPEG files, while convenient for sharing, often compress image data, leading to a loss of detail and the appearance of compression artifacts. For professional results, stick with lossless formats like TIFF, which preserve image clarity throughout the process.
Another critical step is converting your file from RGB to CMYK. Since printing presses use CMYK inks rather than the RGB color system of digital screens, failing to convert colors can result in unexpected shifts. Some RGB colors simply can’t be reproduced in CMYK, so making this conversion ensures more accurate color reproduction.
Finally, professional formats like PDF are better equipped to handle complex designs with layers, transparency, and spot colors. Using the wrong format for such features can result in unexpected backgrounds, missing elements, or degraded quality.
For best results, consider working with professional printing services, such as Miro Printing & Graphics Inc. Their expertise in file preparation, material selection, and equipment calibration ensures that your projects are handled with precision. They can help identify potential issues and recommend the best materials and practices to achieve consistently high-quality prints.
Best Practices for Print Resolution
To ensure your printed materials look professional and avoid unnecessary delays or reprints, it’s important to prepare your files with the right DPI, file format, and layout settings. Following these practices will help you meet industry standards and produce high-quality results.
Preparing Print-Ready Files
Start by setting the correct DPI (dots per inch) based on your project type. Here’s a quick guide:
- 300 DPI: Best for basic text documents and simple graphics.
- 600 DPI: Ideal for documents with illustrations or standard graphics, such as brochures.
- 1200 DPI or higher: Recommended for detailed photo prints or intricate designs.
Using the right DPI ensures sharpness and clarity in your prints. Always source or create images at the correct resolution from the beginning to avoid pixelation or loss of detail. Stick to lossless file formats like TIFF or PDF to maintain resolution and color accuracy.
Before submitting your files for printing, proof them at 100% size to catch any errors in resolution or color. Ensure your files include proper bleed and crop marks, embed all fonts, and flatten any layers to prevent compatibility issues during production.
| Project Type | Recommended DPI | Ink Usage | Print Speed | Best Use Cases |
|---|---|---|---|---|
| Basic text documents | 300 DPI | Low | Fast | Simple graphics, everyday printing |
| Standard graphics | 600 DPI | Moderate | Moderate | Business materials, brochures |
| Detailed graphics | 1200 DPI | High | Slower | Intricate logos, premium materials |
| Photorealistic prints | 1440+ DPI | Highest | Slowest | High-end photography, art prints |
Once your files are properly optimized, professional print services can further refine them for flawless results.
Working with Professional Printing Services
Even with well-prepared files, professional printing services play a critical role in ensuring the final product meets the highest quality standards. They bring expertise, advanced equipment, and a meticulous approach to every project. For example, Miro Printing & Graphics Inc. uses state-of-the-art high-resolution technology and provides guidance on file preparation to avoid common issues like incorrect DPI or color mismatches.
Professional print shops can also help you determine the ideal DPI settings for your project. While 600–900 DPI is often sufficient for standard materials, they may recommend 1200+ DPI for projects requiring exceptional detail, such as fine art prints. This balance ensures both quality and production efficiency.
Beyond DPI recommendations, professional print shops offer preflight services. This process involves checking files for errors like incorrect color spaces, missing fonts, or improper resolution settings before production begins. Catching these issues early helps prevent delays and ensures your project is ready for printing from the start.
With decades of experience, established companies like Miro Printing & Graphics Inc. are equipped to handle nearly any file preparation challenge. Their expertise ensures your materials achieve the resolution and quality needed for outstanding results.
Key Points About Resolution and Print Quality
When it comes to achieving crisp, professional print results, resolution is everything. DPI (dots per inch) plays a direct role in determining how sharp and clear your prints will look.
One of the most important factors is the resolution of your source image. Always make sure your source files meet or exceed the intended print resolution. If they don’t, you risk pixelation and a noticeable loss of detail.
Here’s a quick breakdown of recommended DPI settings for different types of projects:
- 300 DPI: Ideal for basic text and graphics.
- 600 DPI: Works well for standard prints with moderate detail.
- 1200+ DPI: Necessary for high-end photography or intricate designs.
For professional photo printing, you’re usually looking at resolutions between 1200 and 2400 DPI, while everyday office documents typically perform just fine at 300 to 600 DPI.
That said, higher resolution isn’t always better in every situation. It’s about finding the right balance between quality and efficiency. For example, a print job at 600 DPI might take around 2 minutes to complete, but bumping it up to 1200 DPI could increase the time to over 5 minutes. Higher DPI settings also consume more ink, which can drive up costs – especially for large-volume projects.
File preparation and material selection are just as important as resolution. The file format, color space, and type of paper you use all influence the final result. For instance, smoother and glossier papers tend to enhance color vibrancy and detail, while rough or absorbent materials can dull sharpness, even if the resolution is high.
To make the most of your project, it’s crucial to balance technical precision with practical considerations like speed and cost. If you’re unsure, working with experienced professionals – like the team at Miro Printing & Graphics Inc. – can make a big difference. They can help you choose the right resolution, prepare your files correctly, and select materials that complement your DPI settings.
Ultimately, the key is to choose a resolution that aligns with your project’s specific needs. By doing so, you’ll strike the perfect balance between quality, efficiency, and cost, setting yourself up for excellent results.
FAQs
Why do I need to convert colors from RGB to CMYK for printing?
Converting colors from RGB (Red, Green, Blue) to CMYK (Cyan, Magenta, Yellow, Black) is a key step in ensuring your printed materials look as intended. While RGB works perfectly for digital screens, CMYK is the standard for printers. Skipping this conversion can lead to printed colors that don’t match what you see on your monitor.
Why the difference? Screens emit light to display colors in RGB, while printers layer CMYK inks to create colors on paper. These processes are fundamentally different. By converting to CMYK, you align your design with the printer’s color system, helping to minimize color discrepancies and deliver results that match your vision.
How does the type of paper influence the sharpness and vibrancy of printed materials?
The type of paper you choose has a big impact on how sharp and vibrant your printed materials turn out. For example, glossy paper is perfect for showcasing bold colors and fine details, making it a go-to option for photos and marketing materials. On the other hand, matte paper offers a softer, glare-free finish that lends an elegant, understated touch to your prints.
The texture and weight of the paper also play a role in the final result. Smoother and heavier paper tends to produce sharper text and images, while rougher textures can slightly soften the print. Picking the right paper ensures your project not only looks great but also matches the style and purpose you’re aiming for.
What are the cost and time trade-offs of using a higher DPI setting for printing?
Using a higher DPI (dots per inch) setting can make a big difference in print quality, delivering sharper, more detailed images. But it’s not all upside – there are a few trade-offs to keep in mind. Higher DPI settings create larger file sizes, which can slow down processing and take up more storage space. Plus, printing at these higher resolutions tends to use more ink or toner, which could bump up your material costs.
For most projects, finding the right balance between resolution and practicality is key. A 300 DPI setting is typically the go-to standard for high-quality prints. While increasing the DPI beyond that might not make a noticeable difference to the average viewer, it can still lead to higher costs and longer production times. Evaluating your specific project needs will help you choose the resolution that works best for you.
Related Blog Posts
- Large Format Printing: DPI vs. PPI Explained
- Image Resolution Standards for Offset Printing
- DPI vs PPI: Key Differences Explained
- Best DPI Settings for Photo Printing
https://app.seobotai.com/banner/banner.js?id=6923a3939c1061ed16217d0b
