Preflighting a PDF ensures your file is error-free and ready for professional printing. This process involves verifying fonts, image resolution, color modes, and layout dimensions to prevent costly mistakes like color shifts or misaligned designs. Here’s a quick breakdown:
- Why Preflight? Avoid errors like missing fonts, low-resolution images, or incorrect color spaces that can ruin print jobs and lead to expensive reprints.
- Who Needs It? Designers, printers, marketers, and anyone creating print materials.
- Key Tools: Adobe Acrobat Pro and GWG Preflight Profiles help identify and fix issues.
- Steps to Follow:
- Check trim size, bleed, and margins.
- Convert colors to CMYK and verify ink coverage.
- Ensure images are at least 300 DPI.
- Embed fonts and flatten transparencies.
- Export using PDF/X standards.
Skipping preflighting can lead to delays, wasted materials, and unexpected costs. By following these steps, you can ensure your design transitions seamlessly from screen to print, saving time and money.
5-Step PDF Preflight Process for Print-Ready Files
Tools for PDF Preflighting
Adobe Acrobat Pro
Adobe Acrobat Pro includes a powerful preflight engine, derived from the callas pdfToolbox, that uses profiles to identify and correct errors in PDFs. To access this feature, go to All Tools > Use Print Production > Preflight. With over 400 predefined checks, it can identify issues like missing fonts or incorrect color spaces. The tool also provides detailed reports in PDF, XML, or text formats, highlighting problems such as transparent masks or comments. For more intricate layouts, the Snap View feature allows you to zoom in on specific objects to pinpoint issues. Once corrections are made, you can digitally sign the document using the "Embed Audit Trail" option.
"The success of a preflight inspection depends on how well you define the criteria for the inspection." – Adobe Acrobat User Guide
Additionally, Adobe Acrobat Pro offers specialized profiles to enhance error detection, particularly for professional printing needs.
GWG Preflight Profiles
Ghent Workgroup (GWG) Preflight Profiles are another essential tool for ensuring print-ready PDFs. These profiles act as detailed checklists tailored to specific printing methods, including sheetfed offset, web offset, digital printing, and newspaper ads. They go beyond the standard PDF/X requirements, enforcing stricter rules such as rejecting color images below 150 ppi, limiting ink coverage to 320% for sheetfed printing, and requiring a minimum line thickness of 0.125 points.
The Ghent Workgroup recommends using their GWG 2022 or GWG 2015 profiles, based on ISO PDF/X-4 standards, which support modern features like native transparency and color-managed RGB workflows. They advise against the outdated GWG 1v4 standard (PDF/X-1a). These profiles are available for tools like Adobe Acrobat Pro, Enfocus PitStop, and callas pdfToolbox, ensuring consistent results. All compliant applications undergo rigorous testing by the GWG to catch relevant errors and warnings.
"Preflighting your files can save you a lot of money as many errors can only be detected by preflight software. And those errors do create trouble afterwards!" – Ghent Workgroup
sbb-itb-ce53437
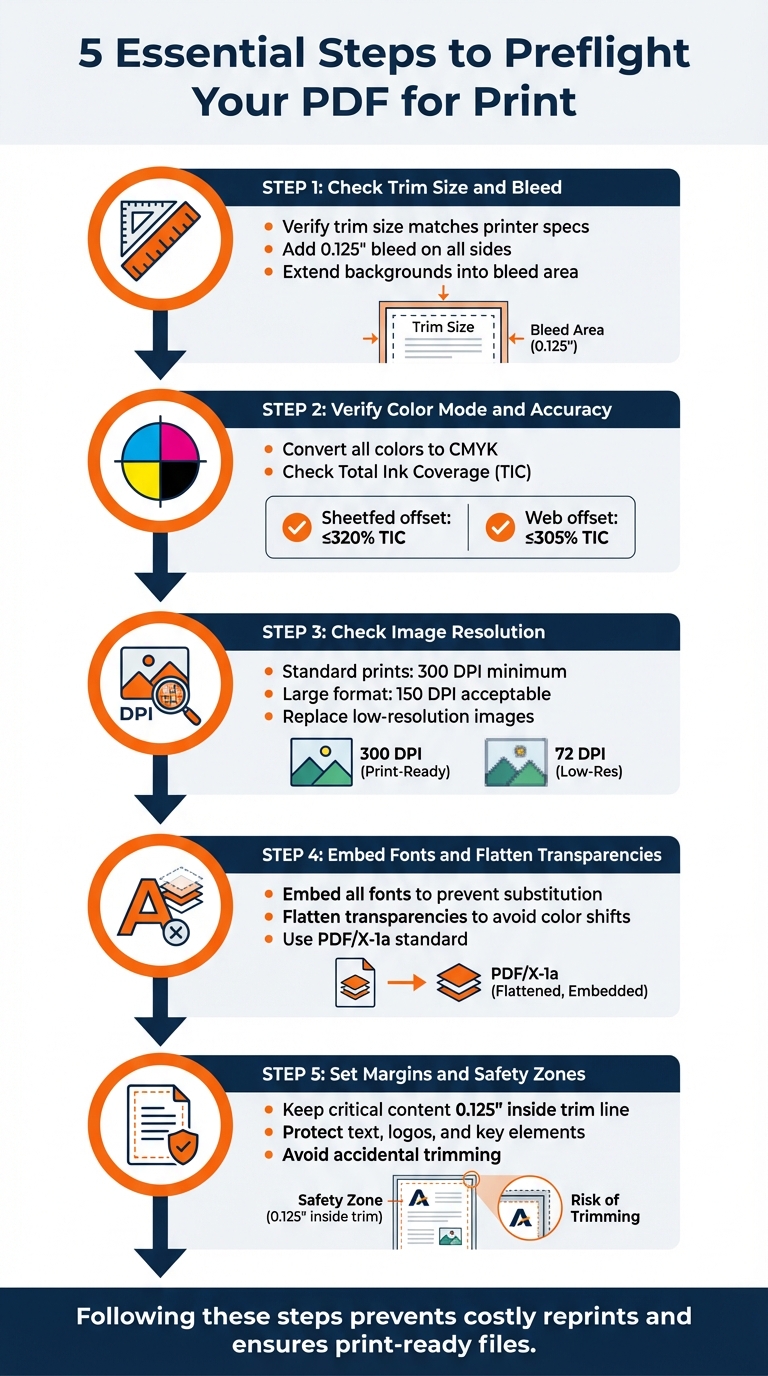
Steps to Preflight Your PDF
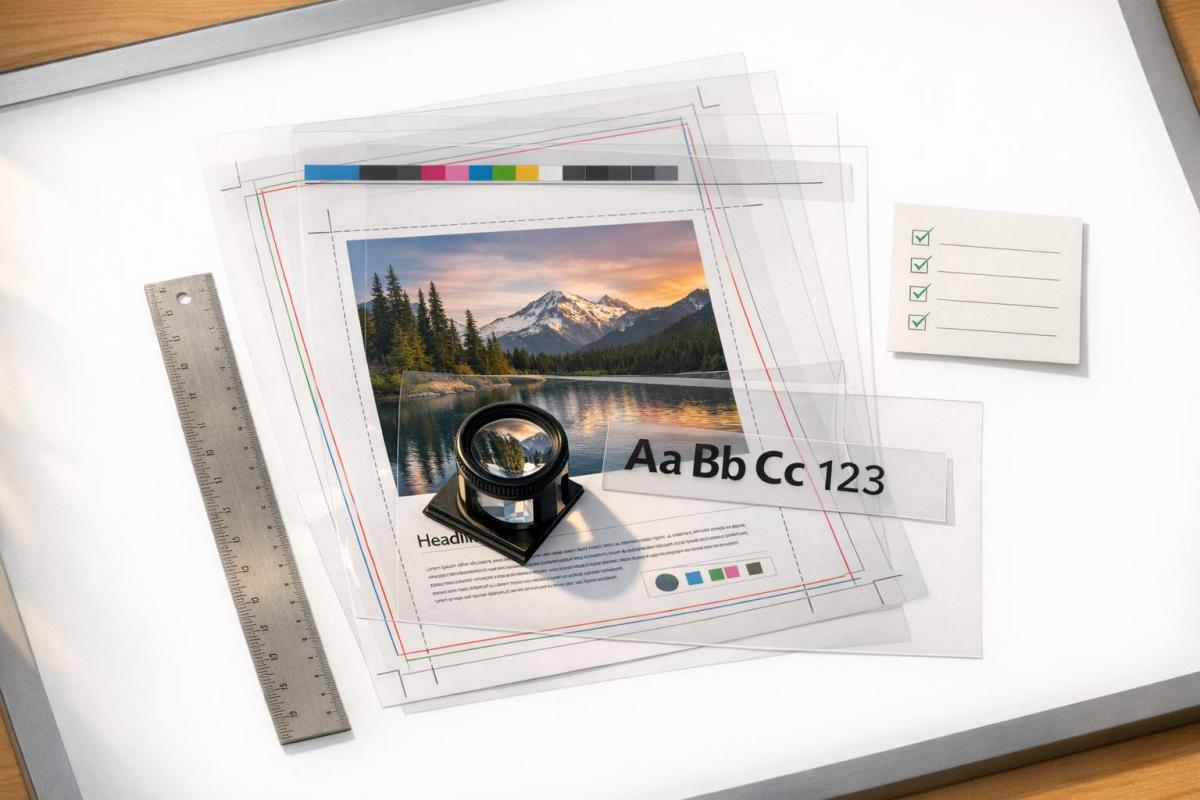
Check Trim Size and Bleed
Make sure your document’s dimensions align with your printer’s specifications. The trim size refers to the final dimensions of your printed piece after cutting, while the bleed is an extra 0.125 inches (1/8") of artwork extending beyond the trim line on all sides. This allows for slight shifts during the cutting process.
In Adobe Acrobat Pro, activate the art, trim, and bleed boxes to confirm your dimensions. For detailed measurements, use the Measuring Tool or open the Crop Pages tool to view exact sizes.
"For exact trim page size measurement use the ‘Crop Pages’ option… to bring up the Crop Pages dialog box to display its TrimBox information." – DK Handbook
Ensure background images and colors extend into the bleed area. Even a tiny 1/64" shift during cutting can expose unwanted white borders if the bleed is missing. When exporting from software like InDesign, check the "Use Document Bleed Settings" option in the Marks and Bleeds tab. Also, enable "Use Overprint Preview" in Acrobat Preferences, set to Always, to preview how colors and bleeds will appear in print.
Verify Color Mode and Accuracy
Once dimensions are confirmed, check that your colors are print-ready. Convert all colors in your PDF to the CMYK color space to prevent unexpected shifts during printing. Use the Output Preview tool in Adobe Acrobat Pro (found under Print Production > Output Preview) and select "CMYK" from the dropdown to verify color accuracy.
Check the Total Ink Coverage (TIC) to ensure it stays below recommended thresholds. For sheetfed offset printing, TIC should be 320% or less, while commercial web offset printing requires TIC under 305%. If you’re using spot colors, ensure they are consistently named throughout the document to avoid creating extra printing plates.
Set black text to overprint and avoid overprinting white to sidestep registration issues. Use Acrobat’s Preflight tool to convert RGB elements to CMYK using profiles like Convert to PDF/X-1a (Coated GRACoL 2006) with the "Analyze and Fix" option.
Check Image Resolution and Quality
After confirming dimensions and colors, ensure your images meet print-quality standards. Images should have a resolution of 300 DPI (dots per inch) for clear printing, though large-format prints can use 150 DPI since they’re typically viewed from a distance. Images that look fine on a screen may appear blurry or pixelated in print if their resolution is too low.
Use Acrobat Pro’s Preflight tool to scan for images below the required resolution. Replace any flagged images with higher-quality versions.
Embed Fonts and Flatten Transparencies
To avoid text and transparency issues, embed fonts and flatten transparencies. Embedding fonts ensures your text appears as intended, preventing substitution errors that could lead to illegible or altered characters. Without embedding, printers may replace your fonts with different ones, disrupting your design.
Flattening transparencies is equally important. If not flattened, overlapping colors can shift, or some design elements might disappear during printing. To handle this, convert your file to the PDF/X-1a standard using Acrobat’s Preflight tool. Alternatively, use Print Production > Flattener Preview, select "Transparent Objects" to highlight areas with transparency, and click "Apply".
Set Margins and Safety Zones
Keep all essential content – like text, logos, and key design elements – at least 0.125 inches (1/8") inside the trim line. This creates a safety zone, ensuring critical elements aren’t accidentally trimmed during production. While decorative elements and background colors can extend into the bleed, make sure important content stays within the trim boundaries to avoid costly reprints.
Acrobat Tutorial: Using the Preflight Dialog Box – Adobe Acrobat Training Course
How to Export a Print-Ready PDF
Getting your PDF ready for print is the final step in ensuring your design transitions seamlessly to the physical world. Here’s how to do it right.
Use PDF/X Standards
When exporting your file, opt for PDF/X-1a or PDF/X-4. These formats are designed to eliminate common printing mishaps by embedding fonts, defining colors, and removing interactive elements or optional features that might cause issues at the print shop.
"PDF/X basically says: No guessing. No surprises. Everything defined." – IMG.LY Blog
- PDF/X-1a works best for traditional offset printing. It requires CMYK color mode and flattens transparencies, ensuring compatibility with older printing workflows.
- PDF/X-4 is ideal for modern digital printing. It supports live transparency and layers, which can improve quality while keeping file sizes smaller.
If you’re unsure which standard your printer prefers, reach out to them. PDF/X-1a tends to be the safer, more universally accepted choice. Once you’ve exported your file, open it in Adobe Acrobat Pro and use the "Verify Conformance" feature in the Standards pane to confirm it meets the required specifications.
Add Crop and Bleed Marks
Crop and bleed marks are essential for accurate trimming. In software like InDesign or Illustrator, go to the "Marks and Bleeds" section during export. Check the "Crop Marks" option and enable "Use Document Bleed Settings" to include the necessary 0.125-inch bleed area.
Keep in mind that some automated print services may not require printer marks. Always confirm your printer’s specific requirements to avoid unnecessary adjustments.
Name and Organize Your Files
Clear and descriptive file names are a must. Instead of vague names like "Final_FINAL_v2.pdf", use something like "BusinessCard_Front_v3_02-16-2026.pdf". Stick to letters, numbers, underscores, and hyphens – special characters and spaces can cause compatibility problems with certain systems.
Before submission, organize your files in a dedicated folder. If you’re sending multiple files (e.g., front and back designs), label them clearly and include a simple text file listing the contents. This extra step helps avoid confusion and ensures your printer processes everything correctly. For detailed submission tips, check out the guidelines from Miro Printing & Graphics Inc. (https://bergencountyprinters.com).
Final Review and Submission
With your PDF fully preflighted and export settings confirmed, it’s time to complete these final steps to ensure everything is ready for print.
Proofread and Print a Test Copy
Printing a physical proof is a critical step to catch issues that might not show up on screen. Check for text clarity, proper image placement, and any unexpected color shifts. Screen previews often miss print-specific problems, such as overprinted white text or transparency issues that only become apparent in a hard copy.
"It’s much cheaper to spend a little extra time proofing your document than it is to re-print it."
– Brian Coale, Creative Director, Casey Printing
A physical proof can uncover details you might otherwise overlook. For instance, small text might become unreadable at its final size, colors can shift during the RGB-to-CMYK conversion, or trim alignment could be slightly off. Skipping this step has cost companies tens of thousands of dollars in reprints – errors a simple test copy would have flagged.
Review Printer Requirements
Before sending your files, double-check that your PDF aligns with your printer’s specific guidelines. This includes ensuring the correct PDF/X format, CMYK color mode, 300 DPI resolution for images, embedded fonts, and proper bleed settings. Additionally, confirm whether printer marks like crop marks should be included, as some automated systems can misinterpret them during the sizing process.
Submit Your Files
When submitting your files, include clear and concise instructions that align with your printer’s procedures. Verify that all final settings, including margins and safety zones, are intact. Run one last preflight scan in Adobe Acrobat Pro to catch any lingering issues. Following these steps will help ensure your final product meets expectations, as advised by Miro Printing & Graphics Inc. (https://bergencountyprinters.com).
Conclusion
Preflighting your PDFs acts as your final safeguard, catching errors early and helping you avoid costly mistakes. Imagine losing tens of thousands of dollars on a single job due to a simple labeling error – something a preflight check could have caught in seconds. This process not only protects your budget but also ensures your project stays on schedule for timely delivery.
By identifying technical issues – like missing fonts or incorrect bleeds – before your files reach the printer, preflighting keeps your production timeline intact. This is especially crucial for hitting key deadlines, such as product launches or trade shows. A thorough review of your file’s essential components ensures it’s truly print-ready, so the final product matches your vision perfectly.
"Preflighting your document regularly is a crucial step towards a trouble-free and predictable printing result."
– Brian Coale, Creative Director, Casey Printing
Preflighting can address half of the top 10 PDF issues. Unlike digital content that can be updated instantly, printed materials are permanent. Once a job is printed, fixing errors requires a complete reprint – an expensive and time-consuming process. Catching problems early not only simplifies corrections but also saves money. By following these steps, you ensure a smooth transition from your screen to the press.
For professional help in creating flawless, print-ready PDFs, check out the services offered by Miro Printing & Graphics Inc..
FAQs
Which PDF/X standard should I choose for my print job?
The PDF/X-1a standard is a go-to choice for print jobs. Why? It guarantees that all fonts are embedded, colors are set in CMYK or spot colors, and transparency is completely eliminated. These characteristics help ensure consistent and dependable printing outcomes every time.
How can I tell if my PDF has enough bleed and safe margins?
To ensure your PDF meets bleed and safe margin standards, make sure any design elements meant to extend to the edge of the page go at least 0.125 inches beyond the trim size. Additionally, keep all important content – like text or logos – at least 0.125 to 0.25 inches away from the trim edge. This helps avoid accidental cutting during printing. Use the guides and tools in your design software to double-check these settings for accuracy.
What’s the fastest way to find RGB colors, missing fonts, or low-res images in my PDF?
The Preflight tool in Adobe Acrobat Pro is a handy way to spot problems like RGB colors, missing fonts, or low-resolution images. To access it, go to Tools > Print Production > Preflight, and use predefined profiles to examine your file. It will flag any issues, helping you fix them quickly and get your PDF ready for printing.
Related Blog Posts
- How to Prepare Vector Files for Print
- Checklist for Print-Ready Files: Bleed, Trim, Safe Zone
- Prepress Checklist for Print-Ready Files
- How to Embed Fonts in Print PDFs
https://app.seobotai.com/banner/banner.js?id=69926269efc60cc2af073cdb
