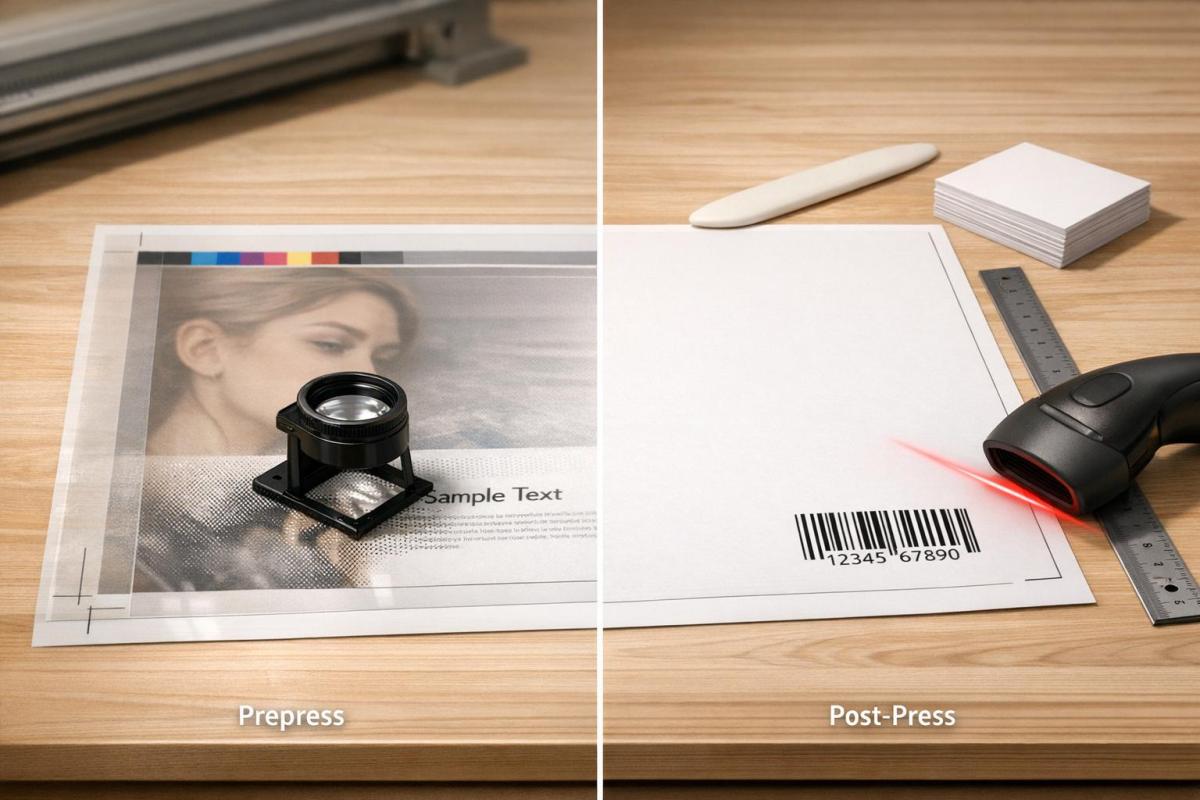
Errors in printing can cost businesses millions, but most mistakes are avoidable. Prepress focuses on preparing digital files for print, while post-press handles physical finishing like trimming and binding. Catching errors early in prepress is cheaper and prevents costly reprints. Post-press ensures the final product is polished and functional.
- Prepress errors: Missing bleeds, low-resolution images, RGB color mode, font issues, and transparency problems.
- Prevention: Use preflight software, embed fonts, convert colors to CMYK, and check resolution.
- Post-press errors: Misalignments, trimming mistakes, folding cracks, and barcode issues.
- Prevention: Allow ink to dry properly, test barcodes, and use folded dummies for accuracy.
Key takeaway: Early checks in prepress save time and money, while post-press ensures the final product meets quality expectations. Together, they form a robust quality control system that minimizes errors and builds trust with clients.
Prepress Errors and Prevention Methods
Common Prepress Errors
When it comes to desktop publishing, many designers lack the technical know-how required for print production. This often leads to overlooked mechanical details that can cause major issues during printing. For example, RGB images may look perfect on screen but fail to translate well into CMYK for print output.
One frequent mistake is missing bleeds. To avoid white edges around the artwork, designers need to extend the artwork by 0.125" beyond the trim line. Another common issue is low-resolution images. While standard printing demands images at 300 DPI (dots per inch) at full size, large-format printing requires at least 150 DPI. In contrast, web images are typically just 72 DPI, which is far below what’s needed for quality print production.
Color mode mismatches are another headache. Designers who work in RGB instead of CMYK often see dramatic color shifts when their files are converted for printing. Similarly, font issues arise when fonts aren’t embedded or converted to outlines, leading to unwanted substitutions or layout problems. Safe zone violations occur when critical elements like text or logos are placed too close to the trim edge – ideally, they should be within 0.125" to 0.25" from the edge to avoid being cut off. Lastly, transparency and overprint errors can result in unexpected color interactions if these settings aren’t properly managed.
These kinds of errors emphasize the importance of thorough prepress checks to ensure a smooth printing process.
Prepress Error Prevention Methods
Once these common errors are understood, implementing effective prevention strategies becomes crucial.
Automated preflight checks are a game-changer. Tools like Adobe InDesign‘s Preflight panel and Acrobat Pro‘s Print Production features can scan files for resolution issues, missing fonts, and incorrect color spaces before production begins. As the GlobalVision Editorial Board puts it:
Preflight catches errors when fixing them costs pennies instead of thousands, turning potential chaos into smooth production runs.
Another key step is proper file preparation. Using the "Package" function in design software ensures all linked images and fonts are gathered in one folder. Exporting files in formats like PDF/X-1a or PDF/X-4 helps maintain layers, fonts, and other essential elements while ensuring the file meets print-ready standards. For rich blacks, it’s better to use a mix like 40C, 40M, 40Y, 100K instead of relying solely on 100% K, as this creates a deeper, more vibrant black.
Color management is another critical area. Calibrating monitors and using ICC profiles allows designers to simulate press output through soft proofing. Converting all images and colors to CMYK – or to specific Pantone colors – before exporting reduces the risk of unexpected shifts. For projects where color accuracy is vital, ordering physical proofs ensures the final output matches expectations before the full production run. Lastly, to avoid font-related issues, always embed fonts in the PDF or convert text to outlines when working in software like Adobe Illustrator.
sbb-itb-ce53437
Post-Press Errors and Prevention Methods
Common Post-Press Errors
Finishing processes bring their own set of challenges, with trimming and cutting errors being among the most frequent. For example, guillotine cutting inaccuracies can eliminate crucial details like phone numbers or logos if safety margins are ignored. Similarly, improper trimming that exposes bleed gaps can leave unsightly white slivers along the edges, making the final product look sloppy and unprofessional. As Quebec-printing.com aptly warns:
Placing critical information in [the risk zone] is like playing Russian roulette with your content.
Folding and binding issues are also prevalent. Incorrect imposition calculations can cause pages to appear out of order, while coated stocks often crack along fold lines if creasing pressure isn’t adjusted correctly. Timing is critical, too – structural issues like poor adhesion or scuffing can occur when finishing starts before the ink has had enough time to dry. In offset printing, it’s generally recommended to allow 1–2 days for proper drying.
Functional problems, such as unscannable barcodes or QR codes, can also arise. These issues often stem from dot gain on porous paper or a lack of contrast between printed elements, rendering the codes ineffective.
The financial consequences of these errors can be severe, leading to costly reprints, wasted materials, delayed project timelines, and even reputational harm. For example, producing a typical book through offset printing may take around three weeks, partly to account for drying time and complex finishing steps. These risks highlight the importance of stringent post-press quality controls.
Post-Press Error Prevention Methods
Just as prepress checks are essential for avoiding errors, post-press controls ensure the final product meets quality standards. Timing plays a critical role here. In offset printing, ink requires at least 24–48 hours to stabilize before finishing begins, whereas digital printing offers the advantage of immediate ink drying, allowing for quicker transitions to the next steps.
Physical verification is another key preventative measure. For instance, creating a folded dummy from imposition proofs can help confirm pagination, cutting, and binding accuracy before moving into full production. Additionally, a rule-up sheet from the press – clearly showing trim lines, final dimensions, spine placement, and perforations – should be cross-checked against the prepress imposition proof.
Automation has also become a powerful ally in minimizing post-press errors. High-resolution cameras and vision systems allow for real-time inspection of registration and defects, significantly improving quality control. One mid-size converter reported impressive results: a 30% drop in rework and a 20% reduction in ink waste within just 90 days of implementing standardized inspection intervals and stricter color tolerances. However, human expertise remains indispensable for aesthetic evaluations and adjustments that machines cannot handle.
Don’t skip functional testing, either. Always test QR codes and barcodes with optical scanners after printing and finishing, as dot gain can easily render them unreadable. For projects involving binding methods like spiral or perfect binding, maintaining a safety margin of 10 mm (approximately 0.4 inches) near the spine is critical to ensure that no important information is lost in the gutter.
Common Prepress Problems
Prepress vs. Post-Press: Error Prevention Comparison

Prepress vs Post-Press Error Prevention Comparison Chart
Prepress and post-press error prevention tackle different stages in the production process: prepress focuses on ensuring digital file accuracy, while post-press emphasizes the precision of physical finishing tasks. In prepress, the goal is to catch issues like missing fonts or incorrect image resolution before printing begins. On the other hand, post-press ensures that tasks like trimming, folding, binding, and specialty finishes – such as embossing – are executed flawlessly .
The timing of error detection plays a crucial role in managing costs. Errors caught during prepress are far less expensive to fix. For instance, resolving a missing bleed or a low-resolution image during preflight might cost next to nothing. However, discovering a post-press issue – like pages bound in the wrong order – can result in scrapping an entire print run, wasting paper, ink, and press time.
Despite their differences, prepress and post-press are deeply interconnected. Decisions made during prepress, such as setting a 0.125-inch bleed or maintaining a 0.25-inch safe zone, are designed to accommodate the mechanical tolerances required during post-press. For example, while imposition is arranged digitally in prepress, its accuracy is ultimately confirmed during the folding process in post-press, highlighting how both stages rely on one another .
Comparison Table: Prepress vs. Post-Press
| Feature | Prepress Error Prevention | Post-Press Error Prevention |
|---|---|---|
| Primary Focus | Digital file setup (fonts, CMYK, resolution) | Physical finishing (trimming, folding, binding) |
| Common Errors | Missing bleeds, low-res images, RGB color mode | Misalignment, page order errors, scuffing |
| Prevention Tools | Preflight software, ICC profiles, digital proofs | Folded dummies, press rule-up sheets, checks |
| Cost of Failure | Low (if caught before printing) | High (wasted materials and labor) |
| Quality Impact | Affects visual clarity and brand color accuracy | Affects functionality and professional finish |
Error Prevention at Miro Printing & Graphics Inc.
Custom Solutions for Error-Free Printing
At Miro Printing & Graphics Inc., prepress isn’t just a step in the process – it’s a safeguard against potential printing pitfalls. Their prepress team meticulously reviews files to catch issues like incorrect color profiles (e.g., RGB instead of CMYK), missing bleeds, low-resolution images (under 300 DPI), and non-vectorized fonts. These proactive checks ensure files are press-ready before production begins.
To maintain color accuracy, they validate ICC profiles and use precise imposition techniques to ensure pages align correctly after folding. Barcodes, including QR and UPC, are tested under different lighting and paper conditions to account for dot gain. For high-stakes projects – such as corporate branding or luxury packaging – Miro provides physical "Sherpa" proofs. These proofs act as binding agreements, as noted:
A physical proof is a contract. It is the reference the printer commits to matching on the presses.
Additionally, their workflow emphasizes strict adherence to safety margins, using 0.125-inch bleeds and 0.2-inch safe zones to protect crucial design elements from being trimmed. They also account for ink drying times (1–2 days for offset printing), plate production, and manual adjustments during prepress, ensuring every detail is addressed without rushing.
Benefits of Full-Service Local Printing
Miro’s full-service, local approach further strengthens its error prevention measures. By housing design, prepress, digital and offset printing, and bindery services under one roof, they eliminate the risks associated with transferring files between multiple vendors. This integrated workflow allows seamless communication across departments, enabling teams to identify and resolve potential issues early in the process. For example, production staff contribute to prepress decisions, while bindery teams provide input on finishing requirements upfront – saving time and avoiding costly mistakes later.
Being a local operation also allows for hands-on quality checks, quicker turnaround times, and personalized support. Clients can review physical proofs, discuss complex projects in person, and get expert advice on preparing files for specific finishing needs. This collaborative, in-house system ensures errors are minimized at every stage, from prepress to post-press, delivering a smooth and reliable production experience.
Conclusion
From the earlier breakdown of prepress and post-press processes, it’s evident that having a well-structured quality system is critical. Preventing errors in printing depends on the smooth collaboration between these two stages. Prepress acts as the first line of defense, ensuring files meet all technical requirements before production begins. Addressing issues early in this stage is far less costly than dealing with mistakes after production.
Post-press, on the other hand, focuses on the physical finishing touches – cutting, folding, binding, and more. This stage demands careful handling and rigorous quality checks to ensure the work done in prepress remains intact. For example, when prepress teams set proper imposition and maintain safety margins, post-press operations can proceed without compromising critical elements.
By treating prepress and post-press as interconnected parts of a single quality control system, production standards can reach new heights. As the GlobalVision Editorial Board aptly notes:
If your earlier stages work properly, proofing confirms quality rather than discovering disasters.
Automated preflight software plays a key role in this process, checking technical parameters with precision. This automation allows human teams to focus on creative decisions and brand alignment – areas where machines fall short. Together, these efforts reduce errors while maintaining consistent quality throughout the workflow.
Beyond cost savings, effective error prevention builds trust with customers and strengthens your brand’s reputation. A misprinted brochure or an unreadable barcode isn’t just a financial loss – it can harm client relationships or even lead to legal trouble in regulated industries. By combining thorough prepress reviews with flawless post-press execution, you create a dependable process that keeps clients coming back.
FAQs
What’s the cheapest stage to fix a printing mistake?
The prepress stage is the best opportunity to catch and fix printing errors without breaking the bank. Identifying mistakes during preflight usually means they can be corrected with minimal expense, saving you from costly reprints or last-minute adjustments during post-press or final production.
Which file settings should I verify before sending artwork to print?
Before you send your artwork to print, double-check these essential settings to prevent mistakes:
- File format: Stick to PDF/X-1a or PDF/X-4 for reliable results.
- Color mode: Convert your design to CMYK to match printing standards.
- Resolution: Ensure images are at least 300 DPI for sharp output.
- Bleed and margins: Add a 1/8 inch bleed and keep elements within safe margins.
- Fonts: Embed or outline all fonts to avoid font substitution issues.
- Linked assets: Package all linked files to keep everything intact.
Following these steps will help you avoid hiccups and achieve a smooth printing process.
How can I prevent trimming, folding, or barcode problems after printing?
To prevent problems such as trimming mistakes, uneven folds, or barcodes that can’t be scanned, it’s crucial to enforce rigorous post-press quality control measures. Use accurate measuring tools to check trim and fold lines, and test barcodes with scanners to confirm they work properly. Conduct frequent inspections both during and after production to catch errors early, ensuring the final product meets dimensional and finishing standards before it reaches the customer.
Related Blog Posts
- Post-Press Quality Control Checklist
- Print Proofing Steps for Flawless Results
- Common Post-Press Quality Issues and Fixes
- Prepress Checklist for Print-Ready Files
https://app.seobotai.com/banner/banner.js?id=6993b214efc60cc2af07b412
