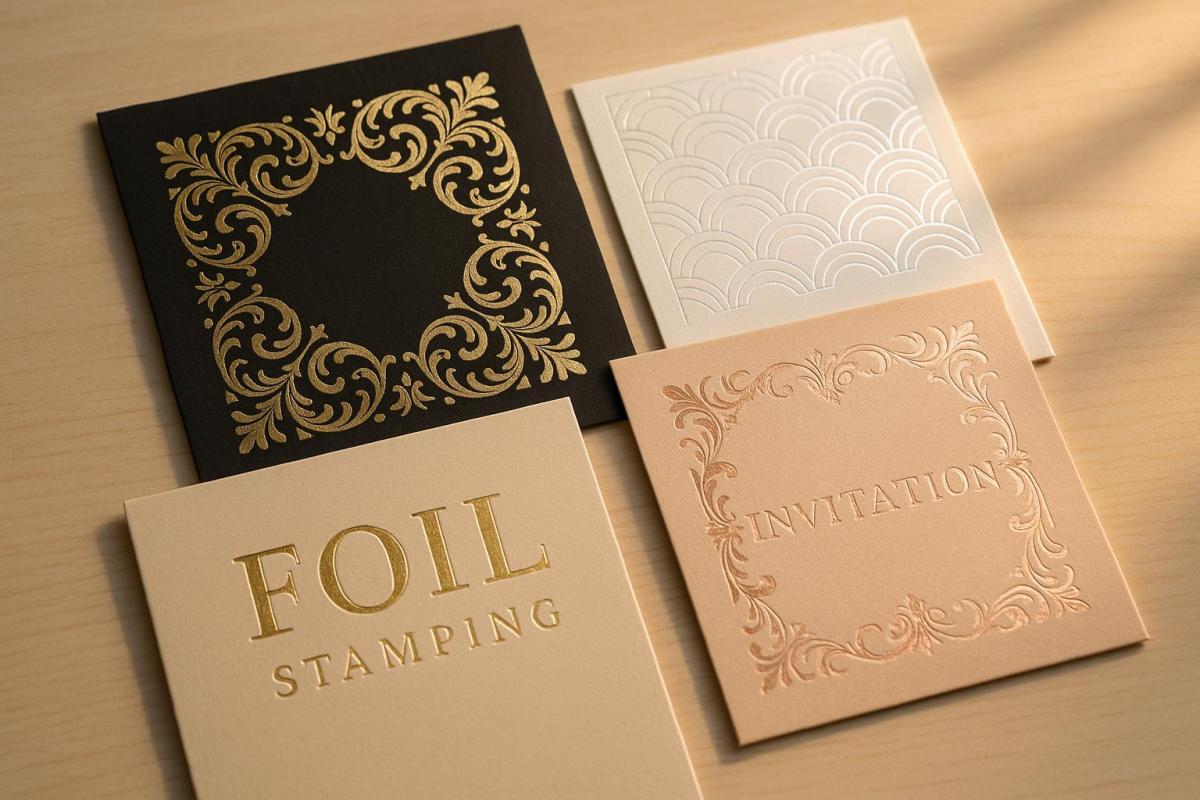
Foil stamping transforms cardstock into a polished and high-end product by applying foil finishes using heat, pressure, or digital methods. It’s perfect for creating standout business cards, invitations, certificates, and packaging. Key methods include:
- Hot Foil Stamping: Uses heat and custom dies for sharp, durable finishes. Ideal for luxury projects but requires more setup time.
- Cold Foil Stamping: Faster and cost-effective for large runs, using adhesive and UV light. Works well with heat-sensitive materials.
- Digital Foil Printing: Best for short runs and personalized designs, offering flexibility without the need for dies.
Each method has unique strengths, suited for different project sizes, budgets, and design needs. Selecting the right cardstock, foil type, and setup ensures crisp, vibrant results. For advanced effects, pair foil stamping with embossing or spot foiling to add depth and texture.
Hot Foil Stamping 101 – Tips, Do’s & Dont’s & More
Main Foil Stamping Methods
When it comes to foil stamping on cardstock, three main techniques dominate the field. Each method has its own process and ideal applications, making it essential to understand the differences to pick the best option for your project. Here’s how these techniques bring a touch of elegance and sophistication to cardstock.
Hot Foil Stamping
Hot foil stamping relies on heat and pressure to transfer foil onto cardstock. This method dates back to the 19th century and remains the go-to choice for high-end applications. The process involves creating a custom metal die, selecting the right foil, and calibrating the temperature and pressure. Once ready, the heated die presses the foil onto the cardstock, leaving a crisp, long-lasting finish.
This technique can also emboss or deboss the material in one pass, adding a textured, three-dimensional effect alongside the foil. It’s ideal for projects like luxury packaging, certificates, business cards, and other items that demand a premium look. However, the method requires more setup time and comes with higher costs, making it less practical for small print runs. For a different approach, cold foil stamping offers a heat-free alternative.
Cold Foil Stamping
Cold foil stamping skips the heat and instead uses an adhesive to bond foil to the cardstock. The process involves applying a UV-curable adhesive, pressing the foil onto it, and curing the adhesive with UV light to secure the foil in place. Any excess foil is removed, leaving behind the finished design.
This method is faster and more efficient for large-scale production since it eliminates the need for dies and extra steps. Cold foil stamping can also create a raised texture, adding an appealing tactile quality to the design. It’s commonly used for labels, brochures, magazines, and packaging where speed and volume are key. Additionally, it works well with heat-sensitive materials that can’t handle the high temperatures of hot foil stamping. However, while cold foil stamping is faster and more cost-effective for large runs, it may not match the precision or glossiness of hot foil stamping, and its scratch resistance is lower. For smaller, customizable projects, digital foil printing is worth considering.
Digital Foil Printing
Digital foil printing is the most modern of the three methods. It uses digital printers to apply adhesive foil directly onto cardstock, eliminating the need for dies or extensive setup. This makes it perfect for short runs and personalized designs, as changes can be made quickly and without additional costs. The process also supports variable data printing, making it ideal for projects like custom invitations or business cards.
This method is a great fit for small-scale jobs like invitations, business cards, or small packaging projects. It’s particularly appealing to small businesses or individuals looking for professional foil effects without the expense of traditional methods. Plus, its on-demand capabilities and reduced waste make it an environmentally friendly choice for smaller projects.
Method Comparison
Your choice of foil stamping method will depend on factors like your budget, project size, and the level of detail required. Hot foil stamping delivers unmatched quality and durability but comes at a higher cost. Cold foil stamping is perfect for large-scale production where speed is critical, while digital foil printing offers flexibility and affordability for small, personalized projects.
| Feature | Hot Foil Stamping | Cold Foil Stamping | Digital Foil Printing |
|---|---|---|---|
| Process | Heat and pressure with a die | UV-curable adhesive and light | Digital printer applies foil directly |
| Cost | Higher setup costs | Cost-efficient for large runs | Affordable for short runs |
| Speed | Slower setup, longer production time | Fast, suited for high-speed production | Quick, on-demand |
| Materials | Cardstock, paper, plastic, leather | Heat-sensitive materials | Varies by printer |
| Detailing | Sharp, intricate designs | Less precise than hot foil | Supports variable data |
| Best Use | Premium packaging, luxury prints | Mass production of labels, packaging | Personalized and small-scale projects |
For smaller projects like invitations or business cards, digital foil printing offers an affordable and flexible solution. However, if you’re aiming for a luxurious finish, hot foil stamping is worth the investment. For larger coverage areas or high-volume needs, cold foil stamping is often the best choice.
Equipment, Materials, and Setup
Getting foil stamping right starts with the materials and setup. The type of cardstock, foil, and the way you prepare everything can make or break your project. Crisp, vibrant results depend on these choices.
Cardstock Types
The quality of your cardstock plays a huge role in foil stamping. Its texture, weight, and coating all affect how well the foil adheres and how sharp the design looks. As foil stamping expert Yana Smakula explains:
"You can’t just take any paper and expect to have perfect results. No. You need to pick the best paper for this particular job. It is that simple, but it is vital".
For the best results, smooth cardstock is the way to go. Smooth surfaces allow the foil to adhere evenly, while textured or rough cardstock can create patchy or incomplete coverage.
Here’s how different cardstock types measure up for foil stamping:
| Cardstock Type | Weight | Rating | Best For |
|---|---|---|---|
| Yupo Paper | Various | 5/5 | Professional results, all foil types |
| Simon Says Stamp Ultra Thick White | 120lb | 4/5 | Business cards, invitations |
| Simon Says Stamp Mega Thick | 130lb | 4/5 | Premium projects with letterpress effect |
| Glossy Photo Paper | Various | 5/5 | High-end applications (requires care) |
| Neenah Solar White | 80lb-110lb | 2/5 | Thin line work only |
Yupo paper is the top choice for foil stamping. Its ultra-smooth surface works with any foil type, making it a favorite for high-end projects like invitations and business cards.
Simon Says Stamp cardstock in 120lb and 130lb weights also performs well. The 130lb version adds a slight letterpress effect, giving designs extra dimension.
Glossy photo paper offers excellent foil adhesion similar to Yupo, but it requires careful handling due to its delicate coating. To protect the surface during stamping, place a sheet of regular printer paper on top.
For toner foiling, smooth, uncoated cardstock is essential. Coated or textured paper can interfere with the toner and foil bonding properly.
Foil Types and Dies
Once you’ve chosen the right cardstock, understanding foil types is the next step. Selecting the appropriate foil ensures you get the look you want while avoiding costly mistakes. Foils fall into two main categories: hot foil and toner reactive foil (also known as toner foil or laser foil).
Hot foil has a built-in adhesive that activates with heat. This type requires heat, pressure, and a metal stamping die to transfer the foil. It’s ideal for creating vibrant, luxurious finishes and is often used for premium projects.
Toner foil, on the other hand, doesn’t have an adhesive backing. Instead, it bonds directly to laser printer toner when heat and pressure are applied. This method is faster since it doesn’t require custom dies – the foil adheres wherever toner is present on the paper.
Not sure which foil you have? Test it by applying heat and pressure to plain cardstock. If it sticks, it’s hot foil. If it doesn’t, it’s toner foil.
Foils also come in a variety of finishes, including:
- Metallics like gold, silver, and copper for a classic look
- Pigmented foils for a wider range of colors
- Matte finishes for a more understated effect
- Gloss finishes for maximum shine
- Holographic foils for a striking, dynamic appearance
- Pearlized foils for a soft, elegant sheen
For hot foil stamping, dies and stamps are critical. These custom metal pieces are made to match your design and must be precisely crafted for clean, sharp results. High-quality dies from trusted suppliers are worth the investment.
For toner foiling, black toner provides the best results due to its thick saturation. While other toner colors can work, they may not deliver the same level of vibrancy or consistency.
Setup Best Practices
A precise setup is key to successful foil stamping. Taking the time to prepare properly can save you materials, time, and frustration.
Start with artwork preparation. For the clearest results, design your artwork at 300 DPI and use vector-based files whenever possible. High-resolution bitmap files can work too. Create your designs in CMYK color mode and save them as PDFs with embedded images and fonts.
If your project includes both printed and foil elements, separate the artwork into layers. Use distinct artboards for foil and print elements to avoid confusion during production. For designs that extend to the edge of the paper, add a 2mm bleed to ensure full coverage.
To achieve reliable results, follow these minimum design guidelines:
- Line thickness: At least 0.2mm (0.008 inches)
- Text size: At least 6pt (2mm height)
- Reversed text: At least 8pt (2.5mm height)
- Spacing between elements: At least 0.5mm (0.02 inches)
Material preparation is just as important. Check your foil sheets for damage, wrinkles, or debris before use. Clean foil surfaces ensure better adhesion.
When positioning foil sheets, use small pieces of washi tape to keep the edges taut against the paper. This prevents the foil from shifting and reduces the risk of over-foiling.
Before starting your main project, run test pieces to check alignment, temperature, and pressure. Make adjustments as needed to achieve consistent, clean results. This step can help you avoid wasted materials and ensure a polished final product.
Finally, working with experienced suppliers can make a big difference. They can guide you on foil selection, troubleshoot adhesion problems, and help maintain color consistency throughout your project.
sbb-itb-ce53437
Advanced Methods and Design Ideas
Once you’ve mastered the basics, it’s time to explore advanced techniques like embossing and multi-color applications. These methods can take your cardstock designs to the next level, adding depth, texture, and a premium look.
Foil Stamping with Embossing and Debossing
Combining foil stamping with embossing or debossing creates a stunning 3D effect that not only catches the eye but also adds a tactile, luxurious feel.
"Embossing creates a physical presence, a sculptural quality, that printing on its own can’t achieve".
The raised or recessed elements amplify highlights and shadows, giving your design a sense of elegance and permanence. There are two main ways to pair these techniques:
- Stamp and Bump Process: This involves stamping an image with foil first, then embossing or debossing the same area (or other parts of the sheet) in a second pass. This creates a multi-dimensional effect that feels layered and detailed.
- Combination Embossing: This method embosses and foil stamps in a single press pass using a die that includes a cutting edge for precise foil trimming. This approach is faster and ensures a seamless, polished look.
When combining embossing with ink or foil, it’s known as a registered or combination emboss. This technique applies both in one step, creating a cohesive design accent. To achieve the best results, use vector artwork for your dies to ensure crisp, clean impressions. Keep embossed elements simple – logos, bold text, or small patterns tend to work best.
Beyond embossing, experimenting with multiple foil layers can add even more depth to your designs.
Multiple Foil Layers and Colors
Multi-color foil stamping involves layering different foil colors in a single design, resulting in a vibrant, dynamic finish. This technique is ideal for promotional materials and luxury stationery.
Achieving precision is key. Each color requires its own die, and careful registration ensures perfect alignment. There are two main methods for multi-color foil applications:
- Sequential Foil Stamping: Here, you apply one color at a time, using separate dies and foils for each layer. This step-by-step process ensures accurate placement and alignment.
- Split-Fountain Foil Stamping: This method uses a single die with multiple foils arranged in a gradient or pattern, allowing for smooth transitions between colors.
When choosing colors, pick foils that complement your overall design. For instance, gold foil pairs beautifully with dark backgrounds, while silver works well on cooler tones. As with embossing, maintaining vector formats is crucial for clean, defined results.
For a more targeted approach, spot foiling can highlight specific design elements.
Spot Foiling Techniques
Spot foiling applies foil to selected areas, drawing attention to key elements and creating a clear visual hierarchy. Instead of covering large areas, this technique focuses on specific spots, making it both impactful and cost-effective.
This method is especially effective for products like business cards, packaging, brochures, and book covers. Spot foiling creates sharp contrasts – such as glossy foil accents against matte backgrounds – that immediately capture attention.
To make the most of spot foiling:
- Use it sparingly to highlight focal points without overwhelming the design.
- Select foil colors that complement your design while offering enough contrast for readability.
- Combine it with embossing or debossing for added depth and texture.
Beyond its aesthetic appeal, foil stamping is also highly durable, resisting fading and scratching to keep your designs looking vibrant over time.
Project-Specific Guidelines
Every foil stamping project has its own set of needs, and tailoring the approach is key to achieving polished, professional results. By understanding the unique requirements of each application, you can ensure your finished pieces stand out and leave a lasting impression.
Invitation Foil Stamping
Foil stamping adds an elegant touch to wedding invitations, creating a luxurious finish that enhances their appeal.
Design Tips for Invitations
For the best results, keep your designs clean and bold. Foil stamping works beautifully with minimal layouts, avoiding intricate details or large blocks of color. Stick to the recommended design specifications for elements like line thickness, text size, and spacing, as outlined in earlier guidelines.
Choosing Cardstock and Foil
When selecting cardstock for wedding invitations, weights typically range from 94 lb to 130 lb for smooth papers, while textured options hover around 110 lb. Classic colors like white and ecru remain popular, but black, navy, and kraft offer stylish alternatives. Shimmer papers in gold, silver, or mocha provide an extra layer of sophistication.
For a cohesive look, stick to a single metallic palette. Traditional gold and silver are timeless, but rose gold, bronze, and holographic finishes are growing in popularity. It’s worth noting that foil stamping is the only technique that delivers a true shiny finish for metallic tones like gold, copper, or silver.
Trends in Invitation Design
Modern invitation designs lean towards minimalism, using foil accents sparingly to create a subtle yet upscale effect. Clean lines, ample white space, and geometric patterns pair beautifully with foil. A mix of bold, sans-serif fonts and delicate script can add depth and sophistication to the design.
Foil stamping isn’t limited to invitations – it also elevates other professional materials like business cards.
Business Card Foil Stamping
Foil stamping on business cards highlights key branding elements such as logos, company names, and contact details. To maintain clarity, use foil sparingly and ensure text is at least 10pt for readability. Beyond aesthetics, foil stamping enhances durability, as it resists fading and scratching, reinforcing your brand’s professionalism . Many clients have noted how foil stamping enhances their brand image.
Other Applications
Foil stamping isn’t just for invitations and business cards. It can be used across various professional materials, adding a touch of sophistication and value.
Certificates and Awards
Foil stamping lends authenticity and prestige to certificates, diplomas, and awards. Use gold or silver foil for traditional designs, or opt for bronze and copper for a modern twist. Add foil accents to seals, signatures, or borders to elevate the overall design.
Packaging and Product Labels
Luxury packaging often relies on foil stamping to convey quality. Whether for cosmetics, jewelry, or high-end consumer goods, foil accents on logos, product names, or decorative details create striking contrasts, especially on dark packaging.
Corporate Materials
Foil stamping can make corporate materials like annual reports, presentation folders, and marketing brochures feel more refined. Highlighting logos, section headings, or key data with foil emphasizes professionalism and attention to detail.
Promotional Items
Event programs, menu covers, and promotional booklets become keepsakes when foil stamping is applied. The added shine and texture elevate these materials, leaving a memorable impression.
No matter the application, following established technical standards ensures your foil stamping projects meet professional expectations and deliver exceptional results.
Summary and Professional Services
Main Points
Foil stamping transforms basic cardstock into an eye-catching, high-quality material that stands out. The three primary techniques each bring their own strengths to the table: hot foil stamping delivers sharp, durable designs perfect for intricate details, cold foil printing speeds up production for larger quantities, and digital foil stamping offers versatility for short runs and personalized pieces. Together, these methods help create polished, professional finishes that go beyond standard printing.
To achieve the best results, simplicity and contrast are key when designing for foil stamping. Sticking to the design principles mentioned earlier ensures clarity and a professional look. Choosing the right materials is just as critical – pairing the weight and texture of the cardstock with the ideal foil type, whether metallic, matte, holographic, or a special effect, enhances both the look and feel. For an even more sophisticated finish, foil stamping can be combined with embossing, debossing, or spot UV treatments to add depth and dimension.
Working with Miro Printing & Graphics Inc.
For flawless execution of these premium techniques, working with seasoned professionals is essential. Miro Printing & Graphics Inc. specializes in foil stamping services, ensuring your projects meet the highest standards. Their team knows the ins and outs of various cardstock types and offers expert advice on optimizing designs, from layering techniques to preparing vector-based artwork.
Whether you’re crafting wedding invitations, business cards, or corporate materials, Miro Printing & Graphics Inc. handles even the most complex designs with precision. They excel in advanced methods like multiple foil layers and spot foiling, and they conduct preliminary tests to guarantee proper foil adhesion and consistent color throughout production. By leveraging their expertise, you can achieve a premium finish that enhances your brand’s image in a competitive market.
FAQs
What’s the difference between hot foil stamping, cold foil stamping, and digital foil printing, and how do I decide which one is right for my project?
Hot foil stamping combines heat and pressure with a metal die to produce intricate, durable designs. This technique is perfect for projects that demand a high-end, long-lasting finish – think wedding invitations or luxury packaging.
Cold foil stamping takes a different approach, using UV light and adhesive to apply foil. It’s a quicker process and works well for larger surface areas, making it a smart choice for items like posters or large-scale marketing materials.
Then there’s digital foil printing, which relies on a toner-based process. It’s fast, budget-friendly, and ideal for small runs or detailed designs. However, it doesn’t offer the same durability as hot foil stamping. When deciding which method to use, consider your project’s design complexity, durability requirements, and production timeline.
What type of cardstock works best for foil stamping, and how does it impact the final result?
The cardstock you select significantly impacts the outcome of foil stamping. For optimal results, go with smooth, high-quality cardstock that has little to no texture. Options like glossy or specialty papers with ultra-smooth finishes work best, as they allow the foil to adhere cleanly and produce sharp, vibrant designs. Choosing heavier cardstock, typically between 80lb and 110lb, ensures the sturdiness needed for precise foil transfers.
On the other hand, steer clear of heavily textured or overly coated papers. These can disrupt the foil application, leading to uneven or unclear results. Picking the right cardstock is key to achieving professional-looking foil designs that truly make an impression.
Can I combine foil stamping with embossing to make my printed materials more visually and physically engaging?
Yes, foil stamping can be combined with embossing to create designs that are both eye-catching and textured. This pairing brings a sense of depth and dimension to printed materials, making features like logos, text, or patterns pop with a shiny finish and a raised feel. It’s a great option for projects like business cards, invitations, or packaging where making a high-end impression matters.
Related posts
- Ultimate Guide to Post-Press Finishing
- Foil Stamping vs Metallic Ink: Key Differences
- How Foil Stamping Works: Step-by-Step Guide
- Ultimate Guide to Textured Printing Effects
https://app.seobotai.com/banner/banner.js?id=6886c76241261bdf48a562a6
