Creating custom ICC profiles ensures your printer produces colors that match what you see on your screen. These profiles are tailored to your printer, ink, and paper combination, offering up to 90% better color accuracy than generic profiles. Whether you’re a photographer or run a print shop, custom ICC profiles help achieve consistent, precise color reproduction.
Key Steps:
- Understand ICC Profiles: They translate colors between devices like monitors and printers.
- Gather Tools: You’ll need a spectrophotometer, colorimeter, and profiling software (e.g., Adobe Photoshop, ColorLogic’s CoPrA).
- Prepare Printer: Disable printer color management and use consistent ink, paper, and settings.
- Print Color Charts: Use tools like Canon Professional Print and Layout or Adobe Color Print Utility to print targets without color adjustments.
- Measure Colors: Use a spectrophotometer to scan printed charts for accurate data.
- Build the Profile: Import measurements into profiling software to generate your custom ICC profile.
- Install and Use: Add the profile to your system and design software for color-managed workflows.
- Maintain Profiles: Update profiles regularly, especially after changes in ink, paper, or printer settings.
By following these steps, you can produce prints with accurate and consistent colors, meeting professional standards while reducing errors and waste.
What ICC Profiles Are and Why You Need Them
ICC Profile Basics
An ICC profile is like a digital guide that ensures devices display colors accurately. Essentially, it’s a file that tells your device how to interpret and reproduce colors correctly.
Here’s how it works: ICC profiles map the colors in a digital image (the source) to the color space of the destination, whether that’s a screen or a printed page. Keith Cooper, Owner of Northlight Images, sums it up well:
"An ICC profile works as a translation between different sets of colour capabilities."
This process involves converting colors from your device’s unique color space into a standardized profile connection space, such as CIE L_a_b* or CIE XYZ. This guarantees consistent and accurate color reproduction. ICC profiles are globally recognized, including by the International Organization for Standardization (ISO 15076).
There are three main types of ICC profiles:
- Input profiles: Used for devices like cameras and scanners.
- Output profiles: Tailored for monitors and printers.
- Working space profiles: Used within editing software.
Even the type of paper you use – whether it’s glossy photo paper, matte cardstock, or canvas – requires a specific ICC profile. That’s because ink interacts differently with each material. This level of detail is what makes custom ICC profiles so effective for achieving precise color adjustments.
Benefits of Custom ICC Profiles
While standard ICC profiles can handle basic color translation, custom profiles go a step further by addressing the unique characteristics of your setup. Generic profiles are designed to fit a wide range of devices, but they don’t account for the specific nuances of your printer, ink, and paper combination. Custom profiles, on the other hand, are tailored to your exact configuration, resulting in better color accuracy and tonal depth.
This level of precision is especially important in commercial printing, where even small color mismatches can diminish the quality of marketing materials or fine art reproductions. Custom ICC profiles excel at handling gamut mapping, ensuring that out-of-range colors are translated while maintaining the overall color balance. This means the colors on your screen will closely match the final print – an essential advantage for professionals.
For print shops like Miro Printing & Graphics Inc., custom profiles are a game-changer. They help meet the high expectations of clients who demand flawless color reproduction. Plus, for businesses managing multiple print jobs daily, these profiles reduce errors and cut down on wasted materials from reprints caused by color mismatches. Custom ICC profiles provide the consistency and reliability needed for an efficient color workflow.
Required Tools and Materials
Hardware and Software Requirements
Creating custom ICC profiles calls for precise tools to ensure accurate color measurement. A spectrophotometer is essential for measuring colors across various materials, ensuring consistency and reliability in color reproduction. These devices come in several forms – benchtop, portable handheld, and inline models. For most print shops, handheld spectrophotometers are the most practical option.
A colorimeter is another key tool, used to calibrate monitors by measuring on-screen color patches. This device works across different display types, using an optical prescription and a finely tuned sensor to capture and measure screen colors. While not as precise as spectrophotometers, colorimeters are critical for making sure your monitor displays colors accurately.
Equally important is a calibrated monitor to ensure accurate color representation throughout the profiling process. Experts recommend recalibrating your monitor monthly to maintain consistency.
On the software side, options range from the open-source ArgyllCMS (which integrates well with the user-friendly DisplayCAL interface) to commercial tools like Adobe Photoshop and ColorLogic’s CoPrA .
| Vendor | Product | Create Profiles | Edit Profiles | v4 Support |
|---|---|---|---|---|
| Adobe Systems | Adobe Photoshop | Y | Y | Y |
| Agfa Graphics | Apogee Workflow | Y | Y | Y |
| basICColor | DeviL | Y | Y | Y |
| CGS | ORIS Press Matcher | Y | Y | Y |
| Heidelberg | Prinect Color Toolbox | Y | Y | Y |
| X-Rite | i1Studio | Y | . | Y |
ColorLogic describes CoPrA as:
"The most intelligent and advanced profiling tool in the industry today".
CoPrA 9 has earned the G7 System Certification, making it a trusted choice for professional applications.
Setting Up Your Printer and Materials
With the right tools and software ready, the next step is configuring your production environment. Use the exact printer, ink, and paper you plan to profile. This step is critical because the profiling process encompasses the entire output system – including the printer, media, inks, environmental conditions, and even the drying process.
"Note that for output devices, you’re really profiling the WHOLE output process – printer, media, inks, environmental conditions, drying process, etc."
- JerryTheC
Before starting, disable your printer driver’s color management. This prevents the driver from applying its own color corrections, which could interfere with the profile creation process. Also, ensure that the same inks and media used during calibration are consistent with those used in actual print jobs.
"If you choose to download and use an ICC profile, you need to adjust the ink limit to your printer. That’s what tunes it in and makes the rest of the profile correct."
- Andy D
For businesses like Miro Printing & Graphics Inc., which handle diverse printing projects, it’s a good idea to create multiple profiles tailored to different settings. Field testing these profiles can help identify the best configurations for specific applications, whether you’re working on business cards, large-format prints, or specialty materials.
Keep in mind that environmental factors like temperature and humidity can influence how inks dry and colors appear. Maintaining consistent conditions during both profile creation and production printing is essential for achieving reliable results.
Printing Color Target Charts
How to Print Target Charts
Printing accurate color target charts is a key step in creating a custom ICC profile that reflects your printer’s actual output. To do this, you’ll need to disable your printer driver’s color management settings. This ensures the printed charts capture the true output of your printer without any automatic adjustments. Similarly, turn off any automatic color corrections to maintain accuracy during profiling.
Use the recommended utility for your printer to disable color management – options include tools like Canon Professional Print and Layout, Adobe Color Print Utility, or macOS ColorSync. Set the mode to No Color Correction.
Next, fine-tune your print settings:
- Match the Media Type to your paper.
- Turn off Borderless Printing.
- Select the highest Print Quality.
- Set the Scale to 100%.
- For glossy or semi-gloss papers, choose a Clear Coating option like Printed Area or Overall. For matte papers, the Auto setting is typically ideal.
Make sure the printed charts fill a letter-size page without shrinking, so all color patches remain visible and properly oriented. Once printed, let the charts dry for 24 hours before measuring them. This drying time ensures accurate results.
After your charts are ready, you can move on to the next step: measuring and building your ICC profile to achieve the best color reproduction.
Selecting Color Patch Count
After printing your target charts, selecting the right patch count is critical for balancing accuracy with practicality. Higher patch counts provide more precise ICC profiles but require more time and resources to produce. Pre-made charts from providers like Red River Paper come in various formats, such as 1-page, 2-page, or 3-page versions. For professional-level color accuracy, the 2-page and 3-page options are the better choice.
Single-page charts work well for basic profiling and are budget-friendly for smaller projects. However, for more demanding tasks – like fine art reproduction or projects requiring strict adherence to brand colors – a higher patch count is invaluable. Multi-page charts are particularly useful for capturing subtle color transitions, which is essential for achieving precise color matches in challenging color spaces. Whether you’re handling everyday printing or high-precision jobs for clients like Miro Printing & Graphics Inc., choose your patch count based on the complexity and requirements of your project.
Measuring Colors and Creating the Profile
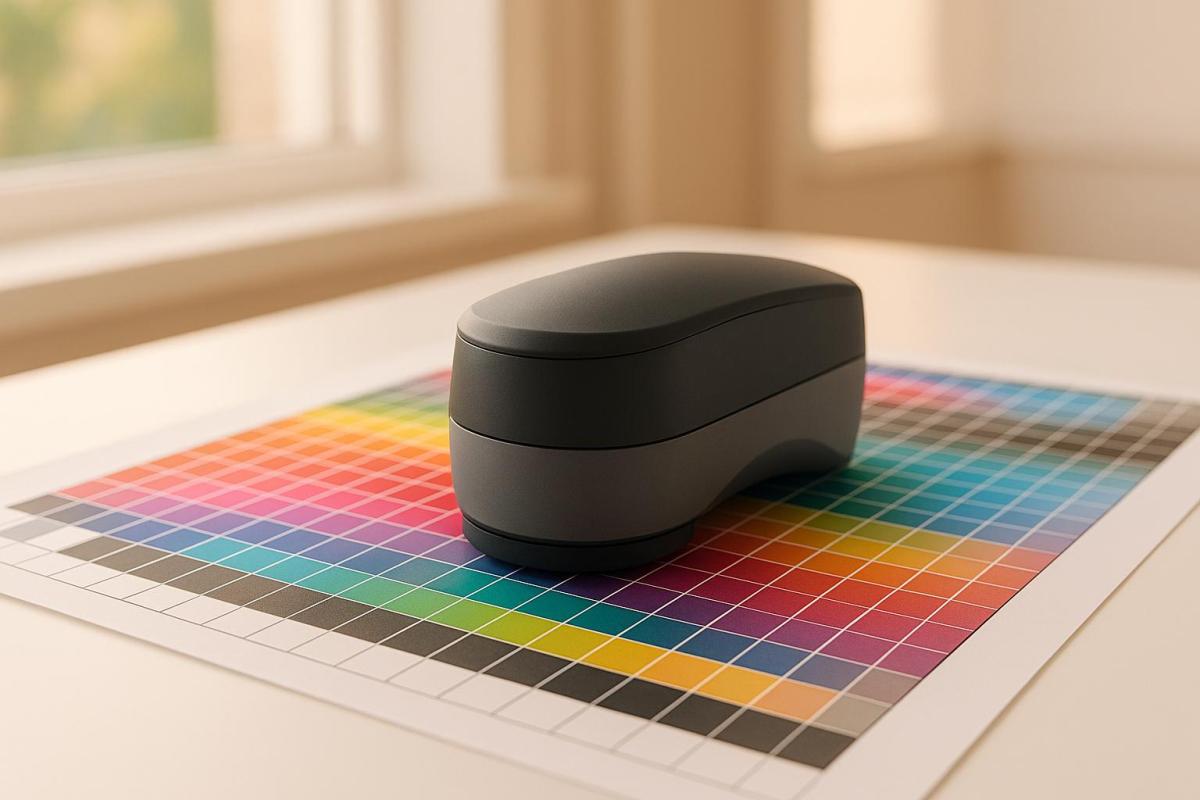
Taking Spectrophotometer Measurements
Once your printed charts have dried completely, it’s time to measure the color patches using a spectrophotometer. This device works by shining light on each sample and analyzing the reflected light across different wavelengths to capture detailed color data.
Start by calibrating your spectrophotometer according to the manufacturer’s instructions. For handheld and scanning models, this often involves placing the device on its charger, which typically includes a small white tile for calibration. Inline spectrophotometers, on the other hand, handle calibration automatically as needed.
Before measuring, make sure your printed charts are clean. Dust, fingerprints, or any debris can interfere with the readings and negatively affect the accuracy of your final ICC profile. Carefully position each color patch under the spectrophotometer’s measurement aperture, ensuring the patch lies flat and fully covers the measurement area. Then, press the measurement button to record the reflected light data.
Follow a systematic approach, measuring each patch in order to maintain precision. Adhere to the manufacturer’s recommendations for cleaning and updating the device’s software to ensure consistent performance.
Once all the patches have been measured, you can move on to creating your custom ICC profile.
Building Your Custom Profile
The next step is to import the measurement data into ICC profile creation software. This software evaluates your printed values against established reference standards to build a translation table that helps your printer reproduce colors accurately.
Some commonly used profiling tools include i1Profiler, ColorMunki Photo, and ProfileMaker. These programs generally follow the same steps: upload your measurement data, analyze the color properties, and generate an ICC profile tailored to your printer, ink, and paper combination.
Using the spectrophotometer data, the software maps the color space of your setup to standardized color values, producing an ICC output profile that characterizes your device. This process involves advanced calculations to ensure precise color reproduction.
After creating the profile, verification is key. Print a test chart using your new ICC profile and measure it again. Compare these results to the target values to confirm the profile’s accuracy. If there are noticeable color differences, revisit your original measurements or tweak your printer settings.
Professional printing services, such as Miro Printing & Graphics Inc., rely on custom ICC profiles to maintain consistent and reliable color reproduction across various projects and materials, meeting client expectations with precision.
Finally, save your completed profile with a clear and descriptive name. Include details like your printer model, paper type, and the creation date. This makes it easier to organize multiple profiles and identify when updates might be necessary.
sbb-itb-ce53437
Installing and Using Your ICC Profile
Installing Profiles on Windows and macOS
Once you’ve created your custom ICC profile, the next step is to integrate it into your operating system and design software to manage colors effectively. Keep in mind that administrator privileges are required for system-level installations on both Windows and macOS.
Windows Installation
To install on Windows, simply right-click your ICC profile file and select "Install Profile" from the context menu. This action automatically places the profile in the correct directory. If you prefer a manual approach, copy the .icc or .icm file directly to the folder located at C:\Windows\system32\spool\drivers\color.
macOS Installation
For macOS, copy your ICC profile to /Library/ColorSync/Profiles for system-wide access. If you only need it for a specific user, place it in /Users/[username]/Library/ColorSync/Profiles . To locate the hidden Library folder, hold down the Alt key and choose Library from the Finder’s Go menu.
Post-Installation Steps
After installing the profile, restart your design software. This ensures the application recognizes and applies the new profile .
Setting Up Profiles in Design Software
Once your ICC profile is installed, configure your design software to maintain consistent color management throughout your workflow. Here’s how to set it up in popular programs:
Adobe Photoshop Configuration
- Navigate to Edit > Assign Profile to apply the custom profile to individual images.
- Use Edit > Color Settings to define default working spaces and set up color management policies.
- When opening images without embedded profiles, Photoshop will prompt you to select a profile. Choose your custom ICC profile for the best results.
Adobe Illustrator Setup
- Custom profiles can be found at the end of the profile list in the Color dialog box.
- If you don’t see your profile immediately, click "More Options" to display all available profiles.
- Save your color settings in Photoshop and load them into Illustrator to maintain consistency across applications.
Best Practices for Accurate Color Reproduction
To achieve precise color reproduction, follow these tips:
- Calibrate Your Monitor: Use a colorimeter to ensure your screen displays colors accurately.
- Enable Soft Proofing: Preview how your colors will appear when printed by enabling soft proofing in your design software.
- Embed Color Profiles: Always embed color profiles when saving images to preserve color information for future use.
- Turn Off Printer Color Management: Disable your printer’s color management settings when using custom ICC profiles. Let your design software handle the color management instead.
"ICC profiles allow printers to accurately reproduce what the designer saw on the screen." – Fujifilm
Professional printing services, like Miro Printing & Graphics Inc., rely on these workflows to deliver high-quality prints with consistent and accurate colors across various projects and materials. By integrating these steps, you can ensure your printed results match the color precision established during profiling.
Fixing Problems and Keeping Profiles Current
Solving Common Problems
Even with the best preparation, issues can crop up when working with custom ICC profiles. Knowing how to tackle these common problems can save you from hours of frustration.
Profile Creation Errors
One of the most frequent challenges happens during profile creation. For instance, clogged printer nozzles or driver issues can mess up your color target charts, stopping the profiling software from processing them properly. Before you start printing, double-check that the nozzles are clear, the correct driver is installed, and your print settings align with the profiling software’s requirements.
Invalid Profile Errors
If you encounter an "invalid profile" error, take a look at the profile’s filename. Make sure it only includes alphanumeric characters – special characters, spaces, or symbols can cause recognition issues in certain applications.
Missing Profiles in Software
If your profiles seem to vanish from Photoshop on Windows 11, close the program and install the profiles in the directory C:\Windows\System32\spool\drivers\color. Then, reopen Photoshop. If the problem persists, re-installing the profiles through the same method can help refresh the system’s profile database.
Color Management Conflicts
To avoid conflicts, disable the printer driver’s color management when using custom profiles. When printing from Photoshop, pressing the spacebar while printing can clear old metadata that might interfere with your custom profile.
Software Synchronization Issues
Ensure consistent color settings across different applications by saving your color settings in one program and loading them into another. This keeps everything aligned and reduces the risk of mismatched outputs.
By addressing these issues quickly, you can maintain consistent results and focus on keeping your profiles up to date.
When to Update Your Profiles
Once you’ve resolved common profiling issues, it’s important to keep your profiles current. ICC profiles aren’t static – changes in your printing setup or environment can impact color accuracy. Knowing when to update ensures your output stays consistent.
Equipment and Material Changes
Anytime you change ink, paper, or printheads, it’s time to update your profiles. These changes can shift color reproduction, making old profiles less reliable.
| Update Trigger | Notes |
|---|---|
| Change in Ink Batch | Ensure consistent colors with new ink |
| Environmental Changes | Adjust for temperature or humidity shifts |
| New DTF Film Type | Create profiles for new films |
Regular Maintenance Schedule
For professional results, follow a regular maintenance schedule. Here’s a quick guide:
| Test Print Frequency | Notes |
|---|---|
| Weekly | Check for color shifts and fine-tune as needed |
| Major Configuration Change | Recalibrate thoroughly after big changes |
Printing a small test target and comparing it to your reference standard is a simple way to check your profile’s accuracy.
Environmental Factors
Temperature and humidity can affect both your printer and the paper you use. If your environment changes with the seasons, consider creating separate profiles for different conditions. Update these profiles as the environment shifts to maintain consistent results.
Long-term Profile Management
Regular calibration is key to keeping your ICC profiles accurate. Incorporate profile updates into your maintenance routine. Depending on how often you print and the variability of your equipment, you might need to recalibrate monthly for high-volume operations or quarterly if you print less frequently.
Major System Changes
After significant updates – like printer maintenance, driver upgrades, or hardware replacements – run thorough tests and create a new profile if needed. Don’t assume your old profile will work seamlessly with updated components; a fresh profile ensures consistent color reproduction.
Professional printing companies, such as Miro Printing & Graphics Inc., rely on strict profile update schedules to deliver top-notch color accuracy. By adopting similar habits, you can achieve professional-quality results with your custom ICC profiles.
Making printer ICC profiles – Creating pro level paper profiles for my reviews. X-Rite i1iSis review

Conclusion
Custom ICC profiles take the uncertainty out of printing and replace it with precision. By following the process – selecting the right tools, printing color targets, measuring with a spectrophotometer, and building profiles – you can achieve highly accurate color reproduction. Each step plays a critical role in delivering results that meet professional standards.
These profiles can improve color accuracy by up to 90% while also reducing ink waste, making them indispensable for applications like branding, packaging, and fine art reproduction.
"ICC profiles are essential for your printing workflow because they help ensure that your prints’ colors are accurate. Without ICC profiles, it would be challenging to produce consistent results."
But precision isn’t a one-and-done effort – it requires ongoing maintenance. Over time, equipment performance can shift due to wear, environmental factors, or changes in consumables. As Fujifilm highlights, "Color management requires ongoing calibration to ensure the profile is properly tailored to the equipment’s performance". Regular calibration helps prevent color shifts and keeps your profiles aligned with your equipment’s current state.
Additionally, as your printing needs evolve, updating profiles becomes essential. Different paper types, ink formulations, or environmental conditions may call for tailored profiles. By creating and maintaining multiple profiles for various scenarios, you’re equipped to handle any project with confidence. Whether you’re managing a high-volume operation or printing occasionally, keeping your profiles up to date ensures the consistent color quality that separates professional work from the rest.
FAQs
Why do I need to turn off printer color management when creating custom ICC profiles?
To create custom ICC profiles, it’s important to turn off the printer’s color management. Why? Because this stops the printer from making its own internal color adjustments, giving your custom ICC profile complete control over the color output. This way, your prints are tailored to your specific materials and deliver the color accuracy and consistency you’re aiming for.
Disabling the printer’s color management also avoids any potential mismatches or errors. This allows your custom profile to work as intended, ensuring you get professional-grade prints with reliable, predictable colors every time.
How often should I update my custom ICC profiles to keep colors accurate?
When you make changes to your printing setup – like switching to different inks, paper, or even a new printer – it’s important to update your custom ICC profiles. Doing so ensures your colors stay consistent and accurate.
In addition, it’s a good idea to review and update your profiles every 6 to 12 months. Over time, equipment and materials can shift slightly in performance, and staying on top of these changes helps you maintain top-notch quality in your printing work.
What’s the difference between a spectrophotometer and a colorimeter when creating ICC profiles?
A spectrophotometer captures the entire spectrum of light that a material reflects or transmits, delivering detailed and precise color data. This level of accuracy makes it perfect for developing ICC profiles, particularly when dealing with complex printing processes or unique materials.
In contrast, a colorimeter is designed for quick and straightforward color comparisons. It’s most commonly used to maintain color consistency during production. While it doesn’t provide the same level of detail as a spectrophotometer, it’s more compact, easier to use, and well-suited for routine color monitoring.
Related posts
- Soft Proofing Techniques for Accurate Colors
- How to Ensure Color Accuracy in Proofing
- 5 Common ICC Profile Issues and Fixes
- 5 Tips for Managing Color on Different Substrates
https://app.seobotai.com/banner/banner.js?id=687e269a766673742bdc6e8c
