Paper Sizes for Commercial Printing Explained

Understand the importance of selecting the right paper size for printing to enhance design, reduce costs, and meet project needs.

Choosing the right paper size is essential for successful printing projects. It affects design, costs, and usability. Here’s what you need to know:

  • North American Sizes: Letter (8.5 x 11"), Legal (8.5 x 14"), and Tabloid (11 x 17") are common. Ideal for business documents, contracts, and posters.
  • ISO Sizes (International): A4 (210 x 297 mm) is widely used for global projects. Other sizes like A3 and A5 are perfect for posters and flyers.
  • Custom Sizes: Great for unique designs like luxury packaging or event materials but may increase costs and production time.

Quick Comparison

Size Dimensions Common Uses
Letter 8.5 x 11 inches Business documents
Legal 8.5 x 14 inches Contracts, legal documents
Tabloid 11 x 17 inches Posters, newspapers
A4 (ISO) 210 x 297 mm Global business documents
A3 (ISO) 297 x 420 mm Posters, presentations
A5 (ISO) 148 x 210 mm Flyers, booklets

Key Takeaways

  • Standard sizes save costs and simplify production.
  • Custom sizes add uniqueness but require extra planning.
  • Work with a professional printer to balance creativity and budget.

This guide helps you pick the right size for any project, ensuring your materials are practical, cost-effective, and visually appealing.

Paper Sizes Explained

Common Paper Sizes in Printing

Knowing the standard paper sizes is key to successful printing projects. Here’s a look at the most common formats used in North America and around the world.

Paper Sizes in North America

In North America, three paper sizes dominate the printing industry and have been widely used since the early 20th century [3]:

  • Letter size (8.5 x 11 inches): The default for business documents, reports, and everyday office printing [2].
  • Legal size (8.5 x 14 inches): Offers extra length, making it a popular choice for contracts and legal paperwork [2].
  • Tabloid size (11 x 17 inches): Perfect for larger prints like posters, newspapers, and technical drawings.

While these sizes are the standard in North America, the ISO paper sizing system provides a different approach used internationally.

ISO Paper Sizes Used Worldwide

The ISO 216 standard, developed by the International Organization for Standardization, offers a globally consistent paper sizing system [1]. A key feature of ISO sizes is that each format halves when folded along its longest edge, simplifying design and printing processes.

Here are the most common ISO paper sizes:

Size Dimensions Common Uses
A4 210 x 297 mm Business documents, letters, forms
A3 297 x 420 mm Posters, large diagrams, presentations
A5 148 x 210 mm Flyers, booklets, small promotional items

This system is especially useful for international businesses, ensuring documents are compatible across countries. Most print shops can handle both North American and ISO standards, making it easy to meet the needs of global projects. For unique requirements, custom paper sizes are also an option.

Custom Paper Sizes for Printing Projects

Standard paper sizes are practical for many uses, but sometimes they just don’t cut it. Custom paper sizes can give your project that extra edge, making it stand out when standard dimensions fall short.

When Custom Sizes Make Sense

Custom paper sizes are ideal for projects where standard formats don’t work:

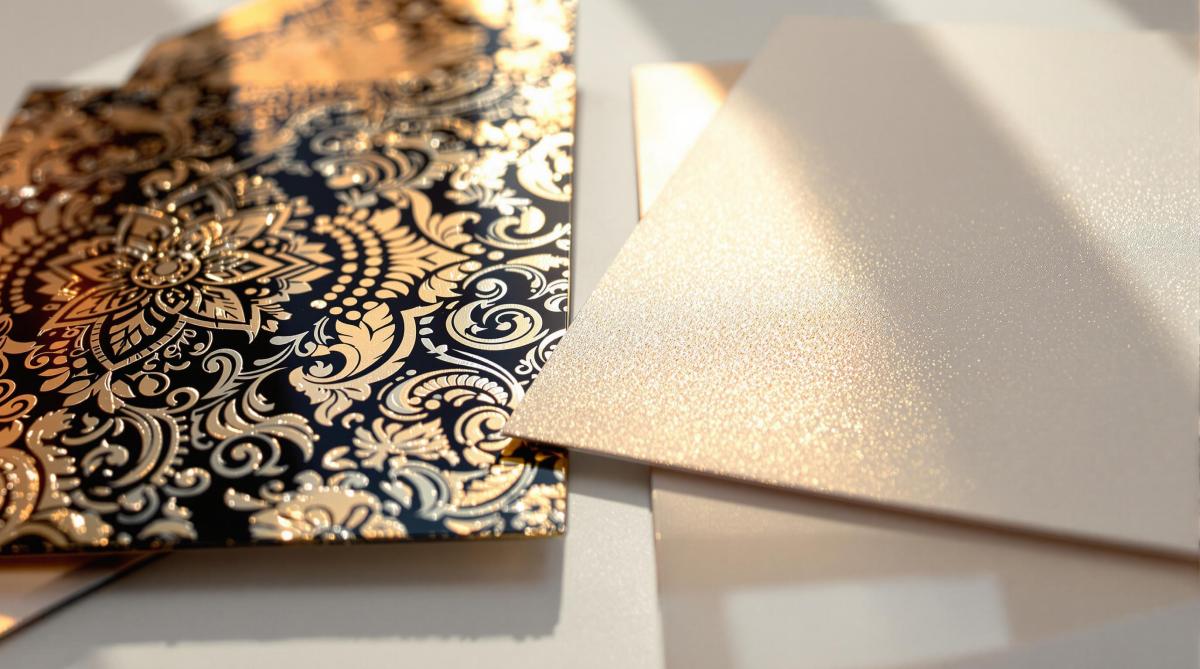
  • Luxury Product Packaging: Premium brands often use tailored paper sizes to enhance their product’s shelf appeal and create memorable unboxing moments.
  • Event Materials: Unique dimensions can make wedding invitations, gala announcements, or VIP event materials more memorable.
  • Brand Identity Materials: Industries like fashion, design, and architecture often choose custom sizes to reflect creativity and attention to detail.

Key Considerations for Custom Sizes

Custom sizes can bring unique challenges, so it’s important to plan ahead. Here’s what to think about:

Factor Impact How to Address It
Production Time May require more time Start planning early
Material Costs Can be higher Order just what you need
Design Needs Requires precision Collaborate with your printer early
Paper Weight Influences usability Choose based on your project’s purpose

Production Details: Custom sizes often need specialized cutting tools and extra setup time, which can stretch your timeline.

Budget Impact: Costs are typically higher due to custom cutting and material optimization.

Design Tips: Work closely with your printer to streamline the process. They can help with:

  • Choosing dimensions that fit your needs
  • Picking the right paper weight
  • Finding cost-effective production methods
  • Adjusting designs to reduce waste

Keep the lines of communication open with your printer. Share your project requirements early, and be ready to adapt based on their advice and production capabilities.

Custom sizes can elevate your project, but the right choice depends on your specific goals and needs.

sbb-itb-ce53437

How to Pick the Right Paper Size

Choosing the right paper size can make or break your printing project. It affects everything from cost and design to how your audience perceives the final product. Whether you’re sticking with standard sizes or going for something custom, aligning the paper size with your project’s purpose is key to a smooth production process.

Matching Paper Size to Your Project

The size you pick should depend on what you’re creating and how it will be used. For example, business cards (2.0 x 3.5 inches) are compact and perfect for networking, while A4 catalogs (210 x 297 mm) work well for showing off detailed product information.

Material Type Recommended Size Purpose
Business Cards 2.0 x 3.5 inches Networking and contact sharing
Standard Brochures 8.5 x 11 inches Mailing or display racks
Premium Brochures 11 x 17 inches Trade shows or presentations
Product Catalogs A4 (210 x 297 mm) Detailed product showcases

Think about factors like how much content you need to include, how you’ll distribute the material, and what your audience expects. For instance, A4 or Letter-sized paper is great for detailed content and easy mailing, while A5 works well for concise designs or more creative layouts.

Balancing Budget and Design

Standard paper sizes, like A4 or Letter, are often more cost-effective because they’re printer-friendly and widely available. On the other hand, custom sizes can help your design stand out but may increase costs and complicate production. It’s all about finding the right balance between your budget and your creative vision.

To make the process easier, you might want to consult with a professional print shop. Companies like Miro Printing & Graphics Inc. can guide you in selecting a paper size that fits both your goals and your budget.

Pro Tip: Decide on your paper size before diving into the design phase. This way, you’ll avoid unnecessary revisions and ensure your content fits perfectly.

While paper size is a big factor, don’t forget to consider other elements like paper weight, finish, and any special printing techniques you want to use. These details can take your project to the next level.

Other Factors to Consider in Printing

Paper Weight and Finishes

The weight of the paper plays a big role in how your printed materials feel and how durable they are. It also affects how the final product performs when handled.

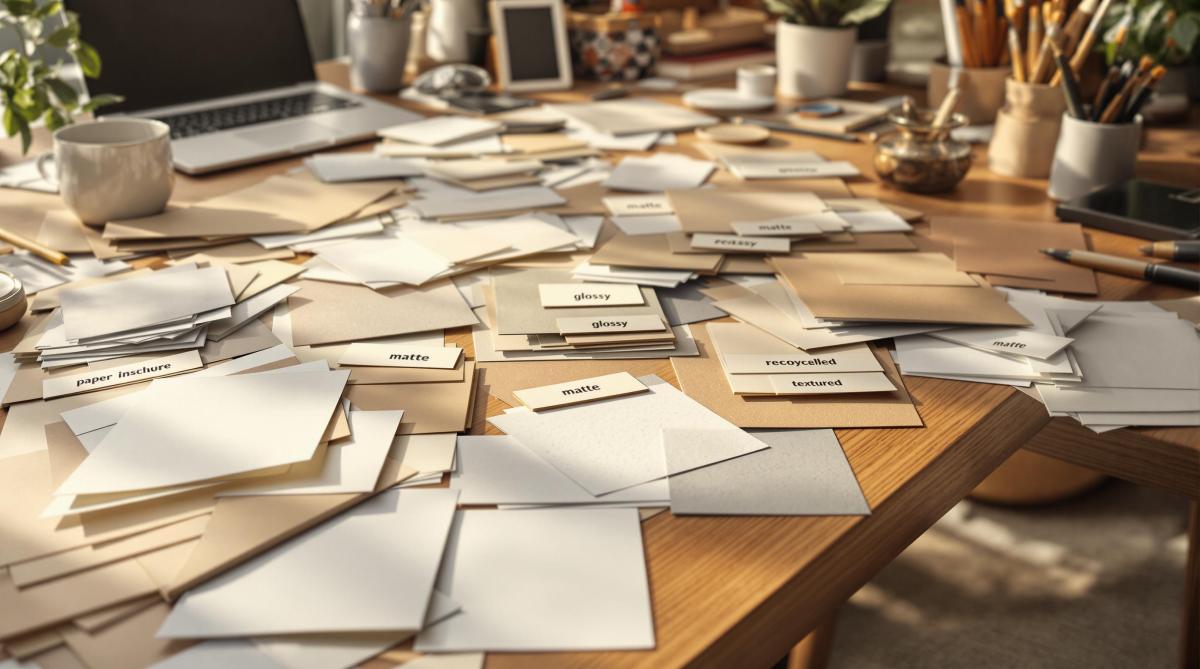
Paper finishes also add a lot to the look and usability of your project:

Finish Type Best Used For Key Features
Matte Text-heavy documents, Reports Reduces glare, easy to write on
Glossy Photo prints, Marketing materials Makes colors pop and details sharper
Satin Magazines, Catalogs Balances readability with visual appeal

Pro Tip: If your project includes both text and images, a satin finish is a great choice. It strikes the right balance between clarity and aesthetic appeal.

Specialized Printing Services

The printing method and additional services you choose can enhance the outcome of your project. Full-service print shops often offer a range of options to meet various needs. For instance, Miro Printing & Graphics Inc. provides everything from digital and offset printing to large-format options and in-house binding.

Here are some key factors to keep in mind when exploring specialized printing services:

  • Print Technology: Different printing methods work better with certain paper weights. For example, offset printing is ideal for heavier paper stocks.
  • Eco-Friendly Options: Many print shops now offer recycled paper and sustainable ink options to reduce environmental impact.
  • Post-Press Services: Think about whether you’ll need folding, binding, or mailing services to complete your project.

Combining the right printing services with your paper choices ensures your materials are both functional and visually impressive. By paying attention to these details, you can create a finished product that leaves a lasting impression.

Choosing the Best Paper Size

Picking the right paper size for your printing project is key to achieving polished results while keeping costs under control. Whether you’re working on business cards, brochures, or large-format posters, matching the paper size to your project’s purpose ensures both practicality and cost-effectiveness.

Project Type Recommended Size Key Consideration
Business Documents Letter (8.5 x 11") Standard size for professional use
Marketing Materials A4 (210 x 297mm) Works well internationally
Large Displays A3 or Tabloid Ensures readability and visual impact

In North America, Letter and Legal sizes dominate, while most other regions use the ISO 216 A-series standard. Standard sizes are often the most budget-friendly, minimizing waste and simplifying production. If your project needs custom dimensions, consulting with print professionals can help strike a balance between creativity and practicality.

Working with experts like Miro Printing & Graphics Inc. can help you navigate these decisions. Their knowledge ensures your project meets its goals while staying efficient and cost-effective.

Here are a few technical factors to keep in mind when deciding on paper size:

  • Printing Compatibility: Make sure the size works with your chosen printing method.
  • Binding and Folding: Consider how the size impacts these processes.
  • Mailing Costs: Check for size restrictions and associated costs.
  • Storage: Opt for sizes that are easy to store.

FAQs

What are the US paper sizes for printing?

In the US, paper sizes for printing come in standardized formats. Letter is the go-to size for business documents and everyday use. Legal is commonly reserved for contracts and legal paperwork, while Tabloid is ideal for larger designs such as newsletters and posters.

Size Name Dimensions Common Uses
Letter 8.5 × 11" Business documents, general printing
Legal 8.5 × 14" Contracts, legal documents
Tabloid 11 × 17" Newsletters, small posters

What is the difference between ANSI and ISO paper sizes?

ANSI paper sizes are standard in North America, while ISO sizes dominate internationally. Though their dimensions differ slightly, Letter and A4 are often used interchangeably, simplifying cross-border printing projects.

Here’s how they differ:

  • ANSI sizes (e.g., Letter) use imperial measurements.
  • ISO sizes (e.g., A4) rely on the metric system.
  • Both systems are versatile enough to accommodate most printing needs.

If your project requires specialized printing, professional services like Miro Printing & Graphics Inc. can handle both ANSI and ISO formats. This ensures your materials meet the necessary standards, whether for domestic or international audiences.

Knowing these distinctions makes it easier to select the right paper size for your specific needs.

Related Blog Posts

https://app.seobotai.com/banner/banner.js?id=6761db9cba109895705bce0c

How Automation Improves Print Turnaround Times

Explore how automation in printing enhances production speed, accuracy, and customer satisfaction, reshaping modern workflows.

Automation in printing speeds up production, reduces errors, and enhances customer satisfaction by streamlining key processes like prepress and finishing. Here’s what you need to know:

  • Faster Production: Automation cuts processing times by up to 50%.
  • Improved Accuracy: Achieves 99% data accuracy and reduces error rates by 20-30%.
  • Cost Savings: Lowers overall costs by 15%.
  • Higher Productivity: Increases job capacity by 50%, enabling quicker delivery.

Print shops like Miro Printing & Graphics have doubled their daily job capacity by adopting automation. To implement it effectively, focus on analyzing workflows, selecting compatible tools, and training teams for seamless integration.

How Automation Improves Printing Processes

Faster Production with Less Downtime

Automation has transformed print production by cutting down processing times significantly. Tasks like file preparation, color adjustments, and material handling that used to take hours can now be completed in just minutes. This is especially noticeable in prepress operations, where automated tools handle file preparation and color correction with speed and consistency.

Here’s a quick breakdown of how automation impacts key areas of print production:

Production Aspect Impact of Automation
Processing Time Cuts by 50%
Data Accuracy Achieves 99% accuracy
On-time Delivery Improves by 20%
Overall Costs Reduces by 15%

These numbers show how automation not only speeds up production but also minimizes errors and lowers costs, making workflows more efficient overall.

Better Accuracy and Fewer Mistakes

By standardizing processes, automation significantly reduces the chance of human error in printing. Automated systems are designed to maintain consistent print quality and precise color matching, eliminating the need for manual adjustments that often lead to mistakes.

For complex projects – like those requiring exact color replication or intricate finishing – automated quality checks ensure the final product meets high standards.

"Automated machines operate at higher speeds and with greater precision, leading to shorter production times and reduced costs." – drupa.com [1]

Boosting Customer Satisfaction

Faster production and consistent quality naturally lead to happier customers. Automation builds trust by ensuring accurate job quotes and delivering results that meet expectations every time.

Many print shops have successfully used automation to handle higher order volumes without compromising quality or missing deadlines. This ability to deliver reliable and timely service not only enhances customer satisfaction but also strengthens client relationships.

These advancements set the stage for real-world examples and deeper insights, which we’ll explore in the following section.

sbb-itb-ce53437

Data and Examples Supporting Automation

Success Stories of Automation in Printing

Miro Printing & Graphics Inc. is a great example of how automation can transform print operations. By automating tasks like prepress and finishing, they managed to cut processing times by 45% and doubled the number of jobs they could handle daily. This case highlights a growing trend in the printing industry: automation helps businesses scale their operations without sacrificing quality.

Here’s a snapshot of key improvements seen in automated print shops:

Performance Metric Before Automation After Automation Impact
Turnaround Efficiency Baseline 70% reduction Faster delivery
Error Rate Regular occurrence 20-30% reduction Higher accuracy
Productivity Standard output 50% increase Greater output

These results align with broader industry research showing how automation is reshaping modern print workflows.

Industry Research and Statistics

Research from HP Site Flow highlights the clear benefits of automation. Their findings emphasize:

"Automated machines operate at higher speeds and with greater precision, leading to shorter production times and reduced costs." [1]

Print shops that adopt automation commonly report three major advantages:

  • Consistent quality thanks to standardized processes
  • Less waste due to precise operations
  • More focus on complex, high-value tasks by staff

Automation doesn’t just improve efficiency – it also reduces waste, supporting eco-friendly practices. These insights set the stage for the next section, where we’ll dive into strategies for putting automation into action.

Steps to Add Automation to Print Workflows

Reviewing Current Processes

Start by mapping out your current workflow to pinpoint areas causing delays. Focus on repetitive tasks that slow down production. A clear analysis should address the most critical stages:

Process Stage What to Analyze Automation Opportunities
Prepress File preparation, color management Automated file processing, digital proofing
Production Machine setup times, material handling Automated job scheduling, robotic material handling

Selecting the Right Automation Tools

Choose tools that align with your services and production needs. Ensure they work smoothly with your current systems for easy integration. Look for tools that can grow with your business and offer clear, measurable benefits.

Key factors to consider when choosing automation tools:

  • Integration with existing workflow systems
  • Ability to scale as your business expands
  • Clear performance tracking and metrics
  • Access to dependable technical support and training

Training Teams for Automation

Introducing automation successfully depends on proper team training and phased implementation. Focus on one process at a time to help your team adapt and provide valuable feedback. Training programs should cover technical skills, an understanding of the updated workflow, and basic troubleshooting.

For example, Miro Printing & Graphics Inc. saw major improvements in efficiency and turnaround times after adopting automation. Their success highlights the importance of analyzing workflows and investing in team training to maximize results.

Conclusion: Automation and the Future of Printing

Main Points Recap

Automated workflows have transformed essential production stages, from prepress to final output. Studies show that automation cuts down manual tasks, improves quality control, and increases customer satisfaction.

To implement automation successfully, businesses should focus on:

  • Evaluating current workflows thoroughly
  • Choosing tools that integrate seamlessly
  • Providing in-depth training and ongoing team support
  • Regularly monitoring processes and making improvements

These steps highlight how automation is shaping both current practices and the future of the printing industry.

Automation’s Role in the Future of Printing

Automation isn’t just about solving today’s challenges – it’s the backbone of future progress in printing. The industry increasingly relies on automation to thrive and grow. Future advancements will depend on systems that adapt to changing needs while maintaining consistent quality and quicker turnarounds.

Currently, automation improves production speed, quality checks, and customer experience. Looking ahead, AI-driven tools and predictive systems could take these benefits even further. By investing in automation now, businesses position themselves for scalable, efficient operations that can handle the growing demand for speed and precision.

Related Blog Posts

https://app.seobotai.com/banner/banner.js?id=6761dc4fba109895705bcf1f

Ultimate Guide to Printing Supplier Negotiations

Learn effective strategies for negotiating with printing suppliers to reduce costs while ensuring quality and building strong partnerships.

Want to save costs, ensure quality, and meet deadlines when working with printing suppliers? Here’s how:

  • Start with Research: Understand market pricing, supplier capabilities, and competitor benchmarks.
  • Set Clear Goals: Use the SMART framework to define priorities and the NICE framework to organize them.
  • Focus on Value, Not Just Price: Balance cost with quality, reliability, and customization.
  • Build Strong Relationships: Open communication and trust lead to better long-term results.
  • Review and Follow-Up: Monitor supplier performance and maintain regular evaluations to keep everything on track.

This guide shows how to negotiate effectively and build partnerships that benefit both you and your supplier. Keep reading for detailed steps, strategies, and real-world examples.

How to Balance Cost Reduction with Quality in Supplier Negotiations

Preparation: Steps for Successful Negotiations

Good preparation is the backbone of productive printing supplier negotiations. Taking the time to research and plan helps businesses approach discussions with clarity and purpose.

Market Research

Knowing the current market landscape gives you an edge during negotiations. Dive into industry pricing trends and assess supplier capabilities in your area. Build a detailed profile of potential suppliers, including their specialties and typical pricing models.

Research Area Key Elements to Analyze Impact on Negotiations
Market Pricing Current rates for digital, offset, and large format printing Helps set realistic price targets
Supplier Capabilities Equipment quality, turnaround times, and service standards Defines service expectations
Competitor Analysis Service offerings, delivery schedules, and minimum order requirements Establishes benchmarks for comparison

Once you have a solid grasp of the market, the next step is to align your business goals with what suppliers can realistically offer.

Setting Clear and Flexible Goals

Setting well-defined goals is key to a successful negotiation strategy. Use the SMART framework – Specific, Measurable, Achievable, Relevant, Time-bound – to create structured objectives. At the same time, leave room for compromise to adapt to the negotiation process.

Organize your priorities using the NICE framework:

  • Necessary: Must-have service levels
  • Important: Preferred delivery timelines
  • Convenient: Added-value services
  • Extra: Non-essential features

This approach keeps your strategy focused and adaptable, ensuring you aim for the best possible outcome for both sides.

Understanding Supplier Needs

To achieve a win-win outcome, it’s important to see things from the supplier’s perspective. Consider their challenges, production schedules, and business goals. This insight allows you to craft agreements that work for both parties.

Key supplier factors to evaluate:

  • Production capacity and scheduling constraints
  • Material sourcing and cost challenges
  • Equipment limitations and maintenance needs
  • Staffing and resource allocation

Negotiation Strategies for Printing Supplier Deals

When negotiating with printing suppliers, focus on strategies that deliver long-term value and build strong partnerships.

Look Beyond Price: Focus on Overall Value

Instead of solely concentrating on price, evaluate factors like quality, reliability, and service. These elements can have a bigger impact on your business over time. Use your market research to identify suppliers who provide the best overall package.

Value Component Impact on Business Negotiation Consideration
Quality Standards Protects brand reputation and customer trust Paying more for consistent quality can be worthwhile
Turnaround Time Ensures deadlines and commitments are met Faster delivery might justify higher costs
Customization & Support Reduces errors and meets specific needs Access to expertise and tailored solutions is a plus

Once you’ve identified the value drivers, communicate clearly with suppliers to align expectations and build trust.

Build Trust Through Open Communication

Clear and honest communication is critical for successful negotiations. Share your needs, constraints, and expectations openly. This helps suppliers understand your priorities and offer tailored solutions.

Here are two ways to strengthen communication:

  • Share timelines: Inform suppliers of upcoming projects in advance to help them plan effectively.
  • Address problems early: Bring up issues as soon as they arise to prevent bigger disruptions.

Strengthen Relationships for Long-Term Gains

Strong, long-term partnerships with suppliers can lead to perks like priority service and better pricing. These relationships are mutually beneficial and can make future negotiations smoother.

To build these partnerships:

  • Share project forecasts: Let suppliers know your order volumes so they can optimize production and potentially offer better rates.
  • Flexible payment terms: Propose faster payment cycles in exchange for discounts or other benefits.

Negotiations should aim to create partnerships that work well for both sides. A strong relationship with your supplier can pave the way for smoother operations and better collaboration in the future.

sbb-itb-ce53437

Closing the Deal and Post-Negotiation Actions

Ensuring Clear Contract Terms

To ensure smooth operations, it’s crucial to thoroughly review and document all important contract details. Cover key aspects like pricing, delivery, quality, and service expectations to minimize misunderstandings later.

Contract Element What to Specify Why It Matters
Quality Standards Acceptable color variance, paper quality, finishing requirements Avoids disagreements over product quality
Delivery Terms Timeline commitments, rush order provisions, shipping methods Guarantees timely and reliable delivery
Pricing Structure Base rates, volume discounts, rush fees, material cost adjustments Clarifies costs and prevents surprises

Evaluating Supplier Performance

Regular performance checks help maintain accountability and ensure that suppliers stick to the agreed terms. Use scheduled reviews to monitor essential metrics and keep everything on track.

Consider creating a scorecard to measure:

  • Delivery timeliness
  • Print quality
  • Responsiveness
  • Adherence to agreed costs

Maintaining Relationships Through Follow-Up

Building strong supplier relationships doesn’t end with signing the contract. Ongoing communication and follow-ups are key to avoiding disruptions and ensuring future success.

Effective follow-up strategies include:

  • Regular project reviews to discuss performance
  • Annual evaluations of the partnership

For instance, Miro Printing & Graphics Inc. highlights the importance of trust and transparency in creating long-term partnerships [1].

Spotlight: Miro Printing & Graphics Inc. as a Model Supplier

When choosing a printing supplier, businesses can learn a lot from established leaders like Miro Printing & Graphics Inc. Their approach offers a clear example of what to look for when evaluating and negotiating with potential partners.

Services That Cover It All

A supplier’s ability to handle a variety of printing needs while maintaining high standards is a strong indicator of their expertise. Miro Printing stands out with a wide range of services:

Service Category Capabilities Business Advantages
Print Production Digital, Offset, Large Format Suited for projects of all sizes
Post-Press Operations In-house Bindery, Finishing Ensures smooth workflows and quality
Support Services Design, Mailing & Fulfillment Full-service solutions from start to finish

This lineup helps businesses simplify their operations by centralizing their printing needs with one trusted partner.

A Focus on Customer Service

What makes a supplier stand out? Businesses should prioritize those that excel in these areas:

  • Operational Efficiency: With in-house production and finishing, Miro Printing ensures tight quality control and quick delivery times.
  • Adaptability: Whether it’s a straightforward job or a complex project, Miro Printing has the flexibility to handle it all.
  • Cutting-Edge Technology: By investing in digital, offset, and large-format printing, Miro Printing stays equipped to meet diverse demands and keep up with industry advancements.

These qualities make Miro Printing a strong example of what to look for in a printing partner.

Conclusion: Key Points for Successful Printing Supplier Negotiations

Summary of Best Practices

Negotiating with printing suppliers effectively requires preparation, clear communication, and a focus on building lasting partnerships. Start with in-depth market research and define specific goals that align with your business needs and what the supplier can realistically provide [3]. Instead of only aiming to cut costs, the goal should be to create mutual benefits that strengthen the relationship over time.

Key elements include thorough preparation, discussions that focus on value, and consistent follow-ups. Research the market, set achievable goals, and keep communication open to strike balanced agreements. To ensure long-term success, monitor supplier performance regularly and nurture the relationship.

While these steps set a strong starting point, staying flexible and reassessing strategies is critical to keeping up with changing conditions.

The Need for Ongoing Improvement

Negotiation isn’t a one-time effort – it’s a process that evolves. Revisiting tools like SMART and NICE periodically helps ensure your approach stays relevant in a shifting market.

To remain competitive, consider these strategies:

  • Regularly evaluate your printing needs and supplier performance to find areas for improvement [2].
  • Use flexible frameworks to create agreements that can adapt as your business evolves [1].

Keep in mind that successful negotiations go beyond lowering prices. The focus should be on building partnerships that deliver value through quality, reliability, and innovation. Companies like Miro Printing & Graphics Inc. illustrate how strong supplier relationships combine excellent service, customer focus, and operational efficiency.

Related Blog Posts

https://app.seobotai.com/banner/banner.js?id=6785955cfc0bf469b7057cdf

Print Proofing Steps for Flawless Results

Master the essential steps of print proofing to ensure flawless designs and prevent costly mistakes before production.

Print proofing is the final step to ensure your design is perfect before production. Skipping it can lead to costly mistakes like color issues, design errors, or wasted materials. Here’s a quick guide to flawless proofing:

  • Check Your Design: Verify text, fonts, layout, branding, and image quality.
  • Prepare Files Correctly: Use CMYK color mode, 300 DPI resolution, embedded fonts, and proper bleed/margins.
  • Choose the Right Proof Type: Digital proofs for quick checks; physical proofs for true-to-life previews.
  • Review Thoroughly: Check layout, colors, resolution, and materials. Involve your team for diverse feedback.
  • Finalize Approval: Ensure corrections are made, colors are accurate, and quality benchmarks are met.

11 Things to Check in a Print Proof

Step 1: Getting Ready for Print Proofing

Before diving into proofing, it’s crucial to prepare your design and files to avoid any hiccups along the way.

Reviewing the Design

Taking a close look at your design can help you catch mistakes early and avoid production delays. Here’s what to check:

Design Element What to Check
Text Content Check for spelling, grammar, and punctuation errors.
Typography Ensure fonts are consistent in size and style.
Layout Verify spacing, alignment, and margins are correct.
Branding Confirm logo placement and color accuracy.
Images Make sure images have the right resolution, are properly placed, and cropped as needed.

Preparing Files Correctly

Getting your files ready the right way is key to achieving professional-quality prints. Pay attention to these details:

  • Color Mode Conversion: Switch your files to CMYK. This ensures colors print as expected, avoiding issues caused by RGB mode [1][2].
  • Resolution Requirements: Use a resolution of 300 DPI for sharp, clear prints. Anything lower can result in blurry or pixelated images [1][3].
  • Font Management: Embed all fonts in your files to prevent unexpected substitutions and maintain text consistency [1][3].
  • Bleed and Margins: Add a 0.125-inch bleed and keep a 0.25-inch safe margin to protect important content from being trimmed off [1][3].

Once your design is reviewed and your files are properly prepared, you’re set to move on to the actual proofing process.

Step 2: The Print Proofing Steps

Creating an Accurate Proof

Getting the proof right is crucial to ensuring the final product matches your vision. Here are two main types of proofs to consider:

Proof Type Purpose and Advantages
Digital Proofs Perfect for quick design checks and layout reviews without high costs.
Physical Proofs Provides a true-to-life preview using actual materials, allowing you to feel and see the final product.

For physical proofs, use the same materials as the final product for the best accuracy. Companies like Miro Printing & Graphics Inc. rely on color-calibrated printers and specialized tools to produce proofs that closely match the final printed piece [1][2].

Reviewing and Correcting Proofs

Once the proof is ready, it’s time for a detailed review to catch and fix any issues.

Steps for Reviewing Proofs: Compare the proof against the original design files and check for:

  • Proper layout, typography, and image placement.
  • Accurate and consistent colors.
  • High-resolution images.
  • Correct text formatting and spacing.
  • Trim marks and bleeds.
  • Paper stock and finish quality.

For physical proofs, use overlays to mark corrections. For digital proofs, add annotations directly [1][2].

Getting Input from the Team: Involve other team members in the review process. Multiple perspectives help catch errors you might miss and ensure the design meets everyone’s expectations [1][2].

Final Approval Before Printing

Before moving ahead with production, take these final steps:

  • Verify that all corrections have been made.
  • Check color accuracy under proper lighting.
  • Confirm that the proof meets all quality benchmarks.
  • Get written approval from everyone involved.

This is your last opportunity to ensure everything is perfect before printing begins. A thorough review at this stage can save time, money, and frustration down the line [1][2].

sbb-itb-ce53437

Best Practices for Flawless Results

Beyond the technical aspects of proofing, following these practices can help ensure smooth collaboration and top-notch results.

Working with Clients on Proofs

A clear feedback system helps avoid miscommunication and keeps everyone on the same page – designers, printers, and clients alike.

Communication Stage Key Actions Benefits
Initial Review Share detailed specifications Prevents confusion about design goals
Feedback Phase Provide written feedback with corrections Keeps a clear record of requested changes
Final Approval Obtain written stakeholder approval Ensures everyone agrees before moving forward

Miro Printing & Graphics Inc. follows a structured feedback process, offering clients regular updates to keep the proofing process transparent and efficient [1][2].

Using a Quality Control Checklist

A checklist is a simple but powerful tool for maintaining consistency and catching errors. Here’s a breakdown of what to include:

Technical Checks

  • Ensure color accuracy and proper calibration
  • Verify text and image alignment
  • Confirm graphics resolution
  • Double-check paper stock and finishing details

Content Review

  • Proofread text for spelling, grammar, and font consistency
  • Inspect image placement and quality
  • Check trim marks and bleeds
  • Account for any special finishing needs

Final Review

  • Assess material quality
  • Confirm design consistency
  • Match all client specifications

"A proof is a test print resembling the finished product." [2]

For the best results, review proofs under proper lighting conditions and involve multiple reviewers to catch any oversights [1][2][4].

Additional Factors for Professional Results

Choosing Paper and Materials

The materials you choose play a big role in how your final product looks and feels. Here’s a quick guide to paper finishes and their ideal uses:

Paper Finish Best Used For
Matte Text-heavy materials, reports
Glossy Photo prints, marketing materials
Satin Business collateral, brochures
  • Matte minimizes glare for better readability.
  • Glossy makes colors pop, perfect for photos or vibrant designs.
  • Satin offers a balance between the two, ideal for professional brochures or business materials.

For a more premium feel, go with heavier paper stocks (100lb+), which work well for brochures and business cards. Lighter stocks (60-80lb) are better suited for flyers or everyday prints.

Ensuring Color Accuracy

Once you’ve picked the right materials, it’s time to focus on color accuracy. Calibrating your monitor, using printer profiles, and checking colors under standard D50 lighting are key steps to ensure your design looks the same in print as it does on screen. Keep in mind, the brightness and tone of the paper you choose can also affect how colors appear.

Partnering with a skilled print provider can make a big difference in maintaining consistent color accuracy.

Selecting a Reliable Printer

A good printer can make or break your project. Look for one with advanced equipment, strong quality control, a variety of material options, and expertise in color management. For example, Miro Printing & Graphics Inc. in Hackensack, NJ, is known for their comprehensive services, including in-house binding and strict quality checks that ensure consistency from start to finish [1][2].

When choosing a print provider, consider:

  • Their technical capabilities
  • How they manage quality control
  • The range of materials they offer
  • Their expertise in handling color

Experienced printers also take into account factors like humidity and lighting to ensure your prints are consistent every time [1][2].

Conclusion: Achieving Flawless Prints

Print proofing is your safety net for ensuring professional results. Start with thorough preparation to lay the groundwork for success. When crafting proofs, make sure they reflect the final product as closely as possible. The type of paper and finishes you choose can greatly influence the outcome.

A strong quality control process helps identify issues early, saving time and money. Here’s a breakdown of what effective print proofing involves:

Stage Key Focus Areas
Initial Review Design elements, typography
Color Check Color accuracy, consistency
Final Approval Overall quality, specifications

Focusing on these stages helps you avoid common mistakes and keeps your project on track. Partnering with an experienced print provider brings additional expertise to the table. Full-service print shops like Miro Printing & Graphics Inc. are known for their attention to detail and rigorous quality control processes [1][2].

Staying attentive throughout the process is essential. Clear communication and collaboration with clients and stakeholders ensure everyone is aligned, reducing the chance of errors. Assigning clear roles to all involved makes the proofing process smoother, helping you achieve top-notch results every time.

FAQs

Here are answers to some common questions about the proofing process to help you achieve professional results.

What is the process of proofing for print?

Print proofing involves creating a test version of your design to spot and fix any errors before full production. While it takes some time, this step can save you from expensive mistakes and ensures your design is ready for printing.

How do you check a print proof?

Pay attention to these critical areas when reviewing a proof:

Element What to Check Common Issues
Text Spelling, grammar, punctuation Typos or inconsistent spacing
Contact Information Phone numbers, emails, addresses Transposed digits
Visual Elements Image resolution, logo quality Pixelation
Technical Specs Size, paper type, and dimensions Incorrect measurements

Check proofs under different lighting conditions to ensure color accuracy – advice backed by experts like Miro Printing & Graphics Inc. [2]. Using a clear plastic overlay can also help you mark corrections clearly, making communication with your printer more efficient [4].

Stick to a thorough quality control checklist and involve key stakeholders early in the review process. This minimizes last-minute changes and keeps the project aligned with its goals.

Related Blog Posts

https://app.seobotai.com/banner/banner.js?id=6786fae1070e33f748599ec6

How Foil Stamping Works: Step-by-Step Guide

Learn the step-by-step process of foil stamping, a technique that adds elegance and shine to various materials through heat and pressure.

Foil stamping is a printing method that uses heat and pressure to apply metallic or colored foil onto materials like paper, cardboard, leather, and plastics. It’s commonly used for luxury packaging, business materials, and special event items to create eye-catching, reflective designs.

Key Steps in Foil Stamping:

  1. Design Preparation: Use vector-based software, outline text, and keep designs simple.
  2. Die Creation: Choose brass (durable), magnesium (budget-friendly), or copper (versatile) dies.
  3. Foil Application: Heat the die, place foil between the die and material, and apply pressure.
  4. Quality Inspection: Check for smooth transfer, alignment, and consistent results.

Tips for Best Results:

  • Use coated materials for smoother finishes.
  • Test settings like temperature and pressure before full production.
  • Partner with experienced printers for complex designs or large-scale jobs.

Foil stamping adds a polished, metallic finish to designs, making them stand out with precision and elegance.

Step-by-Step Guide to Foil Stamping

Step 1: Preparing the Design

Start by creating your design using vector-based software like Adobe Illustrator for sharp and accurate results. Key steps in this process include:

  • Converting all text to outlines
  • Assigning spot colors to areas meant for foil
  • Ensuring text is at least 8 pt for readability
  • Avoiding overly detailed elements that could clog during production

Step 2: Making the Die

The die plays a crucial role in achieving top-notch results. The material you choose depends on your project needs:

  • Brass: Durable and ideal for long production runs
  • Magnesium: A budget-friendly option for shorter runs
  • Copper: A versatile choice for medium-sized runs [4]

Step 3: Applying the Foil

This step involves heating the die to the right temperature, placing the foil between the die and the material, and applying just the right amount of pressure. Proper temperature control is essential for a smooth transfer and to prevent damage [1]. Skilled handling ensures consistent results [2].

Step 4: Inspecting the Final Product

Quality checks are essential to ensure a polished finish. Focus on:

  • Smooth and accurate foil transfer
  • Even coverage throughout the design
  • Proper alignment with other printed elements
  • Clearing any excess foil
  • Consistency across the entire batch

Thorough inspection helps you deliver a flawless product, but it all starts with careful planning and the right materials [1][2].

Tips for Getting the Best Results with Foil Stamping

Choosing the Right Materials

The success of foil stamping starts with picking the right materials. Coated stocks are ideal for paper and cardboard projects because their smooth surface works well with foil. Metallic foils add a shiny finish, matte foils offer a more understated look, holographic foils create eye-catching effects, and pigmented foils provide solid color coverage. After selecting your materials, running thorough tests is key to achieving the best results.

Testing Before Final Production

Running small tests is crucial to fine-tune settings like temperature, pressure, and material compatibility. These tests help you avoid common issues and ensure:

  • Proper heat settings for foil adhesion
  • Correct pressure levels
  • Compatibility between the foil and the material

If problems come up during testing, collaborating with experienced printers can help you find effective solutions.

Working with Experienced Printers

Partnering with professional printers can make a big difference in your foil stamping project. Companies like Miro Printing & Graphics Inc. have the expertise to refine designs, select the right materials, and execute precise stamping techniques. Their knowledge ensures high-quality results and consistent production.

Experienced printers also provide access to advanced equipment and can handle a variety of materials and designs. They can offer valuable guidance on improving designs and resolving technical issues, helping you achieve the best possible outcome [1][2].

sbb-itb-ce53437

Common Problems in Foil Stamping and How to Fix Them

Even with top-notch materials and techniques, challenges can pop up during foil stamping. Here’s how to tackle them head-on.

Avoiding Too Much Foil Application

Excess foil can be a frustrating issue for printers. Opting for adhesive-backed foils designed for precise use can help create strong bonds without wasting material.

To get clean, polished results:

  • Keep your temperature and pressure settings consistent – adjust them based on your foil type and material thickness.
  • Clean your die regularly to avoid foil buildup that can interfere with quality.
  • Monitor adhesive performance during production to maintain steady results.

For intricate designs, steer clear of type sizes smaller than 8 points. Smaller sizes tend to cause plugging and foil buildup, which can ruin the final look [4].

While calibration plays a big role in preventing over-foiling, ensuring proper alignment is just as important for professional-quality results.

Solving Misalignment Problems

Misalignment often happens due to poor die preparation or uneven material surfaces. To keep everything in line during the stamping process:

  • Set up a stable base. Use a large, sturdy foundation for your machine and make sure all parts are securely in place. Stability is key for consistent alignment across multiple runs [3].
  • Prepare your die carefully. Accurate guides are essential for proper die positioning. Regular maintenance and correct storage can also prevent warping, which might cause alignment issues [1].
  • Implement quality checks. Inspect die alignment, substrate evenness, and registration marks both before and during production.

If you notice misalignment, stop production immediately to adjust your setup. Print shops like Miro Printing & Graphics Inc. rely on thorough quality control checks to spot and fix alignment problems early, ensuring they don’t disrupt large-scale projects [1][2].

Conclusion

Foil stamping adds metallic finishes to designs through careful planning, the right materials, and precise execution. As covered earlier, success depends on using vector-based artwork, selecting the appropriate foil, and applying it with care [1][5].

Modern automated controls enhance consistency in commercial foil stamping, ensuring proper adhesion and reducing errors. For intricate designs or large-scale production, working with experienced print shops can make a big difference. Companies like Miro Printing & Graphics Inc. excel in this area, offering in-house design expertise and thorough quality checks to avoid costly mistakes and deliver top-tier results [2][6].

Foil stamping demands both technical skill and hands-on experience. While small projects might be doable in-house, more complex or high-volume jobs often benefit greatly from professional help. Investing in expert services typically ensures consistent, polished results that align with strict quality expectations [5][6].

FAQs

Here are clear answers to frequently asked questions about foil stamping, summarizing key points from the article.

What is the process of foil stamping?

Foil stamping involves using heat and pressure to transfer metallic foil onto a surface. A heated metal die presses the foil carrier film onto the material, typically at temperatures between 200-300°F, creating a metallic imprint [1][2].

What materials are suitable for foil stamping?

Material Details
Paper Great for business cards and invitations; works best with 80lb or heavier paper.
Cardboard Commonly used for packaging and book covers; requires specific pressure settings.
Leather Popular for luxury items like portfolios; needs precise temperature control.
Plastics Ideal for premium packaging; requires specialized foils for proper adhesion.

How can I achieve the best results with foil stamping?

Use vector-based artwork created in professional design tools. Keep text sizes at least 8 pt and avoid overly detailed designs to ensure clean transfers. Proper spacing between elements helps prevent transfer issues like bleeding [4][6].

What are common issues with foil stamping?

Some common problems include:

  • Excessive foil application: Prevent this by maintaining consistent heat and pressure.
  • Misalignment: Use careful die setup and registration marks to avoid this issue [1][2].

What types of foil finishes are available?

Foils come in various finishes, including:

  • Metallic: Popular options like gold, silver, and copper.
  • Matte: A non-reflective, understated look.
  • Gloss: High-shine and eye-catching.
  • Holographic: A multi-dimensional, shimmering effect [1][5].

For more detailed instructions, refer to the step-by-step process and tips shared earlier in the article.

Related Blog Posts

https://app.seobotai.com/banner/banner.js?id=678c5d3380cdd94998feb3ce

Foil Stamping vs Metallic Ink: Key Differences

Explore the differences between foil stamping and metallic ink to choose the best metallic finish for your printing projects.

Foil stamping and metallic ink are two methods for adding metallic finishes to printed materials, each with unique benefits:

  • Foil Stamping: Offers a shiny, mirror-like finish with raised texture, ideal for bold designs like logos or luxury packaging. More durable but higher in cost.
  • Metallic Ink: Provides a soft shimmer with a smooth texture, perfect for detailed designs and gradients. Budget-friendly but less durable.

Quick Comparison

Feature Foil Stamping Metallic Ink
Shine Level High-gloss, reflective Subtle, pearlescent
Texture Raised, tactile Smooth, flat
Durability Long-lasting Moderate, prone to wear
Cost Higher Lower, cost-efficient
Best For Bold, luxury designs Intricate, detailed designs

Choose foil stamping for high-end, durable projects and metallic ink for affordable, detailed designs.

Metallic Ink vs Foil Stamping

How They Look

Foil stamping and metallic ink each create unique visual effects that can influence the overall look of your project. Knowing the differences between these techniques can help you pick the one that fits your design goals.

Foil Stamping Finish

Foil stamping produces a shiny, mirror-like effect with a raised texture that’s both visible and touchable [1]. This method works well for bold designs like logos, luxury packaging, or embossed details that need to stand out.

Metallic Ink Finish

Metallic ink, on the other hand, creates a soft shimmer that blends into the surface [3]. It’s ideal for intricate designs, gradients, or projects with multiple metallic shades. The smooth texture integrates seamlessly with other printed elements.

Characteristic Foil Stamping Metallic Ink
Shine Level High-gloss, mirror-like Subtle, pearlescent
Surface Texture Raised, tactile Smooth, flat
Detail Capability Great for bold elements Perfect for fine details
Visual Impact Bold and attention-grabbing Elegant and understated
Design Integration Stands out Blends in

Your choice depends on the look you’re going for. For example, Miro Printing & Graphics Inc. recommends foil stamping when you want maximum visual impact, while metallic ink is better suited for detailed, refined designs [3].

With the visual differences covered, let’s dive into how these techniques compare when it comes to cost.

Cost Differences

When deciding between foil stamping and metallic ink, understanding the cost variations can help you choose an option that fits your budget. These two methods differ significantly in price due to their unique production processes.

Foil Stamping Costs

Foil stamping tends to be more expensive because of its detailed process. This method requires custom dies, specialized equipment, and high-quality materials, which drive up costs [1]. It’s especially pricey for smaller production runs but delivers a striking finish that’s perfect for upscale projects.

Metallic Ink Costs

Metallic ink is a more budget-friendly choice while still offering a polished metallic look. It’s particularly cost-efficient for larger production runs since it works seamlessly with standard printing processes [2]. The fewer production steps involved make it a more affordable alternative compared to foil stamping [1][2].

At Miro Printing & Graphics Inc., clients can get tailored cost estimates for both methods to ensure their choice aligns with project goals. The decision often comes down to priorities: foil stamping for luxurious, high-end designs and metallic ink for a sophisticated look at a lower price.

Cost isn’t the only consideration – durability also affects the overall value of your printed materials.

sbb-itb-ce53437

Durability

Durability plays a big role when choosing a metallic finish, especially for items meant to last or handle frequent use. Foil stamping and metallic ink each offer different levels of resistance and longevity.

Foil Stamping Durability

Foil stamping creates a strong, lasting finish by bonding metallic foil to the material using heat and pressure. This makes it a great choice for items that see a lot of use or need to maintain a premium look over time, such as:

  • Premium business cards
  • Luxury product packaging
  • High-end promotional materials
  • Corporate identity materials

Metallic Ink Durability

Metallic ink, which contains metal particles, can wear down or crack over time, especially with frequent handling or bending. Adding a protective coating can help extend its life, but it also adds more steps and costs to production [1][2].

Durability Factor Foil Stamping Metallic Ink
Wear Resistance Strong resistance to scratches and wear Moderate, shows wear with frequent use
Longevity Lasts for years without major changes May need a coating for longer durability
Environmental Factors Handles moisture and temperature well More vulnerable to environmental damage
Flexibility Holds up when bent or folded Prone to cracking when flexed

Miro Printing & Graphics Inc. often suggests foil stamping for projects where durability is a priority. While it may cost more upfront, its long-term performance makes it worth the investment.

Now that we’ve covered durability, let’s look at how to choose the right method for specific projects.

When to Use Each

Choosing between foil stamping and metallic ink comes down to your project’s goals, budget, and how it will be used.

Best Uses for Foil Stamping

Foil stamping works best for high-end packaging, event materials like invitations, and professional branding items such as business cards or certificates. It stands out in:

  • Luxury Projects: Perfect for upscale retail packaging or exclusive promotional items.
  • Memorable Keepsakes: Wedding invitations or commemorative pieces where the extra cost is justified by their lasting value.
  • Professional Branding: Business cards, annual reports, and certificates that need to exude quality.

Best Uses for Metallic Ink

Metallic ink is a great choice for detailed designs, budget-friendly marketing, and short-term projects. It shines in:

  • Intricate Designs: Ideal for fine text, small details, or gradient effects.
  • Marketing Materials: Brochures, catalogs, and promotional items for large-scale print runs.
  • Short-Term Use: Seasonal promotions or event materials where durability isn’t a top concern.
Application Foil Stamping Metallic Ink
Premium Materials Perfect for lasting impressions Good for budget-friendly options
Design Detail Best for bold, striking elements Excellent for detailed, fine designs
Production Scale Affordable for smaller quantities Cost-effective for larger print runs

When deciding, think about the visual impact, durability, and budget. Miro Printing & Graphics Inc. recommends assessing your project’s lifespan, handling needs, and financial constraints to make the right choice [1][3].

Next, let’s directly compare these techniques to help you finalize your decision.

Side-by-Side Comparison

Here’s a closer look at how foil stamping stacks up against metallic ink, so you can decide which option fits your project’s needs.

Feature Foil Stamping Metallic Ink
Visual Appeal Bright, reflective metallic shine with a raised texture Subtle metallic effect with a smooth finish
Application Added after printing using heat and pressure Applied as part of the printing process
Design Suitability Works well for bold, larger elements; not ideal for fine details Great for intricate designs and detailed work
Color Options Limited to pre-made foil colors Wide variety of metallic shades through color mixing
Surface Compatibility Best on smooth, flat surfaces Works with many types of paper
Production Time Slower due to extra processing steps Faster as it integrates into standard printing
Durability Long-lasting and resistant to cracking Can crack or become brittle over time
Cost Higher per piece More budget-friendly, especially for large quantities
Handling and Environment Less sensitive to moisture and frequent handling Can be affected by moisture and wear
Embossing Options Pairs well with embossing or debossing for added texture Limited ability to create dimensional effects

This table highlights the strengths and limitations of each technique. When deciding, think about how often the item will be handled and how long it needs to last. For large-scale projects, metallic ink is often the quicker and more affordable choice. On the other hand, foil stamping is perfect for smaller projects that need to make a bold impression.

Conclusion

Foil stamping delivers a bold, long-lasting finish, making it ideal for high-end projects, while metallic ink offers a budget-friendly solution for intricate designs. Deciding between the two comes down to your project’s focus – whether that’s durability, visual impact, or cost.

For the best results, working with experienced printers is key. Miro Printing & Graphics Inc. brings expertise in both digital and offset printing, along with a range of post-press services, to help you achieve the perfect balance for your project.

Related Blog Posts

https://app.seobotai.com/banner/banner.js?id=678c415580cdd94998fe59db

How to Choose the Right Paper for Custom Prints

Learn how to choose the right paper for custom prints, considering types, finishes, durability, and project goals for optimal results.

Choosing the right paper for your custom prints is essential for achieving the best results. Here’s a quick breakdown to help you decide:

  • Coated vs. Uncoated Paper: Coated paper is smooth and enhances colors, great for photos and marketing materials. Uncoated paper has a natural texture, ideal for stationery and forms.
  • Paper Finishes:
    • Matte: Non-reflective, good for text-heavy designs.
    • Gloss: Reflective, perfect for vibrant images.
    • Silk/Satin: A balanced, elegant look.
  • Durability and Weight: Heavier paper (e.g., 100 lb. or 14 pt.) is better for durability, like business cards or outdoor materials.
  • Specialty Options: Textured, metallic, or recycled papers add uniqueness to invitations or eco-friendly projects.
  • Cost vs. Quality: Balance budget with quality by using premium paper for client-facing materials and cheaper options for internal use.

Quick Comparison of Paper Types and Uses

Paper Type/Finish Best For Features
Coated Photos, brochures, flyers Bright colors, smooth surface
Uncoated Stationery, forms, letterheads Natural texture, writeable
Matte Finish Text-heavy designs Non-reflective, easy readability
Gloss Finish Photo-rich designs Reflective, enhances image vibrancy
Silk/Satin Finish High-end materials Soft sheen, balances readability
Recycled Paper Eco-conscious projects Sustainable, professional look

How to Choose the Right Paper Coating: Matte, Gloss, High-Gloss

Overview of Paper Types and Finishes

Choosing the right paper involves more than just selecting its weight or thickness. Knowing the key differences between paper types and finishes can help ensure your prints look great and serve their purpose effectively.

Coated vs. Uncoated Paper: What’s the Difference?

Coated paper has a smooth layer, often made of clay or latex, that enhances ink retention and color brightness. This makes it perfect for sharp, vivid image reproduction. On the other hand, uncoated paper has a natural texture and is ideal for projects that need a writeable surface, like stationery or forms [3]. The coating on coated paper also prevents ink from soaking into the fibers, ensuring crisp results.

Paper Type Best For Features
Coated Photos, Magazines, Marketing materials Smooth surface, Bright colors, Holds ink well
Uncoated Letterheads, Business stationery, Forms Natural texture, Writeable, Absorbs ink more

Common Finishes: Matte, Gloss, Silk, and Satin

Paper finishes play a big role in how your project looks and feels.

  • Matte finishes have a non-reflective surface, making them perfect for text-heavy designs where readability is key [3].
  • Gloss finishes are reflective and make colors and images stand out, ideal for photo-rich marketing pieces [1].
  • Silk and satin finishes offer a middle ground – they have a soft sheen that balances readability with an elegant appearance [3]. These are often chosen for high-end business materials.

Specialty Papers for Unique Needs

For projects that need a distinctive touch, specialty papers are a great choice. Options like textured papers (linen, ribbed), metallic papers (with shimmering effects), and recycled papers (eco-conscious choices) can make a big impression [3] [1]. These are especially suited for invitations, luxury packaging, or sustainable designs.

Selecting the right paper type and finish sets the stage for creating prints that stand out. Next, we’ll dive into how to match these options to your project goals.

How to Choose the Right Paper for Your Project

Now that we’ve gone over paper types and finishes, let’s dive into how to match them with your project’s goals.

Purpose and Function of the Project

The purpose of your print project should steer your paper choice. Different projects call for specific paper qualities to get the best results. For items like business cards that are frequently handled, you’ll need a sturdy, professional-looking paper. On the other hand, marketing materials with bold, colorful images work best with coated papers that make colors pop.

If your project is text-heavy, uncoated paper is a great option. Its natural texture makes it easier to write on and reduces eye strain for readers [1].

Durability and Usage Conditions

Think about how long your project needs to last and the conditions it will face. For outdoor displays, papers that are UV-stable and water-resistant will hold up better over time [1]. If you’re creating mailing pieces, they need to meet postal regulations while staying intact during shipping [2].

Usage Scenario Recommended Paper Type Key Benefits
Outdoor Display UV-stable, water-resistant Protects against weather
Direct Mail 70-80# Text weight Meets mailing standards
Frequent Handling Cover stock Durable and professional

Balancing Quality and Cost

Striking a balance between quality and budget takes some thought. For instance, using the right text-weight paper for brochures can give you a polished look without overspending [3]. Save premium paper for customer-facing materials, while internal documents can use more affordable options.

"Professional printers can offer expert advice on paper selection based on the project’s specific needs, provide samples of different paper types and finishes, and ensure that the chosen paper meets all necessary standards and regulations for the intended use." [context]

If sustainability is part of your brand’s message, FSC-certified or recycled paper is a solid choice [4]. While premium paper may cost more upfront, its durability often means fewer reprints, saving money in the long run [3]. Print shops like Miro Printing & Graphics Inc. can help you weigh these factors and recommend the best options for your needs and budget.

With these considerations in mind, let’s move on to the best paper choices for common print projects.

sbb-itb-ce53437

Best Paper Choices for Common Print Projects

Business Cards and Office Stationery

For business cards, 120-pound (14-point) Gloss or Uncoated Cover is a reliable pick for a polished and sturdy finish [3]. If you need something for note-taking, uncoated finishes are ideal – they’re easy to write on and still look professional. For letterheads and internal memos, go with 50-100# Text Paper. It strikes the right balance between style and usability [2].

Brochures and Flyers for Marketing

For brochures and flyers, 80# or 100# Gloss Text is a smart choice. It ensures sharp, vibrant images and holds up well over time [3]. Gloss Text paper is perfect for rich, vivid colors, while satin finishes add a premium touch with less glare.

Marketing Material Recommended Paper Benefits
Brochures 80# Gloss Text Excellent color clarity
Flyers 100# Gloss Text Better durability
Catalogs 70# Satin Text Premium finish, less glare

Invitations and Posters for Events

Event materials need to make an impression and last. For invitations, 100# Uncoated Cover stock offers a refined, tactile feel [3]. Its natural texture adds a touch of sophistication and holds up well during mailing.

Posters require both durability and eye-catching visuals. 120-pound (14-point) Gloss Cover provides vivid colors that pop [3]. For outdoor posters, UV-resistant paper is a must to guard against weather and fading.

Miro Printing & Graphics Inc. also offers finishing options like UV coating and foil stamping to elevate your designs [3]. These paper choices combine quality and practicality, ensuring your projects stand out without breaking the bank.

Now that we’ve covered these essentials, let’s dive into more ways to perfect your paper selection.

Tips for Selecting the Best Paper

Eco-Friendly Paper Options

Choosing eco-friendly paper, such as 100% recycled options or materials like bamboo and sugarcane, helps reduce the impact on the environment while maintaining excellent print quality. Carbon-balanced paper is another option, as it offsets the environmental costs of printing and provides a way to align with sustainability goals [3].

Using Advanced Printing Techniques

Advanced printing methods can elevate the final result. Techniques like LED UV printing create sharper images and bold colors by instantly curing the ink, making them ideal for glossy or matte finishes. For other needs, digital printing offers quick and cost-efficient results on coated or uncoated papers, while offset printing is well-suited for premium stocks and larger print runs [3].

Printing Technique Best Paper Types Key Benefits
LED UV Printing Gloss, Matte Instant ink curing, vibrant visuals
Digital Printing Coated, Uncoated Quick production, budget-friendly
Offset Printing Premium stocks High-quality, ideal for bulk orders

Getting Help from Professional Printers

Teaming up with professional printers, like Miro Printing & Graphics Inc., can make all the difference in choosing the right paper for your project [3]. They can provide physical samples, helping you evaluate the paper’s weight, texture, and finish to ensure it matches your vision. Additionally, they can guide you in selecting paper that meets postal requirements or handles outdoor conditions effectively.

When consulting with a printer, discuss your project’s timeline, budget, intended use, and durability needs. Their expertise can help you make informed choices that deliver quality results while meeting practical and industry standards [3].

Conclusion: Final Thoughts on Paper Selection

Picking the right paper is key to achieving the quality, durability, and look you want for your prints. Whether you go for coated or uncoated paper, or finishes like matte or gloss, each choice plays a role in delivering the results you’re aiming for.

Paper weight matters too. For instance, 120# Gloss Cover gives business cards a sturdy, high-end feel, while 70# Uncoated Text is better suited for everyday marketing materials [1]. The finish you select also impacts how your prints look and function, with each option tailored to specific uses [2].

If you’re considering eco-friendly options, materials like FSC-certified or recycled paper offer a responsible choice without sacrificing quality. Pairing sustainable materials with guidance from seasoned printers can simplify the decision-making process.

Teaming up with experienced professionals, like Miro Printing & Graphics Inc., ensures you make informed decisions about paper that fit your goals, budget, and environmental considerations [3].

Choosing the right paper is about finding the balance between technical specs and practical needs. With a clear understanding of these factors, you can confidently create prints that stand out and align with your project’s goals.

Related Blog Posts

https://app.seobotai.com/banner/banner.js?id=678c031880cdd94998fe1de0

Ultimate Guide to Personalized Print Design

Explore personalized print design, its importance, essential components, and practical steps for creating impactful printed materials.

Personalized print design is about tailoring printed materials to reflect a brand’s identity and connect with its audience. Even in a digital-first world, it remains an effective way to engage customers and build recognition.

Why It Matters:

  • 29% higher open rates for personalized direct mail compared to generic ones.
  • Boosts brand recognition, customer engagement, and a professional image.

Essentials for Success:

  1. Key Design Elements: Use proper print areas, typography, and high-resolution images (300 DPI).
  2. Custom Features: Logos, vector graphics, and bold designs ensure scalability and clarity.
  3. Printing Methods: Choose digital for quick jobs, offset for large runs, or large format for oversized materials.

Steps to Get Started:

  • Plan with clear goals and audience insights.
  • Use design tools like Adobe Illustrator for precision.
  • Collaborate with professional designers or local print shops for expert guidance.

Pro Tip:

Local print shops, like Miro Printing & Graphics Inc., offer personal consultation, faster turnaround, and expert support for high-quality results.

Whether you’re creating business cards, banners, or event materials, personalized print design helps your message stand out and leaves a lasting impression.

Key Components of Personalized Print Design

Creating personalized print designs that leave a lasting impression involves focusing on a few important elements. These details ensure your designs are both visually appealing and production-ready.

Key Design Considerations

Component Specification Purpose
Print Area Product-specific measurements Ensures clean cuts
Bleed Area Add 1/8 inch beyond trim Prevents unwanted white edges
Safe Zone Inner margin from trim Protects key content
Typography Minimum 5px size Keeps text readable
Logo Placement High-contrast areas Boosts brand visibility
Custom Graphics Vector format Ensures scalability

Print shops provide detailed guidelines to help your artwork meet production standards [1]. Keep in mind that each product has unique dimensions – what works for a business card won’t suit a banner or packaging.

Using High-Resolution Images

After nailing the layout, the next step is ensuring your images meet professional printing standards. For crisp, clear prints, use images with a resolution of 300 DPI (dots per inch) or higher [1]. While low-resolution images may look fine on a screen, they tend to blur when printed.

To maintain sharp visuals:

  • Use vector formats for logos and text.
  • Scale images at 100% or smaller.
  • Avoid enlarging low-quality images.
  • Always check image clarity at the actual print size.

Adding Custom Features

Custom features can elevate your design while reinforcing brand identity. Avoid overly intricate details that may lose clarity during printing [1]. Instead, focus on bold, simple elements that look great across various materials and printing techniques.

With the right mix of technical accuracy and creative flair, print shops ensure your designs transition smoothly from screen to print [2]. This attention to detail helps your designs make a strong impression every time.

Steps to Create a Personalized Print Design

Creating polished print designs takes thoughtful planning and execution. Here’s a guide to help you turn your ideas into high-quality printed materials.

Planning and Gathering Ideas

Start by defining the purpose of your design and identifying your audience. This will shape your creative direction. A mood board or reference materials can help refine your vision. Use the table below to organize your planning process:

Planning Stage Key Activities Outcome
Research Analyze industry trends and competitors Clear design direction
Audience Analysis Identify demographics and preferences Tailored design elements
Concept Development Develop mood boards and initial sketches A cohesive visual style

Using Design Tools and Software

For professional results, tools like Adobe Illustrator are highly recommended. This software provides precise control over every detail. Follow these key file preparation tips to ensure your design is print-ready:

  • Set document dimensions to match the product’s size
  • Use CMYK color mode for accurate color reproduction
  • Ensure all images are at 300 DPI for sharpness
  • Save in vector formats to maintain scalability

Once your concept is ready, these tools will help you bring it to life. If your project requires advanced skills, working with a professional designer can ensure your design meets all technical requirements.

Working with Professional Designers

Professional designers combine creativity with a deep understanding of printing processes. To collaborate effectively, provide a detailed brief that includes your target audience, brand guidelines, dimensions, and preferred printing methods. Establishing a clear timeline and budget upfront will streamline the process.

Local print shops, like Miro Printing & Graphics Inc., often offer in-house design services. Their designers are familiar with specific printing techniques and equipment, ensuring your design is optimized for production and final output.

sbb-itb-ce53437

Best Practices for Printing and Production

Preparing Files for Printing

Getting your files ready for print is a key step to ensure polished results. Always extend your design’s background into the bleed area to prevent unwanted white edges. Make sure your colors are calibrated correctly for accurate reproduction. Use pre-flight checks to catch potential issues before submitting your files for printing.

Choosing the Right Printing Method

Each printing method has its own purpose, and knowing their benefits can help you pick the right one for your project:

Printing Method Best For Advantages
Digital Printing Small to medium runs, fast jobs Quick production, supports variable data
Offset Printing Large quantities, consistent output Lower cost per unit, precise color accuracy
Large Format Banners, posters, signage Perfect for oversized materials

If you need quick results with excellent quality, digital printing is a solid choice. For bigger projects, offset printing offers better cost-efficiency, though it requires more time to set up.

Final Checks and Finishing Options

Before sending your files off, double-check colors, resolution, and text clarity to ensure everything looks sharp and professional. Refer to earlier tips on resolution, typography, and color accuracy to avoid any surprises.

Finishing touches can add both durability and aesthetic appeal to your printed materials. Many print shops provide services like laminating, binding, or embossing to take your prints to the next level. For complex projects, partnering with experienced providers like Miro Printing & Graphics Inc. can be a game-changer. They offer expert pre-press support and use professional-grade equipment to ensure your materials meet high standards.

Why Work with Local Print Shops

Benefits of Choosing Local Print Shops

Working with local print shops brings a range of advantages that can directly influence the outcome of your custom print projects. Their hands-on approach makes collaboration easier and helps deliver high-quality results.

Benefit What It Means for You
Personal Consultation Face-to-face meetings for immediate feedback and tailored solutions
Quality Assurance Review physical proofs and make real-time adjustments
Quick Turnaround Flexible scheduling to meet tight deadlines
Expert Support Direct advice on materials and printing techniques
Local Accessibility Easy communication and regular project updates

Local print shops don’t just handle printing – they bring expertise in areas like paper selection, finishing techniques, and cost-effective strategies. According to a report by American Express, 72% of consumers are more likely to revisit local businesses with excellent customer service [2]. This highlights the long-term value of building a strong relationship with your local printer.

Services Offered by Miro Printing & Graphics Inc.

Miro Printing & Graphics Inc. is a standout option among local print shops, offering a wide range of services and a keen focus on detail. Their offerings include:

  • In-house Bindery: All finishing work done on-site for better control and efficiency
  • Custom Projects: Tailored solutions for unique designs
  • Design Services: Help from concept development to final production
  • Variable Data Printing: Personalized printing for targeted campaigns
  • Post-press Options: Professional finishing touches to elevate your project

What sets Miro Printing & Graphics Inc. apart is their seamless project management. By handling everything in-house, they avoid the coordination issues often faced with online printers. Their blend of design expertise and advanced printing technology ensures your custom print project delivers the desired impact.

Local print shops like Miro Printing & Graphics Inc. are invaluable partners for personalized designs. Their ability to manage complex, tailored projects with precision ensures your vision becomes a reality.

Conclusion: Turning Ideas into Reality

Key Points to Remember

Creating successful print projects relies on a mix of technical accuracy and creative insight. High-resolution images (300 DPI), proper file setup, and careful planning are crucial to achieving results that stand out.

Here’s a quick overview:

Factor Importance
Design Quality Ensures sharp, professional results
File Preparation Prevents production errors and streamlines the process
Print Method Selection Matches the right technique to your project’s needs
Professional Support Helps you avoid mistakes and improve results

Starting Your Print Project

Kick off your print project by defining clear goals and gathering ideas that inspire you. Many print shops offer both technical advice and creative suggestions to help bring your vision to life.

Steps to get started:

  • Outline Your Vision: Write a detailed brief that explains your project’s goals and requirements.
  • Find Inspiration: Collect examples of designs you admire to help guide your project.
  • Work with Experts: Collaborate with print professionals to finalize technical details and troubleshoot any potential issues.

Experienced print shops, like Miro Printing & Graphics Inc., can provide valuable insights on tricky aspects such as bleed areas, color accuracy, and choosing the right materials. Their expertise ensures every detail of your project is handled with care and precision.

Related Blog Posts

https://app.seobotai.com/banner/banner.js?id=678bfdf780cdd94998fe1121

How to Identify Surface Coating Defects in Printing

Learn how to effectively identify and address surface coating defects in printing to enhance product quality and customer satisfaction.

Surface coating defects in printing, such as cracking, flaking, bubbling, and dewetting, can reduce product quality and durability. Identifying these issues early is crucial to saving costs and maintaining customer satisfaction. Here’s a quick summary of what you need to know:

  • Common Defects: Cracking (fine lines), bubbling (air pockets), flaking (peeling), orange peel texture (uneven surface), and dewetting (beaded droplets).
  • Causes: Thermal stress, poor adhesion, material incompatibility, or mismatched surface energy.
  • Detection Methods:
    • Visual Inspection: Use proper lighting and angles to spot obvious flaws.
    • Automated Systems: High-resolution cameras and AI tools detect subtle irregularities with over 95% accuracy.
    • Specialized Tools: Optical microscopy and spectroscopy for detailed analysis.
  • Solutions: Document defects, investigate causes, and adjust printing processes to prevent recurrence.

To ensure consistent quality, combine human expertise with advanced tools like machine vision and AI-based systems. This approach minimizes errors and ensures a high standard for printed products.

Common Surface Coating Defects in Printing

Examples of Common Defects

Surface coating defects often show up in recognizable visual patterns, making them easier to spot. Catching these issues early helps maintain quality standards and avoids expensive reprints.

Cracking looks like fine lines or fractures across the printed surface. This usually happens due to thermal stress during drying or poor adhesion between the coating and the substrate [1].

Bubbling appears as small air pockets trapped beneath the coating. These raised spots, which you can see and feel, often result from problems in the coating process or insufficient surface preparation [2].

Flaking, also called delamination, happens when the coating peels away in small pieces. This is often caused by using incompatible materials or not preparing the surface correctly [4].

Orange Peel Texture creates an uneven surface that looks like the dimpled skin of an orange. This effect is typically caused by improper drying, incorrect application techniques, unsuitable viscosity, or temperature fluctuations.

Dewetting shows up as small droplets or beads forming instead of a smooth coating. This happens when the surface energy of the substrate and coating don’t match, leading to poor adhesion [2].

Defect Type Visual Characteristics Common Causes Impact on Quality
Cracking Fine lines/fractures Thermal stress/poor adhesion Weakens structural integrity
Bubbling Raised air pockets Trapped air/poor application Deteriorates surface quality
Flaking Peeling coating Material incompatibility Reduces protective layer
Orange Peel Dimpled surface Drying/application issues Creates uneven appearance
Dewetting Beaded droplets Surface energy mismatch Leads to poor coverage

These defects not only affect the visual appeal but also compromise durability. Advanced machine vision systems can identify subtle variations in texture and uniformity that might go unnoticed by the human eye [1][3].

Spotting these issues is just the beginning. The next step is implementing the right methods to detect and address them during production.

Methods for Identifying Surface Coating Defects

Visual Inspection Techniques

Visual inspection is a key method for spotting surface coating defects in printing. This process involves using directional lighting, examining prints from different angles, and assessing gloss, texture, and color consistency. It works well for noticeable issues like smudges or uneven colors. However, its effectiveness depends on the inspector’s skill and the quality of lighting [1]. For subtle defects or high-volume production, automated systems often outperform manual inspections in accuracy and speed.

Using Automated Systems

Modern printing facilities rely on automated systems that use high-resolution cameras and AI algorithms to analyze defects consistently and objectively [3]. These systems can detect surface irregularities, measure coating thickness, and identify registration errors in real-time, achieving detection accuracy rates above 95% [3].

Inspection Method Detection Capabilities Best Use Case
Machine Vision High-speed surface analysis High-volume production
AI-Based Systems Pattern recognition Complex printing jobs
Integrated Sensor Systems Detailed defect analysis Premium quality control

Blending automated systems with human inspections provides the best results. Automated tools excel at identifying subtle or complex defects, while human inspectors bring context and can spot unusual issues not covered by pre-programmed parameters [1].

For a balanced and thorough approach, facilities should consider:

  • Automated screening for initial defect detection
  • AI-based analysis for recognizing patterns
  • Human verification for final quality checks

Advanced technologies like spectroscopy and thermal imaging can further refine coating quality assessments [3]. By combining automation with human expertise, facilities can achieve reliable and efficient quality control.

Step-by-Step Guide to Identifying Defects

Step 1: Perform a Visual Check

To spot surface coating defects, start with a thorough visual inspection under proper lighting. Adjust the angle of the printed material to reveal any irregularities. Keep an eye out for issues like smudges, streaks, or uneven colors.

Tips for better visual inspection:

  • Use directional lighting and examine prints from multiple angles to spot variations.
  • Check both matte and glossy areas to ensure consistency.

Step 2: Use Specialized Tools

Once you’ve completed the visual check, move on to specialized tools for a closer look. High-resolution cameras and machine vision systems can detect flaws too small for the human eye. These tools are especially effective for spotting subtle imperfections and patterns [3].

Tool Type Primary Function Detection Capability
Optical Microscopy Examines surface details Coating uniformity, print quality
High-Resolution Cameras Detects defects in real-time Pattern recognition, color consistency
Spectroscopy Equipment Analyzes chemical properties Coating thickness, material properties

Step 3: Analyze and Fix Issues

Review the data collected to identify trends and pinpoint root causes. Common problems, such as contamination or improper drying, can often be resolved with targeted adjustments.

Steps to address defects effectively:

  • Document findings: Record defect types, locations, and frequencies to spot recurring issues and plan preventive measures.
  • Investigate causes: Determine whether the problem comes from equipment, materials, or process variables.
  • Apply solutions: Adjust printing parameters, refine cleaning processes, or improve material handling as needed.

Keep detailed records of defects and how they were resolved to support continuous quality improvement. Following these steps will help you maintain consistent print quality and meet customer expectations.

sbb-itb-ce53437

How Miro Printing & Graphics Inc. Handles Defects

Quality Control at Miro Printing

Miro Printing & Graphics Inc. prioritizes identifying and addressing surface coating defects to maintain top-tier results. By blending advanced technology with skilled craftsmanship, they ensure consistent quality across their projects. Automated systems play a key role, spotting even the smallest defects with precision – often surpassing human capabilities. These systems are fine-tuned to handle specific defect patterns unique to their printing processes.

Their technicians undergo thorough training in areas such as:

  • Advanced visual inspection methods
  • Operating specialized detection tools
  • Recognizing and resolving common coating issues
  • Applying corrective actions effectively
Quality Control Component Purpose Implementation
Visual Inspection Detecting defects early Staff conduct detailed checks under optimal lighting conditions
Automated Systems Continuous monitoring Machine vision and AI-based algorithms identify flaws in real-time
Process Documentation Tracking quality Comprehensive logs of defects and solutions for process improvement

Why Defect-Free Printing Matters for Customers

Detecting defects early helps Miro Printing reduce reprints and maintain consistent quality. For example, during large-format printing, their quality control team can identify slight color mismatches early and make immediate corrections, ensuring smooth production.

Detailed quality control records not only improve internal processes but also enhance transparency with customers. This commitment to precision helps clients avoid delays and ensures every project meets professional standards. Miro Printing’s structured approach to defect management has made them a trusted partner for businesses seeking reliable, high-quality printing solutions.

Conclusion and Final Thoughts

This section pulls together the main points on defect detection methods and tools, while also looking at what lies ahead. Modern printing operations now blend older visual inspection techniques with advanced automation to achieve impressive results. For instance, current systems boast a 97.2% accuracy rate in spotting surface defects [5].

Key Points to Keep in Mind

Surface energy mismatches, such as those causing beading or dewetting, often lead to defects [2]. A solid understanding of these fundamental properties is critical for effective detection and prevention.

The use of automated optical inspection (AOI) systems has revolutionized quality control, offering benefits like:

  • Instant defect detection during production
  • Consistent monitoring across large-scale print runs
  • Pinpointing even the smallest surface irregularities

These methods, combined with the earlier-discussed inspection strategies, ensure both precision and efficiency in defect management.

Approach Implementation Impact
Visual Inspection Routine checks under controlled lighting Early identification of obvious defects
Automated Systems AI-driven scanning and analysis 97.2% detection accuracy rate
Documentation Organized tracking of defects and fixes Supports quality improvement efforts

Looking forward, advancements in AI and machine vision are expected to further refine quality control. By merging human expertise with AI, future systems will be even better at detecting subtle irregularities early, thanks to ongoing improvements in deep learning [3].

Related Blog Posts

https://app.seobotai.com/banner/banner.js?id=678bf6b880cdd94998fdf6c7

Troubleshooting Surface Coating Defects in Printing

Learn how to troubleshoot and prevent surface coating defects in printing for consistent, high-quality results.

Surface coating defects like streaking, peeling, or uneven coverage can ruin print quality and delay production. To fix these issues:

  • Identify the problem: Use visual tools like magnifiers or sample prints to spot defects early.
  • Address common causes: Adjust ink viscosity, clean substrates, and ensure proper equipment calibration.
  • Prevent future issues: Maintain stable temperature (68-72°F), humidity (45-55%), and follow ink and substrate compatibility guidelines.

Coating Cratering and Fish-Eyes Analysis

Common Surface Coating Problems and Their Causes

Surface coating defects can show up in different ways during printing. Knowing these common issues and what causes them is key to keeping print quality high and avoiding delays.

Wrinkling and Flaking Issues

Wrinkling and flaking often occur due to problems like incorrect substrate tension, too much ink, or poor drying conditions. These factors lead to uneven stress and drying patterns, which can affect the final print.

Problem Primary Cause Secondary Factors
Wrinkling Incorrect substrate tension Temperature changes
Flaking Too much ink Substrate incompatibility
Surface distortion Uneven pressure Poor drying conditions

Uneven Coating and Streaking

Uneven coating or streaking usually happens because of incorrect ink viscosity or dirty printing surfaces. If the ink is too thick, it creates resistance, causing streaks. On the other hand, thin ink can result in patchy areas. Identifying these problems quickly helps in fixing them effectively.

Peeling and Adhesion Problems

Adhesion problems like peeling or delamination often result from incompatible substrates or poor surface preparation. Low surface energy can weaken the bond between the coating and the substrate. Companies like Miro Printing & Graphics Inc. tackle this by thoroughly testing and prepping substrates before printing [2].

To ensure consistent and high-quality prints, focus on:

  • Regularly calibrating equipment
  • Properly handling materials
  • Using the right ink formulations
  • Controlling environmental conditions

Catching these issues early makes it easier to apply the right fixes.

How to Identify Surface Coating Defects

Identifying surface coating defects early is key to solving issues in the printing process. Printers rely on specific tools and methods to catch these problems before they disrupt production.

Visual Inspection Tools

Tools like magnifiers, microscopes, and high-resolution cameras are essential for spotting defects such as streaks, adhesion problems, or uneven coatings [1]. These tools make it possible to detect tiny flaws that could otherwise go unnoticed until they escalate into bigger issues.

Evaluating the Printing Process

A detailed review of the printing process can uncover potential problem areas. Focus on these three aspects:

  • Substrate preparation and cleanliness: Ensuring the surface is properly prepared.
  • Ink application and viscosity: Maintaining consistent ink flow and thickness.
  • Environmental factors: Monitoring temperature and humidity during production.

Keeping these elements in check helps avoid many common coating defects [2].

Testing with Sample Prints

Running sample prints under controlled conditions can help pinpoint recurring defects. This approach allows printers to:

  • Check if the substrate and ink work well together.
  • Fine-tune process settings for better results.
  • Record successful fixes for future reference.

For example, companies like Miro Printing & Graphics Inc. use a combination of these methods to deliver high-quality prints consistently [2]. By combining visual inspections, process evaluations, and sample testing, printers can efficiently identify and address coating defects.

After identifying the issues, the next step is to apply targeted solutions to achieve flawless results.

sbb-itb-ce53437

Practical Solutions for Surface Coating Problems

Once you’ve identified surface coating issues, the next step is fixing them to maintain high-quality prints. Here’s how you can address these problems with better substrate handling, smarter ink choices, and regular equipment upkeep.

Improving Substrate Handling

Keeping substrate tension and alignment consistent is key to avoiding coating problems. Here’s what to focus on:

  • Uniform tension: Make sure the material’s tension is even across its width.
  • Precise alignment: Double-check alignment before printing begins.
  • Cleanliness: Remove dust, grease, or debris from substrates to avoid imperfections.

Choosing and Applying the Right Ink

Your ink choice and how it’s applied can make or break the coating quality [3]. Pay attention to these factors:

Ink Property Suggested Adjustment Effect on Quality
Viscosity Stick to manufacturer guidelines Prevents streaks and uneven layers
Compatibility Match ink to the substrate type Improves adhesion and durability
Drying Time Follow recommended curing times Avoids smudging and transfer issues

"Ensuring that the ink is compatible with the substrate can prevent peeling and adhesion problems. It is also important to follow the manufacturer’s guidelines for application and drying times to ensure proper curing" [3].

Maintaining Printing Equipment

Consistent equipment maintenance is essential to avoid defects and reduce downtime. Companies like Miro Printing & Graphics Inc. set an example with their strict quality control processes [2].

Focus on these areas during maintenance:

  • Coating systems: Keep application systems clean and functioning.
  • Transport mechanisms: Regularly inspect for wear and tear.
  • Drying systems: Ensure they are calibrated for optimal performance.

A good rule of thumb: clean equipment daily, inspect weekly, and calibrate monthly. Following these steps will help you minimize defects and maintain top-notch print quality.

Examples and Best Practices for Preventing Defects

How Common Defects Were Fixed

Surface coating defects can negatively affect print quality, but specific solutions have shown to be effective. For example, Miro Printing & Graphics Inc. addressed these issues by improving substrate preparation, enhancing cleaning processes, and conducting regular viscosity checks [2].

Problem Solution Result
Peeling, Uneven Coating, Streaking Better substrate cleaning, viscosity checks, and equipment adjustments Fewer defects and more consistent prints

While fixing defects is important, taking steps to prevent them altogether can save time and improve overall efficiency.

Tips for Preventing Defects

Here are some strategies that can help avoid surface coating defects entirely:

Quality Control Measures
Implementing strict quality control protocols can stop defects before they disrupt production:

Control Measure Preventive Action Expected Outcome
Proactive Inspection Regular checks with magnifying tools before production Early detection and prevention of defects
Pre-production Testing Testing substrate and ink compatibility thoroughly Reliable and consistent print quality
Process Monitoring Continuously tracking key printing parameters Smooth and stable production runs

Environmental Controls
Keep conditions stable: aim for 68-72°F, 45-55% humidity, and ensure proper ventilation. Maintaining these parameters is critical for achieving consistent coating quality and reducing the likelihood of defects [3].

Summary and Final Tips

Key Takeaways

To achieve consistent and high-quality surface coatings, focus on a few essential elements: choosing the right materials, keeping equipment in top shape, and managing environmental factors effectively. These steps will go a long way in minimizing defects.

Practical Recommendations

Now that you’re equipped to tackle coating defects, here are some practical tips to keep your print quality consistent:

  • Keep a close eye on coating thickness and curing conditions to avoid issues like cracking or smudging.
  • Regularly inspect and maintain equipment to catch and fix problems early.
  • Ensure substrates are clean, store materials in controlled environments, and test for compatibility before starting production.

To fine-tune your process, consider using diagnostic tools and keeping detailed records of successful coating parameters. These steps will help you maintain a reliable and efficient workflow.

Related Blog Posts

https://app.seobotai.com/banner/banner.js?id=678bce5d80cdd94998fd77b1