When to Use Vector or Raster for Print Projects

Understanding the differences between vector and raster graphics is essential for achieving high-quality print results in various projects.

Choosing the right graphic format – vector or raster – is crucial for achieving high-quality print results. Here’s a quick breakdown to help you decide:

  • Vector Graphics: Best for logos, text, and designs that need to scale without losing sharpness. These files are resolution-independent and lightweight, making them ideal for business cards, banners, and signage.
  • Raster Graphics: Perfect for photographs and detailed artwork with rich color gradients. However, they are resolution-dependent and require at least 300 DPI for professional print quality.

Quick Comparison

Feature Vector Graphics Raster Graphics
Scalability Infinite; remains sharp at any size Limited; enlarging causes pixelation
File Size Smaller; uses mathematical descriptions Larger; stores pixel data
Best Use Logos, text, icons, simple illustrations Photographs, detailed artwork, complex colors
Resolution Resolution-independent Requires high resolution (300 DPI minimum)

For most print projects, a combination of both formats works best – vector for clean lines and text, and high-resolution raster for detailed images. Starting with the right format ensures polished results and avoids costly reprints.

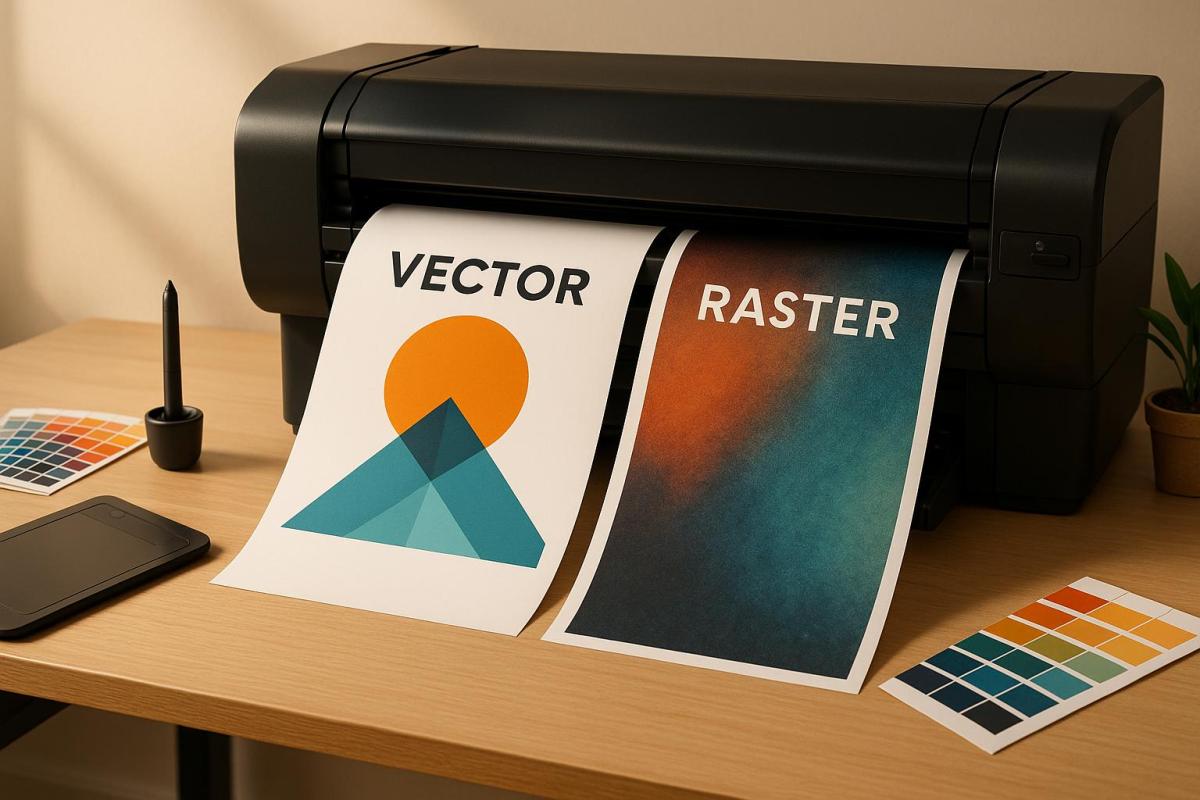
What’s the Difference Between Raster and Vector Images

1. Vector Graphics

Vector graphics stand out from raster images because they rely on mathematical equations to define every element in a design. These equations determine the lines, curves, and shapes, making vectors an excellent choice for print projects that demand flexibility and precision.

Scalability

One of the biggest perks of vector graphics is their infinite scalability. You can resize a vector image from something as small as a postage stamp to as large as a billboard without losing clarity or sharpness. This is possible because the mathematical formulas behind the design adjust the shapes to fit the new size, keeping edges crisp and curves smooth.

This feature is especially important for businesses that need their branding to look consistent across various formats. For example, a company logo designed as a vector can be used on everything from business cards to banners and even vehicle wraps – without creating a separate file for each size. This not only ensures brand consistency but also simplifies file management, as one file can serve multiple purposes.

File Size

Another advantage of vector graphics is their smaller file size, especially when compared to high-resolution raster images. While a raster file can balloon in size due to pixel data, a vector file of the same design might only take up 1-2 MB. This is because vectors store information as mathematical descriptions of shapes rather than data for every single pixel.

For print shops and businesses, this smaller file size translates into faster file transfers, easier sharing, and reduced storage needs. It also makes workflows smoother – emailing files becomes hassle-free, and cloud storage stays more organized.

Color and Detail Capabilities

Vectors are excellent for designs with solid colors, clean lines, and simple gradients. They allow for easy color adjustments, which makes them ideal for applications like screen printing, embroidery, and promotional products that rely on a limited color palette.

However, vectors do have their limits. They aren’t the best choice for photographs or images with intricate color variations. The mathematical structure of vectors works best with defined shapes and areas of solid color, rather than the subtle transitions and details found in photographic images.

Best Print Applications

Vectors shine in projects where crisp scaling is a must. They’re perfect for logos, icons, and text that need to appear sharp on everything from business cards to large signage. Any design element that will be used at multiple sizes should start as a vector.

Typography benefits greatly from the vector format as well. Text remains sharp and clear at any size, which is critical for signage and other print materials. Custom illustrations for branding, simple graphics for packaging, and line art for technical manuals are other areas where vectors excel.

At Miro Printing & Graphics Inc., vector graphics are a cornerstone of maintaining quality across different print sizes and materials. Whether you’re working on custom projects, large-format printing, or branding materials, starting with vector files ensures top-tier print quality and the flexibility to adapt to future needs.

2. Raster Graphics

Raster graphics rely on a grid of pixels, with each pixel holding a specific color. Imagine it as a digital mosaic – thousands, sometimes millions, of tiny colored squares working together to create a complete image.

Scalability

One of the biggest challenges with raster graphics is scalability. Since these images are pixel-based, enlarging them beyond their original resolution forces the software to stretch the pixels. The result? Pixelation, blurriness, and jagged edges that can ruin the image’s appearance.

If you’re working on print projects, this limitation is especially critical. A photo that looks sharp on your screen may appear blurry and unprofessional if printed at a low resolution. For example, if you’re designing a 24-inch-wide poster, you need to ensure the raster elements are created at that size from the start. Unlike vector graphics, which can scale effortlessly from a small business card to a massive billboard, raster images need to be designed with their final size in mind. Resolution isn’t the only concern – file size also plays a major role in printing workflows.

File Size

Raster files can grow very large, especially when working with high-resolution images. A single high-quality photo prepared for print might range from 50 to 100 MB – or more – depending on its dimensions and level of detail.

Why so large? It’s all about the pixels. For example, an 8×10-inch image at 300 DPI contains approximately 7.2 million pixels, and each pixel needs data to store its color information. Compression can help reduce file size, but it often sacrifices image quality, which is unacceptable for professional printing.

Large files also demand more storage space and take longer to transfer. However, the payoff is worth it when you need the level of detail and color accuracy that raster graphics deliver.

Color and Detail Capabilities

This is where raster graphics truly excel. They are unmatched when it comes to capturing intricate color gradients, fine textures, and photorealistic details. Raster images can display millions of colors and handle the subtle transitions found in photographs, painted artwork, and detailed illustrations.

Thanks to their pixel-based structure, raster graphics are ideal for projects requiring artistic complexity or photographic realism. However, achieving the best results requires careful color management. For print purposes, raster images should be prepared in CMYK color mode rather than RGB to ensure colors appear accurately during printing.

Best Print Applications

Raster graphics are the top choice for photographs, detailed artwork, and projects requiring rich color depth and precision. They shine in applications like magazine spreads, photo books, art prints, and marketing materials that feature stunning photography or intricate designs.

For instance, full-color brochures with product photos or promotional posters showcasing detailed imagery are perfect examples of when raster graphics are indispensable. Any project that demands subtle color variations or fine details – like a photograph or complex artwork – benefits from the precision of raster graphics.

At Miro Printing & Graphics Inc., raster graphics are essential for digital printing, large-format printing, and custom projects that require photographic quality. Whether you’re creating marketing materials with product photography or custom prints featuring intricate artwork, well-prepared raster files ensure your printed materials deliver professional clarity and vibrant color accuracy.

Advantages and Disadvantages

To build on the key differences already outlined, let’s dive into a side-by-side comparison of the strengths and limitations of vector and raster graphics. This breakdown will help you determine which format aligns best with your project’s specific needs.

Aspect Vector Graphics Raster Graphics
Scalability Can be scaled infinitely without losing quality – perfect for logos on anything from business cards to billboards. Limited to the original resolution; enlarging beyond that results in pixelation.
File Size Typically smaller, thanks to mathematical descriptions. Larger, especially when saved at 300 DPI for professional printing.
Color Handling Works well with solid colors and simple gradients. Excels at handling complex color variations, shading, and photorealistic details.
Editing Flexibility Easy to modify shapes, colors, and elements without losing quality. Editing can degrade quality, particularly with extensive changes.
Detail Capability Best suited for simple shapes and illustrations. Captures intricate textures, fine details, and realistic imagery.
Print Resolution Resolution-independent – remains sharp at any size. Requires at least 300 DPI for professional-grade print quality.

Vector graphics are the go-to choice for designs that need to scale seamlessly across various sizes. They’re ideal for logos, text-heavy designs, and technical illustrations where sharp, clean edges are a must. On the flip side, they fall short when it comes to capturing intricate details or subtle color transitions, making them less suitable for photorealistic designs.

Raster graphics shine when rich color depth and fine details are critical. They’re perfect for photographs and detailed artwork but come with the trade-off of being resolution-dependent. Enlarging them beyond their original size can lead to pixelation, so it’s crucial to plan the dimensions carefully from the outset.

At Miro Printing & Graphics Inc., the choice between vector and raster formats depends entirely on your project’s goals. High-resolution raster files are ideal for digital and large-format projects that prioritize detailed, photographic elements. On the other hand, vector files are perfect for logos, text, or graphics that need to maintain their quality across a variety of sizes. Choosing the right format from the start ensures professional results and helps you avoid the costly reprints that can come with using the wrong file type.

Conclusion

As we’ve explored, selecting the right format plays a key role in achieving high-quality print results. Vector images are perfect for scalable designs like logos and text, while raster images excel in delivering detailed photographic elements. However, raster graphics depend on resolution, with a minimum of 300 DPI required to maintain quality.

Raster images shine when capturing the fine details and subtle color variations that make photographs and intricate artwork stand out. On the other hand, vector graphics ensure crisp, scalable designs that remain sharp at any size. Combining these two formats – vector for clean lines and text, and high-resolution raster images for detail – can help you strike the perfect balance between quality and cost. Just remember, any raster elements must meet the 300 DPI threshold to avoid compromising the overall quality of your project.

For complex projects or those involving mixed formats, expert advice can make all the difference. Consulting with professionals not only saves time and money but also ensures your materials look polished and professional. Miro Printing & Graphics Inc., with over 30 years of experience, specializes in assessing project needs, recommending the best formats, and even handling file conversions to simplify your workflow.

Whether you’re working on business cards, large-format banners, brochures, or other marketing materials, starting with the right format ensures professional results and prevents costly mistakes. For demanding print projects, expert guidance is an investment in both quality and efficiency.

FAQs

How do I decide between vector and raster graphics for my print project?

When deciding between vector and raster graphics, it really comes down to the specific needs of your project. Vector graphics are perfect for designs that need to be scaled up or down without any loss in quality – think logos, illustrations, or layouts with a lot of text. Since they’re resolution-independent, they stay sharp no matter the size.

Raster graphics, on the other hand, are made up of pixels, which makes them ideal for detailed images like photographs or designs with intricate color gradients. However, because they rely on resolution, they can become pixelated if stretched too far. For print projects, aim for a resolution of at least 300 DPI to keep everything looking crisp and clear.

If you’re still unsure which format suits your project best, reaching out to a professional print shop like Miro Printing & Graphics Inc. can provide the guidance you need to make sure your designs look flawless in print.

How can I make sure my raster images look sharp when printed in different sizes?

To ensure your raster images look sharp and professional when printed, always start with high-resolution files. A resolution of 300 DPI (dots per inch) is generally the sweet spot for most print projects. Enlarging low-resolution images is a big no-no – it often leads to pixelation and a noticeable loss of detail.

If you’re creating or choosing raster images, make sure their dimensions match the intended print size. Should resizing be unavoidable, rely on professional design tools to reduce the risk of quality degradation. For large-format prints, it’s a good idea to check with your printer about the optimal resolution and file format for your specific project. With the right preparation, your images will maintain their quality and look great, no matter the size.

When should I use both vector and raster formats in a print project?

When working on a print project, using both vector and raster formats can help you achieve a polished and professional result, especially if your design includes diverse elements. Vector graphics are perfect for components like logos, text, and illustrations because they can be resized without any loss of quality. Meanwhile, raster images excel at showcasing intricate details, making them ideal for photographs or textures that rely on pixel-based resolution.

By combining these two formats, you can ensure sharp, precise lines for critical design elements while incorporating detailed imagery where it’s most impactful. This balance enhances the overall visual appeal of your print. For expert guidance and high-quality results, you might want to partner with a reliable print shop, such as Miro Printing & Graphics Inc., which provides tailored design and printing solutions to meet your needs.

Related Blog Posts

https://app.seobotai.com/banner/banner.js?id=6920fea89c1061ed16212ca8

Inkjet vs. Laser: Best for Cardstock Printing

Explore the differences between inkjet and laser printers for cardstock printing, including quality, costs, and ideal use cases.

When choosing between inkjet and laser printers for cardstock printing, the decision hinges on your specific needs: vibrant colors and detail or speed and efficiency. Inkjet printers excel at producing rich, detailed images and handling a variety of cardstock finishes, making them perfect for projects like greeting cards or photo-heavy designs. Laser printers, however, are faster, more cost-effective for high-volume tasks, and deliver sharp text, making them ideal for business cards or certificates.

Key Differences:

  • Inkjet: Best for detailed images, supports heavier and textured cardstock, but slower and costlier over time.
  • Laser: Best for sharp text and high-volume tasks, faster, but less vibrant colors and limited cardstock compatibility.

Quick Comparison:

Feature Inkjet Printers Laser Printers
Color Quality Excellent for photos and gradients Good, less vibrant
Text Quality Good with pigment inks Outstanding, sharp and precise
Speed 5–15 pages/minute 20–40 pages/minute
Cardstock Weight Up to 350 gsm Up to 220 gsm
Cost Lower upfront; higher per-page cost Higher upfront; lower per-page cost

Your choice depends on whether you prioritize image quality or efficiency for your cardstock projects.

I Want To Print Linen Card Stock Paper. Should I use an inkjet or laser printer

When it comes to printing on cardstock, the quality of your prints depends heavily on the type of printer you use. Inkjet and laser printers handle cardstock differently, each offering distinct advantages depending on the project. Understanding these differences can help you make the right choice for your needs. Let’s explore how these two technologies perform when printing on cardstock.

Inkjet Print Quality on Cardstock

Inkjet printers are known for their ability to produce vivid, detailed images. They use liquid ink – either pigment-based or dye-based – that penetrates the cardstock fibers, creating rich, saturated colors. This makes them ideal for designs that require vibrant hues and smooth color transitions, such as greeting cards, art prints, and marketing materials.

High-end inkjet models, like the Canon PIXMA Pro-100, can even produce archival-quality prints with a lifespan of up to 100 years when paired with the right papers and inks. Additionally, inkjet printers are incredibly versatile, handling a variety of cardstock types, including glossy, textured, and specialty finishes. This flexibility allows you to experiment with different styles and finishes without compatibility concerns.

However, there are some trade-offs. Inkjet prints often require drying time, particularly on glossy or coated cardstock, to avoid smudging. Ink bleeding can also occur if the cardstock isn’t optimized for inkjet printing. Furthermore, some inkjet models may struggle with very thick or heavily textured cardstock.

Laser Print Quality on Cardstock

Laser printers excel in producing sharp, crisp text, making them a great choice for text-heavy projects like business cards, certificates, and presentation materials. The precision of laser technology ensures that text is highly legible and professional-looking.

One of the standout features of laser printing is its durability. Laser printers use toner – a dry powder that’s fused onto the paper – to create smudge-resistant prints that are also water-resistant. This makes laser-printed documents on cardstock highly durable, with minimal risk of fading over time. Additionally, laser prints dry instantly, allowing for immediate handling, which is especially beneficial in high-volume printing scenarios.

That said, laser printers aren’t as strong when it comes to color reproduction. Because toner sits on the surface of the cardstock rather than bonding with it, the colors may lack the vibrancy seen in inkjet prints, particularly for photos or detailed color images. Laser printers also tend to perform best with smooth, matte cardstock and may struggle with very thick or textured papers, generally supporting weights up to 220 gsm. Uneven surfaces can sometimes lead to inconsistent toner adhesion.

Here’s a quick comparison of key performance factors:

Print Quality Factor Inkjet on Cardstock Laser on Cardstock
Color Vibrancy Excellent for photos and gradients Good for graphics, but less vibrant
Text Sharpness Good with pigment inks Outstanding, laser-precise text
Durability Fade-resistant with pigment inks Smudge-resistant; instant drying
Cardstock Weight 60–350 gsm 60–220 gsm
Drying Time Requires drying time Instant dry, ready to handle

Ultimately, your choice between inkjet and laser printing for cardstock will depend on the specific needs of your project. Inkjet printers are a go-to for vibrant, image-heavy designs like photo cards and invitations. On the other hand, laser printers are better suited for professional projects that prioritize sharp text and quick turnaround times, such as business cards and certificates.

Cost Analysis for Cardstock Printing

When planning a cardstock printing project, it’s important to look beyond the upfront cost of the printer. The long-term expenses of inkjet and laser printers can vary widely, impacting your budget in significant ways.

Initial Purchase Costs: Inkjet vs. Laser

Inkjet printers are generally more affordable upfront, with prices starting around $100–$300 for basic models. High-end inkjets, designed for more demanding tasks, can cost anywhere from $300–$800 or more.

Laser printers, on the other hand, require a larger initial investment. Entry-level models capable of handling cardstock are priced between $200–$400, while business-class options with advanced cardstock-handling features can range from $500–$1,500. While inkjets win in terms of initial cost, the long-term savings often lean in favor of laser printers due to their lower supply expenses.

But the true cost difference becomes clearer when you factor in ongoing per-page expenses and required supplies.

Per-Page Costs and Supplies

The ongoing costs of printing can reveal a lot about long-term affordability. Inkjet printers rely on liquid ink cartridges, which typically cost between $15–$60 each and yield about 200–500 pages per cartridge. However, when printing on thicker cardstock, these yields often drop significantly due to the paper’s absorbency.

Laser printers, on the other hand, use toner cartridges that offer higher yields and greater cost efficiency. For example, inkjet color prints on cardstock generally cost about $0.10–$0.30 per page, while laser color prints average $0.05–$0.15 per page. If you’re printing in black and white, laser printers are even more economical, often cutting costs in half compared to inkjet alternatives.

Here’s a practical example: A small business printing 1,000 color cardstock flyers each month might spend $200–$300 monthly on inkjet supplies, primarily due to frequent cartridge replacements. Switching to a laser printer for the same workload would bring monthly costs down to about $80–$150, saving the business $1,440–$1,800 annually.

Laser toner also has the advantage of a longer shelf life, as it doesn’t dry out like ink. This makes laser printers a great choice for users with irregular printing schedules.

For high-volume printing, laser printers shine not only for their lower per-page costs but also for their faster output, which can save time and reduce labor expenses. However, for smaller, specialized projects – like photo-quality prints or occasional cardstock runs – inkjet printers might be the better option. They offer a lower upfront cost and superior color accuracy for detailed work.

Hidden Costs to Consider

Beyond the obvious expenses, there are hidden costs to keep in mind. Both inkjet and laser printers might require additional investments, such as maintenance kits, specialized paper trays, or upgraded feeders to handle heavy cardstock. Inkjet printers may also need more frequent printhead cleanings or replacements, while laser printers occasionally require drum or fuser replacements.

For businesses with large or complex cardstock projects, outsourcing to professional services can be a smart alternative. Companies like Miro Printing & Graphics Inc. in Hackensack, NJ, offer scalable solutions that can handle high-volume jobs efficiently. By outsourcing, you can avoid the hassle of equipment maintenance and supply management while gaining access to advanced finishing options.

All these factors play a role in determining the overall efficiency and feasibility of your cardstock printing projects.

Speed and Performance for Cardstock Printing

When working on cardstock printing projects, speed and dependability are key. The differences in performance between inkjet and laser printers become especially noticeable with thicker materials. Understanding these differences can help you pick the right printer for your needs.

Laser printers consistently achieve speeds of 20–40 pages per minute (ppm) on cardstock and are designed for efficient, large-batch printing with extended paper trays. In contrast, inkjet printers typically operate at 5–15 ppm and often need to pause for ink or paper refills. This speed gap is especially important when producing large quantities of invitations, business cards, or marketing materials.

While inkjet printers are ready to print almost instantly without requiring a warm-up period, their slower speeds can cause delays in high-volume projects. This makes laser printers the go-to option for handling large-scale cardstock printing efficiently.

Durability and Maintenance

Laser printers are built to last, with fewer moving parts and less frequent maintenance needs. Their toner-based systems reduce many of the issues that come with liquid ink, making them a solid choice for consistent cardstock printing.

On the other hand, inkjet printers require more frequent upkeep, such as cleaning print heads and replacing ink cartridges. Thicker cardstock can accelerate wear on inkjet feed mechanisms, increasing the need for maintenance.

Both printer types face challenges during sustained cardstock printing, but laser printers’ robust design allows them to handle heavy use more effectively. That said, using cardstock outside of a printer’s specifications can still lead to wear or paper jams. For inkjet printers, thicker or textured cardstock may lead to clogs in the print heads and faster wear on feed rollers.

Professional print shops, like Miro Printing & Graphics Inc. in Hackensack, NJ, often use both high-end laser and inkjet printers to meet a variety of client demands. Laser printers are typically favored for bulk jobs requiring speed and efficiency, while inkjets are better suited for specialty finishes or unique media types.

Maintenance also plays a role in overall costs. Toner cartridges for laser printers last longer and don’t dry out like ink cartridges, reducing the frequency and expense of replacements.

When considering your cardstock printing needs, these performance factors – along with operational costs – can help you make the right choice. Reliable cardstock processing is just as important as print quality and cost for achieving professional results.

Cardstock Compatibility: Inkjet vs. Laser

Choosing the right cardstock for your printer is crucial if you want polished and professional results. Inkjet and laser printers each have their own limits when it comes to handling different types of cardstock. Understanding these limitations can save you time, reduce frustration, and even prevent damage to your printer. Using the right cardstock not only improves print quality but also helps keep maintenance and repair costs down.

Paper Weight and Handling

Most inkjet and laser printers can handle cardstock weights ranging from 65 lb (176 gsm) to 110 lb (300 gsm). Some inkjet models can go as high as 130 lb (350 gsm), while certain business-grade laser printers support up to 120 lb (320 gsm) cardstock. For instance, HP OfficeJet Pro and LaserJet Pro printers generally max out at 110 lb (300 gsm), while Canon PIXMA inkjet printers often support heavier cardstock through their rear manual feed slot.

The type of finish on the cardstock also plays a big role in print performance. Inkjet printers are ideal for matte, glossy, and textured finishes because they are designed to absorb ink effectively, resulting in vibrant colors and sharp details. Laser printers, on the other hand, work best with matte and some glossy finishes. However, glossy cardstock may not deliver the same vivid results on a laser printer due to the heat and pressure used in its fusing process. To avoid issues like toner not sticking properly or paper warping, always use cardstock labeled as "laser compatible".

Many printers include features like manual feed slots or bypass trays, which are especially helpful when working with thicker cardstock. These features ensure smoother handling and reduce the risk of jams when printing on heavy media.

Preventing Paper Jams and Damage

Proper loading techniques are essential when working with cardstock. Jams are often caused by exceeding the printer’s weight limits, using incompatible finishes, or loading the paper incorrectly. To minimize issues, feed one sheet at a time through the manual slot, align the cardstock carefully, and always use paper designed for your specific printer type.

For example, an HP OfficeJet Pro 9025 performed well with 110 lb (300 gsm) matte cardstock when fed through the manual slot. Meanwhile, an HP LaserJet Pro M404dn handled matte cardstock effectively but struggled with toner adhesion on glossy media.

Keeping your printer in good condition also helps prevent jams. Clean the rollers regularly and ensure the paper path is clear, especially when using heavier cardstock.

If your project requires cardstock beyond what your office printer can handle, professional print shops are a great alternative. For example, Miro Printing & Graphics Inc. in Hackensack, NJ, specializes in digital and offset printing for a variety of cardstock weights and finishes. They’re a reliable option for projects like business cards, invitations, or other custom print needs.

Before starting any cardstock project, always check your printer’s specifications for maximum weight and compatible finishes. Manufacturer websites are a great resource for detailed compatibility charts and troubleshooting tips, helping you avoid unnecessary headaches and costly errors.

Pros and Cons Comparison Table

Deciding between inkjet and laser printers for cardstock projects depends on your specific needs. Below is a breakdown of their strengths and weaknesses based on key features.

Feature Inkjet Printers Laser Printers
Print Quality Pros: Outstanding color reproduction; great for photos and specialty finishes
Cons: Needs drying time; may smudge on certain cardstock types
Pros: Sharp text and professional finish; dries instantly
Cons: Less vibrant colors; struggles with subtle color blending
Initial Cost Pros: Affordable upfront, making it budget-friendly
Cons: Frequent cartridge replacements increase long-term costs
Pros: Cost-effective for high-volume printing over time
Cons: Higher initial expense
Operating Costs Pros: Lower initial equipment cost
Cons: High cost per page; frequent cartridge changes
Pros: Lower cost per page for black-and-white printing; toner lasts longer with higher yields
Cons: Toner cartridges are more expensive upfront
Speed Pros: Works well for low-volume tasks; first print ready in about 7 seconds
Cons: Slower overall at 5–15 pages per minute; drying time needed before handling
Pros: Much faster at 20–40 pages per minute; no drying time required; first print ready in about 7 seconds
Cardstock Compatibility Pros: Handles a wide range of weights (60–350 gsm); great for specialty finishes and borderless printing
Cons: Can be picky about paper type; struggles with some glossy finishes
Pros: Reliable on matte finishes; supports standard cardstock weights (60–220 gsm)
Cons: Limited to laser-friendly finishes; heat may affect specialty papers
Durability & Maintenance Pros: Pigment-based inks last up to 100 years; compact design
Cons: Ink can dry out if not used regularly; requires frequent maintenance to prevent clogging
Pros: Toner doesn’t dry out; durable and requires less maintenance
Cons: Larger size; replacement parts can be expensive

These trends hold true across most models, offering a clear picture of how each printer type performs.

For projects that demand vibrant colors and fine details – like marketing materials or creative designs – inkjet printers are the go-to choice. Their ability to handle specialty finishes and reproduce subtle color gradients makes them ideal for visually striking results. On the other hand, if speed, text clarity, and cost efficiency for high-volume printing are your priorities, laser printers are the better option. Their instant-dry prints and lower per-page costs make them perfect for text-heavy documents like certificates or forms.

Ultimately, your decision should align with the needs of your specific projects. Inkjet printers shine for greeting cards and visually impactful materials, while laser printers excel with efficient, professional results for text-dominated tasks.

Choosing the Right Printer for Cardstock Printing

When deciding between inkjet and laser printers, it’s important to weigh your primary printing needs, budget, and the volume of work you plan to handle.

If you’re a creative professional or run a small business that thrives on delivering visually stunning materials, inkjet printers are a standout choice. They excel at producing vibrant colors and can handle specialty finishes that laser printers simply can’t match. Whether you’re crafting custom greeting cards, marketing brochures, or any project requiring vivid imagery and fine detail, inkjet technology delivers. Many models also support borderless printing on cardstock sizes as large as 13×19 inches, making them an excellent option for creative projects.

On the other hand, if speed and efficiency are critical, laser printers might be your go-to. They’re particularly well-suited for high-volume, text-heavy tasks. For example, corporate offices printing certificates, business cards, or forms will appreciate laser printers’ ability to churn out 20–40 pages per minute. Plus, their instant-dry, smudge-resistant prints ensure documents are ready for immediate handling. The crisp text and polished output make laser printers a reliable choice for professional, document-focused printing.

While inkjet printers typically come with a lower upfront cost than laser models, it’s worth noting that long-term expenses – like ink or toner replacements – can vary significantly depending on usage.

Another key factor is media compatibility. Inkjet printers can handle a broader range of cardstock weights and finishes, making them ideal for specialty projects that require heavier or uniquely textured paper. If your needs are more standard, such as using matte cardstock, laser printers can deliver consistent and dependable results. Always check your printer’s specifications to ensure it supports the cardstock you plan to use.

For large-scale, professional-grade projects, you might consider working with a full-service print shop like Miro Printing & Graphics Inc. in Hackensack, NJ. They offer advanced digital and offset printing technologies, along with expert advice tailored to your specific needs.

FAQs

What are the long-term costs of using an inkjet printer vs. a laser printer for printing on cardstock?

When evaluating the long-term costs of cardstock printing, inkjet printers are usually more affordable to purchase upfront. However, their running costs can add up quickly due to the frequent need to replace ink cartridges. On the other hand, laser printers come with a steeper initial price tag but tend to save money over time. This is because they offer a lower cost per page and use toner cartridges that last significantly longer.

If you plan to print on cardstock regularly, a laser printer might be the smarter investment over time. That said, it’s essential to weigh factors like your typical print volume and the quality of prints you need before deciding which option suits you best.

Does the type of cardstock finish impact print quality for inkjet and laser printers?

Yes, the type of cardstock finish plays a big role in determining print quality, especially when it comes to the type of printer you’re using. For inkjet printers, matte or uncoated cardstock is the way to go. These finishes allow the ink to absorb properly, resulting in vibrant colors and sharp details. Laser printers, on the other hand, perform better with glossy or coated cardstock. The toner bonds to the surface, creating crisp, clean prints.

When selecting cardstock, it’s important to match the finish with your printer to get the best results for your project. If you’re unsure which option to choose, a professional print shop like Miro Printing & Graphics Inc. can guide you toward the right decision for your needs.

How can I avoid paper jams and ensure smooth printing on heavy cardstock?

To avoid paper jams and ensure smooth printing on heavy cardstock, start by reviewing your printer’s specifications to confirm it can handle thicker paper types. If your printer includes a manual feed tray, use it – it’s often designed for handling heavier materials more efficiently. Adjust the printer settings to match the cardstock’s weight, and carefully align the paper guides to prevent misfeeds.

Store your cardstock in a cool, dry place to keep it flat and prevent curling, which can lead to jams. Feeding one sheet at a time is a smart approach, especially when working with thicker cardstock. Additionally, keep your printer clean and free of debris to minimize the risk of jams and maintain reliable performance.

Related Blog Posts

https://app.seobotai.com/banner/banner.js?id=691fd5fc9c1061ed161f9ff8

How ISO 12647 Ensures Print Quality

Learn how ISO 12647 establishes standards for print quality, ensuring color accuracy and efficiency in various printing processes.

ISO 12647 is a global standard that ensures consistent, high-quality printing by defining measurable benchmarks for color accuracy, ink density, and process control. It applies to various printing methods like offset, digital, and flexographic printing, helping printers achieve repeatable results and meet client expectations.

Key Takeaways:

  • Color Consistency: Defines specific L*a*b* targets for accurate color reproduction.
  • Ink Density: Sets precise density levels for cyan, magenta, yellow, and black inks.
  • Tone Value Increase (TVI): Controls dot gain for sharp and detailed imagery.
  • Substrate Standards: Ensures predictable performance across different papers and materials.
  • Process Monitoring: Relies on tools like spectrophotometers to verify compliance.

ISO 12647 also emphasizes structured workflows, including equipment calibration, proofing, and production monitoring, to minimize errors and improve efficiency. For businesses, this means fewer misprints, reduced waste, and stronger client trust. Companies like Miro Printing & Graphics Inc. successfully use these standards to deliver consistent, reliable results across projects of all sizes.

Core Principles of ISO 12647

ISO 12647 revolves around two main ideas: setting precise measurement targets and following standardized workflows.

Key Parameters for Print Quality

At the heart of ISO 12647 are five essential process control parameters. These parameters provide clear, objective benchmarks, removing uncertainty from print production.

  • Color reproduction: This standard ensures consistent color accuracy by defining specific L*a*b* targets. For instance, a corporate blue will appear the same across different print jobs, maintaining brand integrity.
  • Ink density control: Each process color – cyan, magenta, yellow, and black – has defined density targets. Verified using densitometers, these targets help maintain balanced color saturation and prevent issues like overly dark shadows or faint highlights.
  • Tone Value Increase (TVI): Often referred to as dot gain, TVI measures how much printed dots spread beyond their intended size. The standard sets acceptable tolerances for TVI to ensure crisp contrast and detailed imagery.
  • Paper and substrate specifications: Characteristics like whiteness, gloss, and surface texture are standardized to ensure predictable substrate behavior. This consistency helps printers achieve reliable results across various materials.
  • Measurement methods and tools: Compliance is verified using spectrophotometric and densitometric readings, typically through standardized test strips and control bars. These tools ensure accuracy throughout the process.

Together, these parameters establish a reliable framework that guarantees every print meets the desired quality standards.

Standardized Workflows for Consistency

Using these parameters as a foundation, ISO 12647 introduces structured workflows designed to reduce human error and process variability. This approach ensures consistent results at every stage, from prepress to finishing.

The process begins with equipment calibration and characterization. Regular checks confirm that presses, proofing systems, and measurement tools meet the standard’s specifications. This ensures all equipment operates within set limits.

During production, process monitoring involves measuring control strips at specific intervals. Results are compared with the standard’s targets, and if any measurements exceed tolerances, immediate corrective actions are taken and logged.

ISO 12647 also enhances proofing and approval processes. Instead of relying on subjective visual evaluations, printers and clients can use measurable criteria to assess whether proofs and production sheets meet the standard. This reduces disagreements and simplifies the approval process.

Documentation and traceability play a vital role in maintaining quality. By recording measurements, calibrations, and adjustments, printers can troubleshoot efficiently and demonstrate compliance when needed.

Adoption of ISO 12647 has been widespread, with over 80% of printing facilities in some regions using it for color management and quality control. Additionally, applying techniques based on the standard has resulted in a 20% improvement in color gamut for certain paper types.

This structured workflow is particularly valuable for high-volume commercial printers, where maintaining consistency across shifts, operators, and production runs is essential. By adhering to ISO 12647, these operations can achieve repeatable, high-quality results every time.

How to Implement ISO 12647 Standards

To meet ISO 12647 standards, focus on precise prepress file preparation, thorough proofing, meticulous calibration, and constant production monitoring. These steps ensure your printing process aligns with the standard’s requirements.

Prepress File Preparation and Color Management

Achieving ISO 12647 compliance starts with a well-structured prepress process. Use standardized ICC profiles tailored to your print process and substrate. For example, GRACoL is ideal for coated materials, while SWOP works best for uncoated substrates. Convert files to the appropriate CMYK color space and resolution, ensuring proper bleeds and embedding color profiles. Double-check that color separations align with the substrate and ink limits to reduce the need for adjustments or reprints.

Proofing and Verification Processes

Proofing is a critical step to confirm color accuracy. Use contract proofs generated on calibrated devices with reference profiles like FOGRA39 or GRACoL. Include measurable color control strips on proofs, then verify compliance through spectrophotometric measurements. This process ensures adherence to ISO 12647-7 and -8 guidelines.

Calibration and Equipment Maintenance

Calibration ensures your equipment operates within ISO 12647 specifications. Adjust ink densities, dot gain curves, and substrate parameters accordingly. Routine maintenance, such as cleaning components, checking alignment, and updating software, is essential to prevent color inconsistencies. Keep detailed records of calibration and measurements, and schedule regular checks to maintain compliance.

Process Monitoring During Production

During production, regularly sample prints and measure key metrics like ink density, tone value increase (TVI), and color consistency using spectrophotometers. Address any deviations from ISO 12647 targets immediately, and document all measurements to support continuous improvement. Train your team to interpret measurement data effectively and respond promptly to maintain quality standards.

Benefits of ISO 12647 Compliance

Adopting ISO 12647 standards brings measurable improvements to printing operations, boosting efficiency, cutting waste, and building stronger client relationships. These advantages stem from the standardized processes it introduces, which go beyond basic quality checks to support smoother workflows and long-term growth.

Better Color Consistency and Accuracy

ISO 12647 removes the uncertainty in color reproduction by providing precise targets for every stage of the printing process. It defines specific ink density and color benchmarks, ensuring consistent results. This is especially critical for materials tied to brand identity, where even slight color variations can impact perception. By calibrating equipment to ISO 12647-2 and using tools like spectrophotometers, printers can achieve predictable and repeatable outcomes. References such as FOGRA39 further help minimize inconsistencies and reduce the need for manual adjustments.

A commercial printer in New Jersey shared that, after implementing ISO 12647-2, complaints about color inconsistencies dropped by 75% within a year – instilling greater confidence among their clients.

Higher Efficiency and Less Waste

Standardized workflows under ISO 12647 significantly reduce the trial-and-error process that often leads to wasted resources. Printers adhering to these standards report up to 20% reductions in ink and paper waste, thanks to fewer misprints and more predictable results. Additionally, streamlined calibration and process controls mean less downtime for troubleshooting and quicker turnaround times. According to the European Color Initiative, optimized processes under this standard can expand the color gamut by 20%. Many facilities have also seen a 15% drop in material costs while improving client retention after adopting these practices. These operational efficiencies align perfectly with the objective quality checks built into ISO 12647.

Clear Quality Evaluation

ISO 12647 shifts quality checks from subjective visual inspections to objective, measurable standards. By setting clear tolerances for factors like color and density, printers can use tools such as spectrophotometers to verify that prints meet required specifications. This not only simplifies quality assessments but also enhances transparency in client communication.

Moreover, the standard allows for external verification of color accuracy, ensuring that both printers and designers can confirm the final product meets the agreed-upon standards. For digital printing operations, ISO 12647 also bridges the gap with offset printing, delivering comparable color quality and consistency. This seamless alignment between digital and offset processes highlights the operational improvements printers can achieve with ISO 12647.

How Miro Printing & Graphics Inc. Uses ISO 12647

Miro Printing & Graphics Inc. incorporates ISO 12647 standards throughout its printing processes, ensuring that every project – whether it’s a set of business cards or a large-format display – meets strict benchmarks for color accuracy and consistency.

Standards Integration in Service Offerings

The company applies ISO 12647 standards across a range of printing technologies. Offset presses are aligned with ISO 12647-2 specifications, while digital presses adhere to ISO 12647-5 guidelines, guaranteeing uniform results for projects of all sizes.

For large-format printing, Miro Printing & Graphics Inc. adapts ISO 12647 principles to account for different substrates and printing conditions. For instance, a retail campaign involving varied materials saw a 15% reduction in material waste and turnaround time compared to previous workflows.

Custom projects also benefit greatly from this standardized approach. Whether it’s packaging that requires precise brand color matching or marketing collateral that demands consistent reproduction across multiple runs, the ISO 12647 framework ensures reliable results. These practices extend across all production stages, reinforcing the company’s in-house quality control systems.

In-House Quality Control and Expertise

Quality control at Miro Printing & Graphics Inc. is maintained through advanced in-house systems. Calibrated spectrophotometers and standardized profiles are used to ensure compliance with ISO 12647 standards.

Prepress files are prepared with standardized color profiles, and the production process is closely monitored using tools like control charts and spectrophotometric measurements. Hardcopy proofs are measured against ISO 12647-7 standards to simulate final print conditions, giving clients confidence that the final product will match the approved proofs.

The expertise of Miro Printing & Graphics Inc.’s staff is a critical factor in upholding these standards. Employees receive ongoing training in ISO 12647 protocols, color science, and equipment calibration. This enables the team to quickly address any process deviations and provide clients with guidance on file preparation and color management.

Customer-Focused Approach to Print Quality

By combining rigorous standards with internal expertise, Miro Printing & Graphics Inc. strengthens client trust through transparent and reliable quality processes. ISO 12647 compliance serves as the foundation of these relationships, offering clear documentation and proofing that meet international standards.

This approach is especially beneficial for clients with demanding color requirements. Corporate branding materials, packaging, catalogs, and large-format displays all benefit from the consistent color reproduction that ISO 12647 compliance ensures, even across multiple orders and varied materials.

Miro Printing & Graphics Inc. tailors its ISO 12647-based processes to meet specific client needs. For example, packaging projects may require tighter tolerances for brand colors, while marketing materials might prioritize faster delivery times. This adaptability allows the company to achieve optimal results within the ISO 12647 framework while addressing unique client demands.

With many print buyers now requiring ISO 12647 compliance as a condition for partnerships, Miro Printing & Graphics Inc. has positioned itself as a trusted partner. By consistently meeting these standards, the company reduces concerns about color inconsistencies and costly reprints, fostering long-term relationships built on reliability and trust.

Conclusion: ISO 12647’s Role in Print Quality

ISO 12647 standards serve as a dependable guide for achieving consistent, high-quality prints. By setting measurable benchmarks for color accuracy, process control, and workflow efficiency, these standards benefit both printers and their clients, ensuring predictable and repeatable results.

By defining clear parameters for factors like ink density, tone value increase, and color reproduction, ISO 12647 eliminates guesswork and reduces variability across production runs and printing technologies. This consistency is invaluable in maintaining quality and meeting client expectations.

For print shops navigating a competitive market, ISO 12647 compliance offers measurable business benefits. According to industry data, facilities with compliance scores of 80% or higher often experience stronger client trust and increased repeat business, as customers appreciate the assurance of standardized quality benchmarks. Additionally, compliance helps streamline workflows, cut material waste, and lower production costs, making operations more efficient.

The modular nature of ISO 12647 allows it to adapt to various printing methods, including offset, digital, flexographic, and gravure printing. This flexibility ensures consistent quality across different technologies.

Take Miro Printing & Graphics Inc., for example. Their approach to implementing ISO 12647 demonstrates how these standards can provide a competitive edge in the U.S. market. From prepress preparation to final production checks, their use of ISO 12647 practices has improved process reliability and operational efficiency, showcasing the practical value of these standards in action.

ISO 12647 also fosters transparency and accountability in print production. Clients benefit from objective criteria for evaluating quality, while print providers gain from clear documentation that supports their claims. This shared understanding reduces disputes and strengthens business relationships based on verifiable performance.

As the printing industry continues to evolve, ISO 12647 remains a cornerstone standard for ensuring quality across various technologies. It not only validates print quality but also builds trust between providers and clients – a trust grounded in consistent, measurable results that align with international benchmarks.

FAQs

How does ISO 12647 ensure consistent and accurate color in printing?

ISO 12647 is a globally recognized standard that outlines clear guidelines for managing color in print production. It specifies parameters like ink density, color matching, and tone reproduction, all aimed at helping printers deliver consistent and high-quality results across various jobs and materials.

Following ISO 12647 plays a key role in ensuring color accuracy and predictability, minimizing variations and reducing errors during the printing process. This is especially crucial for businesses that depend on consistent branding or uniform print quality across multiple projects. If you’re looking for expert printing services that align with industry standards like ISO 12647, Miro Printing & Graphics Inc. in Hackensack, NJ, offers reliable solutions tailored to meet your needs.

How can a printing company successfully implement ISO 12647 standards to ensure top-quality results?

To put ISO 12647 standards into practice, a printing company needs to follow a clear and organized plan. Begin by fully understanding the standard’s requirements, which are centered around achieving consistent color quality and adhering to industry norms. After that, focus on calibrating and standardizing all printing equipment, from presses to proofing devices, ensuring they meet ISO 12647 guidelines. Use reliable tools to regularly monitor and measure output, confirming everything stays within the required parameters.

It’s also crucial to train staff so that everyone involved in production knows how to apply the standards effectively. On top of that, implement a quality management system to document procedures, track performance, and quickly address any inconsistencies. By sticking to this approach, printing companies can reliably produce top-notch prints that align with customer expectations.

What are the advantages of ISO 12647 compliance for printers and their customers?

ISO 12647 compliance plays a key role in maintaining consistency and quality in print production. By offering clear guidelines for color management and process control, it helps printers achieve greater efficiency, minimize waste, and confidently meet industry standards.

For customers, this compliance means they can count on dependable, predictable print outcomes. Their materials will not only look polished and professional but also match their expectations. This level of reliability strengthens trust and encourages lasting partnerships between printers and their clients.

Related Blog Posts

https://app.seobotai.com/banner/banner.js?id=691d09cc9c1061ed16122eb1

Understanding Color Gamut in Large Format Printing

Explore how expanded gamut printing enhances color accuracy and vibrancy in large format printing, ensuring brand consistency and reducing reprints.

Color gamut refers to the range of colors a printer can reproduce. In large format printing, achieving accurate and vibrant colors is challenging due to limitations in ink, substrates, and device calibration. Expanded gamut printing, which adds inks like orange, green, and violet to the standard CMYK process, significantly improves color accuracy and coverage, reaching over 90% of Pantone colors. This ensures better brand consistency and reduces reprints.

Key points:

  • Standard CMYK reproduces ~55% of visible colors, while expanded gamut systems can achieve up to 90% Pantone coverage.
  • Substrate and ink type matter: Glossy materials and advanced inks produce brighter, more accurate colors.
  • Calibration and profiling are critical: Regular adjustments ensure consistent results across devices.
  • Expanded gamut printing benefits: Better spot color accuracy, faster production, and lower long-term costs.

Large format printing success depends on selecting the right materials, maintaining calibrated workflows, and leveraging advanced printing systems for precise results.

Printing Workflow | Color Gamut

Research Findings on Color Gamut Limitations

Understanding these findings is key to improving color reproduction strategies in large format printing.

CMYK Limitations in Large Format Printing

Research indicates that standard CMYK printing can reproduce only about 55% of visible colors. This poses challenges when replicating vibrant brand colors, neon shades, or highly saturated hues that fall outside the CMYK range. Advanced systems can extend this coverage to 65–70%. However, logos and designs that rely on colors outside this gamut may experience noticeable color shifts and reduced saturation, which can impact brand consistency and visual appeal.

How Ink and Device Types Affect Color Range

The range of reproducible colors in large format printing is heavily influenced by the type of printer and the ink formulations used. Inkjet printers stand out for their ability to achieve a wider color gamut, thanks to their advanced ink sets and precise droplet control, making them ideal for photographic and color-sensitive projects.

Different ink types also play a role:

  • Aqueous inks: Provide good color range but lack durability.
  • Solvent inks: Offer broader gamuts and excel in outdoor applications due to superior weather resistance.
  • UV-curable inks: Deliver vibrant colors across a variety of substrates.

Additionally, many modern digital printers support expanded ink sets that go beyond the traditional CMYK palette. Hybrid systems, such as those incorporating CMYK+White or CMYKLcLm (light cyan and light magenta), further enhance the ability to reproduce subtle color variations. These advancements are paving the way for even greater improvements in color reproduction.

New Developments in Color Gamut Expansion

Recent innovations in expanded gamut printing are revolutionizing how colors are reproduced. Systems that incorporate additional inks – like CMYKOGV (adding orange, green, and violet) – can now achieve over 90% coverage of Pantone colors, far surpassing standard CMYK ranges. For example, HP’s DesignJet Z Pro series achieves up to 93% Pantone coverage through advanced ink formulations.

Research from Ryerson University highlights that digital printers with expanded gamut systems deliver closer matches to Pantone colors, with significant reductions in color deviation. The introduction of standardized Pantone EG Color Guides has further improved accuracy, enabling printers to achieve color precision within ΔE ≤ 2.8 for 76% of expanded gamut colors.

Case studies in packaging and display graphics demonstrate that expanded gamut printing not only produces consistent, vibrant colors across various substrates but also enhances customer satisfaction while reducing production costs. These advancements are particularly valuable for large format printing, where accurate color reproduction is essential for maintaining brand integrity and creating visually impactful results.

Expanded Gamut Printing: Methods and Benefits

What Is Expanded Gamut Printing?

Expanded gamut printing takes the standard CMYK process (cyan, magenta, yellow, and black) and adds extra ink colors – usually orange, green, and violet (CMYKOGV) – to significantly increase the range of colors that can be reproduced. This method fills in the gaps where traditional CMYK struggles, offering more vibrant and accurate results.

Each added ink has a specific role: orange boosts brightness in warm tones, green enhances natural hues, and violet deepens purples and enriches blues. Together, these inks expand the color range, allowing for up to 90% coverage of Pantone colors. This improvement is particularly beneficial for large format printing, where accurate and vibrant colors are crucial.

Benefits for Large Format Printing

Expanded gamut printing addresses the limitations of standard CMYK by delivering more precise color matching, which is critical for maintaining consistent branding. By improving spot color accuracy, it eliminates the trial-and-error process of custom ink mixing, helping printers meet strict brand guidelines. These systems can achieve Delta E values as low as 2.8 for about 76% of colors, significantly reducing the chances of costly reprints.

Another advantage is efficiency. Using a fixed set of seven inks minimizes the need for frequent ink changes and press cleanups, which speeds up production and allows for job batching. This approach also reduces inventory costs and waste, leading to lower overall expenses and faster turnaround times.

On top of that, expanded gamut printing enhances the overall quality of prints. The added vibrancy and smoother gradients ensure that images and graphics look as intended, with the depth and saturation needed for eye-catching displays.

Standard vs. Expanded Gamut Workflows

Choosing between standard CMYK and expanded gamut workflows depends on the specific needs of the project. Each has its strengths, and the decision often comes down to balancing simplicity with advanced capabilities.

Workflow Type Color Range Spot Color Accuracy Ink Changes Cost Efficiency Complexity
Standard CMYK Limited (50% Pantone coverage) Moderate Frequent Lower initial cost Simpler setup
Expanded Gamut (CMYKOGV) Wide (over 90% Pantone coverage) High (ΔE ≤ 2.8) Reduced by up to 30% Cost-effective long-term More complex color management

For simpler projects where precise color matching isn’t critical, standard CMYK is appealing due to its straightforward setup and lower upfront investment. However, for applications that demand high color accuracy – like luxury retail displays, museum-quality reproductions, or corporate branding – expanded gamut printing is the better choice. While it requires more advanced software, detailed profiling, and operator training, the payoff is higher client satisfaction and fewer reprints.

For print shops managing a variety of color-sensitive projects, expanded gamut printing offers a valuable combination of improved accuracy and production efficiency, making it an excellent option for large format applications. Whether to choose standard CMYK or expanded gamut workflows depends on the specific demands of each project and the priorities of the business.

Color Management Best Practices

Getting color management right in large format printing requires a structured approach. It involves careful profile selection, regular calibration, and addressing standardization challenges. These practices help avoid costly errors and ensure precision in output.

Selecting the Right Color Profiles

ICC profiles are the backbone of accurate color reproduction in large format printing. These data sets define how colors should appear on specific devices, ensuring consistency across different printers and workflows. Without them, even the best printing equipment can produce uneven or incorrect colors.

Choosing the right profile starts with understanding industry standards in the U.S. For example, GRACoL (General Requirements for Applications in Commercial Offset Lithography) provides detailed guidelines for CMYK printing and is widely used in commercial printing across North America. For workflows that include additional colors like orange, green, and violet, Idealliance ECG (Expanded Gamut Printing) offers tailored support.

It’s also crucial to match ICC profiles to the specific printer, ink, and substrate being used. A profile designed for vinyl won’t necessarily work for canvas or paper, as different materials absorb ink differently. Substrate-specific profiling ensures the best results for each material.

Default settings like sRGB or SWOP can restrict the range of achievable colors. Updating these settings to align with modern printing technologies helps unlock the full potential of expanded gamut systems.

Once accurate profiles are selected, calibration becomes the next critical step to maintain consistency.

Device Calibration and Linearization

Linearization ensures that a printer’s output matches its input values, creating smooth transitions and avoiding issues like banding. This step is essential before profiling and plays a key role in maintaining print quality over time.

Regular calibration is needed to counteract shifts caused by environmental factors, ink aging, and heavy usage. Both printers and monitors can drift over time, which makes consistent calibration a must. The frequency of calibration depends on how often the equipment is used and the surrounding conditions.

Hand-held spectrophotometers have made on-site color measurement and adjustments much easier. Tools like the NIX Spectro L and Datacolor ColorReader Spectro allow operators to check color accuracy in real-time and make corrections before starting large print runs.

Environmental stability – such as consistent temperature, humidity, and lighting – also plays a big role in ensuring calibration holds steady.

After calibration, the next challenge is standardizing profiles across multiple devices.

Profile Standardization Challenges

Standardizing color profiles across different printers and environments is no small feat. Variations in printer models, ink types, substrates, and environmental conditions make perfect uniformity difficult to achieve, even with the best practices in place. Factors like device age, print head condition, and manufacturing differences often require individual profiling for each device.

Using LAB color management can help with device-agnostic color matching. LAB encompasses a broader range of colors than RGB or CMYK, enabling more vibrant and accurate reproduction across different devices. However, this approach demands advanced software and skilled operators to implement effectively.

Beyond the technical aspects, workflow management is equally important. Human factors, such as how operators handle equipment or the ambient lighting during quality checks, can impact color perception. Establishing clear protocols and providing proper training can minimize these variables.

G7+ calibration builds on traditional G7 standards by improving gray balance and tonal smoothness. This is especially beneficial for high-density inkjet printers that use six or more inks. By focusing on appearance matching across multiple devices and locations, G7+ helps maintain consistency on an enterprise level.

When perfect standardization isn’t possible, clear communication between designers, printers, and clients becomes essential. Setting realistic expectations and defining a clear color approval process can help avoid misunderstandings and reduce the chances of print rejections over minor color differences.

Practical Adjustments and Recommendations

When it comes to large format printing, consistency in color quality isn’t just about following good color management practices – it’s also about making smart, practical adjustments. Factors like material selection, workflow management, and quality control play a huge role in ensuring reliable results. These strategies not only help deliver the desired output but also reduce the risk of expensive reprints and unhappy clients.

Choosing Substrates and Ink Types

The foundation of accurate color reproduction lies in pairing the right substrate with the right ink. For instance, glossy or coated materials often produce more vibrant and sharp colors because they limit ink absorption. This makes them ideal for projects that demand bold, eye-catching visuals. Materials like photo paper or high-gloss vinyl are common choices for achieving this level of vibrancy and precision.

On the flip side, uncoated or textured materials absorb more ink, which can dull colors and reduce the available color range. Here’s an example: A client once chose an uncoated canvas for a retail display, expecting vibrant reds and blues. Unfortunately, the absorbent material muted the colors, and the dye-based inks they used faded quickly. Switching to a coated polyester fabric paired with pigment-based inks solved the issue, resulting in brighter colors and a longer-lasting print.

Ink selection is just as critical. Pigment-based inks are known for their stability and resistance to fading, making them a reliable choice for long-term projects. Dye-based inks, while offering a broader color range, tend to be less durable. Testing the interaction between the chosen substrate and ink before starting production is a simple but effective way to avoid costly errors and ensure the best results.

Workflow Calibration and Proofing

Maintaining consistent color quality also depends on regular workflow calibration and proofing. Calibration isn’t just about tweaking printer settings – it involves keeping detailed records, recalibrating whenever there’s a material change, and using tools like spectrophotometers for real-time color checks. While automated color management systems can simplify this process, human oversight remains essential for troubleshooting and ensuring top-notch quality.

Proofing acts as the final safeguard before full production. Hard proofs provide physical samples for review under different lighting conditions, giving both print providers and clients a chance to catch issues early. Digital proofs, on the other hand, offer a faster option for initial approvals. For complex projects, advanced proofing methods – like video samples of print outputs – can give clients a clear preview of the final product. This is particularly helpful for intricate items like booklets, where small details matter.

How Miro Printing & Graphics Inc. Applies These Methods

At Miro Printing & Graphics Inc., every project is carefully evaluated to recommend the best combination of substrate and ink for color accuracy and durability.

Customer Judy W. shared her experience:

"I was ordering new business cards and before printing them, Mike sent me the proof and I gave it my approval."

For more intricate projects, Miro Printing & Graphics Inc. employs advanced proofing techniques. Customer Julia I. noted:

"I even received a video of my print sample (a mini booklet) for approval before they proceeded with the rest."

The company also prioritizes regular device calibration and creates custom ICC profiles for each substrate and ink pairing. By keeping detailed records of successful combinations, they can replicate proven workflows while adapting quickly to new challenges. This meticulous approach ensures consistent, high-quality results for every project.

Conclusion

The concept of color gamut plays a crucial role in determining the vibrancy, accuracy, and overall quality of large-format prints. Studies indicate that the color gamut of a printer directly influences the final output, whether it’s for billboards, exhibition graphics, or branded displays. This knowledge becomes essential when comparing traditional printing methods with expanded gamut techniques.

While standard CMYK printing has its limitations, expanded gamut printing is reshaping the industry. By incorporating additional inks like orange, green, and violet into the process, modern printing systems can now achieve over 90% Pantone coverage. This advancement results in more precise brand color reproduction and smoother gradients, enhancing the overall quality of printed materials.

To ensure consistent and accurate color reproduction, advanced technologies and optimized workflows are key. Techniques like LAB color management, proper device calibration, and the use of customized ICC profiles help maintain consistency across various substrates. Additionally, the choice of substrate and ink formulation greatly impacts the achievable color gamut. For instance, glossy materials paired with the right ink systems can significantly enhance color vibrancy.

As printing technology continues to evolve with new inks, substrates, and color management tools, staying updated on these innovations empowers professionals to deliver superior results. Partnering with experienced print providers, such as Miro Printing & Graphics Inc., ensures that every aspect – from material selection to workflow optimization – is handled with precision, enabling exceptional outcomes that meet and exceed client expectations.

FAQs

What are the advantages of using expanded gamut printing instead of the traditional CMYK process for large format printing?

Expanded gamut printing brings a host of advantages over the traditional CMYK process, especially when it comes to large-format projects. By adding colors like orange, green, or violet to the mix, it expands the range of achievable colors. The result? More vibrant, true-to-life reproductions of images and designs – perfect for projects that demand precise brand colors or intricate detailing.

It also reduces the reliance on spot colors, which can simplify production and, in some cases, lower costs. For anyone aiming to create striking, high-quality prints, expanded gamut printing offers an effective way to enhance the visual appeal of their materials.

How does the choice of substrate affect color accuracy and vibrancy in large format printing?

The material you select for your large format printing project has a huge influence on how colors appear and how vivid they look. Substrates like vinyl, fabric, or paper interact with ink in unique ways – some absorb it more, while others reflect it differently – which directly impacts the final color outcome. For instance, glossy surfaces often make colors pop, while matte finishes can create a softer, more muted look.

The range of colors, or color gamut, that a substrate can produce also depends on factors like its texture, coating, and overall quality. To get the best results, it’s crucial to pick a material that aligns with your design goals and is compatible with the printing method you’re using. A professional print shop, such as Miro Printing & Graphics Inc., can guide you in choosing the right substrate for your project to ensure it turns out exactly as you envision.

How can I achieve consistent color reproduction across various printing devices and materials?

To maintain consistent color reproduction, it’s crucial to regularly calibrate your printing devices and use color profiles like ICC profiles that match your specific printer and material. These profiles play a key role in standardizing color output and minimizing variations.

The type of material you’re printing on also matters. Different substrates – like paper, vinyl, or fabric – interact with color in unique ways, either absorbing or reflecting it differently. Testing and fine-tuning your printer settings for each material can ensure more accurate results. For added precision, partnering with a professional printing service, such as Miro Printing & Graphics Inc., can provide expert-level guidance and handling to keep your large format printing projects on point.

Related Blog Posts

https://app.seobotai.com/banner/banner.js?id=691a748960ed14ccdc758c49

Large Format Paper Types Explained

Choosing the right paper for large format printing is vital for quality and durability. Explore different types and their ideal applications.

Large format printing is used for creating large, attention-grabbing visuals like posters, banners, and architectural plans. Choosing the right paper is crucial as it impacts image quality, durability, and overall presentation. Here’s what you need to know:

  • Glossy Paper: Shiny surface for vibrant colors; best for photos and marketing materials but prone to glare.
  • Matte Paper: Non-reflective, ideal for text-heavy designs or art prints; offers a polished look but less color intensity.
  • Satin Paper: A middle ground between glossy and matte; vibrant colors with reduced glare.
  • Bond Paper: Affordable and durable; perfect for blueprints, CAD drawings, and technical documents.
  • Canvas & Specialty Papers: Textured options for art reproductions or durable materials like polypropylene for outdoor use.

Key factors to consider include paper weight (measured in pounds or gsm), thickness (in mils), and finish type (glossy, matte, or satin). Heavier papers are more durable and suitable for long-term projects, while lightweight options work well for temporary displays.

For professional guidance, companies like Miro Printing & Graphics Inc. can help you select the best paper type, ensuring high-quality results tailored to your project’s needs.

Paper Guide: Paper Types for Printing – Choosing the Right One

Common Large Format Paper Types

Choosing the right paper type for large format printing can significantly impact the look and durability of your project. Each type of paper brings unique qualities to the table, making it suitable for specific uses. Below is an overview of the most common options and their ideal applications.

Glossy Paper

Glossy paper stands out for its shiny, reflective surface that enhances color vibrancy and sharpness. This finish makes it a go-to choice for photo prints, posters, and marketing materials like flyers. The rich, deep colors it produces are visually striking, but its reflective surface can create glare under bright lighting, which is something to consider depending on your display setting.

Matte Paper

Matte paper, with its non-reflective finish, offers a sleek and professional look. It’s perfect for applications like fine art prints, artwork, and presentations where a glare-free experience is essential. While matte paper may not deliver the same color intensity as glossy options, it excels in detail reproduction and provides a high-end feel.

Satin Paper

Satin paper strikes a middle ground between glossy and matte finishes. Its semi-gloss surface offers vibrant color reproduction without the harsh glare of glossy paper. This makes it an excellent choice for photo prints and display graphics, especially in environments with varied lighting conditions.

Bond Paper

Bond paper is a practical and budget-friendly option, known for its bright white surface and clarity, especially for line work and text. It’s widely used for blueprints, CAD drawings, and engineering or architectural documents. Available in weights ranging from 75–90 GSM (20#–24#) for everyday use to 90–110 GSM (24#–28#) for premium presentations, bond paper comes in widths like 24", 36", and 42", with roll lengths between 150 and 650 feet.

Canvas and Specialty Papers

Canvas and specialty papers cater to more creative and niche needs. Textured canvas paper is ideal for art reproductions, giving prints the look of traditional paintings. Specialty options like backlit film are perfect for illuminated displays, such as light boxes, retail signage, or architectural lighting, offering a glowing effect. Other materials, such as Tyvek, provide added water and tear resistance, while clear film works well for overlays in engineering and architectural projects.

Paper Type Best Applications Key Benefits Typical Cost Range
Glossy Posters, marketing materials, photo displays Vibrant colors, sharp details Medium
Matte Art prints, presentations, gallery displays Glare-free, polished appearance Medium
Satin Photo prints, retail displays, trade shows Balanced color with minimal reflection Medium
Bond Blueprints, CAD drawings, technical documents Affordable, durable, clear text Low
Canvas/Specialty Art reproductions, backlit displays, overlays Unique textures and specialized features High

Key Paper Attributes

Choosing the right paper type is just the first step. Understanding its technical attributes ensures your final print looks and performs exactly as you need.

Weight and Thickness

In the U.S., paper weight is measured in pounds per ream (500 sheets) or in grams per square meter (gsm). These factors directly impact both the print’s appearance and its durability. For large-format printing, weights can range from 20–24 lb (75–90 gsm) for everyday bond papers to 44 lb or more (300+ gsm) for heavyweight fine art papers.

Thickness, measured in mils, plays a crucial role in stiffness and rigidity. It affects printer feeding, curling, and whether the print shows through on the other side, which is especially important for double-sided printing. For canvas prints or similar applications, thicker, heavyweight papers are essential to handle stretching without tearing.

  • Papers over 32 lb (120 gsm) feel sturdier, resist curling, and are excellent for client presentations, photography, and art reproductions.
  • Medium-weight papers, typically 24–28 lb (90–105 gsm), are great for posters and general signage.
  • Lightweight papers are ideal for high-volume projects where cost efficiency is a priority.

Finish Options

The finish of a paper determines how it reflects light and interacts with ink:

  • Glossy finishes reflect the most light, producing vibrant colors and sharp details. However, they can cause glare in bright lighting.
  • Matte finishes have a non-reflective surface, reducing glare and making them ideal for text-heavy documents or displays in well-lit areas.
  • Satin finishes strike a balance, offering moderate color vibrancy while minimizing glare. This makes them versatile for professional photography and presentations.

Glossy papers typically use less ink since they absorb less, while matte papers may require specially formulated inks to prevent smudging.

Paper Comparison Table

Attribute Lightweight (20–24 lb) Medium Weight (24–32 lb) Heavyweight (32+ lb)
Thickness Under 4 mils 4–6 mils 6+ mils
Best Finishes Matte, Bond Glossy, Satin, Matte All finishes available
Durability Basic handling Good resistance to wear Excellent durability
Ideal Applications CAD drawings, drafts, blueprints Posters, presentations, retail signage Fine art, photography, premium displays
Curl Resistance Low Moderate High

Environmental factors also play a role in paper performance. Heavier papers are more stable in changing humidity, while lightweight papers may absorb moisture and ripple. For outdoor use or displays near windows, UV-resistant coatings can protect against sunlight and water damage, making them a smart choice for long-lasting projects.

Specialty Papers and Advanced Uses

When standard paper just doesn’t cut it for your project, specialty materials can offer exciting new possibilities. These premium substrates require a bit more care but deliver outstanding results, especially for high-end or creative applications.

Canvas and Art Papers

Canvas and art papers go beyond the basics, offering textured finishes and long-lasting durability that make them perfect for premium prints. Canvas paper, for example, stands out with its thick, textured surface – ranging from 10 to 24 mils – that mimics the look and feel of traditional paintings. This makes it ideal for gallery wraps and fine art reproductions, where the image extends around the edges of a frame, capturing the essence of the original artwork.

Not only does canvas paper provide a stunning visual impact, but its archival quality and stretchability also ensure that colors remain vibrant for decades. This durability makes it a favorite for gallery applications and professional art prints. Similarly, art papers offer a variety of textures and finishes. Some are smooth, making them great for detailed photographic work, while others have subtle textures that enhance artistic prints. Both options are excellent for high-end photography and fine art.

For projects requiring different features, films and synthetic materials provide unique advantages.

Backlit Film and Polypropylene

If your project needs to stand out with illuminated visuals or withstand outdoor conditions, films and synthetic materials are worth exploring. Backlit film is specifically designed for lightboxes, retail displays, and trade shows. Its translucent material ensures even light diffusion, making graphics vibrant and eye-catching.

Polypropylene, on the other hand, is a tough synthetic material that’s waterproof, tear-resistant, and UV-resistant. These properties make it an excellent choice for outdoor signage and banners, offering durability and cost-effectiveness for long-term use.

Finishing Options for Specialty Papers

After choosing the right specialty material, applying the proper finishes can take your project to the next level. Finishes like lamination add a clear protective layer, shielding prints from scratches, moisture, and UV light. UV coating, on the other hand, enhances color saturation and sharpness while preventing fading and discoloration.

Handling and storage are also crucial for specialty papers, especially textured options like canvas. Prints should be handled carefully to avoid scratches or creases that could compromise their appearance.

Material Best Applications Key Properties Durability Level
Canvas Gallery wraps, fine art prints Textured, archival quality, stretchable High
Art Paper Fine art, premium photography Smooth or textured, archival properties Medium-High
Backlit Film Lightboxes, displays Translucent, even light diffusion Medium-High
Polypropylene Outdoor signage, banners Waterproof, tear-resistant, UV-resistant Very High

Choosing the right specialty paper and finishing options doesn’t just make your project look better – it ensures it lasts longer and leaves a professional impression.

How to Choose the Right Paper

Picking the right large format paper doesn’t have to be complicated. With a clear understanding of your project’s needs and a step-by-step approach, you can make smart choices that deliver high-quality results without breaking your budget.

Project Requirements Assessment

Start by evaluating the needs of your project. Think about where the final product will be displayed – indoors or outdoors – and how long it needs to last. Is it a temporary piece or something more permanent? Also, consider the desired image quality and your budget. Paper weight and thickness play a big role here, as they affect both durability and cost.

Paper Selection Process

Once you’ve outlined your project requirements, use the following guidelines to choose the right type of paper:

  • Event posters and retail displays: Opt for heavier, coated papers to achieve vibrant colors and long-lasting durability.
  • Technical drawings and blueprints: Lightweight coated or bond paper is ideal for clear details while keeping costs reasonable.
  • Fine art prints: Go for canvas or premium art papers with archival properties to ensure longevity and precise color reproduction.
  • Outdoor signage: Materials like polypropylene or vinyl are excellent for resisting tears, moisture, and UV exposure.

Before finalizing your choice, make sure the paper is compatible with your printer. Many wide-format inkjet printers designed for bond paper can only handle materials that are less than 9 mils thick. For critical projects, it’s a good idea to request test prints to confirm the final output meets your expectations.

How Miro Printing & Graphics Inc. Can Help

Even with a solid understanding of your needs, professional advice can make the process much easier. That’s where Miro Printing & Graphics Inc. comes in. With decades of experience, they specialize in helping clients navigate the balance between quality, durability, and budget.

"Let us know what type of project you are working on, and allow us to offer our expertise."

The team at Miro Printing & Graphics Inc. takes the time to understand your project, whether it’s a trade show display, architectural drawing, or fine art reproduction. They use real-world performance data to recommend the best paper options for your specific needs.

But their services go beyond just paper selection. Their Computer Layout & Design team ensures your artwork is perfectly tailored to the chosen paper type, while their in-house bindery offers finishing touches that enhance both durability and presentation. From scratch-resistant lamination to specialized mounting for gallery displays, they handle all the details to ensure a polished final product.

Miro Printing & Graphics Inc. also offers large format printing capabilities to accommodate various paper types and sizes. Whether you need standard U.S. architectural sizes like ARCH D (24 x 36 inches) or engineering sizes like ANSI E (34 x 44 inches), their flexibility ensures your project specifications are met.

For businesses managing large-scale distributions, their Mailing & Fulfillment Services provide a convenient, end-to-end solution. This approach saves time and guarantees consistent quality from printing to delivery.

"During the process, Miro Printing & Graphics Inc. will work with a professional, personal approach to better understand your company’s needs. The end result is a finished piece that exceeds your highest expectations but never your budget!"

Their attention to detail and customer-focused approach help avoid costly mistakes, ensuring your investment delivers exactly what you need. Clients often highlight their ability to handle complex projects while maintaining exceptional service and timely delivery.

Conclusion

Choosing the right large format paper can take your prints from ordinary to outstanding. The key is aligning paper characteristics – like weight, thickness, and finish – with the specific needs of your project. Whether it’s glossy paper for vibrant photo displays, bond paper for precise technical drawings, or polypropylene for weather-resistant outdoor banners, each material has a role to play.

Start by defining the requirements of your project: where the print will be displayed, how long it needs to last, and the visual impact you want to achieve. Glossy and satin papers enhance colors for photos, while bond and vellum are ideal for technical drawings. Outdoor projects demand tougher materials like vinyl or polypropylene to stand up to the elements.

Paper weight and thickness also influence print quality and cost. Most standard weights fall between 75 and 110 GSM (20# to 28#), with heavier papers offering more durability for tasks like mounting or stretching. However, keep in mind that many wide format inkjet printers can only handle materials under 9 mils thick. Always check your printer’s specifications before making a purchase.

For expert advice, you can rely on the decades of experience at Miro Printing & Graphics Inc. Their team can help you navigate the balance between quality, durability, and cost while ensuring your printer, paper, and ink work seamlessly together.

Additionally, their comprehensive services – spanning layout design, in-house bindery, and large format printing – provide a streamlined process from start to finish. This integrated approach ensures every detail is handled with care, delivering consistent results from the initial concept to the final product.

FAQs

How do I choose the right paper type – glossy, matte, or satin – for large format printing?

Choosing the right paper type for large format printing plays a big role in achieving the desired look and feel for your project. Glossy paper is known for its shiny, reflective surface that makes colors pop, making it an excellent choice for photographs or designs that need to grab attention. However, keep in mind that it can produce glare under bright lighting. Matte paper, on the other hand, has a smooth, non-reflective finish, ideal for text-heavy prints or artwork where clarity and a more understated appearance are key. If you’re looking for something in between, satin paper offers a soft sheen that enhances colors without the overly reflective quality of glossy paper, making it a versatile option for a variety of needs.

If you’re unsure which paper type is best for your project, the team at Miro Printing & Graphics Inc. in Hackensack, NJ, can provide expert guidance and deliver high-quality large format printing tailored to your needs.

How do paper weight and thickness influence the quality and durability of large format prints?

The weight and thickness of paper are crucial factors in determining the quality and durability of large format prints. Heavier, thicker paper offers greater resistance to tearing, creasing, and general wear, making it a smart choice for prints that will face frequent handling or need to last for extended periods.

For instance, if your print will be showcased in a busy area or exposed to outdoor conditions, opting for a sturdier paper stock can help preserve its look and extend its lifespan. Conversely, lighter paper might be better suited for short-term or budget-friendly projects where durability isn’t a top priority.

What are the benefits of using specialty papers like canvas or polypropylene for large format printing projects?

Specialty papers like canvas and polypropylene bring distinct benefits to large format printing, making them the go-to options for certain projects.

Canvas stands out for its textured, premium finish, making it an excellent choice for reproducing artwork, photography, or creating decorative prints. It’s not just visually appealing – it’s also durable and capable of showcasing vibrant colors, which is why it’s a favorite for both professional and personal uses.

On the other hand, polypropylene is a tough, tear-resistant material perfect for banners, signage, or outdoor displays. Its lightweight and water-resistant properties, combined with a smooth surface, allow for sharp, detailed prints that can hold up even in tough conditions.

The key to selecting the right paper lies in understanding your project’s specific needs – whether you’re prioritizing aesthetics, durability, or the ability to withstand environmental challenges.

Related Blog Posts

https://app.seobotai.com/banner/banner.js?id=68fd68819cea6427b3fdb0f2

Surface Treatments for Better Ink Adhesion

Explore effective surface treatments to enhance ink adhesion on low-energy materials, improving print quality and durability.

Getting ink to stick to materials like polyethylene or polypropylene can be challenging because of their low surface energy. Without proper preparation, prints may fade, peel, or smudge. The solution? Surface treatments that modify material properties to ensure ink bonds effectively. Here’s a quick breakdown:

  • Why Ink Doesn’t Stick: Low-energy surfaces repel ink, requiring at least 38 dynes/cm for proper adhesion.
  • Fixing the Problem: Techniques like corona, plasma, or primers increase surface energy or create bonding layers.
  • Choosing the Right Method: Each treatment method – corona for cost-efficiency, plasma for precision, primers for tough cases – has specific strengths and use cases.
  • Testing Is Key: Adhesion tests (e.g., tape test, dyne pens) confirm the success of treatments.

Surface treatments not only improve print durability but also reduce waste by preventing adhesion failures. Whether you’re printing on plastic films or metals, the right method ensures consistent, high-quality results.

Plasma and Flame Surface Treaters Improve Ink Adhesion for printing

Common Surface Treatment Methods

In the printing industry, three main surface treatment methods stand out, each tailored to specific materials and applications. Knowing how these methods work can help printers select the best option for their needs.

Corona Treatment

Corona treatment uses high-voltage electrical discharge to make challenging surfaces more ink-friendly. By exposing the material to electrical energy, oxygen in the air is ionized, creating ozone that oxidizes the surface. This oxidation increases the surface energy, allowing inks to adhere effectively.

This method is especially popular in flexography due to its ability to reliably control surface energy. It works by altering the polarity of non-absorbent materials like polyethylene and polypropylene, which naturally have low surface tension. Corona treatment can raise surface tension to the ideal range of 45-48 dynes/cm, ensuring high-quality printing.

One of the advantages of corona treatment is its simplicity. The equipment is relatively easy to use and integrates seamlessly into most production lines. It’s also considered a cost-efficient option, as the treatment is typically applied during manufacturing. For applications requiring more precision, plasma treatment may be a better choice.

Plasma Treatment

Plasma treatment offers a more precise approach by using ionized gas to modify surfaces. This method provides better control and uniformity compared to corona treatment, making it ideal for applications with strict specifications.

In plasma treatment, a highly energized gas interacts with the surface molecules, increasing surface energy while allowing for fine-tuned adjustments based on material needs. Unlike corona treatment, plasma can be customized for different substrates and requirements.

This method works well on a variety of materials, including both plastics and metals, making it a versatile option for complex projects that involve multiple substrate types. However, the added precision comes with higher equipment costs and greater operational complexity. Despite these challenges, plasma treatment is often worth the investment for projects requiring consistent, high-quality results across diverse materials.

When surface energy modification isn’t enough, primers can serve as an alternative solution, creating a bond between the ink and the substrate.

Primers and Adhesion Promoters

For situations where electrical treatments aren’t feasible, primers provide a practical alternative. Instead of altering surface energy, primers create a bonding layer that enables ink to stick to the substrate. This chemically compatible interface ensures strong adhesion.

Primers are applied through methods like spraying or dipping, and their formulations vary to suit different materials. This flexibility allows printers to select primers that work with both the substrate and the ink system being used.

UV-curable primers are particularly popular for synthetic materials. These primers cure quickly under UV light, forming a durable bond that enhances adhesion and print longevity. They’re especially useful for high-speed production or applications requiring immediate handling.

Primers are a go-to solution for materials that resist electrical treatments. They can be applied selectively to specific areas, offering targeted adhesion. However, using primers adds an extra processing step and requires careful selection to ensure compatibility with both the substrate and the ink.

Ultimately, the choice between corona treatment, plasma treatment, and primers depends on the specific materials, production needs, and quality goals. Corona treatment is a cost-effective option for many common materials, plasma offers precision for demanding applications, and primers provide a reliable solution when other methods fall short.

How Surface Treatments Improve Ink Adhesion

Improving ink adhesion starts with modifying surface energy, a crucial factor in transforming materials that are difficult to print on into ones that are more ink-friendly. By employing specific surface treatment techniques, manufacturers can significantly enhance the interaction between ink and substrate.

Raising Surface Energy

The secret to better ink adhesion lies in increasing surface energy – a measure of how readily liquids can spread across a material’s surface. Many printing challenges arise from materials with naturally low surface energy, which causes ink to bead up and fail to bond properly.

To address this, low-surface-energy materials need to reach at least 38 dynes/cm for effective ink wetting and bonding. Techniques like corona and plasma treatments are designed to tackle this issue. These methods introduce polar functional groups, such as hydroxyl, carbonyl, and carboxyl, onto the material’s surface through oxidation. This chemical modification boosts surface energy, making the material more receptive to ink.

When ink encounters a surface with high energy, it spreads evenly instead of forming droplets. This maximized contact ensures stronger adhesion and delivers better print quality.

Surface Changes and Cleaning

Beyond raising surface energy, these treatments also clean and physically alter the surface. For instance, corona and plasma treatments create a high-energy environment that volatilizes contaminants and slightly etches the surface. This etching introduces micro-roughness, which increases the surface area and provides more anchor points for mechanical bonding.

For materials that respond poorly to electrical treatments, mechanical cleaning methods like sanding or abrasion can achieve similar results. These methods remove debris and enhance surface roughness, further supporting ink adhesion.

Using Multiple Treatments Together

Combining surface treatment methods can produce results that exceed what a single approach can achieve. A popular strategy involves plasma treatment followed by the application of a primer. Plasma treatment raises the surface energy and cleans the substrate, while the primer acts as a chemical bridge between the ink and the treated surface. This dual process enhances both adhesion and durability, especially for challenging materials.

Using multiple treatments is particularly effective in preventing adhesion failures in demanding environments, reducing risks like delamination, fading, or abrasion. However, timing is critical – surface treatments can lose effectiveness over time, so follow-up treatments must be applied while the initial effects are still active.

For example, Miro Printing & Graphics Inc. employs this dual-method approach to achieve consistent, high-quality results. They also incorporate quality control measures such as surface energy testing and adhesion tests to customize the process for specific materials and printing needs.

Investing in combined treatments pays off by improving print quality, minimizing waste caused by adhesion failures, and enhancing the durability of the final product. This multi-step strategy lays the groundwork for rigorous adhesion testing and quality assurance, ensuring reliable outcomes for every project.

Comparing Surface Treatment Methods

Selecting the right surface treatment method is essential for achieving high-quality prints. Each method comes with its own strengths and weaknesses, impacting factors like cost, print quality, and compatibility with different materials. By understanding these differences, you can make better choices tailored to your specific needs.

Pros and Cons of Each Method

Corona treatment is a widely-used option for increasing surface energy, especially in high-volume production. It raises surface tension to the required 38 dynes/cm or higher, ensuring successful printing. Its cost-effectiveness and ability to integrate with existing production lines make it a popular choice.

However, corona treatment isn’t without challenges. Its effects diminish over time, particularly during long storage periods. It’s less effective on three-dimensional objects and requires controlled environments for consistent results. Additionally, it generates ozone, so proper ventilation is necessary.

Plasma treatment stands out for its ability to make molecular-level modifications. By using ionized gas, it creates stable and uniform surface changes that often last longer than those achieved with corona treatment. This method works on both plastics and metals, offering versatility. Its precise control over surface chemistry improves bonding with inks.

The downsides? Plasma treatment requires a higher initial investment and typically operates at slower speeds compared to corona treatment. While it produces minimal waste and emissions, it demands strict safety protocols for handling electricity and gases.

Flame treatment provides an economical way to prepare surfaces. It involves exposing materials to a controlled flame made from low-pressure air and gas. This method is effective for plastic substrates, especially those with mold release coatings that can challenge other treatment methods. It also comes with relatively low equipment costs.

On the flip side, flame treatment struggles with treating complex shapes uniformly and risks damaging surfaces with excessive heat. Combustion byproducts may require ventilation and adherence to environmental regulations.

Primers and adhesion promoters offer a different approach by creating a bondable layer between the ink and substrate rather than altering the surface itself. They ensure consistent adhesion, even on substrates with problematic surface properties, like those containing slip agents that migrate to the surface.

The drawbacks include additional processing steps, which increase production time and labor costs. Primers also add to material expenses and may affect the substrate’s appearance or thickness. Proper curing time is essential, adding another layer of quality control.

Treatment Method Surface Energy Increase Initial Cost Production Speed Durability Environmental Impact
Corona High Moderate Very High Good Moderate (ozone)
Plasma Very High High Moderate Excellent Low
Flame Moderate Low High Good Moderate-High (emissions)
Primers High Variable Low-Moderate Excellent Variable (VOCs)

Picking the Right Method for Your Material

The best surface treatment method depends on your material and production needs. To ensure proper adhesion, aim for a surface tension about 10 dynes/cm higher than your ink’s surface energy.

Polyolefin films like polyethylene and polypropylene are well-suited to corona treatment, which balances cost and effectiveness for these low-energy materials. However, if the films contain slip agents above 500 ppm, you’ll need to address the weak boundary layer they create before treatment.

Metal substrates and advanced plastics benefit most from plasma treatment. Its molecular-level modifications and versatility make it ideal for these materials. While the upfront costs are higher, the improved durability and quality often justify the investment for specialized applications.

Small-scale operations or production environments with varied needs might find flame treatment more practical. It’s particularly effective for plastic surfaces with mold release coatings, and its lower equipment costs make it accessible for businesses with tighter budgets.

Challenging substrates that don’t respond well to energy-based treatments may require primers or adhesion promoters. This approach ensures strong adhesion and works on materials that resist other methods.

Production volume also plays a key role. Corona treatment is ideal for high-volume, continuous production thanks to its speed and integration capabilities. Plasma treatment is better suited for specialized, low-volume tasks where quality is more important than speed. Primers, while versatile, add extra processing steps that can slow down production.

Finally, consider your facility’s capabilities. Corona and plasma systems require specialized maintenance and electrical safety protocols. Flame treatment involves fire safety measures and exhaust management. Using primers means handling hazardous materials and managing waste disposal.

For flexographic inks with surface tensions of 35-38 dynes/cm, aim to treat surfaces to 45-48 dynes/cm. This ensures the substrate meets the necessary energy levels for optimal adhesion.

Testing and Checking Ink Adhesion

Regular adhesion testing is a key step in ensuring effective surface treatments and maintaining high print quality. These tests are a cornerstone of strict quality control throughout the production process.

Standard Adhesion Tests

One of the most commonly used methods for checking ink adhesion is the tape test, which follows ASTM D3359 standards. This involves making cross-hatch cuts in the printed ink layer, applying a standardized adhesive tape over the area, and then quickly removing it. The amount of ink that remains on the substrate is then evaluated. If minimal ink is removed, it signals strong adhesion, whereas significant ink removal indicates weak bonding.

Another method, shear strength testing, measures the force required to separate the ink from the substrate. This test provides precise data, which is especially important when specific adhesion values are required for certain applications.

Dyne pen tests are also widely used to confirm that surface treatments have raised the substrate’s surface energy to the necessary levels. For example, substrates designed for flexographic inks typically need surface energies of 45–48 dynes/cm, while the inks themselves usually have surface tensions of 35–38 dynes/cm. Additionally, cross-hatch testing and rub resistance tests offer both qualitative and quantitative insights into how the ink will perform under real-world conditions.

Why Quality Control Matters

These testing methods form the backbone of robust quality control, which helps prevent small issues from turning into costly production problems. Even minor inconsistencies in surface preparation, ink chemistry, or environmental conditions can weaken adhesion. This can lead to product returns, damaged customer trust, or higher costs due to rework.

Environmental factors, in particular, can significantly affect adhesion. For instance, high humidity may slow ink drying, while elevated temperatures can speed up additive migration, weakening the bond. Additionally, when slip agents in film substrates exceed 500 ppm, they can create weak boundary layers that reduce adhesion. Regular testing helps catch these issues early, preventing larger problems down the line.

Keeping detailed records of test results is another critical aspect of quality control. These records help track equipment performance, ensure process consistency, and support ongoing improvement efforts. Proper training on testing techniques and routine calibration of equipment are also essential for ensuring accurate and reliable results.

Miro Printing & Graphics’ Methods

At Miro Printing & Graphics Inc., rigorous adhesion testing is an integral part of the production process to guarantee high-quality prints. The company employs multiple testing methods to confirm that surface treatments meet the specific demands of various printing applications. These tests are carefully aligned with their surface treatment strategies to ensure every substrate meets the required standards.

Before printing, dyne pen measurements are used to verify that substrates have been properly treated. During production, tape tests provide quick quality checks, allowing for real-time adjustments to surface treatments or ink formulations as needed.

After production, more detailed testing – such as shear strength testing and rub resistance tests – is conducted to ensure the final products can withstand their intended use. Whether it’s outdoor signage or packaging, these protocols confirm that the products are built to last. Additionally, all test results are recorded to optimize future projects and provide quality assurance documentation for customers.

Environmental monitoring also plays a key role. By tracking factors like temperature and humidity during printing and curing, Miro Printing & Graphics ensures that adhesion develops as expected. For specialized applications that demand maximum durability, the company employs a combination of advanced surface treatments and rigorous testing to consistently deliver products that meet or exceed performance requirements.

Getting Better Ink Adhesion with Surface Treatments

Surface treatments play a key role in tackling the common issue of poor ink adhesion on low-energy substrates. By increasing surface tension, these treatments create the conditions needed for strong bonding. For durable prints, substrates should ideally have a surface tension about 10 dynes/cm higher than the ink’s surface energy.

The success of these treatments depends on achieving the right energy balance. Methods like corona, plasma, flame treatments, and chemical primers are tailored to address specific substrate challenges and production needs. When used together strategically, they bridge the gap between low-energy surfaces and dependable ink adhesion.

A multi-step approach often delivers the best results. Start by cleaning the surface to remove contaminants. Then, apply surface modification treatments to boost surface energy. Finally, use primers to achieve the highest level of adhesion when needed. This layered process tackles different adhesion challenges, making it particularly effective for applications that demand long-lasting durability.

To ensure the treatments work as intended, standard tests are used to verify that the required surface energy has been achieved. These quality control steps, combined with environmental monitoring, help maintain consistent adhesion under varying production conditions.

Miro Printing & Graphics Inc. brings decades of expertise to the table, offering tailored guidance to match treatment methods with specific substrate and ink challenges. Their technical support simplifies the process of selecting the best treatment combinations for unique printing needs.

Whether you’re working with tricky polyolefin films, metal substrates, or specialized applications that demand extra durability, the right surface treatment can turn adhesion problems into smooth, reliable results. Proper preparation not only enhances print quality but also reduces waste and ensures consistent performance across a range of printing projects.

FAQs

How can I choose the right surface treatment to improve ink adhesion for my material?

When it comes to choosing the right surface treatment, a few crucial factors come into play: the material you’re using, the type of ink, and the desired appearance and durability of your print. Techniques such as corona treatment, plasma treatment, and primers each offer distinct advantages, making them suitable for various materials and printing needs.

If you’re unsure which option is best for your project, reaching out to an experienced print shop like Miro Printing & Graphics Inc. in Hackensack, NJ, can make all the difference. Their knowledge of printing methods and materials can guide you in selecting the ideal approach to achieve top-notch results tailored to your requirements.

What are the main differences between corona and plasma treatments, and how do they affect ink adhesion on various materials?

Corona and plasma treatments are both techniques used to enhance surface properties for better ink adhesion, but they operate differently and are suited to distinct materials. Corona treatment relies on a high-voltage electrical discharge to boost the surface energy of non-porous materials like plastics, making them more ink-friendly. In contrast, plasma treatment uses ionized gas to clean, activate, or coat surfaces, offering greater precision and the flexibility to treat a broader range of materials, including metals and glass.

Choosing between these methods often comes down to the material and the specific application. Corona treatment is generally more budget-friendly and ideal for flat, simple surfaces. Plasma treatment, however, excels with intricate shapes and materials that need a more thorough treatment. Both approaches are effective, but selecting the right one depends on the unique requirements of your project to achieve the best ink adhesion results.

What’s the best way to ensure ink adheres well and lasts on different surfaces, even in challenging conditions?

When it comes to ensuring durable and lasting ink adhesion, choosing the right surface treatment for your material and ink type is key. Techniques like corona treatment, plasma treatment, or applying primers are widely used to prepare surfaces, enhancing their ability to bond with the ink effectively.

Partnering with experienced professionals can elevate your results. A reliable print shop with expertise in surface treatments can help you select the most suitable method for your project. This ensures not only strong adhesion but also resistance to environmental wear, keeping your product intact throughout its lifecycle.

Related Blog Posts

https://app.seobotai.com/banner/banner.js?id=68fc16499cea6427b3fd9216

Offset vs Digital: Bulk and On-Demand Printing

Explore the differences between offset and digital printing to determine the best choice for your project based on volume, cost, and customization needs.

When choosing between offset and digital printing, the right option depends on your project’s size, budget, timeline, and customization needs. Here’s a quick breakdown:

  • Offset printing is ideal for large print runs (1,000+ pieces). It offers lower per-unit costs, precise color matching (Pantone), and supports specialty finishes like metallic inks and embossing. However, it has high setup costs ($500–$2,000+) and longer turnaround times (3–7 days).
  • Digital printing works best for short runs (1–500 pieces) or projects needing quick turnarounds (same day to 24 hours). It supports personalization (e.g., unique names or promo codes) and has low setup costs, but the per-unit cost remains higher and specialty options are limited.

Key Considerations:

  • Quantity: Offset is cost-effective for bulk orders; digital suits smaller runs.
  • Budget: Offset saves money on large projects; digital avoids upfront costs.
  • Timeline: Digital is faster; offset takes longer due to setup.
  • Customization: Digital handles variable data; offset produces identical copies.

For example, if you’re printing 10,000 brochures, offset printing may cost $0.10–$0.20 per piece, compared to $0.25–$0.40 with digital. But for fewer than 500 pieces, digital printing is more practical and flexible.

Quick Comparison:

Factor Offset Printing Digital Printing
Best For Large runs (1,000+ pieces) Short runs (1–500 pieces)
Setup Cost High ($500–$2,000+) Low ($0–$50)
Per-Unit Cost Low at volume ($0.05–$0.10) Flat rate ($0.50–$1.00)
Turnaround Time 3–7 days Same day to 24 hrs
Customization Not supported Fully supported
Specialty Finishes Extensive options Limited options

For businesses, combining both methods can be effective. Use offset for bulk orders like catalogs or brochures, and digital for personalized mailers or quick updates. Services like Miro Printing & Graphics Inc. in Hackensack, NJ, can guide you based on your project’s specifics.

Offset Printing Vs Digital Printing [ Difference & Best ]

Offset Printing: How It Works and When to Use It

Offset printing has long been a cornerstone of commercial printing, and for good reason. Knowing how it works and when it’s the right choice can help businesses make smarter decisions for their printing needs.

How Offset Printing Works

Offset printing starts with the creation of aluminum plates – one for each color. Most jobs require four plates for cyan, magenta, yellow, and black (CMYK), though additional plates might be needed for specialty colors or finishes. These plates are mounted onto the press, where they’re inked. The ink is then transferred to a rubber blanket cylinder, which applies the image onto paper or other materials. This indirect transfer is what defines offset printing.

Before production begins, operators run test sheets to ensure proper alignment and color balance. While calibration takes time, it’s critical for maintaining consistent quality. The process also involves using specialized inks, cleaning agents, and equipment for custom finishes. This meticulous setup is why offset printing is known for its superior results.

Offset Printing Advantages

Offset printing stands out for its outstanding print quality. It produces sharp details and accurate colors, making it ideal for brands that require precise color matching, such as those relying on the Pantone Matching System (PMS). When it comes to large print runs, the cost savings are hard to ignore. For example, printing 10,000 brochures via offset might cost $0.10–$0.20 per piece, compared to $0.25–$0.40 per piece with digital printing .

This method also supports a wide variety of specialty inks and finishes, including metallics, fluorescent colors, embossing, varnishing, and foil stamping. Additionally, it can handle many types of paper, from lightweight newsprint to heavy cardstock, offering creative freedom for designers and marketers.

Offset Printing Drawbacks

The biggest downside to offset printing is its high setup cost, which can range from $200 to $500 or more, depending on the complexity of the job and the number of colors involved. This upfront expense makes it less practical for smaller print runs, where the cost can’t be distributed across a large quantity.

Another limitation is its lack of flexibility for variable data. Since every copy is identical, offset printing isn’t suitable for projects that require personalization, like customized mailings or business cards. The calibration process also generates waste in the form of scrap sheets, which adds to material costs .

Given these factors, offset printing is best suited for high-volume projects that demand consistent, high-quality output. Think magazines, catalogs, corporate brochures, and marketing materials. Companies like Miro Printing & Graphics Inc. use offset printing to deliver precise color accuracy and custom finishes for large-scale projects, ensuring they meet even the most rigorous quality standards.

Digital Printing: How It Works and When to Use It

Digital printing offers speed, flexibility, and the ability to personalize content in ways traditional methods can’t match. Knowing how it operates – and when it’s the right choice – can help businesses make smarter decisions for their printing needs.

How Digital Printing Works

Unlike offset printing, which requires physical plates, digital printing works by transferring images directly from digital files to the printing surface. All you need is a PDF file sent straight to the digital press. Using either toner-based or inkjet systems, the image is applied and fused directly onto the material. This eliminates the need for lengthy setups, test sheets, or waiting for ink to dry. The result? A faster, more streamlined process that’s ready to go almost immediately.

Why Choose Digital Printing?

Digital printing shines when speed, flexibility, and customization are priorities. Here’s why:

  • Quick Turnaround: Materials can be printed in just hours, making it a go-to solution for tight deadlines or last-minute projects.
  • Cost-Effective for Short Runs: Without the hefty setup fees of offset printing, digital printing is ideal for smaller quantities. Whether you need one piece or a few hundred, the cost per unit stays consistent.
  • Personalization: Variable data printing lets you customize each piece with unique details like names, addresses, or promotional codes. In fact, personalized campaigns using this method can boost response rates by up to 36% compared to generic ones.
  • Eco-Friendly: Digital printing uses fewer chemicals and generates less waste. Plus, it’s easy to make last-minute updates to digital files without redoing any plates.

However, while digital printing has plenty of perks, it’s not without its limits.

The Drawbacks of Digital Printing

For all its advantages, digital printing does have some constraints:

  • Higher Costs for Large Runs: If you’re looking to print thousands of copies (like 5,000 brochures), the per-unit cost of digital printing can add up, making offset printing a more economical choice.
  • Limited Specialty Options: Digital presses don’t handle specialty finishes as well as offset presses. Metallic inks, embossing, spot varnishes, and textured papers may not be available or as effective.
  • Color Accuracy: While digital printing has come a long way, achieving precise Pantone color matching can still be tricky. For projects requiring flawless color fidelity, offset printing might be a better fit.

Digital printing works best for short-run projects (under 500 pieces), on-demand jobs with tight timelines, or materials that benefit from frequent updates or personalization. Local print services, like Miro Printing & Graphics Inc. in Hackensack, NJ, use digital printing to help businesses produce high-quality, customized marketing materials quickly and efficiently.

Offset vs Digital: Side-by-Side Comparison

When choosing between offset and digital printing, it’s important to weigh how each method performs across key factors, especially when managing bulk orders versus on-demand projects.

Quality and consistency:
Offset printing is unmatched in color accuracy and detail, making it the go-to option for projects that demand precise Pantone color matching. Its plate-based setup ensures consistent quality, even across thousands of copies, which is ideal for high-end marketing materials and packaging. Digital printing, while greatly improved, delivers quality that meets most standard business needs. However, slight inconsistencies in color may appear during long runs or when working with specialty materials.

Cost structure:
Offset printing comes with steep upfront costs due to the need for plate creation and press setup, which can range from hundreds to thousands of dollars. That said, its per-unit cost drops significantly as volume increases, often reaching as low as $0.05 to $0.10 per piece for runs of 10,000 or more. Digital printing, on the other hand, has minimal setup costs, but its per-unit cost remains fixed, typically between $0.50 and $1.00 per piece, making it more cost-effective for shorter runs. This cost difference also impacts production speed and scheduling.

Turnaround time:
Speed is where digital printing shines. Without the need for plate creation or extensive calibration, projects can often be completed within hours. Offset printing, however, requires additional time for setup, including plate preparation and press adjustments, which can extend project timelines by several days. Once setup is done, though, the actual printing process for offset is very fast.

Flexibility and customization:
Digital printing is the clear winner for personalization. It supports variable data printing, allowing unique details – like names, addresses, or promo codes – to be incorporated into each piece without slowing down production. Offset printing, by contrast, is less adaptable; making changes typically requires new plates, adding to the cost and time.

Offset vs Digital Printing Comparison Chart

Factor Offset Printing Digital Printing
Best For Large runs (1,000+ pieces) Short runs (under 500 pieces)
Setup Cost High ($500–$2,000+) Low ($0–$50)
Per-Unit Cost Low at volume ($0.05–$0.10) Flat rate ($0.50–$1.00)
Turnaround Time 3–7 days Same day to 24 hrs
Print Quality Highest, with precise color matching Very good; meets most needs
Color Accuracy Excellent for Pantone matching Good, with limits on specialty colors
Personalization Not supported Fully supported
Minimum Quantity Typically 500–1,000 pieces As low as 1 piece
Paper Options Wide range, including specialty stocks Standard to good variety
Specialty Finishes Extensive (metallic, embossing, etc.) Limited options
Environmental Impact Higher waste and chemical use Lower waste and fewer chemicals
Content Changes Expensive (requires new plates) Easy and cost-effective

Substrate compatibility:
For projects requiring a variety of paper types, thicknesses, or specialty finishes like metallic inks and custom coatings, offset printing has the upper hand. Digital printing works well with most standard papers but can struggle with very thick, textured, or specialty materials.

Miro Printing & Graphics Inc., located in Hackensack, NJ, offers both offset and digital printing. Their expertise allows them to recommend the best approach tailored to your project’s volume, timeline, and customization needs.

How to Choose Between Offset and Digital Printing

Choosing the right printing method depends on a few key factors: project size, budget, timeline, and customization needs. By carefully weighing these elements, you can determine which option best suits your specific requirements.

Quantity is a good starting point. Offset printing becomes cost-effective when you’re producing 1,000 to 5,000 pieces or more. On the other hand, digital printing is ideal for smaller runs and even allows for single-copy orders without additional costs.

Next, think about total costs. Offset printing involves upfront expenses for plate creation and press setup, which can range from several hundred to thousands of dollars. However, the per-unit cost decreases significantly as your order volume increases. Digital printing, meanwhile, has consistent per-unit pricing regardless of quantity, making it a better choice for smaller budgets or short runs.

Deadlines and customization needs are also critical. Digital printing offers quick turnaround times and supports variable data, such as personalized names, addresses, or promo codes. In contrast, offset printing requires extra time for plate creation and press adjustments, making it better suited for projects with static content where every copy is identical.

Quality and material preferences should not be overlooked. If your project demands precise Pantone color matching, specialty inks, or premium finishes, offset printing generally delivers superior results. Digital printing, while sufficient for most standard business needs, may struggle with specialty materials or very thick paper stocks.

Your regular printing habits matter, too. For frequent small batches with updated content – like monthly newsletters or seasonal promotions – digital printing’s flexibility is a major advantage. However, for large-scale projects with static designs, such as annual reports or extensive marketing campaigns, offset printing offers better value due to its economies of scale.

Another consideration is environmental impact. Digital printing tends to produce less waste and uses fewer chemicals, making it a more sustainable option.

For expert guidance, companies like Miro Printing & Graphics Inc. in Hackensack, NJ, can help simplify the decision. With expertise in both offset and digital printing, they can evaluate your project and recommend the best approach.

"Let us know what type of project you are working on, and allow us to offer our expertise."

Beyond printing, Miro provides a range of services, including in-house design, bindery, large-format printing, and mailing fulfillment, ensuring your project is managed seamlessly from start to finish.

If minimizing costs per piece is your priority and your timeline is flexible, offset printing might be the way to go. But if speed, personalization, and flexibility are key, digital printing is likely your best bet.

Making the Right Printing Choice for Your Business

Understanding the benefits of offset and digital printing can help businesses manage costs, improve efficiency, and support growth. The trick is to align your printing method with the specific needs of each project instead of sticking to a one-size-fits-all approach.

Factors like print volume, budget, quality expectations, and deadlines play a big role in determining the best option. For a deeper dive into these considerations, check out the earlier sections.

Often, combining both methods delivers the best results. For example, offset printing works well for producing large quantities of marketing materials, while digital printing is ideal for personalized follow-ups or smaller updates. This blend of techniques offers both cost savings and greater flexibility.

Partnering with a comprehensive print provider, such as Miro Printing & Graphics Inc. in Hackensack, NJ, can simplify the process. Their expertise in both offset and digital printing ensures you’ll make informed choices tailored to your goals.

"Let us know what type of project you are working on, and allow us to offer our expertise."

As market needs evolve, choosing the right printing method remains essential. Offset printing shines for large-scale, budget-conscious projects, while digital printing is perfect for customized materials and fast turnarounds. By understanding both options, businesses can stay responsive to change while keeping costs and quality in check.

FAQs

How do I choose between offset and digital printing for my project?

When choosing between offset and digital printing, it’s important to weigh three key factors: quality, cost, and scalability. Offset printing shines when it comes to large-volume projects, delivering high-quality results and better cost efficiency for bulk orders. In contrast, digital printing is perfect for smaller, on-demand jobs, thanks to its fast turnaround and ability to accommodate customization.

Miro Printing & Graphics Inc., located in Hackensack, NJ, offers both offset and digital printing services, ensuring you get the best option to meet your specific needs. They also provide in-house bindery and design services, making them a one-stop shop for both personal and business printing projects.

What are the environmental differences between offset and digital printing, and which is more eco-friendly?

Offset and digital printing each have their own effects on the environment. Offset printing, which relies on plates and large presses, tends to generate more waste due to setup materials and uses more energy for large print runs. That said, it becomes more efficient for bulk orders, as the waste and energy consumption per unit decrease with higher quantities. In contrast, digital printing is generally a more eco-conscious option for smaller jobs. It eliminates the need for plates, produces less waste, and uses less energy overall.

The choice between these methods depends largely on the scope of your project. For smaller, on-demand printing, digital printing often proves to be the more environmentally friendly option. For large-scale projects, offset printing can be the better choice in terms of efficiency per unit. Consulting with a professional print provider like Miro Printing & Graphics Inc. can help you determine the best method to meet both your project needs and environmental priorities.

Can I use both offset and digital printing for the same project, and what are the advantages?

Yes, it’s possible to use both offset and digital printing for the same project, and this combination can deliver distinct advantages. Offset printing works best for large-volume jobs, offering consistent quality and precision. On the other hand, digital printing is perfect for smaller runs, providing quick turnaround times and flexibility at a lower cost. By blending these two approaches, you can balance affordability with customization, tailoring your project to meet specific requirements without sacrificing quality or efficiency.

Related Blog Posts

https://app.seobotai.com/banner/banner.js?id=68faf1409cea6427b3fd751e

Ultimate Guide to Fogra Prepress Software Integration

Integrate Fogra-compliant software into your prepress workflow for consistent color management and enhanced print quality across various printing methods.

Fogra compliance ensures precise color management and print quality, making it essential for modern printing workflows. This guide breaks down how to integrate Fogra-compliant software into your prepress setup to achieve consistent and accurate results across digital, offset, and large-format printing. Here’s what you need to know:

Understanding Fogra Standards and Their Role in Printing

Fogra

Overview of Fogra Standards

Fogra standards are globally recognized specifications that set precise color targets, ensuring consistency across various printing equipment and materials.

In the U.S., the three most widely used Fogra standards are Fogra39, Fogra51, and Fogra52. Each is tailored to specific paper types and printing conditions. Fogra39 is designed for traditional coated papers without optical brighteners, making it ideal for legacy printing setups. Fogra51, on the other hand, is optimized for modern coated papers that include optical brightening agents (OBAs) – chemicals that enhance the paper’s whiteness and brightness. For uncoated papers with OBAs, Fogra52 provides the necessary guidelines, covering applications like business cards and brochures with matte finishes.

What makes these standards so effective is their ability to deliver measurable color targets, regardless of the ink, paper, or equipment in use. For example, Fogra39 allows yellow solid color densities to range from 1.07 to 1.92 D, providing flexibility while maintaining compliance.

Fogra standards are closely tied to ISO 12647 specifications, which define process controls for offset, gravure, and flexographic printing. This alignment ensures that printers adhering to Fogra standards meet international quality benchmarks.

These standards have become a cornerstone of the U.S. printing industry. For instance, Miro Printing & Graphics Inc., based in Hackensack, NJ, uses a Fogra-compliant workflow to deliver consistent, high-quality color results.

Standard Paper Type Primary Use Key Feature
Fogra39 Coated paper (no OBAs) Traditional offset printing Widely adopted legacy standard
Fogra51 Modern coated paper (with OBAs) Contemporary offset printing Updated for optical brighteners
Fogra52 Uncoated paper (with OBAs) Matte and textured printing Tailored for modern uncoated papers

Next, let’s dive into the essential terms that help maintain strict Fogra compliance throughout the production process.

Key Terms in Fogra Compliance

Understanding Fogra compliance requires familiarity with several technical terms that are critical to a color-managed workflow. These concepts ensure that the transition from standards to practical application is seamless.

  • ICC Profiles: These are digital files that describe how specific devices – such as monitors, printers, or presses – handle color. Think of them as a translator, ensuring that the blue you see on your screen matches the blue printed on the final product.
  • Media Wedge: This is a printed strip containing standardized color patches that serve as a quality control tool. Measured with a spectrophotometer, it verifies color accuracy. The Fogra MediaWedge comes in several versions, like CMYK V3.0 for traditional four-color printing, RGB Photo V1 for photographic work, and Multicolor 5C for specialty applications.
  • Output Intent: Embedded in PDFs, this metadata specifies the Fogra standard and ICC profile to be used for printing. It ensures that everyone, from designers to press operators, is aligned on the intended printing conditions, minimizing errors.
  • Soft Proofing: This process simulates the final printed output on a calibrated monitor, allowing potential color issues to be addressed before production begins. Using Fogra-certified profiles and controlled viewing conditions, soft proofing can save time and costs.
  • Delta E (ΔE): This metric measures color differences. The lower the ΔE value, the closer the color match. In workflows using Fogra39, aim for a ΔE2000 tolerance of 3 or less to maintain precise color accuracy.
  • ProcessStandard Digital (PSD): Developed by Fogra, this guideline provides a framework for creating, preflighting, and processing PDF-based documents. It supports both small and large format digital printing, ensuring a smooth transition from digital files to physical prints.
  • Monitor Calibration: Modern workflows rely on a gamma of 2.2 for monitor calibration, aligning with current color management practices. Proper calibration is essential for reliable soft proofing and accurate color decisions throughout the process.

Color Match in Hybrid Print Production with ColorLogic GmbH

ColorLogic GmbH

Setting Up a Fogra-Compliant Prepress Workflow

Establishing a Fogra-compliant workflow requires careful attention to file preparation, monitor calibration, and proofing system integration. This process involves both technical configurations and creating standardized procedures for your team to follow consistently. The goal is to ensure seamless color accuracy from design to print. Below, we’ll explore the steps for file preparation and technical checks essential for maintaining Fogra compliance.

File Preparation and Preflight

The cornerstone of Fogra-compliant file preparation lies in adhering to PDF/X standards. Files should be created in either PDF/X-4 or PDF/X-6 formats, ensuring all necessary elements are embedded. Automated preflight checks then verify critical details like font embedding, CMYK conversion, and image resolution.

Preflighting acts as a quality control step, systematically scanning files for compliance with both Fogra and PDF/X standards. Key checks include confirming that fonts are embedded, images are in the correct CMYK color space, and spot colors are accurately defined. Preflight software flags issues like missing fonts, incorrect color spaces, or low-resolution images before files reach production, saving time and avoiding costly errors.

When choosing preflight software, look for features like customizable profiles tailored to your Fogra standards, seamless integration with PDF/X requirements, and automated correction tools for common problems. High-quality software will also generate detailed reports, guiding you through any necessary file adjustments with ease.

For optimal print quality, ensure all images are at least 300 DPI, and convert all color elements to the appropriate CMYK color space based on your chosen Fogra standard.

Calibrating Monitors and Viewing Conditions

Once files are prepared, the next step is ensuring your monitors accurately display Fogra standards. Monitor calibration is best achieved using hardware tools like a colorimeter or spectrophotometer. Set your monitors to Fogra specifications, including a D50 white point, ~120 cd/m² brightness, and a gamma of 2.2. This gamma setting is now the standard for modern workflows, replacing the older 1.8 gamma.

Calibration should take place in a controlled lighting environment. A D50-certified light box (5000K) near your workstation ensures reliable visual comparisons between on-screen colors and printed outputs. This standardized lighting eliminates inconsistencies caused by ambient conditions, offering a stable reference for color evaluation.

The environment around your workstation also plays a role in color accuracy. Surrounding walls and surfaces should be painted neutral gray to avoid color contamination from reflections. Additionally, consistent overhead lighting and monitor hoods can help minimize glare and stabilize viewing conditions.

Monthly calibration is generally sufficient, though high-production environments may require more frequent adjustments. Keeping logs of calibration sessions helps track monitor performance over time, allowing you to address any drift and schedule equipment replacements as needed.

Setting Up Fogra-Certified Proofing Systems

After file preparation and monitor calibration, the final step is setting up a certified proofing system. Start by selecting a Fogra-certified proofing device that aligns with your production needs. The device should support the Fogra simulation profiles you’re using, such as Fogra39 or Fogra51. Pair it with proofing software capable of interpreting ICC profiles to ensure your digital files match the expected print output.

To verify color accuracy, integrate a spectrophotometer into your proofing system. This tool measures the actual color values on your proofs and compares them to Fogra reference values. Regular use of a spectrophotometer helps maintain accuracy and alerts you when recalibration is needed.

Validation using the Fogra Media Wedge CMYK V3.0 is another critical step. This process provides independent verification of your proofing accuracy. Print the media wedge on your proofing system, measure the color patches using your spectrophotometer, and compare the results to Fogra reference data. To remain compliant, the color differences should fall within a 3 ΔE2000 tolerance.

For color-critical projects, repeat this verification process with every proof. Regular checks ensure your proofing system consistently meets Fogra standards, catching any deviations in color accuracy before they impact the final product.

Printing companies like Miro Printing & Graphics Inc. in Hackensack, NJ, demonstrate how implementing these Fogra-compliant practices across digital, offset, and large-format printing can deliver consistent, high-quality results that meet both industry standards and customer demands.

Software and Tools for Fogra Integration

Once the prepress setup is in place, the next step is choosing the right software and tools to manage and verify color accuracy. To meet Fogra standards and align with US printing requirements, it’s essential to select tools that streamline workflows and ensure consistent results. Modern Fogra-compliant software simplifies color management, so understanding which tools to use and how they fit together is key.

Overview of Fogra-Compliant Software

Tools like Esko Pack Proof and SureProof make color management more efficient by automating RIP processes and supporting Fogra and other international color standards. Esko Pack Proof integrates seamlessly with major proofing devices, offering automated workflows that reduce manual effort. SureProof focuses on high-volume production, featuring batch processing and automated quality checks to maintain accuracy.

For monitor calibration, Eizo calibration tools are a solid choice. These tools ensure that what you see on-screen matches the printed output, adhering to Fogra specifications. Paired with Eizo ColorEdge monitors, they maintain consistent gamma settings of 2.2, a standard for Windows-based environments commonly used in US print shops.

X-Rite solutions add another layer of precision with tools for color measurement and ICC profile management. Their software automates profile creation and compliance verification, ensuring consistency throughout the workflow. These solutions also generate compliance reports, making it easier to track and maintain standards.

Specialized tools like MagicPress and MagicPrepress focus on optimizing ink density. For instance, a US print shop used these tools in 2021 to match Fogra39 and G7 standards, achieving color accuracy within a 3 ΔE2000 tolerance. This kind of precision helps ensure reliable and repeatable results.

Using ICC Profiles and Measurement Tools

ICC profiles act as the backbone of Fogra compliance, translating color data between devices in your workflow. Managing these profiles effectively involves creating, updating, and applying them based on regular device calibration and verification.

To handle ICC profiles, use spectrophotometers and colorimeters. Best practices include:

  • Using Fogra-certified ICC profiles for proofing and printing.
  • Regularly updating profiles after calibrating devices.
  • Keeping a centralized repository for easy access across teams.

In US-based workflows, managing dual profiles is often necessary – one for Fogra compliance to serve international clients and another for local standards like GRACoL or SWOP for domestic jobs.

Accurate measurements depend on controlled conditions. Operators use spectrophotometers to calibrate monitors, verify proofing systems, and ensure printed output meets reference standards under D50 lighting. While many tools automate this process, understanding the fundamentals is crucial for troubleshooting. Regular checks of control patches can catch device drift early, prompting maintenance or profile updates as needed.

Matching Software with Hardware

Your software must integrate smoothly with certified hardware to avoid compatibility issues. This means ensuring your tools support the RIPs, measurement devices, and calibration equipment in your setup. All components should handle Fogra-certified ICC profiles without data loss or conversion errors. This is especially important when combining equipment from different manufacturers, as communication protocols can vary.

Software Type Primary Function Key Hardware Requirements US Localization Needs
Proofing RIP Color-accurate proofing Fogra-certified proofer, calibrated monitor Imperial units, USD pricing
Monitor Calibration Display accuracy Compatible colorimeter/spectrophotometer Gamma 2.2, US date formats
Color Measurement Profile creation/verification High-accuracy measurement device Fahrenheit temps, inch measurements

Hardware should align with the capabilities of your software. FograCert-certified proofing solutions specify compatible monitors, measurement devices, and software, offering a pre-tested combination that simplifies integration and ensures reliable results. Starting with certified hardware-software pairs minimizes setup challenges and supports consistent quality.

The configuration process involves setting up reference viewing conditions, calibrating monitors to match Fogra reference values, and maintaining consistent gamma settings across your workflow. Regularly verifying and documenting calibration results not only ensures compliance but also provides an audit trail for quality control.

For example, Miro Printing & Graphics Inc. in Hackensack, NJ, successfully integrated Fogra-compliant software across their digital, offset, and large-format printing services. By focusing on workflow compatibility, they maintained consistent color accuracy across diverse printing methods and substrates, meeting both client expectations and industry standards.

Installation and Configuration Best Practices

After selecting your software and integrating tools, the next step for a smooth prepress workflow is proper installation and configuration. For Fogra-compliant software, this means meeting system requirements, setting up licenses, and adjusting initial settings.

Software Installation and Licensing

Before installing any Fogra-compliant software, make sure your system meets the necessary requirements. This typically includes a compatible operating system – either Windows or macOS – along with sufficient RAM, processing power, and storage. You’ll also need administrative access during installation since the software modifies system files and installs drivers for devices like spectrophotometers.

Licensing options depend on the software you choose. Perpetual licenses grant permanent access but may require separate update fees, while subscription-based licenses include continuous updates and support, though they come with recurring costs. For larger teams, network licenses allow multiple users to access the software from different workstations.

To avoid disruptions, securely store license keys in an encrypted password manager. Additionally, configure user permissions carefully – only authorized personnel should have access to critical workflow settings or licensing details. This not only protects your system but also ensures compliance with Fogra standards.

Proofer Calibration and Substrate Selection

Once your software is installed, calibrating your proofing devices is a critical next step. This process requires tools like a spectrophotometer or colorimeter – devices such as the X-Rite i1Pro are popular for their precision and reliability.

Calibration involves using a D50 light box to simulate standardized lighting conditions. You’ll print test patches, measure their color values, and adjust device settings until the output matches Fogra reference values, such as Fogra39 for offset printing.

The substrate you choose plays a big role in maintaining compliance. Proofing papers should meet Fogra standards for whiteness, gloss, and optical brightening agents (OBA). Using certified proofing substrates ensures consistent and predictable color reproduction.

Regularly verify calibration because devices can drift over time. Environmental factors like temperature and humidity can also affect both your equipment and substrates. For example, Miro Printing & Graphics Inc. in Hackensack, NJ, achieved consistent color accuracy by using X-Rite tools and sticking to a strict calibration schedule. This approach not only improved their workflow but also enhanced client satisfaction.

With calibrated devices and compliant substrates ready, the next step is to organize your workflow settings for long-term efficiency.

Organizing Workflow Settings

Proper installation and calibration set the stage for organizing your workflow. Start by structuring your files into clear categories – such as folders for inputs, proofs, calibration data, and archives. Use logical naming conventions like "job_date_client" to make files easy to locate.

Maintain consistent gamma settings, ideally at 2.2. While older Mac systems used gamma 1.8, the 2.2 standard ensures better compatibility across different platforms.

Enhance security by implementing role-based access controls and storing credentials in encrypted systems. Regularly audit access logs to monitor usage and identify potential issues.

Set up automatic backups for critical data, including calibration files, ICC profiles, and job files. Version control is a lifesaver – it allows you to track changes and revert to previous configurations if needed. Even small changes to settings can ripple through the workflow, so having a way to restore a stable setup is invaluable.

Finally, maintain thorough documentation. Keep records of calibration events, including the device used, the operator’s name, and the results. Use checklists to ensure consistency across shifts, and rely on digital records and automated reminders to stay on track. This level of organization not only boosts accountability but also helps maintain compliance over time.

Maintaining Compliance and Workflow Optimization

Keeping a Fogra-compliant workflow running smoothly isn’t a one-and-done task. It requires consistent calibration and adjustments as equipment naturally drifts and environmental conditions shift.

Regular Calibration and Verification

To stay compliant with Fogra standards, you need a clear and consistent calibration routine. Proofers and presses typically need recalibration every week, while monitors can go a bit longer, usually about a month. In environments where color precision is non-negotiable, daily verification might even be necessary.

Changes in ambient conditions can also push the need for more frequent checks. A helpful tool in this process is the control strip – specifically the Fogra MediaWedge, which should accompany every proof and production run. This strip acts as a benchmark for color accuracy. By measuring it with a spectrophotometer and comparing the results to Fogra reference values, you can catch and address deviations early, well before they lead to expensive reprints.

For critical colors, aim to maintain a tolerance within 3 ΔE2000. If measurements start creeping close to this threshold, recalibration should happen immediately.

To keep everything consistent and accountable, document every calibration session. Include details like the operator’s name, the equipment used, environmental conditions, and results. This practice not only promotes accountability but also creates a reliable reference for troubleshooting when issues arise.

These habits ensure you’re prepared to tackle any deviations before they snowball into bigger problems.

Troubleshooting Common Issues

Routine calibration lays the groundwork for effective troubleshooting. When something goes wrong, follow a structured approach to pinpoint and fix the issue. Start by ensuring the correct ICC profile is being used.

Consistent lighting conditions are also critical. D50 lighting is the standard for accurate color evaluation, and any variations in ambient lighting can throw off your results. Stick to standardized lighting to maintain accuracy across the board.

Substrate differences can also lead to color mismatches. Always use the same proofing paper or substrate as the one used in your last successful calibration. Even slight differences in brightness or optical brighteners can cause noticeable shifts in color.

Gradual device drift is another common culprit. If recalibration doesn’t solve the problem, it might be time for professional servicing or even replacing the hardware.

Environmental factors like temperature and humidity can also interfere with performance. Keeping these conditions stable ensures your measurement devices and overall workflow stay consistent.

Improving Workflow Efficiency

Once calibration and troubleshooting are under control, the next step is to fine-tune your workflow for efficiency. Automated preflight tools can check that files meet Fogra PDF/X standards, cutting down on human error and preventing unnecessary rework .

Workflow software can further streamline processes. These systems can automatically apply the correct ICC profiles based on job specifications and flag files that don’t meet workflow requirements. This automation lightens the load on operators and ensures consistency.

Tracking key performance indicators (KPIs) like the percentage of jobs passing color verification on the first try or the average ΔE values for key colors can reveal trends and highlight areas that need attention . Regular staff training in color theory and measurement techniques also helps maintain a high standard of compliance and troubleshooting .

Standardizing processes with detailed standard operating procedures (SOPs) is another way to eliminate variables that could disrupt compliance. These SOPs should cover everything from handling substrates to performing measurements and systematic troubleshooting.

Version control is a must for preventing accidental changes to workflow settings. The ability to quickly revert to a known-good configuration can save time and frustration, especially in environments with multiple operators.

Finally, regular workflow reviews – monthly assessments of things like turnaround times, error rates, and client feedback – can uncover bottlenecks and opportunities for improvement. These reviews not only enhance compliance but also help streamline operations, making your workflow as efficient as possible.

Conclusion

Integrating Fogra-compliant software into your prepress workflow requires a thoughtful approach to ensure consistent print quality and efficient operations. The primary benefits include enhanced color accuracy and a smoother process that consistently delivers top-notch prints across various jobs and devices.

Achieving successful Fogra integration hinges on three key factors working in harmony to uphold professional standards. Investing in certified hardware, calibrated monitors, and precise measurement tools is essential. When combined with regular calibration schedules and well-documented procedures, these investments yield significant long-term benefits.

For businesses in the United States, Fogra compliance provides additional perks. The standards align well with regional requirements such as GRACoL and SWOP, helping your workflows stay competitive both domestically and internationally.

The learning curve for Fogra integration can be challenging, particularly for smaller operations without dedicated color management expertise. However, partnering with experienced providers can ease this transition. For example, in Hackensack, NJ, Miro Printing & Graphics Inc. offers Fogra-compliant prepress and printing services, helping businesses achieve compliance without requiring heavy upfront investments.

As you refine your workflow, focus on sustainable practices rather than quick fixes. Regular training, updated documentation, and dependable calibration tools will keep your processes running smoothly for years to come. With the printing industry moving toward digital standardization and automation, adopting Fogra compliance early can provide a strategic edge.

This guide has outlined the essential steps for integration. Whether you handle the process internally or work with professional partners, long-term success depends on treating compliance as an ongoing effort rather than a one-time task. By committing to Fogra-compliant practices, you can consistently deliver high-quality results that meet today’s rigorous printing standards.

FAQs

What are the benefits of using Fogra-compliant software in my prepress workflow?

Integrating Fogra-compliant software into your prepress workflow guarantees consistent, high-quality print results by following internationally recognized standards. This approach ensures precise color accuracy, simplifies production, and minimizes errors – saving both time and money in the long run.

At Miro Printing & Graphics Inc. in Hackensack, NJ, precision and attention to detail are at the heart of delivering outstanding print products. Using Fogra-compliant tools aligns with these values, helping businesses produce reliable and professional results for all their printing projects.

How can I calibrate my monitor to meet Fogra standards, and what tools should I use?

To align your monitor with Fogra standards, begin by using a trusted hardware calibration device like a colorimeter or spectrophotometer. These tools fine-tune your monitor’s settings, ensuring precise color reproduction that aligns with industry benchmarks.

Follow the specific instructions provided by your calibration device manufacturer, and use software that supports Fogra-compliant profiles – such as the Fogra Media Wedge – for the best results. To keep your prepress workflow consistent and reliable, it’s a good idea to recalibrate your monitor every few weeks.

What are the differences between Fogra39, Fogra51, and Fogra52 standards, and how can I choose the right one for my printing needs?

Fogra39, Fogra51, and Fogra52 are widely recognized color standards in the printing industry, ensuring consistent and precise color reproduction. Here’s a quick breakdown:

  • Fogra39: Based on ISO 12647-2, this standard is ideal for offset printing on coated papers.
  • Fogra51: An update to Fogra39, tailored for modern printing environments, particularly when optical brighteners are present in the paper.
  • Fogra52: Specifically developed for uncoated papers, ensuring accurate color reproduction on materials with different surface qualities.

Choosing the right standard depends on your printing method and the type of paper you’re using. For instance, Fogra39 works well with coated paper in offset printing. On the other hand, Fogra51 or Fogra52 might be better suited for uncoated or optically brightened papers. If you’re uncertain, reaching out to a professional print service like Miro Printing & Graphics Inc. can help you achieve top-tier results for your project.

Related Blog Posts

https://app.seobotai.com/banner/banner.js?id=68fac4dd9cea6427b3fd5f4a

Complete Guide to Print Workflow Automation Tools

Explore how print workflow automation enhances efficiency, reduces costs, and boosts quality in printing operations.

Print workflow automation transforms printing processes by replacing manual tasks with software-driven solutions. This approach improves efficiency, reduces errors, and helps businesses meet tight deadlines while controlling costs. Here’s what you’ll learn:

  • What it is: Software automates steps like job submission, file checks, and production scheduling.
  • Why it matters: It addresses labor shortages, minimizes mistakes, and ensures consistent quality.
  • Key features: Automated job routing, centralized management, and quality control tools.
  • Benefits: Faster production, lower costs, and scalability for growing demands.
  • How to implement: Map current workflows, choose compatible tools, and track performance.

Automation helps printers handle complex jobs, like variable data printing, and manage operations across multiple locations. Adopting tools like AI-powered quality checks or cloud-based management can boost productivity and customer satisfaction. Dive in to see how this technology reshapes printing businesses.

Podcast: The 6 Levels of Workflow Automation

Key Features of Print Workflow Automation Tools

Modern print automation tools simplify the entire production process, from job intake to final quality checks, creating a smooth workflow that minimizes errors and speeds up delivery. These tools are designed to address common challenges in manual workflows, such as scheduling conflicts and costly reprints, while boosting efficiency.

Three standout features make these tools indispensable: automated job submission and routing, centralized print management and monitoring, and quality control with preflight checks. Let’s dive into how each of these features transforms daily operations.

Automated Job Submission and Routing

Manually processing print orders can create bottlenecks, but automated job submission systems eliminate these delays. These tools collect print jobs from various sources – like web portals, email attachments, or direct file uploads – and assign them to the right equipment based on the job’s specific requirements, such as materials, size, and deadlines.

The routing process relies on rule-based logic to evaluate factors like job size, color, finishing needs, and equipment availability. This ensures smooth, uninterrupted production. For example, variable data printing benefits significantly from this feature. Imagine a marketing campaign requiring 50,000 personalized postcards – automated routing ensures the workload is evenly distributed across available digital presses, seamlessly merging data while maintaining high-quality output.

Centralized Print Management and Monitoring

With real-time dashboards, print shop managers gain a complete overview of their operations through a single interface. These centralized systems monitor job progress, equipment performance, and resource allocation, making it easier to identify and resolve issues before they impact deadlines.

Modern dashboards provide live metrics on equipment usage, material consumption, and labor allocation. If a press unexpectedly goes offline, the system alerts managers and suggests alternative routing options to prevent delays. Role-based access further enhances efficiency, giving team members visibility into tasks relevant to their roles – prepress operators handle file approvals, press operators oversee their production queues, and finishing staff track jobs ready for binding.

For businesses with multiple locations, centralized monitoring is even more critical. Managers can allocate jobs based on equipment availability, proximity to customers, or facility capacity. For example, companies like Miro Printing & Graphics Inc. in Hackensack, NJ, have effectively used centralized tools to streamline operations and maintain high standards across their production lines.

Quality Control and Preflight Checks

Automated quality control tools scan files for potential issues – like incorrect color profiles, low-resolution images, or missing fonts – before production begins. This proactive approach reduces waste and minimizes the need for reprints.

The preflight process runs automatically as files enter the system, flagging errors and generating detailed reports for corrections. Some systems even make automatic adjustments, such as optimizing color profiles or resolution, to ensure the best possible output.

Color management plays a vital role in maintaining consistency across print runs and equipment. For brand-sensitive materials, where precise color accuracy is essential, these systems ensure files meet required standards. Advanced tools like HP Scan AI Enhanced take this a step further by using OCR technology to extract and validate data from documents, cutting down on manual verification time while maintaining quality.

By catching errors early, print shops save on materials, reduce labor costs tied to reprints, and maintain strong customer relationships through consistent, high-quality results. Many businesses report noticeable reductions in material waste and quicker turnaround times after implementing these automated preflight systems.

Together, these three features – automated routing, centralized monitoring, and quality control – create an efficient production environment where jobs move seamlessly from start to finish. This integration allows print shops to handle growing workloads while consistently delivering exceptional results to their customers.

Benefits of Print Workflow Automation

The advantages of print workflow automation become clear when you consider how it improves production speed, cuts costs, and enables businesses to scale their operations. In today’s fast-paced market, this can give print shops a significant edge.

Faster Production and Improved Efficiency

Automation simplifies the entire print process, from prepress to finishing, cutting processing times by as much as 50%. For example, when a customer places an order, automated systems can check the file quality, assign the job to the correct equipment, and schedule production based on deadlines and available capacity. Staff are only notified when their input is absolutely necessary, allowing them to focus on tasks like customer service and quality control.

One major perk is the elimination of bottlenecks. Businesses that adopt workflow automation often experience quicker delivery times and the ability to handle more orders. This is especially helpful in addressing labor shortages, as smaller teams can manage larger workloads without compromising on quality.

Lower Costs and Smarter Resource Management

The financial benefits of automation extend across a variety of areas. For mid-size companies, annual savings typically range from $5,000 to $50,000. These savings primarily come from reduced labor costs, less material waste, and fewer expensive reprints.

By automating repetitive tasks, businesses can allocate their workforce to more critical roles, such as customer engagement or solving complex problems. Automated preflight systems also help by catching errors – like font or color issues – before production begins, minimizing the waste of paper, ink, and finishing materials.

Automation also enhances resource management. Real-time tracking tools monitor equipment usage, inventory levels, and maintenance schedules. For instance, maintenance can be planned during slower periods to avoid costly downtime. Additionally, automated systems ensure presses stay active by reducing the manual preparation time between jobs, keeping production running smoothly.

Scalability and New Opportunities

Automation doesn’t just save money – it also sets the stage for growth. By allowing existing teams to handle more jobs at once, businesses can scale up during busy seasons or when taking on larger contracts.

A great example of this is variable data printing, which allows for personalized campaigns with thousands of unique pieces. Automation makes it easy to merge and route data, turning what used to be a time-intensive process into a profitable service.

Automation also enables print shops to expand their offerings. For instance, a shop that once focused on basic products like business cards can now confidently bid on more complex projects, such as multi-component marketing campaigns. Many shops report productivity boosts of 20–40% after implementing automation, which supports revenue growth without a proportional increase in overhead. This efficiency often allows businesses to offer competitive pricing while maintaining strong profit margins.

Take Miro Printing & Graphics Inc. in Hackensack, NJ, as an example. By using automation, they efficiently manage a wide range of services – from digital and offset printing to large-format and custom projects – while maintaining high quality. Their automated systems also provide detailed performance data, helping managers make smart decisions about staffing, equipment investments, and market opportunities. This kind of insight enables businesses to adapt quickly to changing demands and plan strategically for growth.

sbb-itb-ce53437

How to Implement Print Workflow Automation

Streamlining print workflows begins with a structured approach that builds on your current operations. The most effective implementations typically follow three key phases to maximize efficiency and return on investment.

Review and Map Current Workflows

Start by documenting every step of your process, from when a customer places an order to the delivery of the final product. Bring together staff from all relevant areas – job intake, prepress, production, and finishing – to examine each workflow step in detail.

Use visual process mapping to uncover hidden bottlenecks. Look for common delays like manual data entry or approval hold-ups, as these are often the points where automation can make the most difference.

Pay close attention to areas where tasks frequently stall. For example, manual preflight checks or delayed customer approvals due to the lack of automated notifications can slow things down. Record how long each step takes and identify redundancies, such as entering the same data multiple times across different systems.

Include input from everyone involved in the workflow. Front-office staff can highlight communication challenges with customers, while production teams can point to issues like equipment scheduling conflicts or quality control slowdowns. Taking this comprehensive approach ensures no stage is overlooked, helping you pinpoint areas where automation will have the greatest impact.

Select the Right Automation Tools

Once you’ve mapped your workflows, the next step is choosing tools that integrate smoothly with your existing systems. Compatibility should be a top priority – your new tools must work seamlessly with your CRM, ERP, and inventory management systems. Avoid solutions that require manual data transfers, as they can undermine the efficiency gains you’re aiming for.

Opt for tools that can grow with your business and support the file formats your industry relies on, such as PDF/X standards. If your work involves regulated industries like healthcare, ensure the software complies with data privacy laws like HIPAA. This not only keeps you compliant but also strengthens customer trust.

Staff training is critical for successful adoption. Choose tools with user-friendly interfaces and strong vendor support, including training materials and responsive help desks. Many vendors offer tailored training sessions and guides for different roles within your organization.

Begin with pilot projects to test the tools in real-world scenarios. This lets you demonstrate the value of automation to your team while identifying any integration or training issues before a full-scale rollout.

Track Performance and Results

Once automation tools are in place, tracking their performance is key to ongoing improvement. Monitor metrics like job completion times, error rates, cost per job, waste, and equipment utilization to measure the impact.

Set up regular review schedules – weekly for operational metrics and monthly for broader trends. Modern automation tools often include dashboards and reporting features, making it easy to access and analyze this data. Use these insights to identify new bottlenecks or areas for further optimization.

Customer satisfaction is another critical metric. Faster turnaround times and fewer errors should lead to happier customers, and tracking this feedback helps you see which automation features have the greatest effect.

Take Miro Printing & Graphics Inc., for example. After automating workflows across their digital, offset, and large-format printing operations, they used detailed performance metrics to make smarter staffing and equipment decisions. Automated job submission and real-time monitoring systems provided actionable data, allowing them to improve turnaround times, optimize resource allocation, and ultimately achieve higher customer satisfaction while reducing costs.

Perform annual audits or reassess after major changes in volume to ensure your system remains effective. Technology evolves quickly, and what worked well last year might need fine-tuning to handle new demands or opportunities.

The Future of Print Workflow Automation

Automation tools are revolutionizing printing operations, making them faster, more efficient, and capable of handling increasingly complex tasks. As technology continues to advance, print shops are discovering new ways to streamline workflows and maintain a competitive edge.

Why Automation Matters

Print workflow automation brings several key advantages: faster production, cost savings, and improved quality control. Features like automatic job submission, real-time tracking, and error prevention allow print shops to handle larger workloads with fewer mistakes, ultimately boosting customer satisfaction.

Businesses that adopt these tools often see major efficiency gains. For instance, real-time tracking helps optimize how jobs are assigned to equipment and staff, ensuring resources are used effectively. A great example is Miro Printing & Graphics Inc. in Hackensack, NJ. By embracing automation, they can manage a variety of projects quickly and deliver high-quality results. As automation evolves, emerging technologies are setting the stage for even more transformative changes.

AI and Machine Learning
Artificial intelligence (AI) and machine learning are reshaping print workflows. These technologies automate tasks like document processing, job routing, and error detection. Tools such as HP Scan AI Enhanced use Optical Character Recognition (OCR) to extract data from scanned documents, simplifying data entry and managing complex workflows with real-time insights.

In 2024, HP launched AI-powered tools like HP Scan AI Enhanced and TotalAgility, integrated into the HP Workforce Experience Platform. These tools help organizations automate document handling, reduce manual workloads, and improve efficiency. With features like AI-driven recommendations, businesses can identify high-volume scanning areas, optimize workflows, and cut paper use.

Cloud-Based Management
Cloud solutions are becoming a cornerstone of modern print operations, especially for businesses adapting to hybrid or remote work setups. These systems offer centralized control, remote access, and easy integration with tools like CRM and ERP platforms. With cloud-based print management, businesses can oversee operations from anywhere and scale up effortlessly.

Predictive Maintenance
Predictive maintenance is another game-changer. By using AI and sensors to monitor equipment, these systems can predict potential failures and schedule maintenance before issues arise. This proactive approach reduces downtime, extends the life of machines, and lowers repair costs with automated alerts for technicians.

Eco-Friendly Solutions
Sustainability is becoming a priority in the print industry. Automation tools now help minimize waste, reduce energy usage, and lessen environmental impact. Features like digital proofing cut down on paper use, while AI analytics track material consumption and recommend ways to reduce waste. Some platforms even support eco-friendly ink and substrate options, providing detailed reports on environmental performance.

Looking ahead, the next decade is likely to bring even more advancements in AI, cloud-based platforms, and sustainability-focused features. Experts predict deeper integration with digital channels, more personalized print services, and smarter analytics for business optimization. As these tools become more accessible, even smaller print shops will be able to adopt them, staying competitive and meeting market demands.

FAQs

How do print workflow automation tools improve efficiency in variable data printing?

Print workflow automation tools make variable data printing faster and more efficient, which is essential for producing personalized marketing materials or tailored documents. These tools handle tasks like merging individual data – such as names or addresses – into pre-designed templates automatically. This not only saves time but also minimizes the risk of errors.

For companies like Miro Printing & Graphics Inc., these tools enable the production of high-quality, customized prints while staying on schedule, even with tight deadlines. Automation brings consistency, precision, and the ability to scale, making it a must-have for today’s printing demands.

What are the key steps to successfully implement print workflow automation tools?

To make the most out of print workflow automation tools, start by pinpointing your specific printing requirements and identifying any bottlenecks in your current process. This step ensures you choose tools that match your business objectives and address your unique challenges.

Bring your team into the loop early on. By involving them from the start, you can help them understand how these tools will streamline operations and minimize mistakes. Offering proper training and ongoing support during the transition will also make the adoption process much smoother.

Lastly, consider teaming up with a reliable print service provider, like Miro Printing & Graphics Inc. based in Hackensack, NJ. With their expertise in digital, offset, and large-format printing, as well as in-house bindery and design services, they can help ensure your automation tools are seamlessly integrated into your workflow for the best possible results.

How do AI and machine learning improve print workflow automation systems?

AI and machine learning are transforming print workflow automation by making processes faster, more efficient, and less prone to errors. These technologies excel at analyzing large datasets to fine-tune workflows, anticipate potential problems, and suggest practical solutions. The result? Operations run more smoothly, and projects are completed in less time.

Take repetitive tasks, for instance – AI can handle file preparation, fine-tune color adjustments, and optimize layouts automatically. Meanwhile, machine learning algorithms learn and adapt to the specific needs of a business over time. This combination doesn’t just boost accuracy and save costs; it also elevates the customer experience by delivering consistent, high-quality results.

Related Blog Posts

https://app.seobotai.com/banner/banner.js?id=68f97f8f9cea6427b3f568be

Offset vs. Digital: Fogra Color Accuracy

Explore the differences in color accuracy between offset and digital printing, focusing on Fogra standards and their impact on print quality.

Offset and digital printing both aim for precise color accuracy, guided by Fogra standards, which align with ISO certifications. Offset printing excels in large-scale projects, offering consistent results with profiles like Fogra39 for coated papers and Fogra52 for uncoated. However, it faces challenges with ink absorption on uncoated stock, leading to muted colors. Digital printing, certified under Fogra PSD, provides vibrant colors, especially on coated papers, and is ideal for short runs or personalized materials. While offset is cost-effective for high volumes, digital printing offers faster setup and flexibility for smaller jobs. Choosing the right method depends on your project’s size, timeline, and color needs.

Offset Printing and Fogra Color Accuracy

Fogra

How Offset Printing Works

Offset printing relies on an indirect transfer method that sets it apart from other printing techniques. The process starts with aluminum plates, where the images are etched directly onto the surface. These plates are then mounted onto the press, forming the basis for precise image reproduction.

Here’s how it works: ink is applied to the image areas of the plate, while the non-image areas attract water to stay ink-free. From there, the ink moves from the plate to a rubber blanket and finally to the paper. This indirect transfer process – where the ink doesn’t go straight from plate to paper – is what gives offset printing its name. It’s also the key to its ability to produce sharp, high-quality images.

Offset printing is ideal for large-volume projects because the fixed setup costs are spread out over the run. It also supports a broad range of colors, including the Pantone Matching System (PMS), which allows for the use of spot colors beyond the standard CMYK palette.

This reliable process is the foundation for meeting the stringent requirements of Fogra certification.

Fogra Certification for Offset Printing

Fogra certification for offset printing is built on the Process Standard Offset (PSO) framework, which aligns with the ISO 12647 standards. This system ensures consistent color quality across various print jobs and materials.

To achieve Fogra certification, print providers must undergo rigorous testing and documentation. This includes producing test prints, measuring color values against predefined benchmarks, and maintaining detailed process control records. Regular verification ensures ongoing consistency in color reproduction.

One widely used standard in commercial offset printing is Fogra39, which allows for ink coverage up to 330%. This higher ink limit produces richer, more saturated colors compared to many digital printing methods. For specific paper types, Fogra offers tailored profiles like FOGRA51 for coated papers and FOGRA52 for uncoated papers, which adjust color separations and ink limits to account for how different substrates absorb and reflect ink.

The cost of certification starts at $2,753 for members, a significant investment in quality assurance. However, this expense often pays off by reducing reprints, boosting client trust, and enabling printers to handle complex projects requiring precise color consistency.

Even with these standards in place, offset printing still faces challenges when working with certain materials.

Offset Printing Color Accuracy Challenges

Offset printing is not without its hurdles, especially when it comes to achieving consistent color accuracy across different paper types. One of the biggest challenges is ink absorption on uncoated paper stocks. Uncoated papers soak up more ink than coated ones, which can cause colors to appear lighter and less vibrant than intended.

For instance, black ink on uncoated paper often looks gray rather than deep black. While profiles like PSO uncoated v3 FOGRA52 are designed to optimize color separations for these substrates, they can only do so much to counteract the physical limitations of the paper.

Environmental factors like temperature and humidity also play a role. These variables can affect ink flow, paper stability, and overall color consistency. To address this, print shops must maintain strict environmental controls alongside their Fogra compliance measures.

Using specific ICC profiles for coated and uncoated papers helps ensure consistent results. Additionally, regular press calibration and frequent checks against Fogra reference values are essential for maintaining accuracy over time.

Digital Printing and Fogra Color Accuracy

How Digital Printing Works

Digital printing skips the need for traditional plates by working directly from digital files. Instead of relying on plates, it uses toner or ink applied through toner-based or inkjet methods. This direct approach has a major perk: there’s almost no ink spread or diffusion in toner-based digital printing. That precision means colors are reproduced instantly, without the lengthy plate-making process that offset printing demands.

Modern digital systems use CMYK with extended color gamuts to meet strict Fogra standards. For example, the ProStream 1000 can reproduce an impressive 2,182 out of 2,334 PANTONE colors using just four on-press colors. Plus, the direct-to-print nature of digital printing minimizes setup times, making it perfect for short-run projects or jobs with tight deadlines. To ensure consistent high-quality results, digital printers must meet their own Fogra certification standards.

Fogra Certification for Digital Printing

Fogra has developed a specific framework for digital printing called ProcessStandard Digital (PSD), designed to suit the unique workflows of this technology. PSD aligns with ISO 15311-3 for digital printing and integrates with ISO 12647-2, ensuring uniformity across various printing methods. Digital printing can achieve one of three Fogra quality levels, ranging from fine art to production draft, each with defined ΔE_00 and resolution benchmarks.

The ProStream 1000 series became the first digital production printer in the world to earn Fogra certification using the FOGRA59/eciCMYKv2 exchange color space under PSD standards. Similarly, Canon’s varioPRINT iX-series achieved FOGRA51 certification, proving that digital systems can rival offset printing in color accuracy. These certifications empower print shops to seamlessly switch between offset and digital printing on the same paper stock while maintaining consistent quality.

Digital Printing Color Accuracy Benefits

Fogra certification highlights the strengths of digital printing, especially in color accuracy and vibrancy. Digital printing often produces brighter colors and richer blacks compared to offset printing, particularly on coated papers. This is largely due to the precision of droplet placement and the minimal ink diffusion in digital systems. For instance, the ProStream digital printer achieves exceptional PANTONE coverage, reproducing up to 93% of PANTONE colors (2,182 out of 2,334) with just four CMYK colors, all while maintaining a CIEDE2000 value below 2.0. This level of spot color accuracy eliminates the need for additional press colors.

Another advantage is the consistency digital printing offers across various substrates, thanks to its controlled toner application process. While uncoated papers can still pose challenges – such as colors looking slightly washed out or blacks appearing gray when using profiles like "PSO uncoated v3 FOGRA52" – these issues are typically less noticeable than with offset printing. Additionally, the FOGRA59 certification introduces a larger color gamut that encompasses traditional output standards. This expanded color space allows for process colors to be used in spot color reproduction, offering more flexibility in digital workflows.

Regular updates to ICC profiles help maintain process stability, avoid costly reprints, and ensure continued Fogra compliance.

Offset vs Digital: Fogra Color Accuracy Comparison

Color Reproduction Differences

When it comes to color reproduction, offset printing, especially with profiles like PSO uncoated v3 FOGRA52, tends to produce muted colors on uncoated paper. This happens because the ink gets absorbed into the paper, leading to grayer blacks and less vibrancy overall. Digital printing, on the other hand, delivers brighter, more vibrant colors. Since toner doesn’t absorb into the paper as ink does, the colors remain sharp and consistent, even on different paper types.

That said, digital printing has its limitations. Its color range is narrower compared to offset printing, which can reproduce the full Pantone color spectrum. These differences in color reproduction don’t just affect the final look – they also impact production costs and the flexibility of the printing process.

Factor Offset Printing Digital Printing
Color Vibrancy Muted, especially on uncoated paper Vibrant, particularly on coated paper
Consistency Excellent for large runs, with detailed setup Consistently high, even for small runs
Fogra Standards PSO certification PSD certification

Cost and Production Scale Comparison

The differences in color quality also tie into production costs and workflow decisions. Offset printing is more economical for large-volume jobs. While it requires longer setup times due to plate preparation, the cost per unit decreases significantly with higher quantities. In contrast, digital printing shines in short-run and on-demand scenarios, offering quick turnaround times but at a higher cost per unit. However, digital printing’s reliability can reduce the risk of costly reprints, which is especially valuable for smaller runs.

Factor Offset Printing Digital Printing
Cost per Unit Lower for large quantities Higher for smaller quantities
Setup Time Longer due to plate preparation Minimal setup; faster turnaround

Customization and Print Run Flexibility

Customization and flexibility are areas where digital printing truly stands out. Unlike offset printing, where plates are fixed once created, digital printing allows for easy personalization without additional setup costs. This makes it perfect for variable data printing, such as personalized marketing materials, short-run publications, or even proofs before committing to a larger offset run. For instance, Canon’s varioPRINT iX-series, which has earned FOGRA51 certification, shows that digital systems can meet the high-quality standards traditionally associated with offset printing.

Digital printing also allows seamless integration with offset processes. You can switch between the two methods on the same stock while maintaining consistent quality, provided both systems adhere to Fogra standards. However, digital printing requires ongoing process management. Regularly updating ICC profiles is crucial to address changes in media properties, ink batches, or environmental conditions like humidity and temperature.

In contrast, offset printing remains the go-to for high-volume jobs where consistency is key, but it lacks the flexibility for customization that digital printing offers. This makes digital printing an excellent choice for projects demanding personalization or quick turnaround times.

sbb-itb-ce53437

Choosing the Right Printing Method

Key Points Summary

Deciding between offset and digital printing comes down to your project’s specific needs, budget, and timeline. Offset printing is often the go-to for large-scale jobs where precise color accuracy is a must. With Fogra39 certification and support for the Pantone Matching System, offset printing ensures top-tier color consistency, making it ideal for brand-critical materials like packaging and corporate collateral. Plus, the larger the production scale, the more cost-effective offset printing becomes.

On the other hand, digital printing has made significant strides in quality. Modern digital presses, such as the Canon ProStream 1000 series – the first digital production printer to achieve FOGRA59/eciCMYKv2 certification – show how far digital technology has come in matching offset standards for Pantone reproduction and color accuracy. Digital printing shines in short-run projects and those requiring variable data, delivering quick turnarounds without compromising quality.

The choice of substrate also plays a big role. Offset printing on uncoated paper can result in muted colors due to ink absorption, while digital printing typically produces more vibrant results, especially on coated stock. Digital printing also offers the advantage of flexibility, allowing for personalized materials without the extra setup costs required in offset printing.

When time and budget are tight, digital printing’s streamlined process is a clear advantage. However, for large-scale, color-critical projects, offset printing’s established workflows and lower per-unit costs often make it the better option.

These factors underline the thoughtful approach taken by Miro Printing & Graphics Inc. in achieving Fogra compliance across all their printing methods.

How Miro Printing & Graphics Inc. Ensures Fogra Compliance

Miro Printing & Graphics Inc. employs advanced Fogra-certified techniques to guarantee high-quality results across both offset and digital platforms. Their process involves precise calibration of equipment to meet Fogra standards – using Fogra39 for offset printing and ProcessStandard Digital (PSD) profiles for digital projects.

By investing in both offset and digital capabilities, Miro Printing & Graphics Inc. can guide clients toward the best printing method for their specific needs. Their team’s technical expertise ensures that color-critical projects meet exact specifications, no matter the method chosen.

"With meticulous attention to detail, our print shop has a customized approach."

This commitment to precision extends to proofing and color management. Miro Printing & Graphics Inc. provides proofs aligned with the intended Fogra profile, giving clients a clear preview of how their colors will appear in the final product. Their team works closely with designers and print buyers, ensuring that digital assets are prepared with the correct ICC profiles – whether Fogra39, FOGRA51/52, or PSD standards.

To maintain Fogra compliance, the company conducts regular calibration and maintenance, addressing environmental factors that could affect output quality.

For businesses needing seamless transitions between printing methods, Miro Printing & Graphics Inc. offers the ability to shift projects between offset and digital presses while maintaining consistent color reproduction. This flexibility is a game-changer for clients requiring both high-volume materials and personalized variations, all while safeguarding their brand’s integrity.

EXPERT TALK: Offset vs. Digital with Versafire Digital Print Engines

FAQs

How does Fogra color accuracy compare between offset and digital printing?

Fogra color standards play a key role in ensuring consistent and accurate color reproduction in the printing world. When it comes to offset printing, this method stands out for its ability to deliver exceptional color consistency and precision, especially for large-scale projects. By using custom-mixed inks and plates that align closely with Fogra guidelines, offset printing is a go-to option for projects that demand exact brand colors or specific hues in high-volume production.

On the other hand, digital printing also adheres to Fogra standards but operates differently. It uses toner or inkjet technology, which can sometimes introduce slight color variations, particularly in larger batches. That said, digital printing shines when it comes to flexibility and speed, making it a fantastic option for smaller projects or those with tight deadlines where minor color shifts aren’t a major concern. Ultimately, both methods can produce high-quality results, and the best choice depends on the project’s size, timeline, and the level of color precision required.

How does the type of paper impact color vibrancy in offset and digital printing?

The type of paper you choose has a big impact on how colors appear in both offset and digital printing. For instance, glossy papers are known for boosting color brightness and sharpness, making them perfect for bold, vibrant images and intricate designs. On the flip side, matte papers deliver softer, more muted tones, which work well for a more polished or sophisticated look.

In offset printing, the way ink interacts with the paper – based on its coating and texture – can significantly alter the final color outcome. For digital printing, the surface of the paper affects how well the toner or ink sticks, which influences both the richness of the colors and the print’s durability. Picking the right paper ensures your prints not only look the way you want but also meet your practical needs.

Why is digital printing often preferred over offset printing for small print runs?

Digital printing has become the preferred option for smaller print runs, thanks to its fast turnaround, affordable setup, and the ability to produce smaller quantities without compromising on quality. Unlike offset printing, which involves time-consuming setup processes and plate creation, digital printing lets you jump into production almost instantly – perfect for meeting tight deadlines.

Another standout feature of digital printing is its ability to personalize. Whether it’s marketing materials or event invitations, customization is straightforward and hassle-free. For short-run projects, this mix of speed, cost-effectiveness, and flexibility makes digital printing a smart and reliable choice.

Related Blog Posts

https://app.seobotai.com/banner/banner.js?id=68f826611019c13c0b386d1d