Checklist for Using Pantone Charts in Design

Learn how to effectively use Pantone charts for accurate color matching in design and printing, ensuring brand consistency and quality.

Pantone charts simplify color matching in design and printing by providing a universal system with precise codes for each color. They ensure consistent results across materials and production methods, avoiding issues like color shifts caused by lighting, monitor settings, or paper types. Here’s what you need to know:

  • Why Use Pantone Charts?
    They offer reliable, physical color references, ensuring uniformity across print and digital applications, unlike RGB or CMYK, which can vary based on devices or processes.
  • Types of Guides:

    • Solid Coated/Uncoated: For glossy or matte papers.
    • Color Bridge: Matches Pantone colors with CMYK equivalents.
    • Specialty Guides: For textiles, metallics, and pastels.
  • Choosing the Right Guide:
    Match your guide to the material (e.g., coated for glossy finishes, uncoated for matte). Testing colors on actual substrates is critical to avoid surprises.
  • Maintaining Accuracy:
    Replace guides every 12–18 months to prevent fading or outdated colors. Store guides properly to extend their lifespan.
  • Collaborating with Print Shops:
    Work with professionals who understand Pantone standards to achieve precise results. Always provide exact Pantone codes and request printed proofs for verification.

Pantone charts are indispensable for maintaining consistent branding and avoiding costly errors in design projects.

Pantone Formula Guides – WHEN and HOW to use them – Huge Collection Unboxed

Pantone

How the Pantone Matching System (PMS) Works

The Pantone Matching System (PMS) is a spot color system that relies on pre-mixed ink formulas to create consistent, precise colors. Each shade is assigned a unique code, making it easy to match colors across different materials and processes. This eliminates the uncertainty and variation often found in other color systems.

PMS serves as a universal reference, ensuring consistent color reproduction worldwide. Each Pantone color also includes corresponding RGB, CMYK, and HEX values for digital and print applications, but the physical ink formula remains the ultimate standard.

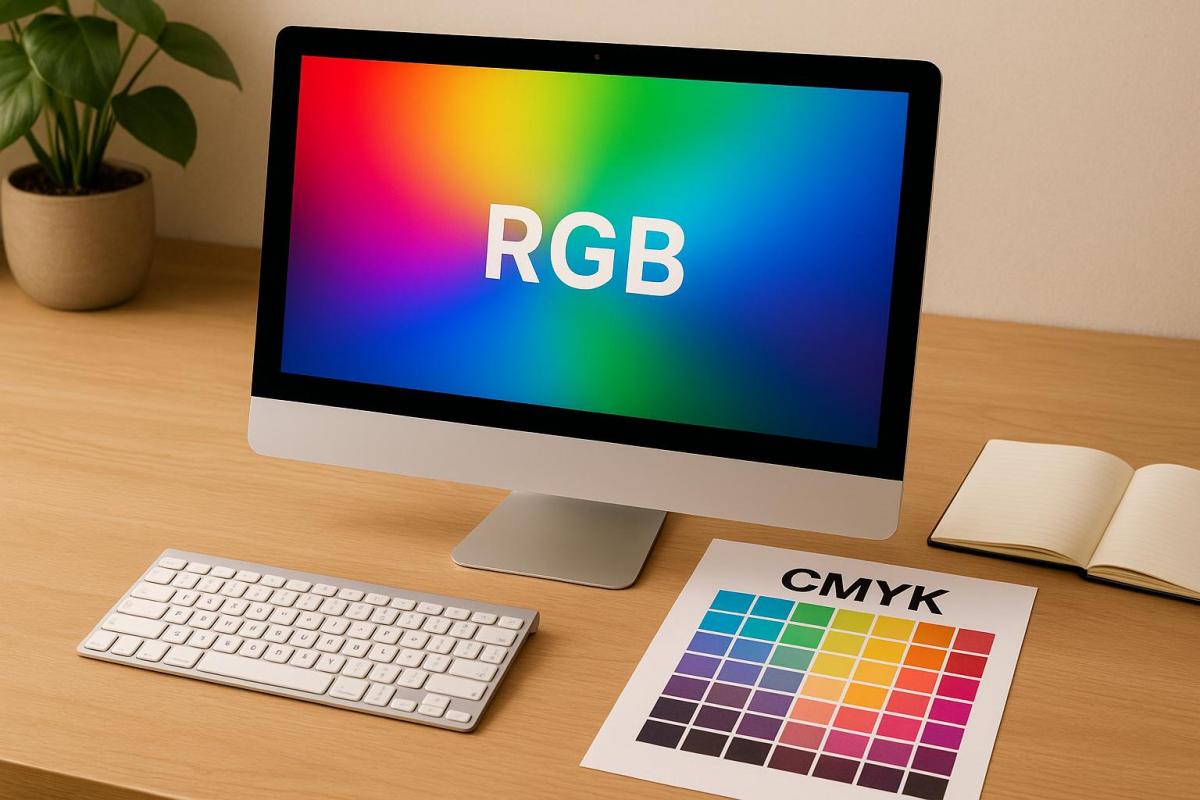
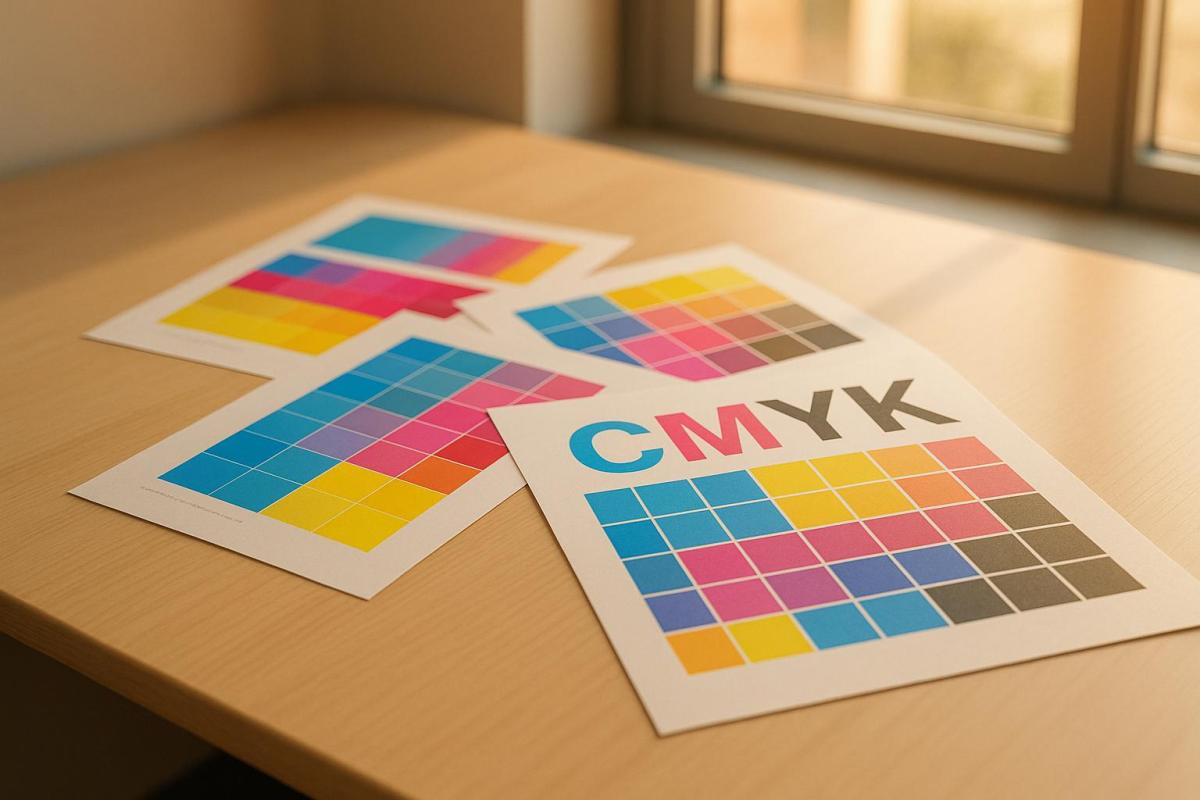
Unlike CMYK and RGB, PMS stands out for its reliability and specific use cases. CMYK uses a subtractive process by layering Cyan, Magenta, Yellow, and Black inks to approximate colors. However, this method often leads to inconsistencies due to factors like printer type, paper quality, or environmental conditions. RGB, on the other hand, is designed for digital screens, combining red, green, and blue light to create colors. While great for web design, RGB isn’t suitable for print since what you see on a screen may not match the final printed result.

Color Model Primary Use Color Consistency Key Limitation
PMS Spot color printing, branding High Limited to available Pantone colors
CMYK Full-color process printing Moderate Some colors not reproducible
RGB Digital screens, web design Low (in print) Unsuitable for print

For projects where color consistency is critical – like brand logos or packaging – PMS is the go-to choice. It ensures that a color remains visually consistent across a variety of substrates, whether it’s glossy packaging or matte business cards. While finishes like gloss or matte may slightly affect how the color looks, the integrity of the shade itself remains intact.

For example, a national retailer launching a new product line might specify Pantone 185 C for all packaging. By doing so, they ensure that the color looks the same across different printers and materials, avoiding the inconsistencies that can occur with CMYK or RGB.

Types of Pantone Guides

Pantone offers several types of guides, each tailored to specific printing needs. The Formula Guide is the core of the Pantone system and comes in two versions: Solid Coated and Solid Uncoated. The Coated guide shows how colors appear on glossy or coated paper, where they tend to look more vibrant. The Uncoated version, on the other hand, reveals how the same colors appear on matte or uncoated paper, where they often look more subdued.

Color Bridge guides are especially helpful for comparing Pantone spot colors with their closest CMYK equivalents. This is a valuable tool for designers working with tight budgets who may need to use CMYK printing while still aiming to maintain brand color accuracy.

For specialized needs, Pantone also offers specialty guides. For instance, the Pantone TCX guide is designed for textiles and fashion, accounting for how dyes interact with various fabrics. Other guides cater to metallics, pastels, and plastics, ensuring accurate color representation across unique materials.

Professional print shops, like Miro Printing & Graphics Inc., use these Pantone guides to deliver consistent results across a variety of printing methods, including digital, offset, and large-format printing. Whether the project involves packaging, signage, or promotional materials, these guides are essential for achieving high-quality, consistent outcomes.

Choosing the Right Pantone Chart for Your Project

Picking the right Pantone chart is crucial for achieving accurate print colors. It’s all about understanding how ink interacts with the material you’re printing on and selecting the guide that aligns with your specific needs. This process extends to matching guides with the appropriate paper types, ensuring the best results for your project.

Matching Pantone Guides to Paper Types

The type of paper, or substrate, you use can dramatically affect how colors appear, making the choice of Pantone guide a key decision.

  • Coated guides are made for glossy, shiny papers where ink sits on the surface instead of soaking in. This results in vibrant, eye-catching colors, making them ideal for packaging, posters, and bold marketing materials.
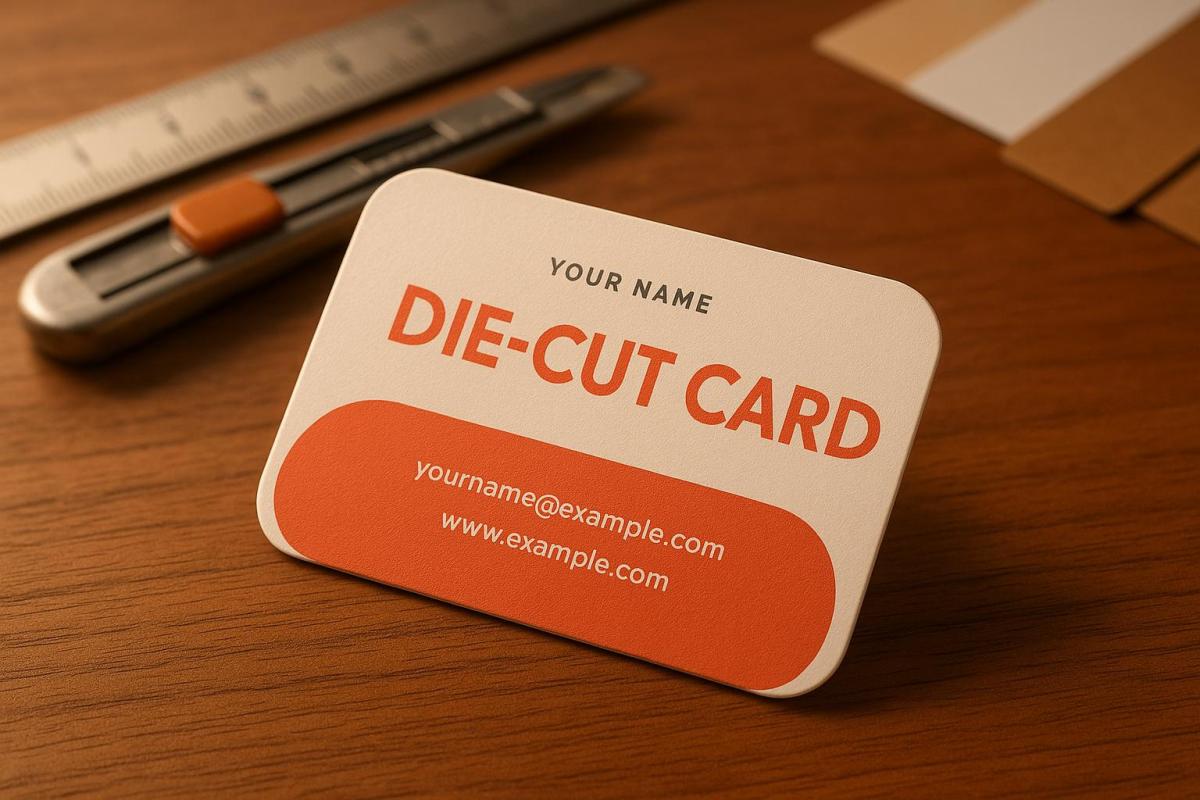
  • Uncoated guides, on the other hand, show how colors will look on matte or absorbent papers. Here, the ink sinks into the fibers, creating softer, more muted tones. These guides are perfect for stationery, letterhead, and business cards, where a subdued, professional look is often desired.

Using the wrong guide can lead to disappointing outcomes. For example, if you use a coated guide for uncoated paper, the colors will appear duller, potentially leading to brand inconsistencies and costly reprints.

For specialized needs, specialty guides are available. Pantone TCX guides are tailored for textiles and fashion, taking into account how dyes interact with fabrics rather than paper. Metallic and pastel guides are designed for projects that require special finishes or effects that standard guides can’t replicate.

Using Physical Guides for Accurate Color Selection

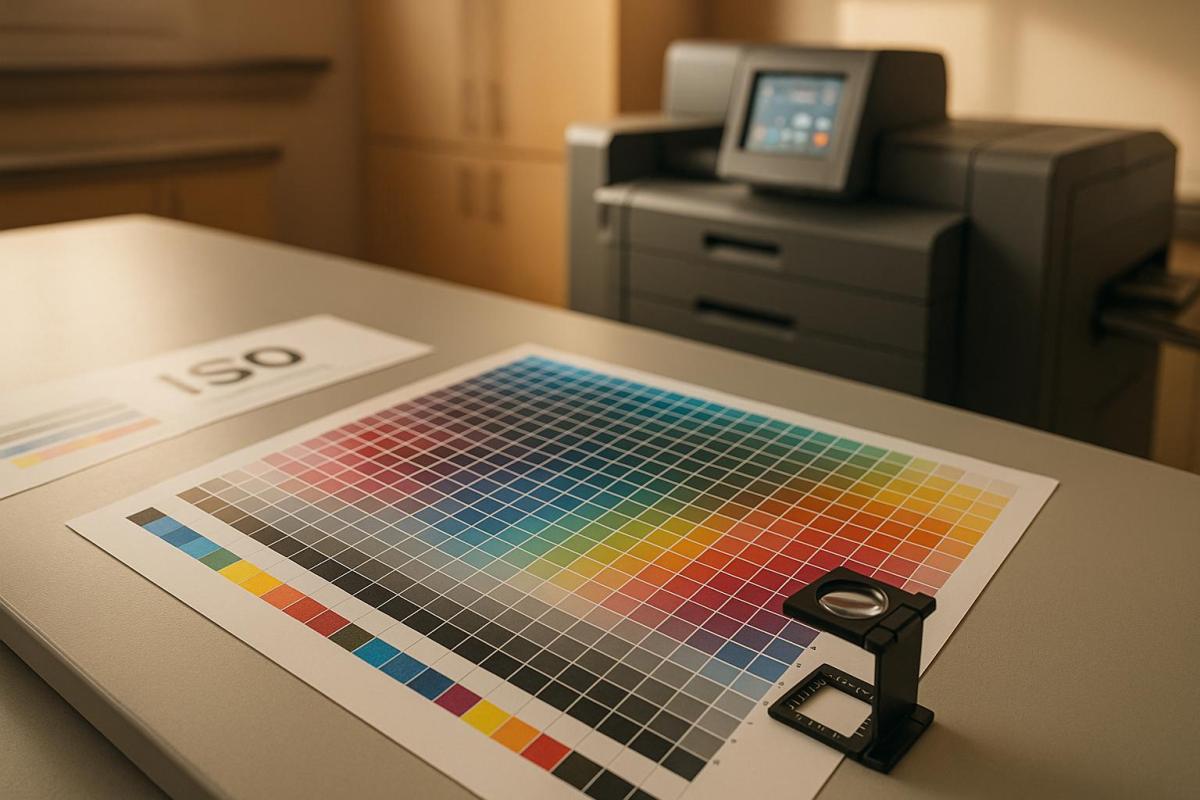
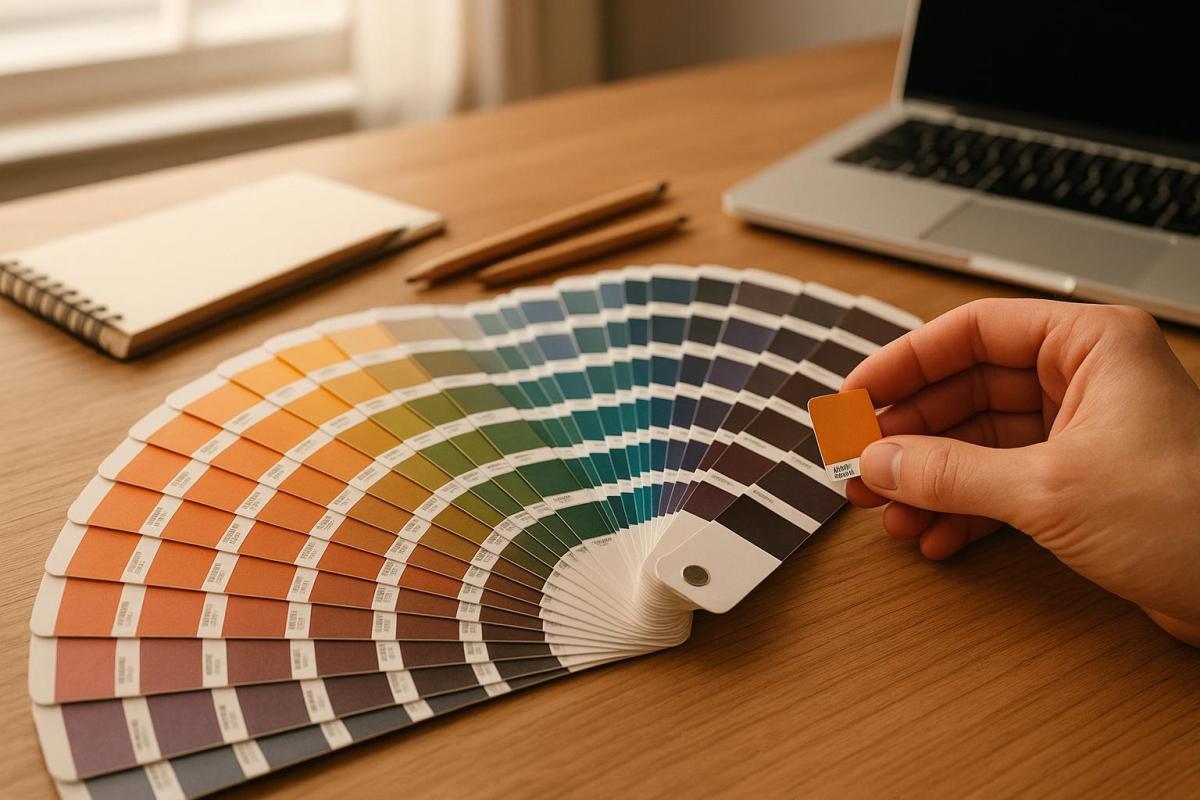
Choosing the right substrate is only part of the equation. To ensure precise color communication with print professionals, physical Pantone guides are essential. These guides provide the most reliable reference, as they show actual printed swatches of how colors will appear in print.

Digital screens can’t be trusted for color accuracy. Differences in calibration, brightness settings, and even the type of device can distort how colors appear. Physical guides eliminate this uncertainty by offering a consistent, tangible reference that everyone involved in the project can rely on.

When collaborating with print partners like Miro Printing & Graphics Inc., physical guides are invaluable. They allow you to clearly communicate your color preferences and ensure that both you and the printer are aligned. This shared understanding minimizes the risk of color mismatches and delays, helping your project stay on track.

Physical guides also let you compare colors under different lighting conditions, ensuring your brand’s colors remain consistent no matter where they’re viewed.

Pantone Guide Comparison Chart

Here’s a quick breakdown of the different Pantone guides to help you choose the right one for your project:

Pantone Guide Type Advantages Disadvantages Typical Use Cases
Solid Coated Bright, vibrant colors on glossy paper Not accurate for uncoated paper Packaging, posters, brochures
Solid Uncoated Accurate for matte or uncoated paper Colors appear less vibrant Stationery, letterhead, business cards
TCX/TPG (Textile) Designed for fabrics and textiles Not suitable for paper Fashion, textiles, soft goods
Metallics/Pastels Adds special effects and finishes Limited use, may need special inks Specialty packaging, invitations

The best guide for your project depends on the final application and the impression you want to create. For example, coated guides work well for high-impact marketing, while uncoated guides are better suited to professional correspondence.

Before committing to full production, consider requesting printed proofs or sample swatches of your chosen Pantone color on the intended substrate. This allows you to see how the colors will look under real-world conditions and make any necessary adjustments. Taking this step can save you time and money while ensuring your project turns out exactly as planned. Selecting the right guide is just the first step toward achieving perfect color accuracy.

sbb-itb-ce53437

Steps to Maintain Color Accuracy and Consistency

Once you’ve chosen the right Pantone guide, the next step is ensuring consistent color reproduction throughout your design and print process. This involves carefully managing variables like printing methods, substrates, lighting, and equipment. Paying attention to these details helps maintain brand consistency and ensures your colors look exactly as intended.

Working with Print Partners

Collaborating with skilled print professionals is key to achieving accurate Pantone color reproduction. Different printing methods – such as digital, offset, or large-format printing – can produce varying results, even when using the same Pantone specifications. A knowledgeable print partner can navigate these differences and guide you toward decisions that best suit your project.

When choosing a print partner, prioritize those who offer personalized service over cookie-cutter solutions. The best partners take the time to understand your specific needs and work closely with you to achieve the desired results.

"With meticulous attention to detail, our print shop has a customized approach that is unmatched by big online printing companies or franchises." – Miro Printing & Graphics Inc.

Clear communication is essential. Provide your print partner with the exact Pantone code and finish specifications to ensure everyone is on the same page. Including these codes, along with CMYK, RGB, and HEX values, in your brand guidelines creates a universal reference across all production environments.

A great example of this collaborative approach is Miro Printing & Graphics Inc. in Hackensack, NJ. Their expertise spans digital, offset, and large-format printing, allowing them to reproduce Pantone colors with precision, no matter the method.

Once you’ve established a trusted partnership, the next step is validating your choices through sample testing.

Testing Colors on Sample Materials

Never underestimate the importance of testing. Even with the most experienced print partner and a carefully chosen Pantone guide, colors can look different when printed on your specific materials. Testing your selected Pantone colors on actual substrates ensures their vibrancy and appearance meet your expectations before full production begins.

Ask your print partner for printed proofs or sample swatches to see how your colors perform under real-world conditions. This step allows you to spot any issues and make adjustments before committing to the entire print run.

Julia I., a customer of Miro Printing & Graphics Inc., shared her experience with this process. Before her complex booklet project went into full production, she received a video of her print sample for approval. This allowed her to confirm the colors and quality were exactly what she wanted.

"I even received a video of my print sample (a mini booklet) for approval before they proceeded with the rest. Best service I’ve ever received from a printer; couldn’t recommend Miro more highly." – Julia I., Customer of Miro Printing & Graphics Inc.

When reviewing samples, examine them under different lighting conditions to ensure consistency. Pay close attention to how the ink interacts with your chosen material. For example, colors on coated paper often appear more vibrant due to the glossy finish, while uncoated paper tends to absorb ink, resulting in a softer, muted look.

Document any adjustments you make and share them with your team. Keeping a record not only ensures consistency for future projects but also saves time and resources by avoiding repeated corrections down the line.

Keeping Your Pantone Charts Current

Maintaining up-to-date Pantone charts is essential for ensuring color consistency. Over time, Pantone guides can degrade, leading to color mismatches, costly reprints, and unhappy clients. Regularly updating your guides is the best way to avoid these issues.

Pantone guides are affected by exposure to light and air, which can cause colors to fade and swatches to yellow. Additionally, the Pantone system evolves, introducing new colors to reflect trends and advancements in technology. For instance, one design agency learned this the hard way when they used a three-year-old guide for branded materials. The result? Duller colors that clashed with the client’s brand palette. This misstep led to reprints, staff retraining, and a damaged client relationship. The lesson here is simple: keeping your Pantone guides current is non-negotiable.

When to Replace Pantone Guides

To maintain accuracy, it’s recommended to replace Pantone guides every 12–18 months. This timeline accounts for the natural wear and tear that occurs even under normal use. Exposure to light, air, and frequent handling can cause printed colors to shift over time.

If your guides are in constant use or exposed to intense lighting, consider replacing them closer to the 12-month mark. Proper storage can also extend their lifespan – store guides in a cool, dry place, away from direct sunlight or strong artificial lighting. Always handle them with clean hands to prevent oil or dirt transfer, and keep them closed when not in use.

Here are some signs it’s time to update your Pantone guides:

  • Colors appear noticeably different from memory.
  • Swatches show fading, especially around the edges.
  • White areas have yellowed.
  • Guides have physical damage like tears or stains.

If you find yourself second-guessing whether a color is accurate, it’s likely time for a replacement. Professional print shops, like Miro Printing & Graphics Inc. in Hackensack, NJ, prioritize using up-to-date Pantone guides alongside calibrated equipment, ensuring precise color matching.

Training Your Team on Pantone Best Practices

Keeping guides updated is just one part of the equation. Training your team on Pantone best practices ensures consistent results across all projects. Everyone involved in color decisions – designers, project managers, and client-facing staff – needs to understand the importance of Pantone standards and how to use them effectively.

Start with the basics. Teach your team why physical Pantone guides are more reliable than digital displays, which can vary due to screen calibration differences. A physical guide provides a universal reference point that everyone can trust.

Encourage consistent documentation of Pantone colors. Team members should always record the specific guide type (Coated, Uncoated, or Matte) and color number in design files. This information should also be clearly communicated to print partners. When the reasoning behind these practices is clear, adherence becomes second nature.

To avoid inconsistencies, create a system for tracking the age and condition of your guides. Assign someone to monitor replacement schedules and ensure every workstation has access to current materials. This eliminates the risk of one team member using an outdated guide while others rely on a newer version.

Document your color standards in your brand guidelines. Include Pantone codes alongside CMYK, RGB, and HEX values to ensure consistent communication across platforms. However, Pantone specifications should remain the primary standard.

Regular training sessions can reinforce these practices, especially when onboarding new team members or introducing updated guides. Use the arrival of new guides as an opportunity to review procedures and address any questions.

Investing in team training pays off with fewer errors, stronger client relationships, and more efficient workflows. When everyone on your team is aligned on Pantone best practices, you’ll spend less time fixing issues and more time delivering exceptional design work.

Key Points for Using Pantone Charts Effectively

When it comes to working with Pantone charts, success hinges on a thoughtful process that includes proper selection, thorough testing, and regular upkeep. The cornerstone of accurate color work is relying on physical Pantone guides for color selection. Why? Because digital screens often distort colors due to calibration differences, making physical guides a more reliable choice.

Start by choosing the right Pantone guide for your project. Whether it’s Solid Coated, Solid Uncoated, or TCX for textiles, selecting the appropriate guide ensures consistency and avoids costly production errors. Be sure to document the exact Pantone code and finish type in your design files and brand guidelines. This step eliminates guesswork and ensures everyone involved – designers, printers, and manufacturers – works from the same color standard. Keep in mind that the same color code can look vastly different on various materials, so always match your guide to the intended substrate.

Testing is another critical step. Always request printed samples on the actual materials you’ll be using before committing to a full production run. This allows you to see how the colors will appear in real-world conditions and gives you the chance to make adjustments before finalizing your design. Skipping this step can lead to unpleasant surprises later on.

Once your colors are finalized, maintaining your Pantone guides is essential. Replace them every 12 to 18 months to avoid relying on faded or outdated swatches. This ensures your references remain accurate and up to date, helping you stay aligned with current standards and trends.

For the best results, consider partnering with experienced print professionals, such as Miro Printing & Graphics Inc.. These experts specialize in translating Pantone specifications into high-quality prints. They understand the complexities of color reproduction across various printing methods and can help you navigate potential challenges before they escalate. By working with skilled print shops, you can ensure your Pantone colors are executed flawlessly, elevating the overall quality of your project.

FAQs

When should I replace my Pantone guides to maintain accurate colors?

Pantone guides are best replaced every 12 to 18 months to maintain accurate color representation. Factors like exposure to light and frequent handling can cause colors to fade or shift, which affects their reliability in design work.

If you spot noticeable fading, wear, or inconsistencies in color matching, it’s a clear sign that your guide might need replacing. Keeping your Pantone charts up-to-date is key to ensuring your design projects meet professional standards.

Why do my Pantone colors look different when printed on various materials, and how can I fix it?

Pantone colors can look different depending on the material they’re printed on. Things like surface texture, the type of material, and how the ink is absorbed all play a role in how the color turns out. That’s why working with experts who understand these variables is key to getting consistent and accurate results.

Miro Printing & Graphics Inc., based in Hackensack, NJ, excels at helping clients achieve precise color reproduction. They tailor their approach to your specific materials and project needs, ensuring the final product aligns with your vision – no matter what it’s printed on.

Why should I work with a professional print shop when using Pantone charts for my design projects?

Working with a professional print shop like Miro Printing & Graphics Inc. guarantees that your design projects maintain consistent and accurate colors. Their expertise ensures that your Pantone color choices are flawlessly translated into printed materials, avoiding the typical pitfalls that can arise during production.

With their meticulous attention to detail and personalized approach, they’ll guide you through every step of the process. Whether it’s aligning with your creative vision, meeting deadlines, or staying within budget, their commitment to precision helps deliver top-notch results for your design projects.

Related Blog Posts

https://app.seobotai.com/banner/banner.js?id=68f1ab731019c13c0b2c99e9

Checklist for Packaging and Delivery Quality

Effective packaging and delivery quality are vital for customer satisfaction and business success. Learn essential steps to enhance your processes.

Packaging and delivery quality are critical for customer satisfaction and business success. Poor packaging can lead to damaged goods, high return rates, and negative reviews, while excellent packaging builds trust and loyalty. Here’s what you need to know:

  • 60% of consumers value packaging quality, and 40% share unique packaging on social media.
  • Poor packaging causes up to 30% of e-commerce returns in the U.S.
  • A retailer reduced returns by 15% in six months by using a quality checklist.

Key Steps for Better Packaging and Delivery:

  1. Inspect Materials and Print Quality: Check for damage, ensure branding accuracy, and verify design clarity.
  2. Count and Verify Products: Match items to orders and confirm specifications.
  3. Test Packaging Durability: Conduct drop and pressure tests to ensure secure transit.
  4. Prepare for Shipping: Use clear labels, proper documentation, and stable pallet stacking.
  5. Collect Customer Feedback: Use surveys or follow-ups to identify and address issues.

Results to Expect:

  • 30% fewer complaints about packaging and delivery.
  • 20–25% more repeat customers due to improved trust.
  • Better efficiency and cost savings from early issue detection.

Packaging Quality Control Checklist

Packaging Quality Control Checklist

Taking a methodical approach to packaging quality control after verifying materials and prints helps avoid expensive errors and safeguards your brand’s reputation. This checklist ensures every package meets high standards before it reaches your customers.

Check Packaging Materials and Print Quality

Begin by examining all packaging materials as soon as they arrive. Look for any visible damage, moisture exposure, or defects that could compromise the final product. Store these materials in a controlled environment to prevent issues like warping or ink absorption.

When it comes to print quality, focus on a few key areas. First, ensure color accuracy by comparing printed materials against approved color specifications – Pantone color matching is especially important for maintaining brand consistency. Next, confirm that logos, text, and graphics align with the approved design. Lastly, check for image clarity and sharpness, particularly in detailed graphics or small text.

Using digital proofs and samples is a great way to catch errors early. For instance, digital proofs or sample videos can highlight mistakes before full production begins. In one case, a customer spotted an error on a proof, allowing for a correction and a free reprint.

Always conduct test prints and sample checks before moving into full production. Once print quality is verified, move on to confirming item counts and specifications.

Count Items and Verify Products

Accurate item counting is essential to avoid one of the most common customer complaints. Count the units in each carton and compare them to the packing list. Discrepancies in item counts can lead to added costs for handling, restocking, and resolving customer service issues.

Set up a verification system to ensure products meet order specifications. Verify that each item matches the customer’s request in terms of size, color, quantity, and any customization. This step is especially critical for custom printing projects, where even minor variations can affect customer satisfaction.

For complex or high-value orders with multiple items, consider using a two-person verification process to reduce the chance of errors. Document any discrepancies immediately and follow a clear procedure to resolve them before shipping. Mistakes in counts or specifications can harm your brand and lead to costly returns.

Test Seals and Package Durability

Once materials and counts are confirmed, assess the physical strength of the packaging. Seal integrity testing is a must to ensure packages stay secure during transit. Check all adhesive seals, tape applications, and closures to confirm they are properly applied and firmly attached. Pay extra attention to corner seals and other stress points.

Conduct drop tests to evaluate how packages perform during shipping. Drop them from about 3 feet onto a hard surface, then inspect for seal failures, damage to corners, or product movement inside the package.

Use pressure testing to identify weak spots in the packaging. Apply moderate pressure to various areas of sealed packages to make sure they can handle the weight of other packages stacked on top during storage and transit.

Consistent quality control practices have been shown to reduce print and packaging defects by up to 50%, resulting in significant cost savings and happier customers. Randomly sampling packages from each batch can also help maintain consistent quality throughout production.

Maintain a quality log to document all inspections, any issues found, and the corrective actions taken. This record not only supports ongoing improvements but also provides traceability in case of post-delivery concerns. Regular staff training on these procedures reinforces the importance of each quality control step.

Delivery Preparation and Shipping Checklist

Once you’ve confirmed the packaging quality, the next step is all about ensuring secure and compliant delivery preparation. This involves paying close attention to shipping documentation, pallet stability, and carrier requirements to help packages arrive on time and in perfect condition.

Check Shipping Labels and Documents

Accurate shipping labels are essential for smooth delivery. Make sure labels are clear, properly placed, and verified with a barcode scanner. Double-check that all accompanying documents align with the customer order.

Barcode verification is a key step to avoid costly mistakes. Use a standard retail scanner to confirm that barcodes are readable and correctly linked to the right product details. Labels should be printed with high contrast, free of smudges, and placed away from edges or seams to prevent damage during handling.

For international shipments, customs declarations must include accurate product descriptions and values. Missing or incorrect paperwork can lead to delays at customs, so this step can’t be overlooked.

To catch errors early, use a standardized inspection checklist. This should cover details like order numbers, quantities, shipping addresses, and any special handling instructions. Once everything checks out, move on to securing the shipment for transit.

Secure Pallets and Prepare for Transit

Proper pallet stacking is critical to protect products during shipping. Stack cartons evenly, avoiding overhangs that can lead to damage. Place heavier items at the bottom to stabilize the load, and distribute weight evenly across the pallet surface.

Secure the load with strapping or shrink wrap, and consider using corner protectors or edge boards for added stability. These extra measures also help prevent strapping from damaging the packages.

Before loading, inspect each pallet for structural integrity. Conduct drop or tilt tests to ensure the load remains stable during normal handling conditions. Finish with a visual check to confirm everything is securely in place.

Meet Carrier Requirements

Different carriers have different rules, so it’s important to review their specific guidelines. These include labeling formats, weight and size limits, and required documentation like shipping manifests. Compliance with these standards helps avoid rejected shipments, extra fees, or delays.

Use carrier-specific checklists to verify shipments meet their requirements. This is especially important for businesses shipping custom-printed materials, where precision is critical to ensure smooth transit.

Training staff on carrier requirements is equally important. Regular updates on the latest guidelines ensure shipments are consistently prepared to meet current standards. Keep detailed records of shipping discrepancies or feedback from carriers to identify areas for improvement.

At Miro Printing & Graphics Inc., we follow these practices to ensure our shipments meet carrier standards, helping us deliver on time and keep our customers happy.

sbb-itb-ce53437

Customer-Focused Quality Control

Once the packaging and shipping processes are set, the final steps zero in on ensuring customer satisfaction. By thoroughly inspecting each package before it leaves the facility, businesses can build trust, reduce complaints, and minimize returns. These steps are all about delivering a seamless experience for the customer.

Final Package Inspection

Before dispatching, give each package a careful visual check. Look for any signs of damage, confirm the product matches approved samples, and ensure the seals are intact. Even minor physical flaws can impact a customer’s perception.

According to industry data, 70% of print defects are detected during the final inspection and packaging stage. Pay close attention to labels and barcodes, making sure they’re clear and correctly placed. Color accuracy is another critical factor – compare each batch to approved proofs to ensure consistency. Additionally, check that the physical substrate is free from any defects caused by improper handling or storage.

If any issues are identified during this stage, document them thoroughly. Tracking these patterns over time can highlight areas for improvement and help refine processes.

Maintain Order Consistency

Consistency is key to earning and keeping customer trust. Use standardized checklists for every shipment, regardless of the order size. Whether it’s a small batch or a large project, every order should receive the same level of care. Reference approved samples to ensure uniformity in color, size, and branding across all products.

Standardized quality control practices have been shown to reduce customer complaints by 30% and increase repeat business by 20%. To keep things on track, conduct regular audits, such as reviewing random samples of completed orders weekly. This ensures that all procedures are being followed and that standards remain high.

Staff Training and Oversight

The backbone of consistent quality lies in well-trained staff and effective oversight. Assign quality control tasks to team members who are well-versed in inspection procedures. Training should cover everything from using inspection tools to understanding relevant regulations and spotting defects. Clear accountability is also essential – introduce supervisor sign-offs and digital documentation systems to create a reliable chain of responsibility.

At Miro Printing & Graphics Inc., maintaining high standards through quality control is a top priority. They’ve implemented mentorship programs where seasoned staff guide newer team members, reinforcing best practices and ensuring that packaging and delivery meet the highest expectations. This kind of hands-on training helps sustain a culture of excellence.

Customer Feedback Collection and Implementation

Gathering customer feedback after delivery is where meaningful insights emerge. This stage of the quality process uses customer observations to fine-tune packaging and delivery standards. Even the most thorough quality checks can miss details that only surface after a product reaches the customer. A well-designed feedback loop helps catch these issues early and strengthens the overall customer experience.

Collect Post-Delivery Feedback

Act quickly to gather feedback. Add QR codes to package slips or send short email surveys within 24–48 hours of delivery. Focus on key areas like packaging condition, delivery timing, and order accuracy.

Keep surveys concise – 5 to 7 targeted questions work best. For example, ask questions like, “Was the packaging intact upon arrival?” or “Did your order contain all the correct items?” This approach ensures higher response rates and actionable insights.

For high-value orders, consider phone or SMS follow-ups to capture details that surveys might miss. The goal is to make the process simple and hassle-free for customers.

One company saw a boost in response rates and a drop in damage claims by implementing a similar program.

At Miro Printing & Graphics Inc., customer feedback plays a key role in maintaining quality. They share proofs and, in some cases, video samples of print jobs with customers before completing full orders. This proactive approach allows for early adjustments, resulting in consistently high satisfaction levels.

Once feedback is collected, the next step is to analyze the data and take action.

Review Feedback and Make Changes

After gathering responses, dive into the data to uncover trends and root causes. Organize feedback into categories like damaged packaging, delayed deliveries, labeling errors, or incorrect items. This makes it easier to spot patterns and prioritize fixes.

For example, if multiple customers report unclear shipping labels in a short period, it likely points to a larger issue rather than isolated incidents. Regularly reviewing feedback ensures both immediate problems and long-term improvements are addressed.

A 2022 McKinsey report revealed that companies using structured feedback systems reduced customer complaints by up to 30% within a year (McKinsey, 2022).

Root cause analysis is critical. For instance, if customers frequently report damaged products, dig deeper. Are packages mishandled during shipping? Is the packaging material insufficient? Or are items not securely packed? Asking "why" repeatedly helps uncover the real problem. Documenting every change ensures accountability and tracks whether the improvements are effective. For example, if barcode scanning issues persist, upgrading to better label printers and adding verification steps can resolve the problem.

Improve Processes Over Time

Use a PDCA (Plan-Do-Check-Act) cycle to turn feedback into meaningful improvements. Start by planning changes based on recurring feedback, test these changes on a smaller scale, monitor the results, and then standardize what works.

Update standard operating procedures and quality checklists to reflect customer input. For instance, if customers report packages arriving wet, adding moisture resistance testing to your checklist can address the issue. Similarly, if certain practices receive consistent praise, document them to ensure they’re applied universally.

Customer-driven feedback can also shape employee training. Instead of generic quality programs, focus on real issues customers face – like inconsistent packaging quality. Implement measures such as supervisor sign-offs or peer reviews during packing to address these concerns.

According to a 2023 survey by Qualtrics, 77% of consumers are more likely to recommend companies that actively seek and act on their feedback (Qualtrics XM Institute, 2023).

Track metrics like packaging complaints per 1,000 orders, customer satisfaction scores, and return rates to measure the impact of feedback-driven changes. These key performance indicators (KPIs) help determine whether adjustments are effective or if further tweaks are needed.

The best companies close the loop by letting customers know how their feedback has been used. Sending follow-up emails or including notes in future shipments that highlight improvements based on customer suggestions builds trust and encourages continued feedback. It’s a simple yet powerful way to strengthen relationships and show customers they’re truly heard.

Key Takeaways

Using a structured checklist for packaging and delivery quality can transform how orders are handled, leading to higher customer satisfaction. Companies that adopt detailed quality control processes report a 30% drop in customer complaints related to packaging and delivery errors. By catching issues before they reach customers, this approach prevents frustration and negative reviews that could harm a business’s reputation.

But it’s not just about avoiding problems – there are measurable benefits too. Strong quality control processes can lead to a 20–25% boost in repeat business thanks to happier customers. When orders arrive on time, in perfect condition, and exactly as promised, customers are more likely to return and recommend the business to others.

Consistency is one of the biggest advantages of using a checklist. Every order is held to the same high standards, from inspecting materials at the start to ensuring flawless delivery. This eliminates inconsistencies that could disappoint customers and builds trust over time.

The checklist approach also improves operational efficiency by identifying potential problems early. For example, inspecting materials as they arrive or testing sample packages before full production can save time and resources. Clear guidelines at each stage mean staff need less training and are better prepared to handle busy periods without compromising quality. Empowering employees to pause production when they spot issues helps prevent small problems from becoming larger ones.

Key Benefits

Benefit Impact
Reduced Complaints Up to 30% fewer delivery-related issues
Increased Repeat Business 20–25% improvement in customer retention
Consistent Quality Every order meets the same high standards
Operational Efficiency Early issue detection saves time and resources

Keeping detailed records throughout the process also supports continuous improvement. Quality logs can reveal patterns and trends that might otherwise go unnoticed, allowing businesses to address root causes instead of just short-term fixes. This evidence-based approach ensures that improvements are meaningful and targeted.

Incorporating customer feedback into the checklist process creates a powerful feedback loop. When customers share specific concerns, businesses can update their checklists to address these issues, showing customers that their input matters.

For example, Miro Printing & Graphics Inc. saw real results by implementing detailed packaging and delivery checklists. Over six months, their customer satisfaction scores increased by 20%, and return rates dropped by 15%. This demonstrates how structured quality control can directly impact business performance.

In today’s competitive market, where customer expectations are sky-high, maintaining consistent quality is a key factor in standing out. These measures not only strengthen your brand’s reputation but also foster customer loyalty, setting the stage for long-term success.

FAQs

What steps can a business take to ensure packaging quality and improve customer satisfaction?

To deliver top-notch packaging and enhance customer satisfaction, businesses should adopt a detailed quality control checklist. This means checking packaging materials for strength, confirming labels are correct, and ensuring seals are tight to avoid damage during shipping.

Equally important is the presentation. Neat, visually appealing packaging can create a memorable impression on customers. By prioritizing these aspects, you can minimize returns and complaints, while building a reputation for reliability and quality.

What are common packaging and delivery mistakes that increase return rates, and how can they be avoided?

Mistakes in packaging and delivery can quickly lead to unhappy customers and an increase in returns. Here are some common problems businesses face – and how to fix them:

  • Weak packaging: Using packaging that’s too flimsy or inappropriate for the product can mean items arrive damaged. Opt for durable materials and include proper padding, especially for delicate goods.
  • Labeling errors: Mislabeling or unclear shipping labels can cause delays or even deliveries to the wrong address. Take the time to double-check all shipping details, from addresses to barcodes, before the package goes out.
  • Poorly sealed packages: Packages that aren’t securely sealed are at risk of opening in transit. Use strong, reliable tape and make sure every seam is properly closed.
  • Skipping quality control: Overlooking a final inspection can result in sending out defective products or incomplete orders. Create a simple checklist to verify the contents and condition of each package before it ships.

Fixing these issues can help you keep your customers happy, reduce complaints, and cut down on costly returns. If managing this process feels overwhelming, partnering with a reliable provider like Miro Printing & Graphics Inc. can simplify your packaging and shipping operations.

Why is customer feedback important for improving packaging and delivery quality?

Customer feedback is key to improving how products are packaged and delivered. When you know what matters most to your audience – whether it’s sturdy packaging, on-time delivery, or clear updates – you can tackle specific problems and go above and beyond their expectations.

Listening and acting on feedback allows you to spot recurring issues, cut down on complaints, and earn your customers’ trust. Taking these steps doesn’t just improve the experience for your buyers; it also helps create stronger, long-term loyalty to your brand.

Related Blog Posts

https://app.seobotai.com/banner/banner.js?id=68f18c3d1019c13c0b2c8a71

Fogra Certification: Steps for Print Professionals

Learn the essential steps to achieve Fogra certification and enhance quality and efficiency in your print operations.

Fogra certification is a trusted standard in the printing industry, proving a provider’s ability to deliver consistent, high-quality, and color-accurate results. Recognized globally, it ensures compliance with ISO standards like ISO 12647 (process control) and ISO/TS 15311 (digital printing). For print professionals, this certification builds credibility, improves workflows, and attracts clients who prioritize precision.

Key Steps to Achieve Fogra Certification:

Fogra

  • Technical Knowledge: Master color management, ISO standards, and PDF/X workflows.
  • Equipment Requirements: Use calibrated tools like spectrophotometers, Fogra-certified proofing systems, and ISO 3664-compliant lighting.
  • Training: Enroll in Fogra-approved programs to gain necessary skills.
  • Application Process: Prepare documentation, conduct internal reviews, and submit materials to Fogra.
  • Audit & Examination: Undergo an on-site audit and demonstrate compliance with Fogra’s standards.

Benefits:

Certified businesses experience improved efficiency, reduced waste, and better print quality. Certification is valid for two years, with a renewal process ensuring continued adherence to standards.

Whether you’re a small print shop or a large operation, Fogra certification signals a commitment to precision and quality in a competitive industry.

de FOGRA 39 a FOGRA 51. APRENDE, CONVIERTE y MIGRA a la nueva ISO 12647 de IMPRESIÓN

Requirements for Fogra Certification

To achieve Fogra certification, print professionals must meet specific technical and equipment-related criteria. Below, we break down the essential requirements.

Required Technical Knowledge and Skills

A strong understanding of color management is a must for anyone pursuing Fogra certification. This includes expertise in color spaces, profiling techniques, and calibration processes that ensure consistent and accurate color reproduction across various devices and materials. These skills are vital to meet Fogra’s high standards for color consistency.

Familiarity with ISO standards is another key requirement. For those in offset printing, ISO 12647 is the standard to master, while digital printing professionals need to be well-versed in ISO/TS 15311. These standards serve as the foundation for Fogra’s certification guidelines, covering everything from quality control to process management.

Another critical area is print data preparation. Professionals must be skilled in creating and reviewing PDF/X-compliant files, often using preflighting tools. The Altona Test Suite, widely used for PDF validation, is a common part of Fogra certification assessments, making familiarity with this tool highly beneficial.

For some certification programs, like the Fogra PSD Digital Print Professional, candidates are required to have prior technical experience and a background in color management before enrolling. This ensures participants can fully engage with the training and meet certification standards.

Equipment and Process Requirements

Beyond technical skills, achieving Fogra certification requires the right equipment and standardized workflows.

A Fogra-certified proofing system is mandatory. This system must consistently deliver accurate color reproduction and undergo regular calibration to maintain performance.

Professionals also need calibrated spectrophotometers for precise color measurements throughout the production process.

On the software side, tools for color transformation and PDF/X preflighting are crucial to support standardized workflows. Additionally, digital printing operations must use a licensed Fogra MediaWedge CMYK to evaluate color accuracy and maintain production consistency.

Workspaces must include ISO 3664-compliant norm light booths. These controlled lighting environments ensure accurate color evaluations, regardless of ambient lighting conditions, by adhering to standardized light conditions.

Standardized PDF/X workflows and detailed process documentation are also essential. This includes creating internal quality control checklists in line with Fogra standards and conducting regular audits to maintain compliance.

For digital printing certification, the entire workflow – from file preparation to final output – must be fully auditable and repeatable. Clear documentation of color management practices, process stability checks, and quality control measures is crucial for meeting Fogra’s rigorous audit requirements.

Take, for example, a print shop like Miro Printing & Graphics Inc., which offers digital, offset, and large-format printing services. To achieve Fogra certification, they would need to implement all these equipment and process standards across their operations. While this requires an investment in tools and documentation, it ultimately enhances efficiency and customer satisfaction.

How to Apply for Fogra Certification

Once your facility meets the necessary technical and equipment requirements, the next step is to navigate the application process. This involves targeted training and compiling thorough documentation to demonstrate your readiness.

Finding and Enrolling in Fogra-Approved Training

Fogra Academy and Web Academy are the go-to platforms for certification training. These programs cover essential areas like color management, print quality control, workflow standardization, and adherence to ISO standards such as ISO 12647 and ISO 15311. For digital print professionals, Fogra offers fully online certification programs that are self-paced – perfect for busy print shops looking to minimize downtime. However, a solid understanding of color management basics is highly recommended before starting these courses.

In addition to Fogra’s own platforms, regional partners and authorized trainers also provide approved courses. For instance, APTEC offers both onsite and virtual sessions tailored to the PSD Digital Print Professional certification. To find the right training, visit Fogra’s official website. You can explore courses by skill level, preferred learning format, and the specific certification you’re aiming to achieve.

After completing your training, the next step is to gather the necessary documentation and submit your application.

Completing the Application Process

Before you formally apply, conduct an internal review of your processes and equipment to ensure they align with Fogra standards. This includes compiling detailed documentation, such as process descriptions, quality control checklists, and records of staff training, to support your application.

Additionally, verify that your equipment is properly calibrated and that your software meets Fogra’s requirements. Some certifications may also require you to demonstrate compliance with ISO 3664 lighting conditions and PDF/X-ready preflighting capabilities.

Once all documentation is prepared, submit your training certificates and supporting materials directly to Fogra or through an authorized partner. Be sure to check Fogra’s website for up-to-date submission guidelines, as fees and procedures can vary depending on the certification type and your location.

Morgan Manning of Heidelberg USA, Inc. maintained Fogra Digital Print Professional certification in 2016. Manning utilized the certification’s principles to educate clients and enhance both digital and offset workflows. According to Manning, Fogra’s guidance was invaluable in addressing technical challenges.

For instance, a print shop like Miro Printing & Graphics Inc. in Hackensack, NJ, could enroll key staff in Fogra-approved training programs and upgrade their equipment to meet Fogra standards before applying. Achieving certification not only reinforces their reputation for quality but also attracts clients who prioritize certified color accuracy and process control.

The timeline for certification varies depending on your facility’s preparation and the type of certification you’re pursuing. Key steps include completing training, preparing and submitting documentation, undergoing an on-site audit, and, upon successful review, receiving your certification.

sbb-itb-ce53437

Certification Audit and Examination

Once your application is submitted, Fogra arranges an on-site audit to ensure your print operation meets their stringent standards.

On-Site Audit Process

During the on-site audit, Fogra representatives visit your facility to evaluate your production processes in real-time. This hands-on review allows them to see how your workflow performs under actual working conditions. Key areas of focus include output control, color accuracy, and workflow consistency. Auditors will assess your handling of PDF/X data, verify ISO 3664-compliant lighting, and check that your measurement devices and color management software are functioning correctly. They also ensure compliance with standards such as ISO 12647 and ISO 15311.

Be prepared to provide documented process guidelines, quality control checklists, and audit records for their review.

The audit typically lasts several hours to a full day, depending on the size of your facility and the scope of the certification. During this time, auditors may observe multiple print runs, request test prints using standardized targets like the Fogra MediaWedge, and interview key staff members to gauge their knowledge of color management and workflow practices.

If any non-conformances are found, you’ll receive a detailed report highlighting the issues and suggesting corrective actions. Common problems include inconsistent color reproduction caused by improper calibration or outdated profiles. Once you’ve addressed these issues, you’ll need to provide evidence of the corrections. This audit lays the groundwork for the formal examination, ensuring your operations align with Fogra’s standards.

Examination Standards and Criteria

After clearing the audit, the examination phase evaluates both your facility’s performance and individual expertise. Building on the audit findings, this step confirms your ability to consistently meet Fogra’s rigorous performance benchmarks.

The examination focuses on measurable performance metrics to guarantee high-quality, reliable output. Key areas include color accuracy, print resolution, and the stability of results across multiple production runs. Color fidelity is particularly critical – auditors use standardized test forms and reference targets to compare your printed samples against defined colorimetric values, checking for deviations and ensuring your equipment maintains precise color tolerances.

For professional certification, individuals must pass a written exam that tests both technical knowledge and practical skills. For example, the Digital Print Professional exam requires a minimum score of 50 out of 100 to pass and can be taken online or on-site, depending on the certification type. Topics include output process control, color accuracy assessments, workflow standards, norm lighting conditions, and handling PDF/X data.

Evaluation Area Key Criteria Assessment Method
Color Fidelity Accuracy to reference values and consistency Fogra MediaWedge measurements and colorimetric analysis
Print Resolution Sharpness, detail reproduction, and dot gain control Visual inspection and densitometric readings
Workflow Compliance Adherence to ISO standards and documented processes Process observation and review of documentation

The examination also evaluates your facility’s ability to maintain these standards over time. Auditors will look for evidence of regular internal quality checks, adherence to equipment maintenance schedules, and staff training records – all of which demonstrate a commitment to ongoing quality.

For print shops like Miro Printing & Graphics Inc., earning Fogra certification is a testament to their expertise in color management and workflow excellence. This certification not only enhances credibility but also provides a competitive edge when vying for projects that require certified print partners. It’s a clear signal of dedication to international quality standards, which can help attract clients and secure high-value contracts.

Keeping Your Fogra Certification Current

Achieving Fogra certification is a significant milestone, but maintaining it requires ongoing effort to ensure your operations consistently meet international benchmarks.

Certification Duration and Renewal Process

Fogra certifications, including PSD Digital, are valid for two years, encouraging professionals to stay aligned with evolving standards.

The renewal process starts well before your certification expires. To keep your certified status, you’ll need to submit a renewal application and pay the associated administration fee. For instance, renewing the PSD Digital Print Professional certification costs approximately $450 (HK$3,500/CNY3,500), while the Fogra PSO Professional certification requires around $900 (HK$7,000) for each four-year term.

It’s important to prepare your renewal application in advance. This includes identifying and addressing any compliance gaps, gathering necessary documentation, and scheduling audits. During the renewal process, Fogra representatives conduct re-certification audits to verify that your facility continues to meet the required standards. These audits focus on ongoing compliance rather than starting the certification process anew. Once renewed, maintaining compliance becomes an ongoing priority.

Maintaining Compliance Standards

Renewing your certification is just the beginning. To retain it, your print operation must adhere to Fogra standards consistently throughout the certification period – not just during audits.

Regular internal audits are essential. Use Fogra’s evaluation criteria to assess your operation, including checks for color accuracy with tools like the Fogra MediaWedge CMYK. Verify that your equipment remains calibrated and workflows are documented thoroughly. Scheduling these reviews at regular intervals ensures you stay on track with compliance.

Staff training is another critical element. Enroll key team members in courses offered by Fogra Academy or Web Academy to keep them informed about the latest standards and best practices.

Keep your equipment and software up to date. This includes maintaining valid licenses for tools like the Fogra MediaWedge CMYK, calibrating hand-held measurement devices regularly, and updating color transformation software as needed. Additionally, ensure your lighting conditions meet ISO 3664 standards throughout the certification period.

Documentation plays a pivotal role in demonstrating compliance. Maintain detailed records of internal audits, staff training sessions, equipment calibrations, and any corrective actions taken. Consistently applying Fogra-aligned quality control checklists will help you stay organized and prepared for audits.

Letting your certification lapse can have serious consequences. Losing certification can erode customer confidence and diminish your competitive edge. If your certification expires or standards are not maintained, you may need to restart the entire certification process – a time-consuming and resource-intensive undertaking. Certified print shops signal a strong commitment to quality, which can help secure contracts that require accredited partners.

Finally, stay informed by monitoring updates from Fogra and its partners. These updates often include changes to standards or certification requirements. Implementing any revisions promptly will help ensure continuous compliance and minimize potential gaps.

Conclusion

Achieving Fogra certification is more than just a formal process; it’s a strategic step that can elevate a print business. From internal assessments to training, documentation, audits, and the final application, following a clear path ensures success.

The costs involved, such as around $2,050 for training and $450 for administrative fees, are investments that can lead to noticeable improvements in quality and efficiency. Print professionals should also account for potential equipment updates, including hand-held measurement tools, color transformation software, and lighting that complies with ISO 3664 standards.

As highlighted earlier, Fogra certification brings tangible benefits: better print quality, streamlined operations, and cost reductions. It also strengthens a business’s competitive edge by showcasing its commitment to high standards and expertise in print processes. This certification not only reassures customers of service reliability but also fosters a culture of excellence that benefits both teams and clients alike.

Take Miro Printing & Graphics Inc. in Hackensack, NJ, as an example. This full-service print shop has used Fogra certification to reinforce its dedication to quality, ensuring consistent performance across various printing disciplines.

With a validity of two years, the certification encourages businesses to stay aligned with evolving industry standards and fosters continuous improvement. While the process may be demanding, the rewards – enhanced quality, operational efficiency, and customer satisfaction – are well worth the effort.

Ultimately, maintaining Fogra certification requires a steadfast commitment to excellence. Those who embrace this challenge gain not only the recognition of a respected institution but also the ability to guide their customers effectively across both digital and offset workflows.

FAQs

What are the key benefits of Fogra certification for small print shops?

Fogra certification provides a range of benefits for small print shops aiming to boost their credibility and improve how they operate. Earning this certification signals a dedication to top-tier printing standards and confirms that your processes align with globally recognized benchmarks. This not only strengthens client confidence but also distinguishes your business in a crowded market.

On top of that, Fogra certification can streamline your workflows by ensuring your equipment and procedures are fine-tuned for consistent, high-quality results. It can also open up new opportunities, as many clients and industries prefer working with certified providers who can deliver dependable and professional services.

What steps should print professionals take to prepare for the Fogra certification audit and exam?

To prepare for the Fogra certification audit and exam, it’s crucial to start by familiarizing yourself with Fogra’s detailed requirements and standards. Make sure your equipment is calibrated correctly and that your processes are running consistently before you even submit your application.

Take the time to fully understand the certification criteria and collect any required documentation or evidence of compliance. Running internal audits or trial tests can be a smart way to pinpoint and fix any potential problems ahead of time. A thorough preparation approach not only boosts your confidence but also improves your chances of a successful audit and exam outcome.

How can print professionals maintain their Fogra certification and stay compliant during the two-year certification period?

To keep your Fogra certification intact over the two-year period, there are a few important steps you should follow. Start by ensuring your printing processes consistently align with Fogra standards. This means scheduling regular quality checks and staying informed about any changes to the certification requirements. Calibrating your equipment regularly and following strict color management protocols are also critical for ongoing compliance.

It’s also a good idea to maintain detailed records of your production processes, including any adjustments you make over time. These records can be incredibly useful during audits or reviews. If you ever feel uncertain about meeting compliance standards, reaching out to a professional service like Miro Printing & Graphics Inc. could be a smart move. They specialize in advanced printing techniques and quality control, offering the expertise needed to support your business.

Related Blog Posts

https://app.seobotai.com/banner/banner.js?id=68f037611019c13c0b247de7

RGB vs. CMYK: Color Conversion Tips

Learn the essential differences between RGB and CMYK color models, conversion tips, and best practices for print accuracy.

RGB and CMYK are two color models used for different purposes – RGB for digital screens and CMYK for printing. Converting between them is necessary when transitioning designs from digital to print, but it can lead to color shifts and dull tones if not done properly. Here’s what you need to know:

  • RGB: Uses red, green, and blue light to create colors. It’s ideal for screens and offers a broader color range (16.7 million colors).
  • CMYK: Uses cyan, magenta, yellow, and black inks for printing. It reflects how colors appear on paper and has a smaller color range.
  • Key Differences: RGB is brighter and more vibrant, while CMYK is softer and better suited for print consistency.

To avoid issues like muted colors or mismatched tones during conversion:

Quick Tip: Start your design in CMYK if it’s intended for print to minimize surprises later. Proper conversion ensures your designs look great on both screens and paper.

How to Convert RGB to CMYK in Photoshop WITHOUT Changing Colors (EASY!)

Why Accurate RGB to CMYK Conversion Matters

Getting the RGB to CMYK conversion right can be the difference between a polished print project and a disappointing mismatch. Errors in this process can derail the quality of your work entirely. Let’s dive into how improper conversions can affect print quality and why CMYK files are a must-have for professional printing.

How Poor Conversion Affects Print Quality

When RGB to CMYK conversion is handled poorly, the results are often glaring. The most common culprits? Color shifts and inconsistencies. For example, that vibrant electric blue in your logo might print as purple, or a bold red could turn into a dull maroon. These shifts can leave your design looking fragmented and unprofessional.

Another issue is muted tones. RGB’s color gamut is broader than CMYK’s, meaning some colors in the RGB spectrum simply can’t be replicated in print. Without careful conversion, these out-of-gamut colors are automatically mapped to the nearest CMYK equivalent, often dulling the vibrancy of your design. The result? A flat, lifeless look that fails to capture attention.

And let’s not forget the potential costs. Imagine printing 5,000 business cards only to find your brand colors are completely off. The entire batch becomes unusable, wasting both time and money.

Why Professional Printing Requires CMYK

To avoid these pitfalls, professional printers rely on CMYK for consistent and predictable results. Unlike RGB, which is optimized for digital screens, CMYK mirrors the physical behavior of ink on paper. Printing presses are specifically designed to use cyan, magenta, yellow, and black inks, making CMYK the natural choice for accurate color reproduction.

Consistency in print is one major advantage of CMYK. Every CMYK value directly corresponds to the exact amount of each ink applied, giving printers precise control over the final output. This level of accuracy ensures your materials look exactly as intended.

Predictable colors are another critical benefit. By working in CMYK from the start, you get a better sense of how your colors will look in print, helping you avoid surprises when the finished product arrives. This foresight allows for smarter design decisions early on, saving you headaches later.

Miro Printing & Graphics Inc. emphasizes the importance of using CMYK files to maintain quality and branding consistency. Whether it’s business cards, brochures, or marketing materials, properly converted files ensure your designs look cohesive and professional.

Another bonus? Streamlined workflows. When you provide files in CMYK, printers can process jobs faster and with fewer adjustments. This means quicker turnarounds and lower costs, helping keep your projects on schedule and within budget.

How to Convert RGB to CMYK

To convert RGB files to CMYK effectively, it’s best to use professional design software. These tools provide the precision and control needed to ensure accurate color reproduction for print.

Converting with Professional Software

Adobe Photoshop: Start by opening your RGB image in Photoshop. Check the color mode under Image > Mode and confirm it’s set to RGB. To convert, go to Edit > Convert to Profile. This method allows you to select a target CMYK profile and rendering intent. For vibrant photos, choose Perceptual. For graphics with specific brand colors, opt for Relative Colorimetric and enable Use Black Point Compensation. Avoid using Image > Mode > CMYK for conversion, as it lacks the customization offered by Convert to Profile. Once converted, save your file as a PSD, TIFF, or PDF with the profile embedded.

"Do NOT use the Image > Mode > CMYK command to convert your image, because that does not offer the degree of control that you have with Convert to Profile, and limits you instead to the target space and conversion controls set in the application’s Color Settings, which may not be appropriate for your purposes."

Adobe Illustrator: Open your document and select File > Document Color Mode to switch from RGB to CMYK for the entire file. Use View > Overprint Preview to check how colors will appear when printed. This step is particularly useful for identifying and adjusting any color shifts in your artwork.

Adobe InDesign: Navigate to Edit > Convert to Profile to change the document’s color space. For linked RGB images, use the Links panel to open and edit them in Photoshop for conversion. According to design expert Lukas Engqvist, InDesign’s conversion process provides consistent results and allows for last-minute adjustments to the CMYK profile.

Each tool has its strengths, and the table below highlights how they differ:

Conversion Methods Comparison Table

Method Color Accuracy Control Level File Quality Ideal Uses
Adobe Photoshop Excellent High Maintains original quality Photos and detailed images
Adobe Illustrator Excellent High Preserves vector precision Logos, graphics, and illustrations
Adobe InDesign Excellent Highest Consistent multi-element quality Brochures, magazines, and complex layouts

Using professional software ensures precise color conversion and optimal print results. For example, when working with Miro Printing & Graphics Inc., submitting files converted through these tools speeds up processing, reduces revisions, and ensures a smoother workflow.

To avoid costly reprints, soft proofing is essential. In Adobe applications, use View > Proof Colors to preview how your design will look in print. This step helps catch potential issues early, saving time and money.

sbb-itb-ce53437

Best Practices for Color Conversion

To maintain consistency when converting RGB to CMYK, it’s important to follow a reliable workflow. This involves using key color management tools like ICC color profiles and soft proofing. Here’s how these methods work together to help maintain color accuracy in your prints.

Soft Proofing and Color Profiles

ICC color profiles are essential for standardizing a device’s color range and temperature. Think of them as a guide that helps your color management system translate RGB to CMYK in a way that stays true to the original colors. These profiles ensure that RGB colors are mapped to CMYK as accurately as possible.

Soft proofing, on the other hand, is like a sneak peek at your printed output. It gives you the chance to spot any color discrepancies before committing to the final print.

Fixing Common RGB to CMYK Problems

When converting from RGB to CMYK, color issues can creep in, but there are ways to address them effectively. Let’s look at some common problems and how to fix them.

Fixing Color Shifts and Dull Colors

One of the biggest challenges is how vibrant colors can lose their punch during conversion. This happens because CMYK simply can’t replicate the bright blues, greens, and reds that shine on RGB screens. To tackle this, adjust saturation and brightness in your design software before converting.

Here’s a quick tip: bump up saturation by 10-15% for colors prone to dulling. This gives you a bit of a cushion to counteract the loss of vibrancy.

For specific colors, try these tweaks:

  • Bright blues: Add more cyan and reduce black.
  • Vivid greens: Increase yellow while keeping cyan high.
  • Rich reds: Boost magenta, add yellow, and lower black.

When it comes to skin tones, subtlety is key. If faces come out looking too pink or yellow, dial back the magenta slightly and fine-tune the yellow. Keep cyan levels low to maintain a natural look.

Grays can also be tricky. They often end up with unwanted color casts after conversion. To fix this, rely mostly on black ink with just a touch of cyan. Avoid using equal amounts of cyan, magenta, and yellow, which can muddy the results.

If these manual adjustments don’t quite get you there, it might be time to call in the experts.

Working with Professional Print Services

Sometimes, no matter how much tweaking you do, the colors just won’t cooperate. For high-stakes projects – like marketing materials or product packaging – professional print services can make all the difference.

Take Miro Printing & Graphics Inc., for example. They specialize in digital printing, offset printing, and large format printing, ensuring consistent colors across various methods. Their calibrated equipment and industry-standard color profiles can handle even the toughest conversions.

Here’s when you should consider professional help:

  • When exact color matching is critical (think brand colors).
  • For large print runs where consistency matters.
  • If you’re using specialty papers or finishes that affect color.
  • When gradients or complex blends shift unpredictably.

Another benefit? Professional print shops can provide proof prints before going into full production. These proofs let you see exactly how your colors will look on the final paper stock, under real-world conditions. If something’s off, you can request adjustments before committing to the entire run.

Clear communication is essential when working with print professionals. Share your original RGB files and highlight which colors are most important to preserve. Be specific about your expectations, and ask for samples of similar projects they’ve done to ensure you’re on the same page.

RGB to CMYK Conversion Summary

As we’ve covered earlier, knowing the differences between RGB and CMYK is essential for managing color shifts effectively. Converting from RGB to CMYK can be simple if you take the right steps.

Color shifts are unavoidable – those vibrant colors you see on a screen can’t always be perfectly matched with printing inks. Anticipating this early on can save you a lot of headaches later. The key lies in using precise conversion techniques.

Professional design software like Adobe Photoshop or Illustrator is your best bet for accurate results. Unlike free online tools, these programs give you control over color profiles and allow for manual tweaks when automatic conversions don’t quite hit the mark.

Soft proofing is another valuable tool. It lets you preview how your RGB colors will appear in CMYK while you’re still working, so you can make adjustments before finalizing your design.

Final Tips for Better Color Conversion

  • Start your projects in CMYK if you know they’ll be printed. This approach eliminates surprises and ensures your colors align with the final output.
  • Calibrate your monitor regularly – ideally once a month – to maintain accurate color representation.
  • For complex projects, consider using professional print services like Miro Printing & Graphics Inc.. They specialize in digital printing, offset printing, and large format printing, using calibrated equipment to handle tricky color conversions with precision.
  • Always keep your original RGB files. This ensures you have the flexibility to make adjustments or repurpose your design for digital use later.
  • Communicate openly with your print provider. Discuss specific color concerns, provide reference materials, and request proofs before committing to large print runs. Clear communication upfront can save you from costly mistakes down the line.

FAQs

What challenges can arise when converting RGB designs to CMYK for printing, and how can they be resolved?

When preparing RGB designs for printing, one of the biggest hurdles is color shifting. This happens because the vibrant hues of RGB often lose their intensity or look different when converted to CMYK, which has a more limited color range. The result? Your design might not look the way you expected once it’s printed.

To minimize this issue, start by working with a calibrated color profile tailored to the specific printing process you’ll be using. When it’s time to convert, rely on professional design software with tools like ‘Convert to Profile’ to maintain as much accuracy as possible. Better yet, consider designing directly in CMYK mode from the outset to avoid any surprises later. Keep in mind, though, that some RGB colors simply can’t be replicated in CMYK. The best approach is to adjust your color palette early and stick to shades that fall within the CMYK gamut for a smoother transition.

Why should I design in CMYK if my project will be printed, and what are the advantages?

When creating designs for print, starting in CMYK is essential to ensure accurate and consistent color reproduction. Unlike RGB, which is optimized for digital screens, CMYK is specifically designed for printing. It uses four ink colors – cyan, magenta, yellow, and black – to produce the final output. By designing directly in CMYK, you minimize the risk of unexpected color changes that often occur when converting from RGB.

This approach not only guarantees better color accuracy but also ensures your printed materials appear vibrant and polished. Plus, it helps maintain brand consistency and reduces the need for time-consuming adjustments later in the process. The result? A smoother workflow and professional-quality prints.

Why is professional design software like Adobe Photoshop or Illustrator better for converting RGB to CMYK than free online tools?

Professional design tools like Adobe Photoshop or Illustrator excel in handling RGB to CMYK conversions because they come equipped with advanced color management systems and customizable color profiles. These features let you adjust colors precisely to match specific printer settings, ensuring your printed materials closely resemble your digital designs.

On the other hand, free online converters often use generic color conversion methods. They don’t consider printer-specific profiles or the full color range (gamut) used in professional printing. This can lead to inconsistent or unexpected results in your final prints. For the most accurate color reproduction, rely on professional software and collaborate with a trusted print shop, such as Miro Printing & Graphics Inc..

Related Blog Posts

https://app.seobotai.com/banner/banner.js?id=68ed7ee8d96b3d41f69dcb57

Ultimate Guide to Foil Stamping Costs

Explore the factors influencing foil stamping costs, from materials to methods, and learn how to achieve high-quality results within budget.

Foil stamping adds a polished, high-end look to printed materials like business cards, invitations, and packaging. However, the cost can vary based on factors like materials, design complexity, and production methods. Here’s what you need to know:

  • Material Choices: Standard papers cost less, while textured or premium options increase expenses.
  • Foil Types: Metallic foils are affordable, but specialty options like holographic foils are pricier.
  • Design Complexity: Intricate designs require more labor and higher die setup costs.
  • Production Volume: Larger orders reduce the per-unit cost by spreading fixed expenses.

Foil Stamping Methods:

  • Hot Foil Stamping: Best for large runs but involves higher setup costs.
  • Cold Foil Stamping: A flexible option for medium runs, using UV adhesives.
  • Digital Foil: Cost-effective for small or custom projects, as it skips die creation.

To save money, focus on selective foiling, use standard materials, and plan bulk orders. Partnering with a skilled provider like Miro Printing & Graphics Inc. ensures quality results while keeping costs under control.

Best Cardstock for Hot Foil Stamping

Main Factors That Affect Foil Stamping Costs

Foil stamping adds a touch of sophistication and elegance to designs, but understanding what influences its cost is crucial for planning your project and managing your budget. Let’s break down the key elements that determine foil stamping expenses.

Material Selection

The type of paper you choose plays a big role in the cost. Standard paper options are typically more affordable, but if you opt for premium papers with unique textures or extra thickness, expect to pay more. Smooth, uncoated papers are ideal for foil stamping because they allow the foil to adhere more effectively. On the other hand, textured or coated papers may require additional preparation, which can increase costs.

Foil Type and Coverage Area

The type of foil you use can also impact your budget. Standard metallic foils are generally the most economical choice. However, specialty foils, like holographic or custom-colored options, come with a higher price tag. The size of the area being foiled matters, too – larger coverage areas require more material and labor. If you’re looking to save, consider using foil selectively to highlight key elements while keeping costs manageable.

Die Creation and Setup Costs

Creating the die is another factor to consider. The complexity of your design directly affects the cost of die production. Intricate designs take more time to create and set up, which increases labor costs. However, if you’re planning a larger print run, the cost per unit decreases as the setup costs are spread across more pieces. Keep in mind that precise setup and calibration are essential for achieving a flawless finish, and this attention to detail can add to the overall expense.

Foil Stamping Methods and Their Costs

The method you choose for foil stamping plays a big role in both the quality of the final product and the overall cost. Here’s a closer look at the key methods, how they work, and what impacts their cost.

Hot Foil Stamping

Hot foil stamping is a classic technique that uses heat and pressure to transfer metallic foil onto a surface. A heated metal die presses the foil onto the material, creating a permanent bond. While the upfront costs can be high due to the need for specialized equipment and custom metal dies, this method shines for larger production runs. The cost per unit decreases as the volume increases, making it a smart choice for detailed designs on items such as business cards, invitations, book covers, and packaging.

Cold Foil Stamping

Cold foil stamping skips the heat and instead relies on UV-curable adhesives to bond the foil to the material. Without the need for high temperatures, it reduces equipment and die costs. This method is also more versatile, allowing for textured or gradient effects and working well with heat-sensitive materials. While specialized adhesives and foils can add to the cost, cold foil stamping is a great middle-ground option for medium production runs where flexibility and efficiency are key.

Digital Foil Enhancement

Digital foil enhancement is a newer method that uses digital printing technology to apply foil, completely eliminating the need for custom dies. This makes it an affordable option for short runs, prototypes, or personalized projects. It offers impressive visual results and easily handles variable designs. However, opacity and durability can vary slightly compared to other methods. Still, for custom or limited-edition items, digital foil enhancement stands out as a convenient and cost-effective choice.

sbb-itb-ce53437

How to Reduce Foil Stamping Costs

Careful planning and smart design decisions can go a long way in cutting foil stamping costs without sacrificing the visual appeal of your project. By using foil strategically and making thoughtful choices, you can achieve a polished, professional look while staying within budget. Here are some practical ways to keep costs in check.

Focus on Selective Foiling

Selective foiling, often called spot foil stamping, is a great way to save money while maintaining a high-end appearance. Instead of applying foil to an entire surface, this method uses foil only on specific design elements like logos, names, or accents.

By concentrating foil on key areas, you reduce material usage and keep costs under control. For instance, highlighting a logo or a key piece of text with foil can add depth and make your design pop without overusing the material. This approach not only saves money but also enhances the overall design by drawing attention to the most important elements.

Interestingly, selective foiling often creates a more dynamic and engaging design than full foil coverage. It ensures that your focal points stand out while keeping expenses manageable.

Choose Standard Materials and Foils

The materials and foils you choose can significantly impact your budget. Sticking with standard paper stocks and commonly available foil colors is a straightforward way to keep costs down. While unique materials or custom foil colors might seem appealing, they often come at a premium price.

Classic foil shades like gold, silver, and copper are not only versatile but also cost-effective. Similarly, opting for standard paper weights and finishes simplifies production, which can lower overall expenses. Avoiding specialty papers or uncommon textures can help you achieve a polished look without overspending.

Plan for Bulk Orders

Ordering in bulk is another smart way to reduce foil stamping costs. Fixed expenses – like creating the die, setting up equipment, and preparation time – are spread across a larger number of items, which lowers the per-piece cost.

If possible, plan your foil stamping needs for multiple projects or timeframes to take advantage of better pricing tiers. Combining orders for seasonal campaigns or recurring events can help you avoid repeat setup charges and maximize savings. For businesses with consistent designs, bulk orders can be especially cost-effective, offering significant savings over time.

Working with Miro Printing & Graphics Inc.

Finding ways to save on costs while maintaining quality is much easier when you partner with a team that knows the ins and outs of both design and production. That’s where Miro Printing & Graphics Inc. steps in. Based in Hackensack, NJ, this full-service print shop combines expertise, top-tier equipment, and a wide range of services to deliver professional results while keeping your budget in check.

Foil Stamping Services

Miro Printing & Graphics Inc. has honed its craft in foil stamping, offering techniques that elevate the look and feel of printed materials. Using advanced equipment and high-quality materials, they ensure sharp, clean results that give your brand a polished, professional edge.

Their team is well-versed in the intricacies of various foil types and can help you choose the right materials to achieve your desired look without overspending. Whether you’re considering hot foil stamping for a classic touch or exploring digital foil enhancement for a modern twist, their technical expertise ensures that your project hits the mark in both design and cost-effectiveness. This seamless blend of knowledge and skill extends across all of Miro’s comprehensive service offerings.

Full-Service Benefits

Miro Printing & Graphics Inc. takes a full-service approach, simplifying the entire production process. With their in-house design team, you can collaborate directly with experts who understand the specific requirements of foil stamping from the outset. This approach often leads to smarter, more budget-friendly design decisions because production efficiency is factored in from the beginning.

Beyond foil stamping, Miro offers a wide array of services, including digital and offset printing, as well as post-press options like cutting, folding, and binding. By handling everything in one place, you save time and reduce costs since there’s no need to juggle multiple vendors.

Their in-house bindery is particularly helpful for complex projects. With everything managed under one roof, you avoid the delays and miscommunications that can crop up when coordinating with multiple providers. This streamlined process not only saves time but also helps keep your budget on track.

Getting Accurate Cost Estimates

Accurate cost estimates are key to managing your budget and making informed decisions. Miro Printing & Graphics Inc. provides detailed quotes tailored to your project’s specifics, ensuring transparency and clarity.

To get the most precise estimate, gather all project details before reaching out. This includes your preferred print format, quantity, dimensions, paper stock, and foil stamping requirements. If your project involves foil stamping, be sure to outline which areas will feature foil, your color preferences, and any unique design elements.

When submitting your request, include complete artwork and detailed specifications, such as foil placement, colors, and page count. For multi-page projects like catalogs or booklets, specifying the exact page count helps avoid delays in the quoting process.

If you’re unsure about any aspect of your project, Miro’s team is ready to assist. Their experience with foil stamping ensures they can guide you through the process, even if you’re unfamiliar with the technical details.

For added clarity, request itemized quotes that break down costs for each component of your project. This level of detail makes it easier to understand where your money is going and helps identify areas where adjustments can be made to better align with your budget. If anything in the quote seems unclear, don’t hesitate to ask for explanations to ensure every cost and service is fully understood.

Conclusion

Foil stamping costs become clearer when you understand the factors that influence them. Elements like material choices, foil types, and die costs all play a role in shaping the final expense. By recognizing how these pieces fit together, you can make informed decisions that balance aesthetics with your budget.

The method you choose also impacts both cost and appearance. Hot foil stamping offers a timeless, high-end finish but involves higher setup costs, making it ideal for larger projects. On the other hand, digital foil enhancement provides a more flexible option for smaller runs, as it doesn’t require custom dies. Each technique has its strengths, depending on your project’s needs and timeline.

Managing costs effectively often comes down to making smart choices. Opting for selective foiling, using standard materials, and planning in bulk can significantly lower per-unit costs without compromising the quality of your finished product. These strategies allow you to achieve a polished, premium look while staying within budget.

Partnering with a seasoned provider like Miro Printing & Graphics Inc. simplifies the process. Their full-service capabilities eliminate the need to juggle multiple vendors, and their in-house design team can enhance both the visual appeal and cost-efficiency of your project. With detailed, itemized quotes, you gain transparency into every cost component, helping you avoid surprises and make well-informed decisions. Their comprehensive approach ensures seamless integration of design and production, delivering consistent results from start to finish.

Investing in foil stamping is worthwhile. With careful planning and the right partner, you can achieve a professional and striking look that elevates your materials while keeping expenses under control. Whether it’s business cards, invitations, or marketing pieces, understanding these cost factors gives you the power to bring your vision to life without overspending.

FAQs

What’s the most cost-effective foil stamping method for my project based on size and design complexity?

Choosing the right foil stamping method for your project comes down to balancing cost, design complexity, and production size. Cold foil stamping is often the more budget-friendly option for larger production runs. It skips the need for heated dies and performs best with simpler, less intricate designs.

On the flip side, hot foil stamping shines when working on smaller projects or designs that demand precision and fine detail. Its tooling allows for a high level of intricacy, making it the go-to choice for more elaborate creations.

To keep costs down, stick to bold and straightforward designs. Intricate, multi-layered effects or detailed patterns usually require extra tooling, which can drive up expenses. By assessing your project’s specific requirements, you can choose the most suitable method without overspending.

How can I lower foil stamping costs while still achieving a high-quality design?

To keep foil stamping costs in check without compromising on quality, focus on applying foil to specific design elements like logos or small accents instead of larger areas. This targeted approach reduces material usage and helps trim expenses.

Simplifying your design can also go a long way. Opt for bold, straightforward shapes and clean lines, as these are easier and more cost-effective to work with during the hot foil stamping process. Pairing this with high-quality foils and collaborating with skilled printers can significantly improve the final outcome while minimizing waste.

Finally, pay close attention to the temperature and pressure settings during the stamping process. Fine-tuning these parameters can help avoid errors and reduce material loss, ensuring your designs maintain their quality without stretching your budget.

How do materials and foil choices affect the look and cost of a foil stamping project?

The materials and foils you select can make a big difference in both the look and cost of your foil stamping project. Specialty foils – like metallic, holographic, or matte finishes – add a polished, attention-grabbing touch that can take your design to the next level. Pairing these with premium papers can further enhance the quality and feel of the finished piece.

That said, these upgrades come with a price. Specialty foils and high-end materials are often more expensive, with foil rolls typically costing between $30 and $50 each. More intricate designs, such as full-coverage or holographic effects, may also require additional time and resources, which can drive up production costs. Striking the right balance between your design goals and your budget is essential for achieving the results you want.

Related Blog Posts

https://app.seobotai.com/banner/banner.js?id=68d5dc31e3dd4bddfa53e71b

FSC Standards: What Printers Need to Know

Learn about FSC certification for printers, its importance, key labels, and how it supports sustainable practices and client trust.

FSC certification helps printers show their commitment to responsible sourcing and forest management. It ensures materials like paper come from well-managed forests or recycled sources, aligning with growing client and market demands for eco-friendly practices. Here’s what you need to know:

  • What it is: FSC certification tracks materials from forest to product, ensuring responsible sourcing.
  • Why it matters: Many clients, including governments and corporations, now require FSC-certified materials for projects.
  • Key labels:
    • FSC 100%: All materials from certified forests.
    • FSC Mix: Combines certified, recycled, and controlled sources.
    • FSC Recycled: Made entirely from reclaimed or post-consumer waste.
  • Chain of Custody: Certification ensures materials are tracked and separated during production.
  • Getting certified: Involves audits, documentation, and staff training to meet FSC standards.

FSC certification also boosts credibility and helps printers meet client expectations. By combining it with eco-friendly practices like vegetable-based inks and energy-efficient equipment, printers can reduce their impact and attract environmentally conscious customers.

Unlocking Success for Small Printers with FSC Group Certification

FSC

Key FSC Labels and What They Mean

For printers aiming to make informed choices about material sourcing, understanding the different FSC labels is essential. These labels not only reflect specific standards but also play a role in shaping both the environmental impact and the marketability of printed products. They also align with FSC’s stringent chain-of-custody requirements.

FSC 100%, FSC Mix, and FSC Recycled

The FSC system offers three distinct labels, each with its own criteria for material sourcing and marketing:

  • FSC 100%: This label guarantees that all materials used come exclusively from FSC-certified forests. It ensures that every fiber in the product originates from responsibly managed forests that meet rigorous environmental and social standards. Using FSC 100% materials enhances environmental credibility and satisfies strict sustainability expectations from clients.
  • FSC Mix: This label allows for a blend of FSC-certified materials, recycled content, and controlled wood sources. It provides printers with sourcing flexibility while maintaining credible environmental standards. Products carrying this label must include a minimum percentage of FSC-certified or recycled content, which varies based on the product type.
  • FSC Recycled: This label signifies that materials are sourced from reclaimed or post-consumer waste. It appeals to clients who prioritize waste reduction and circular economy principles. Often, FSC Recycled materials offer cost benefits while still meeting sustainability goals.

When sourcing materials, printers should verify the authenticity of these labels through the FSC Global Certificate Database at info.fsc.org or search.fsc.org. It’s important to ensure that the supplier’s certificate specifically covers the required materials for a project. Additionally, checking FSC codes on sales documents and packaging is crucial. Look for the FSC License Code (FSC-C######) on FSC labels and promotional materials, and the FSC Certificate Code (ACB-XXX-######) on invoices and delivery notes.

The FSC database provides detailed information about each certificate, including its issue and expiration dates, contact details, and the specific products covered under the certification. If no results appear during a search, it could mean the certificate has expired, been terminated, or suspended.

For printers, FSC certification is a must to use any FSC label on printed materials.

Printing professionals, such as those at Miro Printing & Graphics Inc., rely on these verification processes to ensure their work meets the highest sustainability and quality standards. This labeling system is directly tied to maintaining a robust FSC chain of custody, which will be discussed next.

FSC Chain of Custody Requirements for Printers

When it comes to FSC labels, understanding the chain of custody (CoC) is a must for printers. The FSC CoC certification ensures that materials labeled as FSC-certified are kept separate from non-certified ones throughout the entire production process – from the forest all the way to the finished product. For any company handling forest-based products, securing this certification is essential to back up FSC claims.

For printing businesses, CoC certification isn’t optional – it’s a requirement. This certification is what allows them to confidently label their printed products as FSC-certified, providing assurance to their customers.

The process involves strict segregation of FSC-certified materials from non-certified ones, along with meticulous tracking. These steps are non-negotiable for maintaining compliance with FSC standards.

Take, for instance, the practices at Miro Printing & Graphics Inc., where these principles are fully integrated into their operations. By adhering to FSC guidelines, they not only support sustainable resource use but also foster trust with clients who prioritize environmentally responsible choices. This strong chain of custody framework sets the stage for navigating the audits and compliance measures needed to achieve and maintain FSC certification.

How to Get and Keep FSC Certification

Securing FSC certification is just the beginning of a larger commitment to sustainable practices. Maintaining this certification requires ongoing effort, regular monitoring, and adherence to FSC standards. Below, we’ll break down the steps to obtain certification and the key measures needed to stay compliant over time.

Application and Audit Process

The path to FSC certification begins with selecting an FSC-accredited certifier. These independent organizations assess your operations to ensure they meet the Chain of Custody requirements. To start, you’ll need to prepare detailed documentation that outlines how FSC-certified materials are handled. This includes systems for separating certified from non-certified materials, tracking certified projects, and clearly identifying FSC work throughout your supply chain. For example, internal processes should mark FSC projects from the very beginning.

Certifiers will review your facility, your material handling procedures, and your team’s understanding of FSC standards. This includes compliance with FSC Core Labor Requirements and integrating FSC guidelines into client-facing processes – such as using job tickets to clearly label FSC projects.

Once you successfully pass the initial audit, you’ll receive your Chain of Custody certification, which allows you to use FSC labels on qualifying print jobs. However, maintaining this certification is an ongoing process that demands strict attention to detail and adherence to established procedures.

Compliance and Training Requirements

To retain your certification, annual on-site audits by an FSC-accredited certifier are required. These audits ensure that your operations consistently meet the Chain of Custody standards. A comprehensive documentation system is crucial – every FSC-certified project must have a complete paper trail, from start to finish, for auditors to review.

Training your staff is equally important. Your team must stay up-to-date on FSC standards and follow internal compliance processes to maintain certification. Everyone involved should understand their role in ensuring the integrity of the chain of custody.

Another critical aspect of compliance is the proper use of the FSC logo. Guidelines dictate its placement, size, and presentation on finished products. Any misuse of the logo can lead to compliance issues, and repeated violations may result in losing your FSC certification. This highlights the need for rigorous attention to detail when applying FSC standards.

For companies like Miro Printing & Graphics Inc., FSC certification is more than just a badge – it’s an integral part of their daily operations. By embedding FSC requirements into their standard procedures, they ensure ongoing compliance and sustainable practices across all projects. The key to long-term success lies in treating FSC certification as a continuous commitment, requiring regular reviews and a proactive approach to sustainable printing practices.

sbb-itb-ce53437

Benefits of FSC Certification for Printers

Earning FSC certification demonstrates a printer’s dedication to responsible sourcing while fostering trust within the market.

Building Client Confidence and Market Appeal

Displaying the FSC logo tells customers that the materials – whether wood, paper, or other products – originate from responsibly managed forests or recycled sources. This third-party validation strengthens the perception of sustainable practices and reassures clients. For printers, it’s a clear way to stand out by offering products that resonate with environmentally conscious buyers.

Strengthening Business and Environmental Efforts

FSC certification not only boosts your brand’s reputation for eco-consciousness but also helps differentiate your services in a crowded marketplace. Companies like Miro Printing & Graphics Inc. showcase their commitment to sustainability through this certification, demonstrating leadership in environmental responsibility. It also opens the door to adopting more sustainable practices in the future.

Eco-Friendly Practices Beyond FSC Certification

FSC certification is a great starting point for sustainable printing, but it’s only part of the picture. To truly reduce environmental impact and meet the growing demand for greener products, printers need to embrace additional eco-friendly practices. These go beyond certification, reflecting a deeper commitment to sustainability.

Green Printing Techniques

Switching to eco-conscious inks is a smart step. Vegetable-based inks emit fewer volatile organic compounds (VOCs) compared to petroleum-based options, making recycling easier. Meanwhile, water-based inks eliminate harsh chemical solvents while still delivering vibrant colors and high-quality prints.

Reducing waste is another key focus. Printers can optimize layouts, adopt gang printing methods, and use precise color management to cut down on material waste. Comprehensive recycling programs for paper scraps, ink cartridges, and printing plates ensure leftover materials are handled responsibly.

Investing in energy-efficient equipment is also essential. Modern digital presses and advanced curing systems are specifically designed to use less energy without sacrificing performance. Additionally, adopting waterless printing technology eliminates the need for chemical fountain solutions, improving air quality and producing sharp, consistent results.

These techniques not only reduce environmental impact but also align with the expectations of consumers who are increasingly drawn to eco-friendly products.

Meeting Consumer Demand for Green Products

Sustainability is no longer just a bonus – it’s a priority for many consumers and corporate clients. Businesses often evaluate vendors based on their environmental practices, and a growing number of customers are willing to pay more for products with a smaller ecological footprint.

Promoting the benefits of green printing can help attract this eco-conscious audience. By tracking metrics like energy consumption, waste diversion rates, and carbon footprint, printers can provide concrete evidence of their environmental efforts. This transparency builds trust and sets them apart in a competitive market.

Offering carbon-neutral printing options is another way to appeal to environmentally aware clients. By collaborating with verified carbon offset programs, printers can neutralize the emissions tied to their operations. Many clients see this as a valuable service.

Additionally, developing specialty eco-friendly product lines can make a printing business stand out. Options might include recycled paper with high post-consumer content, tree-free papers made from agricultural byproducts, or biodegradable packaging materials.

At Miro Printing & Graphics Inc., a full-service print shop in Hackensack, NJ, sustainability is woven into every aspect of our operations. By combining FSC standards with these eco-friendly strategies, we’re not just meeting expectations but leading the way in sustainable printing practices.

Conclusion

FSC certification stands out as the benchmark for responsible forest management and a powerful way to build stronger client relationships. With research showing that up to 73% of consumers worldwide are willing to adjust their purchasing habits to minimize environmental impact, FSC certification has shifted from being a choice to an essential business strategy.

In the U.S. and Canada alone, FSC has certified over 168 million acres of forestland, offering an average annual economic benefit of $4.74 per cubic meter in certified production. This certification brings together environmental responsibility and economic value.

The market advantages of FSC certification are clear. As Mike Ribaudo, Executive Vice President at Kase Printing, puts it:

"The FSC logo is a mark of trust. It ensures that wood, paper, and other forest products you’re using in your business are sourced responsibly from well-managed forests or recycled materials".

To fully integrate FSC practices, make it a point to discuss certification in every project meeting, train your team on chain-of-custody processes, and establish tracking systems to monitor materials from their origin to the final product. Additionally, reallocating resources – like moving from physical proofs to digital ones – can help manage costs effectively.

Combine FSC certification with other eco-friendly practices, such as using vegetable-based inks and energy-efficient equipment. This not only reinforces your business’s commitment to sustainability but also positions it as a forward-thinking leader ready to meet the demands of today’s eco-conscious market.

By investing in FSC certification, you enhance your reputation, minimize supply chain risks, and tap into a growing customer base that values sustainability. For printing businesses, it’s not a matter of if but when to take the leap.

At Miro Printing & Graphics Inc., we are dedicated to providing sustainable printing solutions that align with FSC standards. Choosing responsible forest management practices isn’t just about meeting current demands – it’s about securing a stronger, greener future.

FAQs

What steps does a printing company need to take to get FSC Chain of Custody certification?

To get FSC Chain of Custody certification, a printing company starts by reaching out to an FSC-accredited Certification Body (CB). This step is crucial to understand the process and specific requirements involved.

Next, the company needs to set up a management system designed to track FSC-certified materials throughout its supply chain. This system ensures proper documentation and control measures are in place to meet FSC standards.

After implementing the system, an FSC-approved CB conducts an audit to confirm compliance. If the audit is successful, the company earns the certification. This allows them to use FSC trademarks on their products, showcasing their dedication to responsible sourcing practices.

How does FSC certification help printing companies build trust and stand out in the market?

FSC certification offers printing companies a way to build trust and distinguish themselves by highlighting their dedication to responsible forest management. This appeals to clients who prioritize eco-friendly practices and care about the environment.

By adhering to FSC standards, printing businesses can strengthen their brand reputation, draw in loyal customers, and stand out in a crowded market. Moreover, having FSC certification shows a clear commitment to preserving natural resources, which can help nurture lasting client relationships and open doors to new growth opportunities.

What are some eco-friendly practices printers can adopt in addition to FSC certification to minimize their environmental impact?

Printers looking to reduce their environmental impact can take meaningful steps by combining eco-conscious practices with FSC certification. For instance, opting for soy-based or vegetable-based inks helps cut down on harmful emissions, while digital printing ensures more accurate print runs, resulting in less waste.

Beyond that, upgrading to energy-efficient equipment and choosing biodegradable or recyclable materials for projects can make a noticeable difference. These efforts not only conserve resources and reduce waste but also highlight a dedication to environmentally responsible printing practices.

Related Blog Posts

https://app.seobotai.com/banner/banner.js?id=68d35609e3dd4bddfa4bd9c8

UV vs. Eco-Solvent Inks: Which Offers Better Resistance?

Explore the strengths and weaknesses of UV and eco-solvent inks to determine the best choice for your outdoor printing needs.

When choosing between UV and eco-solvent inks for outdoor prints, the decision depends on your specific needs:

  • UV inks: Best for rigid materials and long-term durability. They cure instantly, resist harsh weather, chemicals, and scratches, and last 5–7 years outdoors without extra protection.
  • Eco-solvent inks: Ideal for flexible materials like vinyl and fabric. They offer good weather resistance but often need lamination for extended outdoor use. They emit fewer odors, making them suitable for indoor spaces.

Quick Comparison:

Factor UV Inks Eco-Solvent Inks
Durability Long-lasting without lamination Requires lamination for longevity
Flexibility Limited High
Chemical Resistance High Moderate
Drying Time Instant Requires time
Best Use Rigid materials Flexible materials

UV inks are perfect for tough outdoor environments, while eco-solvent inks are a better choice for projects requiring flexibility.
For the best results, match the ink type to your material and project requirements.

Ink Type Comparison Guide for Business Owners

UV Ink Properties and Resistance

To understand why UV inks are a go-to choice for tough outdoor applications, it’s essential to explore their curing process, durability, and compatibility with various materials.

How UV Inks Cure and Form

UV inks cure instantly when exposed to ultraviolet light, creating a solid and durable surface. This rapid polymerization forms a tough, scratch-resistant layer that sits atop the substrate rather than soaking into it. The immediate curing process eliminates drying time, prevents smudging, and ensures vibrant colors with sharp details. This quick solidification is key to their long-lasting performance.

Durability and Resistance Performance

UV inks are built to endure. Prints made with UV inks can last 5–7 years or more outdoors without the need for lamination. Thanks to their chemical composition, they resist UV rays, water, abrasion, and even harsh chemicals like cleaning agents or automotive fluids. Whether exposed to direct sunlight or heavy rain, these prints maintain their professional look. Additionally, their superior water resistance outperforms many traditional transfer methods, making them a reliable option for challenging environments. This resilience not only ensures consistent branding but also helps reduce replacement costs over time.

Material Compatibility and Uses

UV inks excel on rigid materials like acrylic, aluminum composite panels, PVC foam boards, and polycarbonate sheets. When used with these substrates, they can withstand years of outdoor exposure without compromising structural integrity. However, because UV inks tend to be rigid, they may crack on surfaces that stretch or bend frequently, making them less ideal for highly flexible applications.

To maximize results, it’s crucial to use substrates designed to handle UV exposure, temperature fluctuations, and moisture. Proper printer calibration and lamp upkeep are also essential to prevent issues like cracking, peeling, or fading. For projects needing extra protection, applying a clear coat or UV-resistant laminating film can shield prints from fading, moisture, chemicals, and environmental pollutants.

Eco-Solvent Ink Properties and Resistance

Eco-solvent inks take a different route compared to UV inks, using a solvent-based system that prioritizes flexibility and a reduced environmental impact. This makes them a great match for printing on flexible substrates.

Composition and Drying Process

Eco-solvent inks are formulated with gentler solvents that evaporate gradually. As the solvent dissipates, the ink slightly penetrates the substrate and forms a flexible film on its surface. Unlike UV inks, which cure almost instantly, eco-solvent inks require a drying period that depends on environmental factors like temperature and humidity. This slower drying process allows the ink to adapt to substrates that need to bend or stretch, making it especially useful for curved or flexible materials. Thanks to this gradual curing, eco-solvent inks hold up well in outdoor conditions that may fluctuate.

Weather and Chemical Resistance

Eco-solvent inks offer moderate durability for outdoor use. Their resistance to weather can be enhanced with protective lamination, which extends the lifespan of printed materials in diverse environments. Once cured, these inks resist moisture and temperature changes, minimizing issues like color bleeding or adhesion failures. However, their chemical resistance depends on the specific formulation. While many eco-solvent inks can handle mild cleaning agents, additional protective coatings may be necessary for exposure to harsh chemicals.

Low-Emission Benefits and Applications

One standout advantage of eco-solvent inks is their lower volatile organic compound (VOC) emissions. They produce less odor during printing and require less intensive ventilation, making them well-suited for indoor spaces where air quality is a concern. Eco-solvent inks also shine in applications where both durability and flexibility are essential. They are widely used for vinyl banners, vehicle wraps, and window graphics – projects where the ability to stretch or bend without cracking is key to maintaining both the look and functionality of the print. These qualities make them a reliable choice for long-lasting indoor and outdoor applications.

sbb-itb-ce53437

UV vs. Eco-Solvent Ink Comparison

When deciding between UV inks and eco-solvent inks, it all boils down to your project’s specific needs. UV inks are known for their durability, while eco-solvent inks shine in flexibility. Each type has its own strengths and limitations, as outlined in the table below.

Performance Comparison Table

Factor UV Inks Eco-Solvent Inks
Chemical Resistance Excellent – withstands harsh chemicals and solvents Moderate – tolerates mild cleaning agents; often needs extra coating
UV Resistance Superior – retains color even with prolonged outdoor exposure Good – lamination helps maintain color stability
Water Resistance Outstanding – forms a waterproof layer upon curing Good – resists moisture well with proper curing
Abrasion Resistance Excellent – creates a hard, scratch-resistant surface Moderate – more prone to surface wear but offers flexibility
Substrate Compatibility Ideal for rigid materials like metal, glass, and hard plastics Best for flexible materials like vinyl, fabric, and soft plastics
Post-Processing Ready for handling immediately after curing Requires drying time and benefits from lamination
Outdoor Durability Long-lasting without additional protection Shorter lifespan outdoors; durability improves with protective coating

UV inks are perfect for projects requiring fast curing and exceptional resistance in challenging environments.

On the other hand, eco-solvent inks excel when flexibility is key, making them a go-to for applications like vehicle wraps or banners.

How to Choose the Right Ink Type

Choosing between UV and eco-solvent inks depends on your project’s specific demands. UV inks are the top choice for rigid substrates and situations requiring maximum durability, such as outdoor signs exposed to extreme weather or labels that need to withstand chemical exposure. Their long-lasting performance makes them an excellent investment for industrial and outdoor applications.

Eco-solvent inks, however, are the better option for flexible materials. They’re ideal for vehicle wraps, fabric banners, and indoor graphics where bending and stretching are essential. Plus, their lower odor and minimal ventilation requirements make them more practical for indoor use or in spaces with limited airflow.

While UV inks may come with a higher initial cost, their durability often translates into better long-term value. Eco-solvent inks, with their lower upfront cost, might require additional lamination to extend their lifespan, especially for outdoor use.

Choosing the Right Ink for Your Project

Key Points Summary

The type of ink you choose can make or break your project, especially when it comes to durability. UV inks are known for their excellent resistance to abrasion, chemicals, water, and UV light. They create a tough, weather-resistant coating, making them a go-to option for projects like outdoor signage, industrial labels, or any application where longevity and resilience are non-negotiable.

On the other hand, eco-solvent inks may not provide the same level of durability for high-resistance needs. Understanding these differences helps professionals select the best ink for each specific project.

Miro Printing & Graphics Inc. Expertise

At Miro Printing & Graphics Inc., we bring this knowledge to life. Our team is skilled in both UV and eco-solvent printing, ensuring we meet the exact durability demands of your project.

Whether you’re planning large-format outdoor advertising in New Jersey or tackling a project with strict performance criteria, we’ve got you covered. From initial consultation to final delivery, our services are designed to deliver results that last and leave a lasting impression.

FAQs

What should I consider when deciding between UV and eco-solvent inks for outdoor printing?

When choosing between UV inks and eco-solvent inks for outdoor printing, it’s important to consider how they hold up against the elements. UV inks stand out for their strong resistance to UV rays, harsh weather, chemicals, and scratches. This makes them a go-to choice for projects that need to endure tough outdoor conditions. They can last an impressive 5–7 years or more and work well with both rigid and flexible materials.

On the other hand, eco-solvent inks provide durability for 3–5 years outdoors and are particularly well-suited for flexible materials like vinyl and banners. However, they don’t hold up as well as UV inks when exposed to extreme sunlight or severe weather. Other factors to consider include how quickly they dry, their environmental footprint, and how well they pair with the material you’re using. By weighing these aspects, you can determine which ink type aligns best with your project’s specific requirements.

Why are UV inks so durable, even without lamination?

UV inks stand out for their durability, thanks to their ability to cure instantly when exposed to ultraviolet light. This curing process creates a strong, chemically stable layer that resists fading, water, chemicals, and abrasion. The result? A resilient, plastic-like finish capable of withstanding tough outdoor conditions – no lamination required.

Because of this, UV inks are a go-to option for outdoor printing. They hold up exceptionally well over time, even when faced with challenging weather and environmental factors.

What are the benefits of using eco-solvent inks for indoor printing?

Eco-solvent inks bring a range of benefits to indoor printing. For starters, they release far fewer volatile organic compounds (VOCs) and other harmful pollutants than traditional solvent inks. This not only helps maintain better indoor air quality but also creates a safer and more pleasant environment for both employees and anyone nearby.

Another perk? These inks produce very little fume and have a much gentler odor, making them perfect for use in enclosed spaces. With their lower environmental footprint and health-conscious design, eco-solvent inks are an excellent option for businesses aiming to combine safety with sustainable printing practices.

Related Blog Posts

https://app.seobotai.com/banner/banner.js?id=68d339ade3dd4bddfa4bbd10

Standard DPI for Commercial Printing

Learn the standard DPI for commercial printing to ensure sharp, professional-quality prints while balancing quality and file size.

When printing professionally, DPI (Dots Per Inch) determines the sharpness and detail of your materials. Here’s what you need to know:

  • 300 DPI is the standard for most print jobs like business cards, brochures, and magazines. It ensures sharp, detailed results for items viewed up close.
  • For larger prints like banners or posters, 150 DPI or even 100 DPI works well due to longer viewing distances.
  • High-resolution images are critical. Low-res files (e.g., 72 DPI) can result in blurry, pixelated prints.
  • Material type and viewing distance influence the ideal DPI. Glossy papers handle higher DPI, while textured surfaces can work with lower resolutions.
  • Balancing quality with file size is key. Higher DPI creates larger files, which may slow production without noticeable quality improvements for distant viewing.

Proper DPI selection ensures clear, professional prints while optimizing time and costs.

Image resolution for printing: our guide

Standard DPI Requirements for Commercial Printing

Selecting the right DPI is crucial for saving time, reducing costs, and ensuring your printed materials look professional across various formats.

300 DPI: The Go-To Resolution for Most Print Jobs

For most commercial printing projects, 300 DPI is the gold standard. This resolution is ideal for items people hold and view up close, like business cards, brochures, flyers, booklets, magazines, and postcards.

At 300 DPI, individual dots are indistinguishable to the human eye at typical reading distances (12–18 inches). This ensures that text remains sharp and images appear smooth and detailed. For instance, a business card printed at a lower resolution might look pixelated, giving off an unpolished vibe, while one printed at 300 DPI conveys professionalism and attention to detail.

Marketing materials like brochures and catalogs also benefit greatly from 300 DPI. High-resolution product images appear vibrant and detailed, leaving a strong impression on potential customers. Investing in this resolution enhances the overall quality and impact of your printed materials.

However, for prints viewed from a distance, the DPI standards are adjusted to suit the viewing conditions.

DPI for Large Format Printing

For larger prints, lower resolutions are often more practical due to the increased viewing distance. When you’re dealing with banners, posters, trade show displays, or outdoor signage, viewing distance becomes a key factor in determining the required DPI.

  • 150 DPI: Ideal for most large-format indoor prints like banners, trade show graphics, and wall displays. At viewing distances of 3–6 feet, this resolution provides clear images and manageable file sizes.
  • 100 DPI: Works well for very large outdoor signage, such as billboards and vehicle wraps, which are typically viewed from much farther away (10 feet or more). For example, a billboard seen from 50 feet doesn’t need the same level of detail as a brochure held in your hand.

Using a lower DPI for large-format printing offers several advantages: faster file processing, reduced printing time, and lower costs. It also prevents the creation of unnecessarily large files that printers and viewers won’t benefit from.

DPI Requirements Table for Common Print Products

Print Product Recommended DPI Typical Viewing Distance Notes
Business Cards 300 DPI 12–18 inches Close-up items require the sharpest details.
Brochures & Flyers 300 DPI 12–24 inches Standard for marketing materials.
Magazines & Catalogs 300 DPI 12–18 inches Ensures crisp text and detailed images.
Posters (small) 300 DPI 2–4 feet Suitable for sizes up to 18" x 24".
Banners & Displays 150 DPI 3–6 feet Ideal for indoor events and trade shows.
Large Posters 100–150 DPI 4–8 feet Best for sizes 24" x 36" and larger.
Outdoor Signage 100 DPI 10+ feet Perfect for billboards and building signs.
Vehicle Graphics 100–150 DPI 6–20 feet Used for wraps and decals.

For example, a 24" x 36" poster printed at 300 DPI creates a very large file, which may be unnecessary. Printing it at 150 DPI still delivers excellent quality while keeping file sizes more practical.

These recommendations are general guidelines, not hard-and-fast rules. Factors like paper type, ink quality, and specific viewing conditions can all influence the ideal DPI for your project. When in doubt, it’s better to start with a slightly higher resolution and scale down if needed, as increasing resolution later can compromise quality.

Factors That Affect DPI Selection

When preparing files for printing, there’s more to consider than just standard DPI guidelines. Factors like viewing distance, material type, and production needs all play a role in determining the best DPI settings for your project.

How Viewing Distance Affects DPI

Viewing distance is a key factor in determining the required DPI. The farther away someone views an item, the less detail the human eye can detect, meaning ultra-high resolutions aren’t necessary for distant displays.

For items viewed up close, such as business cards or brochures, 300 DPI is essential. At this range, any pixelation or blurriness becomes obvious, making a high resolution critical for sharp, professional results.

On the other hand, for items viewed from a moderate distance – like posters on a wall 4–6 feet away – 150 DPI is generally sufficient. At this range, the eye naturally blends details, allowing for a lower resolution without compromising visual quality.

For large outdoor signage, such as billboards seen from 20–50 feet away, even 100 DPI can look great. Printing these at 300 DPI would create unnecessarily large files without offering any noticeable improvement to viewers at such distances.

Next, let’s look at how the material you print on affects the final resolution.

How Material Choice Affects DPI

The type of material you print on directly influences how much detail the final product can display. Different surfaces interact with ink or toner in unique ways, affecting sharpness and clarity.

  • Glossy papers handle the highest DPI settings. Their smooth surfaces allow ink to sit precisely where it’s placed, making them ideal for fine details and sharp text. These materials are well-suited for the full 300 DPI standard.
  • Coated papers also align with the 300 DPI recommendation. The coating prevents ink from spreading, ensuring crisp edges and clear images.
  • Uncoated papers often don’t need the full 300 DPI resolution. As printing expert Rafael Otake explains:

    On coated paper, a standard lineature is 150 lpi, so the pixel resolution or ppi is recommended to be 300ppi. This is where this "standard" comes from. But it is not the only case. On uncoated paper, the lineature could be lower, like 133 lpi, so the pixel resolution could be 266 ppi.

  • Textured and canvas materials naturally mask small imperfections due to their rough surfaces. These materials typically perform well at 200 DPI, with some coarser options working effectively at 150 DPI.

Additionally, the printing method matters. Inkjet printers may experience some ink seepage into paper fibers, which can slightly reduce sharpness. In contrast, laser printers use toner that sits on the surface of the paper, often producing sharper results at the same DPI.

Finally, let’s consider how file size impacts production.

File Size and Production Speed

Higher DPI settings don’t just affect print quality – they also impact file size and production speed. A 300 DPI file contains four times more data than a 150 DPI file, which can significantly slow down production.

Large files can bog down design software, delay file transfers, and strain print servers, all of which add time to the production process. For example, a banner rendered at 300 DPI might take 30–45 minutes to process and print, while the same banner at 150 DPI could finish in just 10–15 minutes with comparable visual results.

Storage costs are another consideration. Oversized files consume valuable server space, which can impact resource allocation for other projects. Balancing resolution with file size is critical to maintaining efficiency without sacrificing quality.

Most commercial printers are optimized for standard DPI settings, ensuring smooth workflows. Sticking to these recommendations helps you avoid unnecessary delays and costs while delivering high-quality results.

sbb-itb-ce53437

How to Prepare Print-Ready Files with Correct DPI

Getting your files ready for printing with the correct DPI is key to ensuring high-quality results. Starting with the right resolution settings for your images and graphics saves time and prevents quality issues. A well-prepared file ensures that your final prints showcase the detail and clarity you intended, aligning perfectly with the DPI standards discussed earlier.

Setting DPI in Design Software

Professional design tools make it easy to set and adjust DPI. For example, in Adobe Photoshop, you can tweak both pixel dimensions and resolution in the "Image Size" dialog box. For most print projects, set the resolution to 300 DPI.

In Adobe Illustrator and InDesign, you can check and manage image resolution through the "Document Raster Effects Settings" or the "Links" panel. InDesign even flags images that fall below the 300 DPI threshold with warning icons, helping you catch potential issues early.

Other design programs often come with pre-made print templates that already include the correct DPI settings, making the setup process even simpler.

Common File Preparation Mistakes to Avoid

Even after setting the right DPI, some common errors can still compromise your print quality. One major mistake is altering the DPI metadata without actually improving the image resolution. Simply changing the DPI number in your software’s settings doesn’t add detail – it only tells the printer how to interpret the existing pixels.

How to Adjust Image Resolution

If you need to adjust an image’s resolution, it’s important to understand the difference between resampling and just changing DPI metadata. Resampling alters the actual amount of image data: downsampling reduces pixels, while upsampling adds new ones.

Upsampling, or increasing resolution, must be done carefully since the software has to "guess" where to add new pixels. This process can sometimes lead to a loss of sharpness. For the best results, use options like "Bicubic Smoother" in Adobe Photoshop or "Lanczos" in GIMP.

For even better results, consider AI-powered upscaling tools like Topaz Labs‘ Gigapixel AI or LetsEnhance. These tools use artificial intelligence to add pixels more intelligently, preserving more detail and sharpness compared to traditional upsampling methods.

On the other hand, downsampling usually provides better results because it works with existing image detail rather than creating new pixels. Starting with high-quality originals is always your best bet for achieving optimal print results. A sharp, high-resolution image will always outperform an upsampled low-resolution one, regardless of the software used.

After resampling, applying an Unsharp Mask filter can help restore focus and detail to your adjusted images, ensuring they’re print-ready.

How Miro Printing & Graphics Inc. Supports Optimal DPI Standards

When it comes to achieving top-notch print quality, selecting the right print partner is just as important as understanding DPI standards. Miro Printing & Graphics Inc., based in Hackensack, NJ, ensures that your files meet industry DPI benchmarks, delivering professional-grade clarity and sharpness in every project.

Comprehensive Printing Services

Miro Printing & Graphics Inc. provides a wide array of printing solutions, tailored to meet the DPI requirements of each project type. Their digital printing services produce crisp 300 DPI outputs, perfect for brochures, business cards, and flyers. For larger-scale jobs, their offset printing ensures exceptional detail and consistency across high-volume runs. When it comes to large-format printing, their team carefully adjusts methods based on the viewing distance, ensuring the best visual impact. Additionally, their bindery services – such as booklet making, perfect binding, and comb binding – maintain image quality throughout the finishing process.

Personalized Project Support

One of the standout features of Miro Printing & Graphics Inc. is their hands-on approach to each project. They meticulously review every file to catch resolution issues early, ensuring proper DPI and preventing costly reprints. This proactive attention to detail minimizes errors and maximizes efficiency.

"Let us know what type of project you are working on, and allow us to offer our expertise. During the process, Miro Printing & Graphics Inc. will work with a professional, personal approach to better understand your company’s needs. The end result is a finished piece that exceeds your highest expectations but never your budget!"

In-House Design and File Optimization

To make the entire process seamless, Miro Printing & Graphics Inc. offers in-house design services. Their skilled design team collaborates directly with your source materials, enhancing low-resolution images, ensuring proper rasterization of vector files, and refining intricate layouts. This ensures that your files are optimized for printing from start to finish.

Conclusion

Choosing the right DPI is key to achieving sharp, professional-quality prints. It plays a major role in ensuring your materials look polished and visually appealing.

For most marketing materials, 300 DPI is the go-to standard for crisp, detailed results. However, larger projects like banners or posters can often work well with a resolution of 100–150 DPI, since viewers typically see them from a distance, where ultra-high resolution isn’t as critical. As a rule of thumb, higher DPI produces sharper prints, while lower resolutions can lead to pixelation and blurry images.

Several factors influence the ideal DPI, including viewing distance, the type of material being printed on, and file size. For example, a billboard viewed from far away doesn’t require the same level of detail as a business card that’s examined up close. Beyond resolution, ensuring your files are properly optimized is just as important to translate these settings into flawless prints.

Steps like converting colors from RGB to CMYK, using lossless file formats, and setting appropriate bleed zones are essential for quality results. Even with the perfect DPI, neglecting these preparation steps can compromise the final outcome.

FAQs

Why is 300 DPI the standard resolution for commercial printing?

When it comes to commercial printing, 300 DPI (dots per inch) is the go-to resolution. Why? It delivers sharp, clear images and text that look polished and professional. At this level of detail, everything remains crisp, even when viewed up close, with little to no pixelation or blurriness.

This resolution is ideal for materials like brochures, banners, and booklets, ensuring they leave a strong visual impression. Using a lower resolution risks muddying the details, which can detract from the quality of the final product. Sticking to 300 DPI helps maintain the standard of excellence expected in print.

When it comes to large format printing, the viewing distance is crucial in deciding the ideal DPI. For prints that will be seen up close (within 6 feet), a higher DPI – 200 to 300 – is necessary to achieve crisp, detailed visuals. If the prints will be viewed from a medium range (6 to 12 feet), a DPI of 100 to 150 typically does the job. For anything viewed from over 12 feet away, a DPI of 100 or lower is sufficient, as the human eye naturally picks up less detail at greater distances.

Matching the DPI to the viewing distance strikes the right balance between image quality and printing efficiency. This ensures your large format prints look impressive while avoiding unnecessary use of resources.

What are the downsides of using a higher DPI than needed for large prints?

When working with large prints, using a higher DPI than needed can lead to unnecessarily large file sizes. This not only slows down processing and printing but also demands more storage space – without any visible improvement in print quality. This is especially true for items like banners or posters, which are usually viewed from a distance.

For most large-format prints, a DPI between 150 and 300 delivers great results. Going beyond this range often wastes resources without adding any real benefit to the final product.

Related Blog Posts

https://app.seobotai.com/banner/banner.js?id=68d1e6847b5c01ae369367c6

Lightfastness Testing for CMYK Prints

Learn how lightfastness testing ensures your CMYK prints resist fading, maintain vibrancy, and prolong their lifespan through informed material choices.

Lightfastness testing helps ensure your CMYK prints stay vibrant and durable over time. It measures how well prints resist fading when exposed to light, which is crucial for maintaining quality in marketing materials, signage, and fine art prints. Here’s what you need to know:

  • Why It Matters: Fading can distort colors (magenta fades fastest) and harm brand consistency, increasing reprinting costs.
  • Key Factors: Ink type (pigment-based lasts longer than dye-based), substrate choice (coated papers and vinyl perform better), and exposure conditions (UV light, temperature, humidity).
  • Testing Methods: Accelerated aging tests simulate years of light exposure in hours, using tools like spectrophotometers to measure fading.
  • Improving Durability: Use pigment-based inks, UV-resistant substrates, and protective coatings to extend print life.

Understanding these principles ensures your prints maintain their appearance and value, whether displayed indoors or outdoors.

Lightfastness, How It’s Tested And What It Means For You | Acrylic Painting Liquitex

Liquitex

Standard Lightfastness Testing Methods

Testing lightfastness involves specialized methods that replicate prolonged light exposure in controlled lab settings. These standardized procedures help printing professionals predict how various ink and substrate combinations will hold up over time, ensuring informed decisions before large-scale production begins.

Accelerated Aging Tests

Accelerated aging tests subject print samples to intense artificial light that mimics the UV and visible light spectra of natural sunlight. Xenon arc lamps are a popular choice for these tests because they closely simulate sunlight. The samples are placed in controlled environmental chambers that replicate indoor display conditions. Testing durations are carefully calibrated to represent years of exposure in just a few hours. Throughout the process, color measurements are taken at regular intervals to identify which colors begin to fade first. These tests provide a solid foundation for standardized comparisons, as outlined in the next section.

Key Standards for Lightfastness Testing

International standards play a critical role in guiding lightfastness testing for the graphic arts industry. For instance, ISO 2835 specifies parameters like light intensity, temperature, humidity, and measurement intervals, ensuring consistent and comparable results across different labs. Another widely used benchmark is the Blue Wool scale, originally developed for textiles but now adapted for print testing. This scale uses reference standards, with higher ratings indicating greater resistance to fading. In North America, additional testing protocols have been developed to address the unique challenges of digital printing, such as variations in substrates and ink application methods. Accurate color tracking, which is explored in the following section, is an essential part of these procedures.

Using Spectrophotometers for Color Measurement

Spectrophotometers are essential tools for detecting subtle color changes that might not be noticeable to the human eye. These devices use the Delta E (∆E) system to quantify color differences, providing a clear indication of when fading becomes apparent. By comparing baseline and post-exposure measurements, professionals can precisely track color shifts. For example, data often reveals that magenta tends to degrade more quickly, while other colors remain relatively stable. This level of detail allows printing experts to refine color profiles and choose ink formulations that improve the durability of CMYK prints.

Factors That Affect Lightfastness in CMYK Prints

Understanding the elements that influence lightfastness is essential for printing professionals aiming to produce long-lasting prints. From the chemical composition of inks to the conditions where prints are displayed, several factors play a role in determining how well CMYK prints resist fading over time.

Ink Formulation and Type

The durability of CMYK prints starts with the ink itself. One of the biggest differences comes down to the choice between pigment-based and dye-based inks. Pigment-based inks contain tiny particles that rest on the surface of the substrate, forming a physical layer that helps block UV rays and resist fading. When properly formulated, these inks can preserve their color for decades.

Dye-based inks, on the other hand, work by dissolving into the substrate fibers. While they produce vibrant and vivid colors, they’re more prone to fading since the dye molecules are more exposed to light and environmental factors.

Modern ink formulations often include UV inhibitors and antioxidants to combat fading. These additives slow the photochemical reactions that break down color. Even the particle size in pigment-based inks matters – smaller particles can enhance color saturation but may be slightly more vulnerable to fading than larger ones.

Color longevity also varies within the CMYK spectrum. Cyan tends to hold up the best, while magenta fades the quickest, with yellow falling somewhere in between. Black inks, especially those made with carbon-based pigments, generally offer excellent resistance to fading.

Substrate Selection

The type of substrate used can significantly impact how well inks resist fading. Coated papers provide a sealed surface that enhances lightfastness by preventing ink absorption, while uncoated papers absorb more ink, offering some protection but also increasing the risk of chemical degradation, especially if the paper is acidic.

Specialty substrates bring additional benefits. Synthetic materials like polyester films are chemically stable and don’t interact with ink components, making them highly resistant to fading. Textured art papers and canvas can also offer some protection by creating tiny shadows that reduce direct light exposure to the ink.

However, substrates with optical brightening agents (OBAs) present challenges. These agents make prints appear brighter initially, but they degrade faster than the ink, leading to noticeable shifts in the print’s overall appearance over time.

Ultimately, the combination of ink chemistry and substrate properties is crucial in achieving long-lasting CMYK prints.

Environmental Conditions

Environmental factors, especially light exposure, play a major role in determining the lifespan of CMYK prints. Direct sunlight, which contains high levels of UV radiation, causes the fastest fading. A print exposed to sunlight through a window can start showing signs of fading within weeks.

Indoor lighting, such as LEDs, emits less UV radiation but still contributes to gradual fading over time. Regional climate differences across the U.S. also matter – prints in Arizona’s dry heat face different challenges than those in Florida’s humid and damp conditions.

Temperature and humidity further accelerate fading. High temperatures speed up chemical reactions, while excessive humidity makes inks more reactive. Even air quality can influence lightfastness. Pollutants like ozone and nitrogen oxides, common in urban or industrial areas, can interact with ink components and cause fading, even in low-light environments.

Mounting and framing choices also affect print longevity. UV-filtering glass or acrylic can significantly extend the life of a print by blocking harmful rays. However, poor ventilation behind frames can trap moisture and pollutants, creating conditions that speed up degradation.

sbb-itb-ce53437

How to Read Lightfastness Test Results

Lightfastness test results help predict how prints will hold up over time, offering clear benchmarks for choosing materials and managing expectations about fading. Building on earlier discussions about ink types and substrates, this section will guide you through understanding lightfastness data to achieve the best CMYK print results. We’ll explore key metrics, practical fading thresholds, and comparative performance to simplify material selection.

Key Metrics for Measuring Lightfastness

Delta E (∆E) quantifies color changes between fresh and faded prints. The scale runs from 0 (no change) to values above 6 (severe fading), aligned with human visual perception. Here’s how the scale breaks down:

  • 0-1: Changes are nearly invisible.
  • 1-3: Noticeable to trained observers.
  • 3-6: Clearly visible to most people.
  • Above 6: Fading is immediately obvious.

Gamut volume change measures shifts in the overall color range during fading. While ∆E focuses on individual colors, this metric evaluates whether the entire spectrum of reproducible colors shrinks or shifts, revealing how well the print retains its visual impact over time.

The Blue Wool scale, originally developed for textiles, rates lightfastness from 1 to 8 using blue wool reference samples. Here’s a quick breakdown:

  • 1-2: Poor lightfastness – suitable only for short-term indoor use.
  • 3-4: Works for general indoor applications.
  • 5-6: Handles moderate outdoor exposure.
  • 7-8: Excellent for demanding outdoor conditions.

Setting Practical Thresholds for Fading

Once you understand the metrics, it’s important to set realistic fading thresholds based on your project’s needs and budget. Different applications require varying levels of color stability:

  • Marketing materials: ∆E of 5-6 is acceptable.
  • Business signage: A stricter ∆E of 2-3 is recommended.
  • Fine art prints: Require a ∆E of 1.5 or below for optimal preservation.
  • Outdoor applications: May tolerate a ∆E of 3-4 due to harsher exposure conditions.

The environment where prints will be displayed also matters. Bright retail lighting or locations near windows demand tighter ∆E thresholds, while dimly lit offices or storage areas can allow for more leniency. Always consider the lighting intensity and type when determining acceptable fading limits.

Comparing Ink and Substrate Performance

The table below compares how different ink and substrate combinations perform under standardized tests, simulating 150 hours of xenon arc exposure – equivalent to about two years of typical indoor display conditions.

Ink Type Substrate ∆E After Testing Blue Wool Rating Best Applications
Pigment-based UV Vinyl 1.2 7-8 Outdoor signage, vehicle graphics
Pigment-based Solvent Canvas 1.8 6-7 Fine art, gallery prints
Pigment-based Aqueous Coated Paper 2.3 5-6 Indoor posters, presentations
Dye-based Aqueous Photo Paper 3.1 4-5 Short-term displays, proofs
Standard CMYK Offset Uncoated Paper 4.2 3-4 Brochures, newsletters
  • Pigment-based UV inks on vinyl stand out for their exceptional lightfastness, making them ideal for outdoor use, even though they come at a higher cost.
  • Solvent-based pigment inks on canvas offer a great balance of lightfastness and aesthetic appeal, perfect for fine art prints.
  • Aqueous pigment inks on coated paper provide solid performance for indoor applications at a moderate price.

On the other hand, dye-based inks, while delivering vibrant colors initially, fade more noticeably across all substrates. They are best suited for short-term projects where immediate visual impact is more important than longevity.

Keep in mind that these results are based on standardized conditions. Real-world performance can vary depending on factors like environmental conditions, display methods, and quality expectations. Use this data as a starting point, and whenever possible, test samples under the actual conditions your prints will face.

How to Improve Lightfastness in CMYK Prints

Now that you know how to interpret lightfastness test results, let’s dive into practical steps to make your CMYK prints more durable. By focusing on both the ink and the substrate, you can significantly extend the lifespan of your prints.

Best Practices for Better Lightfastness

To reduce fading, start by selecting the right substrate. Both the ink and the material you print on play a major role in how well your prints resist fading over time. Look for substrates that are resistant to degradation and have a neutral pH. Materials with low reflectivity can also help minimize wear and tear, further extending the life of your prints.

New Developments in Ink Technology

Advances in ink technology are making it easier to achieve longer-lasting prints. Modern inks now include UV-blocking additives and improved pigment encapsulation techniques, which shield color molecules from breaking down under light exposure. Nano-pigment technology has also been developed, offering better pigment dispersion and increased surface area. This not only improves lightfastness but also maintains vibrant, high-quality colors.

Another exciting innovation is hybrid ink systems. These combine the vividness of dye-based inks with the durability of pigment-based inks, giving you the best of both worlds. This makes them a great choice for applications where both color intensity and longevity are crucial.

How Miro Printing & Graphics Inc. Can Help

At Miro Printing & Graphics Inc., we specialize in helping you achieve prints that last. Whether you’re creating outdoor signage, indoor displays, or archival documents, we’ll guide you in choosing the best combination of inks and substrates for your specific needs. The right materials can mean the difference between prints that fade in a few months and those that stay vibrant for years.

Our expertise spans digital printing, offset printing, and large-format printing, allowing us to tailor our approach to your project. For outdoor applications requiring maximum durability, we use pigment-based UV inks on premium vinyl substrates. For indoor prints, we focus on balancing cost and longevity with aqueous pigment systems on carefully chosen coated papers.

In addition to printing, we offer a variety of protective finishing services. Our in-house bindery and finishing team ensures that protective coatings are applied flawlessly, enhancing both the durability and appearance of your prints.

Based in Hackensack, NJ, Miro Printing & Graphics Inc. proudly serves businesses across the region, delivering high-quality, long-lasting print solutions tailored to your needs. Let us help you create prints that stand the test of time.

Conclusion

Lightfastness testing plays a crucial role in ensuring that CMYK prints maintain their quality over time. This process involves the right combination of testing methods, material choices, and advanced printing techniques.

Key Takeaways

Accelerated aging tests and standardized methods help predict how prints will perform under various conditions, whether displayed indoors or exposed to outdoor elements for extended periods.

Print longevity is influenced by several interconnected factors. Ink formulation is a major component – pigment-based inks typically hold up better in lightfastness tests compared to dye-based options. Substrate selection also matters, with coated papers and specialized vinyl materials providing greater resistance to UV damage. Additionally, environmental conditions play a significant role in determining fade rates.

When analyzing test results, pay attention to Delta E values, which measure color change. Keep in mind that different applications require varying durability standards. For instance, indoor displays may allow for more noticeable color shifts than outdoor signage or archival materials.

These considerations form the foundation for creating long-lasting print solutions that meet diverse needs.

Miro Printing & Graphics Inc.: Your Trusted Printing Partner

Miro Printing & Graphics Inc.

Armed with these insights, Miro Printing & Graphics Inc. is here to help you achieve exceptional print longevity. With over 30 years of experience, we specialize in producing durable CMYK prints by understanding the intricate relationship between inks, substrates, and environmental factors.

"Let us know what type of project you are working on, and allow us to offer our expertise. During the process, Miro Printing & Graphics Inc. will work with a professional, personal approach to better understand your company’s needs. The end result is a finished piece that exceeds your highest expectations but never your budget!"

Our range of services – spanning digital, offset, and large-format printing – ensures that your prints not only look great but also stand the test of time. Whether you need outdoor banners designed to resist fading for years or indoor materials with consistent, vibrant colors, we guide you in selecting the ideal combination of inks and substrates for your project.

Located in Hackensack, NJ, we proudly serve businesses across the region, delivering prints with enduring quality. Our in-house bindery and finishing services add an extra layer of precision, applying protective coatings and treatments to ensure your materials are both visually stunning and long-lasting.

FAQs

How do pigment-based inks compare to dye-based inks in terms of lightfastness?

Pigment-based inks stand out for their resistance to fading when exposed to light. This quality makes them a go-to option for prints that need to retain their color and sharpness over time, such as archival materials or long-lasting CMYK prints.

In contrast, dye-based inks are made from soluble dyes, which are more vulnerable to UV light and other environmental factors. While they can deliver vivid, eye-catching colors initially, they tend to fade faster, especially in brightly lit or outdoor settings. If maintaining color over time is a top priority, pigment-based inks are the smarter choice.

How do humidity and temperature affect the longevity of CMYK prints?

Environmental factors like humidity and temperature have a big impact on how long CMYK prints last. If the humidity is too high, the paper can soak up moisture, which might cause it to warp, smudge, or fade faster. On the flip side, low humidity can lead to static buildup, which can cause problems like sheet misfeeds that hurt print quality.

Temperature swings can be just as tricky. When materials expand or contract due to temperature changes, it can throw off color alignment or distort the design, ultimately shortening the print’s lifespan. To keep your prints in great shape, aim for a stable environment – 45-55% relative humidity and steady temperatures are ideal. Storing prints properly in controlled conditions can make a noticeable difference in how long they last.

How can I make my CMYK prints more resistant to fading when used outdoors?

To keep your CMYK prints looking sharp and vibrant outdoors, think about adding UV-protective coatings like varnishes or laminates with UV inhibitors. These coatings act as a barrier against sunlight, helping to reduce fading and giving your prints a longer lifespan.

Another way to boost durability is by using UV-resistant inks or adding UV absorbers during the printing process. If you’re serious about maintaining print quality over time, performing lightfastness tests – like using a Xenon Arc fadeometer – can give you valuable insights into how your prints will hold up in outdoor conditions.

If you need professional help, Miro Printing & Graphics Inc. in Hackensack, NJ, provides top-notch printing services and post-press solutions to ensure your prints are both high-quality and built to last.

Related Blog Posts

https://app.seobotai.com/banner/banner.js?id=68d487bae3dd4bddfa4c15af

Checklist for Designing Die-Cut Cards

Learn how to design die-cut business cards that make a lasting impression with essential tips on dimensions, materials, finishes, and layout.

Die-cut business cards are a powerful way to make a lasting impression. By using custom shapes, materials, and finishes, they can visually and tactilely represent your brand. Here’s what you need to know:

  • Dimensions & Shapes: Start with a standard size (3.5" x 2") and extend your design by 0.125 inches for bleed. Custom shapes like rounded corners or unique cut-outs can add appeal but must balance creativity with usability.
  • Materials: Choose sturdy cardstock (14pt–16pt) or explore textured, coated, or plastic options for durability and aesthetic impact.
  • Finishes: Add spot UV, foil stamping, embossing, or edge painting for extra flair. These details enhance the design while maintaining functionality.
  • Layout & Readability: Ensure text and graphics are clear, with a safe margin of 1/8 inch from edges. Use high-contrast colors and legible fonts.
  • File Preparation: Submit print-ready files in PDF format with 300 DPI resolution, CMYK colors, and separate die-cut layers.

Die-cut cards demand precision in design and production. Miro Printing & Graphics Inc. offers expert support, from design troubleshooting to proofing, ensuring your cards stand out and meet technical standards.

Dimensions and Shapes

Standard Dimensions and Guidelines

When designing a die-cut business card, the starting point is the standard U.S. dimensions: 3.5" × 2". To ensure a polished final product, extend your design by 0.125 inches beyond the cut line for bleed and keep all critical elements at least 0.125 inches inside the trim. This prevents key details from being accidentally trimmed. If you’re venturing into custom die-cut shapes – like a card shaped as a house – these technical guidelines become even more important. The more intricate the shape, the more precise you need to be with bleed and spacing to achieve a flawless result.

How Custom Shapes Affect Usability

Once the dimensions and layout are set, the card’s shape takes center stage in determining how recipients will interact with it. Custom shapes add a tactile and visual appeal, making the card more engaging and memorable for those who receive it. However, they come with practical considerations that standard rectangular cards don’t encounter.

For example, rounded corners and smooth curves not only enhance usability but also reduce the risk of tearing, which can happen with sharp or acute angles during handling or production. These small design tweaks can make a big difference in durability.

The shape of the card can also leave a lasting impression. A unique design increases the chances of the card being kept and even sparking conversations. For instance, a card with an interactive die-cut feature – like a small window revealing hidden details or a tab that doubles as a bookmark – can encourage recipients to engage with it beyond a simple glance.

That said, readability should always remain a top priority. While creative shapes can align beautifully with your brand identity, it’s crucial to ensure that your card is practical and easy to read. Opt for clear, legible fonts and avoid overly intricate typefaces, as complex shapes can sometimes make text harder to decipher.

Custom shapes also allow your cards to serve purposes beyond traditional networking. A fitness trainer might design dumbbell-shaped cards that double as appointment reminders, while a bakery could create cupcake-shaped loyalty cards with punch-out sections to track purchases. These multifunctional designs not only reinforce brand identity but also add value for the recipient.

Ultimately, the goal is to strike the right balance between creativity and functionality. Consider how easy it is to handle your chosen shape. Your card should stand out as a unique representation of your brand while remaining practical for everyday use as a networking tool.

Materials and Finishes

Paper Stock Options

Choosing the right paper stock is your starting point. The thickness of cardstock, measured in points (pt) or pounds (lb), plays a huge role in the durability and overall feel of your card. Heavier weights offer a sturdier, more premium touch.

For die-cut business cards, 14pt to 16pt cardstock strikes a great balance between sturdiness and flexibility. This weight is ideal for clean, precise cuts while being rigid enough to hold intricate shapes without bending or tearing. If your design includes very detailed die-cut patterns, 18pt cardstock provides added stability, though it can be trickier to cut through complex designs.

Uncoated cardstock gives a natural, tactile feel and is perfect for techniques like embossing or letterpress. Its rough texture adds an earthy, handcrafted vibe to your card.

Coated cardstock, on the other hand, comes in two popular finishes: matte and gloss. Matte-coated stock delivers vibrant colors without the glare, and it’s easy to write on. Gloss-coated stock, however, offers vivid colors and sharp image quality, making it a great choice for designs featuring bold graphics or photography.

If durability is a priority, plastic substrates like 20mil PVC are an excellent option. These are waterproof and long-lasting, making them ideal for membership or loyalty cards that see frequent handling.

For a unique touch, consider textured papers. A linen finish offers a polished, classic look, while a felt finish provides a softer, approachable texture. These specialty papers can elevate your die-cut design by adding a tactile element that makes your card unforgettable.

Once you’ve settled on the paper stock, you can explore specialized finishes to make your design even more striking.

Special Finishes and Add-Ons

Spot UV coating is a fantastic way to draw attention to specific elements of your design. By applying a glossy finish to select areas while keeping the rest matte, you can emphasize the unique contours of your die-cut shape or highlight key details.

For a touch of luxury, foil stamping adds metallic accents that catch the light. Classic options like gold, silver, and copper are timeless, while rose gold or holographic foils offer a modern twist. Beyond the visual appeal, foil stamping adds a tactile dimension that pairs beautifully with the depth of die-cut designs.

Embossing and debossing create raised or recessed details that add texture to your card. These techniques work particularly well along the edges of die-cut shapes, creating borders that accentuate the custom outline. Blind embossing (without ink) delivers a subtle, elegant look, while registered embossing combines texture with printed elements for added impact.

For a soft, luxurious feel, soft-touch coating is a standout choice. It adds a velvety texture that enhances the tactile experience of your card’s unique shape while also resisting fingerprints and wear.

If your cards need extra protection, aqueous coating is a practical option. This water-based finish guards against moisture and wear while maintaining excellent print quality. It’s a cost-effective alternative to UV coating and dries quickly for a professional look.

Edge painting is another way to make your card pop. By adding color to the edges, you can highlight the custom shape and give your card a polished, finished appearance. Metallics like gold and silver are popular choices, but bold colors that match your branding can be equally striking.

When combining multiple finishes, think about how they’ll work together with your die-cut shape. For example, rounded corners pair beautifully with edge painting to emphasize smooth curves, while sharp angles might benefit from spot UV to showcase precision. These thoughtful combinations can take your custom design to the next level, ensuring your card leaves a lasting impression.

How To Set Up A Die Cut Business Card or Sticker in Adobe Illustrator | Clubcard TV

Adobe Illustrator

Design Layout Setup

Once you’ve nailed down your design’s dimensions and materials, it’s time to focus on the layout and where to place your content.

Required Information to Include

Make sure your card includes the essentials: your company name, logo, and primary contact details. Stick to one or two key contact methods like a phone number, email, or website, along with one or two active social media handles.

Adding a short job title or tagline can quickly communicate what you do. Phrases like "Creative Director" or "Your Marketing Partner" are concise and effective, especially if your business name doesn’t clearly explain your industry.

If space is tight – like on die-cut cards – consider adding a QR code. This can link directly to your digital business card, portfolio, or contact details. Just be sure to place it where it won’t interfere with the card’s unique shape but remains easy to scan.

Don’t forget a clear call-to-action. Phrases like "Schedule Your Free Consultation" or "View Our Latest Projects Online" can guide recipients toward their next step and make your card more engaging.

Once you’ve locked in the content, focus on refining your design for readability and visual appeal.

Design Best Practices

  • Font size matters: Use fonts that are easy to read, with a minimum size of 8pt – though 10pt or larger is ideal.
  • Lines and borders: Keep decorative lines or borders at least 0.5pt thick to ensure they print cleanly.
  • Graphics and images: Use vector graphics for logos and icons to maintain sharp edges, and ensure photos or illustrations are at 300 DPI at their actual size to avoid pixelation.
  • Color contrast: Ensure strong contrast between text and background, especially near the die-cut edges. For example, light text on a dark background (or vice versa) stands out better. Avoid placing critical text over busy patterns or images.
  • Visual hierarchy: Guide the reader’s eye by prioritizing elements. Start with your company name as the most prominent, followed by your name and title, and then your contact details in descending order of importance.
  • Die-cut considerations: Be mindful of how the card’s shape affects readability. Curved text can work well for short phrases like taglines, but keep contact details in straightforward horizontal or vertical arrangements for clarity.

Lastly, ensure your design elements are securely placed to avoid issues during trimming.

Safe Layout Guidelines

To avoid trimming mishaps, keep all critical elements at least 1/8 inch away from the die-cut edge.

Die-cut designs require a slightly different approach to bleed. While standard cards need a 1/8-inch bleed on all sides, die-cut cards require the bleed to follow the custom shape. Extend any background colors, patterns, or images beyond the cut line by at least 1/8 inch.

Pay extra attention to text placement near curved or angled edges. Horizontal text should maintain a safe distance from non-horizontal cut lines. If your design includes sharp angles or intricate details, avoid placing text in those areas altogether.

For logos, stick to stable, flat areas – usually the center or the largest unobstructed section. Avoid placing logos near complex cut patterns or narrow sections where distortion could occur.

If your die-cut shape includes functional elements like tabs or notches, keep these areas free of important details. These sections are more prone to wear and tear, so place critical information like phone numbers or email addresses in safer, more stable parts of the layout.

When working with Miro Printing & Graphics Inc., their design team can provide tailored safe area guidelines for your specific die-cut shape. This ensures your layout not only meets technical requirements but also makes a strong visual impact.

sbb-itb-ce53437

Getting your print files right is essential to avoid delays and costly reprints. A little extra attention upfront can save you a lot of headaches later.

File Format and Specifications

Always use PDF as your file format – it’s the industry standard for preserving designs across different software. When exporting, choose the "Press Quality" preset to ensure top-notch resolution and accurate colors.

Make sure to embed your fonts to prevent any unexpected text shifts during printing. Most design programs let you do this when exporting; just look for an option like "embed fonts" or "outline fonts" and check the box.

Convert your colors to CMYK before submitting your file. Remember, what you see on your screen (RGB) may not match the printed result, as print colors use CMYK inks. That vibrant blue on your monitor? It might print closer to purple if left unconverted.

For photos and raster images, set the resolution to 300 DPI. This ensures crisp, professional-quality prints without any pixelation. Vector elements, like logos and text, don’t require a DPI setting since they scale perfectly at any size.

If your design is vector-based, Adobe Illustrator (.AI) and Encapsulated PostScript (.EPS) files are excellent options. These formats are particularly effective for handling custom shapes and die-cut lines, as they maintain sharp edges no matter the size.

File Setup Tips

  • Disable facing pages – die-cut cards are single-sided, so this setting isn’t needed.
  • Add crop marks and bleed: Extend your background by 1/8 inch beyond the trim edge. Crop marks guide the printer on where to cut, while the bleed ensures no awkward white edges if the cut is slightly off.
  • Use a separate layer for die-cut lines: Assign a unique, bright color (like magenta) with a 0.25pt stroke to make the cutting path easy to identify for the production team.
  • Double-check your file at 100% zoom: Look for stray pixels, overlapping elements, or text placed too close to the cut line. A quick review can save you days of revisions.
  • Name your file clearly: For example, "CompanyName_DieCut_BusinessCard_CMYK_300DPI.pdf" makes it easy for the production team to know exactly what they’re handling.

If this process feels overwhelming, don’t worry – there’s help available.

In-House Design Support

Feeling stuck? Miro Printing & Graphics Inc. offers expert design services to take the guesswork out of file preparation. Their team can handle every step, from concept creation to print-ready files, ensuring your die-cut cards look amazing and meet all technical requirements.

Here’s how they can help:

  • Die-cutting expertise: Their team can spot and fix potential production issues before they become problems. They’ll adjust your design to ensure it works seamlessly with their cutting equipment, which can save you money on setup costs and reduce material waste.
  • File troubleshooting: Got a file with minor issues, like incorrect color profiles or low resolution? They can often fix these problems in-house without sending it back to you for revisions.
  • Proofing support: See exactly how your card will look before production starts. They can provide digital proofs for accurate colors and proportions or even physical samples if you want to feel the material and test the die-cut shape.

Pre-Press Review and Proofing

Once your file preparation is complete, it’s time for a final pre-press review. This step ensures your design is ready for production, helping you avoid costly reprints or delays.

Pre-Submission Checklist

Start by checking the legibility of your text. Print your design at actual size to make sure everything is readable, especially if you’re using a minimum text size of 8pt – this is particularly important for textured paper stocks. Double-check that all crucial details, like your contact information and company name, are clear and easy to find.

Pay close attention to color accuracy, especially for die-cut cards. Open your file in different software to catch any color shifts, and, if possible, view it on multiple devices. Be cautious with dark colors near die-cut edges; if your bleed isn’t set up correctly, white paper might peek through at the edges.

Keep all critical design elements – logos, text, and graphics – at least 1/8 inch away from the die-cut edge. Die-cutting equipment can slightly vary, and you don’t want important details, like your phone number, accidentally trimmed off.

Evaluate the die-cut shape to ensure it’s sturdy enough for production. Corners with angles sharper than 90 degrees are prone to tearing or bending. Thin or delicate sections should be at least 1/4 inch wide to maintain stability and durability.

Finally, confirm all file specifications are correct. Your resolution should be set at 300 DPI, colors in CMYK format, and fonts either embedded or outlined. Ensure the die-cut line is on a separate layer, marked with a distinct color that won’t interfere with your design.

Once you’ve verified these details, move on to proof review to ensure everything is production-ready.

Requesting Proofs

After ensuring your design meets technical standards, request proofs to finalize production quality. Digital proofs are a great way to check color accuracy, layout, and die-cut alignment. These proofs provide a clear view of how your design will look, including where the die-cut edges will fall.

For die-cut cards, physical proofs are especially helpful. They allow you to test the paper weight, assess durability, and confirm the practicality of the die-cut shape. While an intricate cut-out might look amazing, it could prove too fragile for everyday use in wallets or cardholders.

When reviewing proofs, compare the colors to your original design. Keep in mind that printed colors often differ from what you see on screen, particularly when specialty finishes or textured papers are involved. If your brand colors are essential to your identity, request a color-matched proof to ensure they’re accurate.

Proofs typically take 1-3 business days to prepare, depending on your design’s complexity and the production schedule. Be sure to account for this time in your project timeline, especially if you’re working toward a specific event or launch date.

Miro Printing & Graphics Inc. offers both digital and physical proofing options to help you perfect your die-cut cards before full production begins. Their team can also recommend adjustments during the proofing stage to address potential issues that could impact the final quality or durability of your cards.

Summary and Next Steps

Crafting professional die-cut cards requires careful attention to detail, from the initial concept to the final production stages. Following these essential steps ensures a polished, high-quality result.

Key Steps Review

Start by understanding the dimensions and shapes of your design. While the standard business card size of 3.5" x 2" serves as a reliable starting point, custom shapes demand extra precision. Avoid intricate or narrow design elements that could weaken the card’s durability.

Choose cardstock in the 14-16pt range for a balance between sturdiness and aesthetic appeal. Adding specialty finishes like spot UV or foil stamping can enhance the card’s visual impact. However, keep in mind that textured paper often requires larger text sizes to maintain legibility.

When laying out your design, maintain a safety margin of at least 1/8 inch from the edges to protect crucial elements such as logos and contact details. For file preparation, use 300 DPI resolution in CMYK, embed all fonts, and include a separate die-cut layer marked with a distinct color.

A thorough pre-press review is essential to avoid costly mistakes. By reviewing both digital and physical proofs, you can confirm color accuracy, test the paper’s durability, and ensure proper die-cut alignment. While this step may add 1-3 business days to your timeline, it’s a worthwhile safeguard against reprints.

Once these foundational steps are in place, having access to expert guidance can make a significant difference.

Why Partner with Miro Printing & Graphics Inc.

Miro Printing & Graphics Inc. specializes in die-cutting as part of their post-press services, making them an excellent choice for managing your custom card projects from start to finish. Their personalized approach ensures even the most intricate designs are handled with care and expertise.

Through their Custom Projects service, Miro Printing & Graphics Inc. offers tailored solutions that go beyond standard options. Whether you’re looking to experiment with unique shapes, specialty materials, or eye-catching finishing techniques, their experienced team collaborates with you to bring your vision to life while ensuring the final product is both durable and functional.

Their graphic design consultation services simplify the design process, providing expert advice to help you navigate complex specifications. This hands-on support ensures your die-cut cards are not only visually impressive but also ready for production.

Conveniently located at 831 Main St in Hackensack, New Jersey, Miro Printing & Graphics Inc. serves clients across New Jersey, New York, and Connecticut. To discuss your die-cut card project, you can reach them at (201) 439-9686 or email info@bergencountyprinters.com during business hours (Monday through Friday, 9:00 AM to 5:00 PM).

FAQs

What should I consider when choosing a custom shape for a die-cut business card?

When choosing a custom shape for your die-cut business card, it’s important to pick a design that mirrors your brand and industry. A shape that ties directly to your logo, product, or service can leave a memorable impression and highlight your originality.

However, don’t overlook practicality. The card’s shape should still be sturdy, easy to read, and convenient to handle. Overly elaborate designs might weaken the card or make production tricky. Striking the right mix of creativity and usability ensures your card grabs attention while staying polished and professional.

How do paper types and finishes affect the look and durability of die-cut cards?

The type of paper and finish you select for your die-cut cards plays a big role in both their look and durability. Coated finishes – like gloss or matte – add a layer of protection against moisture, dust, and wear. Plus, they make colors pop, giving your cards a sharp, vibrant appearance. If you prefer a more natural feel, uncoated paper offers a soft texture and muted tones, though it’s more prone to smudging and wear.

A glossy finish delivers a shiny, attention-grabbing effect, while matte offers a subtle and sophisticated vibe. Pairing the right paper with the perfect finish ensures your die-cut cards not only turn heads but also stand the test of time.

How do I make sure my design file is ready for printing die-cut cards?

To prepare your design file for die-cut business cards, start by adding a die line layer that clearly defines the card’s cut shape. Use a spot color, like "DIE-CUT FORME", and set it to CMYK. Don’t forget to include a bleed area of at least 0.125 inches to prevent any part of the design from being cut off.

Ensure all images and text are at a 300 dpi resolution and in CMYK color mode. To avoid font-related issues, either convert fonts to outlines or embed them. Add trim marks and maintain safe zones around the design to ensure accurate cutting. By following these guidelines, your file will be ready for professional die-cut printing.

Related Blog Posts

https://app.seobotai.com/banner/banner.js?id=68d0cc547b5c01ae368bb95f