Recycled cardstock is a great way to reduce waste while maintaining quality for printing projects. It’s made from post-consumer materials, often with added virgin fibers for strength, and comes in various weights and finishes. To choose the right option, consider:
- Weight: Lighter options (e.g., 80lb) suit flyers, while heavier ones (e.g., 110lb) work for business cards.
- Finish: Smooth finishes are ideal for digital printing; textured ones add a premium feel.
- Recycled Content: Look for high post-consumer waste percentages and certifications like FSC.
- Printer Compatibility: Match cardstock to your printing method (digital or offset).
Selecting the right recycled cardstock ensures quality results while supporting waste reduction efforts. Pair it with experienced printers for best outcomes.
170gsm Paper Weight Guide | Flyer & Leaflet Printing | UK Print Store
Main Factors for Selecting Recycled Cardstock
When choosing recycled cardstock, focus on three main aspects: print quality, durability, and appearance. Additionally, consider the weight and thickness to ensure it aligns with your specific printing needs.
Weight and Thickness
Cardstock weight is typically measured in pounds (lbs or #) or grams per square meter (gsm), while thickness (caliper) is measured in points (pt), where 1 pt equals 1/1000 of an inch. Interestingly, two papers with the same weight can vary in thickness depending on the materials used and the finishing process, such as calendering.
Cardstock stands out for being sturdier and thicker than regular paper. Here are two common weight options and their uses:
- 80lb recycled cardstock: Ideal for lightweight applications like flyers, program covers, and invitations.
- 110lb cardstock: Offers a thicker, more substantial feel, making it perfect for business cards, presentation covers, postcards, and invitations.
Recycled Cardstock for Different Printing Methods
When choosing recycled cardstock, it’s essential to consider how it performs across various printing methods. Factors like weight and finish, as mentioned earlier, play a big role in determining how well the cardstock works for both digital and offset printing.
Digital Printing Applications
Recycled cardstock works well with digital presses, copiers, inkjet, and laser printers. For home printing, an 80 lb cardstock typically feeds without issues, but heavier options like 120 lb may require testing to ensure smooth performance.
Smooth finishes, such as uncoated smooth, ultra-smooth, or vellum, tend to deliver better print quality for digital projects. Products like Mohawk Fine Papers Color Copy and Finch Paper Finch Fine Color Copier are specifically designed for digital printing and are great options to consider.
To get the best results, adjust your printer settings to accommodate cardstock or heavier paper weights. For an eco-friendly approach, pair recycled cardstock with sustainable inks. However, if you’re working with offset printing, the requirements change significantly.
Offset Printing Applications
Offset printing requires recycled cardstock that can handle mechanical pressure and liquid inks while maintaining good ink holdout.
Always check the product specifications to confirm compatibility with offset printing. Vendors typically provide detailed descriptions to guide you in selecting the right cardstock for this method.
sbb-itb-ce53437
Common Recycled Cardstock Types Compared
When choosing recycled cardstock, understanding the differences between types can help you pick the best option for your project. Each type brings its own strengths, making them suitable for different purposes.
Recycled Cardstock Comparison Chart
Here’s a quick look at some popular recycled cardstock options, along with their descriptions, ideal uses, benefits, and things to keep in mind:
| Cardstock Type | Description | Best For | Key Advantages | Considerations |
|---|---|---|---|---|
| 100% Post-Consumer Recycled | Made entirely from recycled consumer materials. | Projects focused on sustainability, like business cards, invitations, and brochures. | Offers strong eco-friendly benefits and may include certifications. | May show slight color or texture variations. |
| Mixed Content Recycled | Combines recycled fibers with virgin materials for greater consistency. | Marketing materials, presentations, and reports. | Delivers reliable print quality while still using recycled fibers. | Contains less recycled content compared to 100% recycled options. |
| Recycled Kraft Cardstock | Features a natural brown tone with an earthy, rustic feel. | Rustic invitations, eco-conscious packaging, and craft projects. | Provides a vintage, organic aesthetic. | Limited to brown or tan shades. |
| Recycled Colored Cardstock | Pre-colored recycled paper that adds visual interest. | Projects needing a colored background or accents. | Reduces the need for full-color printing. | Fewer color options compared to virgin cardstock. |
| Recycled Cover Stock | A thicker, premium cardstock with a polished finish. | Professional reports, book covers, and upscale brochures. | Creates a high-end, substantial look perfect for premium projects. | Higher cost and often lower recycled content percentage. |
Each type serves a specific purpose. For maximum sustainability, go with 100% post-consumer recycled cardstock. If you need consistent quality, mixed content recycled is a solid choice. For a natural, earthy vibe, recycled kraft is the way to go. Recycled colored cardstock works well for creative designs, while recycled cover stock is ideal for premium, polished presentations.
Consider your project’s design, functionality, and environmental goals to find the perfect match. Up next, learn where to source these cardstock options and explore printing services.
Where to Buy Recycled Cardstock and Printing Services
Finding the best recycled cardstock and printing services means balancing quality, availability, and environmental considerations while working with suppliers who understand your specific project requirements.
Finding Recycled Cardstock Suppliers
When searching for recycled cardstock in the United States, focus on suppliers that provide certified materials. Look for eco-labels like FSC (Forest Stewardship Council) and Blue Angel – these certifications ensure the materials are responsibly sourced and meet high environmental standards.
Choosing local suppliers not only supports the economy but also helps lower your carbon footprint. Many paper distributors across the U.S., especially in larger metro areas, offer a wide range of recycled cardstock options to meet growing demand.
Be sure to ask suppliers about the percentage of recycled content in their products. Cardstock with a high proportion of post-consumer waste (PCW) content is particularly impactful, as it represents materials that have already been used and kept out of landfills. To ensure accuracy, verify supplier claims through third-party audits or certification programs.
While recycled cardstock is often competitively priced compared to virgin paper, consider the potential for long-term savings. Benefits like reduced waste, tax incentives, and bulk purchase discounts can offset upfront costs [12, 18].
Once you’ve secured a reliable supplier, the next step is to partner with an expert printing service to bring your recycled cardstock projects to life.
Working with Miro Printing & Graphics Inc.
After sourcing high-quality recycled cardstock, it’s essential to work with a printing partner that has experience handling eco-friendly materials. Miro Printing & Graphics Inc., based in Hackensack, New Jersey, offers over 30 years of expertise in printing on recycled substrates. Their services include digital, offset, and large-format printing, all fully compatible with recycled materials.
What sets Miro apart is their personalized approach. As they state:
"Let us know what type of project you are working on, and allow us to offer our expertise."
This hands-on support is particularly valuable when working with recycled cardstock, which may require special handling compared to virgin materials. Miro’s team knows how to fine-tune print settings to achieve sharp, professional results across all printing methods.
Located at 831 Main St, Hackensack, NJ, Miro offers the convenience of local service with the precision of a boutique print shop. Their dedication to quality and customization is evident in their philosophy:
"With meticulous attention to detail, our print shop has a customized approach that is unmatched by big online printing companies or franchises."
For projects involving recycled materials, this level of expertise and attention to detail can make all the difference in achieving the best possible outcome.
Summary and Next Steps
Choose the right recycled cardstock by focusing on its weight, finish, color, recycled content, and compatibility with your printer.
Key Factors to Consider
To ensure your recycled cardstock meets your project’s needs, keep these points in mind:
- Weight and thickness: Use lighter cardstock for items like flyers and brochures, while heavier cardstock works better for business cards and postcards.
- Surface finish: Matte finishes improve readability, glossy finishes enhance color vibrancy, and textured finishes provide a high-end feel.
- Color selection: Natural tones offer a unique character, while eco-friendly bleached options deliver brighter whites.
- Recycled content and certifications: Look for cardstock with high post-consumer waste content and certifications such as FSC or Blue Angel.
- Printer compatibility: Digital printing works with most recycled cardstocks, but offset and large-format printers may require specific standards.
These guidelines will help you select the perfect cardstock and prepare you for a smooth professional printing experience.
Expert Assistance for Your Project
To bring these principles to life, it’s helpful to partner with experienced printers who understand the nuances of working with recycled materials. They can adjust printer settings to accommodate the unique characteristics of recycled cardstock, ensuring top-notch results.
Miro Printing & Graphics Inc. is a trusted name in handling recycled cardstock for digital, offset, and large-format printing. Their team specializes in managing challenges like ink coverage and feeding issues on textured surfaces.
"Let us know what type of project you are working on, and allow us to offer our expertise."
"With meticulous attention to detail, our print shop has a customized approach that is unmatched by big online printing companies or franchises."
By considering factors like paper grain direction, moisture content, and surface texture, professional printers can help you save time and materials while achieving your quality and sustainability goals.
Start by gathering cardstock samples and consulting your printing partner to balance quality, budget, and environmental responsibility.
FAQs
How do I choose recycled cardstock that works with my printing method?
To choose recycled cardstock that works well with your printer, start by looking at the weight and finish of the paper. Some printers struggle with heavier or textured cardstock, so make sure your printer can handle the specific type you’re considering. Also, check if the cardstock is compatible with your printing method – whether it’s laser, inkjet, offset, or digital printing. Each type of printer has unique needs, and matching the cardstock to the technology can make a big difference in the final results.
For the best results, review your printer’s specifications or try a sample of the recycled cardstock with your equipment. Testing can help you avoid problems like smudging, paper jams, or uneven prints, giving your project a polished and professional look.
What are the environmental advantages of using 100% post-consumer recycled cardstock over mixed-content options?
Using 100% post-consumer recycled cardstock comes with some serious environmental perks. For starters, it keeps waste out of landfills by giving post-consumer materials a second life. Plus, compared to making paper from virgin fibers, this process uses significantly less water and energy.
It also helps cut down greenhouse gas emissions and lowers energy demands during production. Choosing 100% post-consumer recycled cardstock is a smart way to conserve resources and reduce your overall impact on the planet.
What factors should I consider when choosing the finish of recycled cardstock for my printing project?
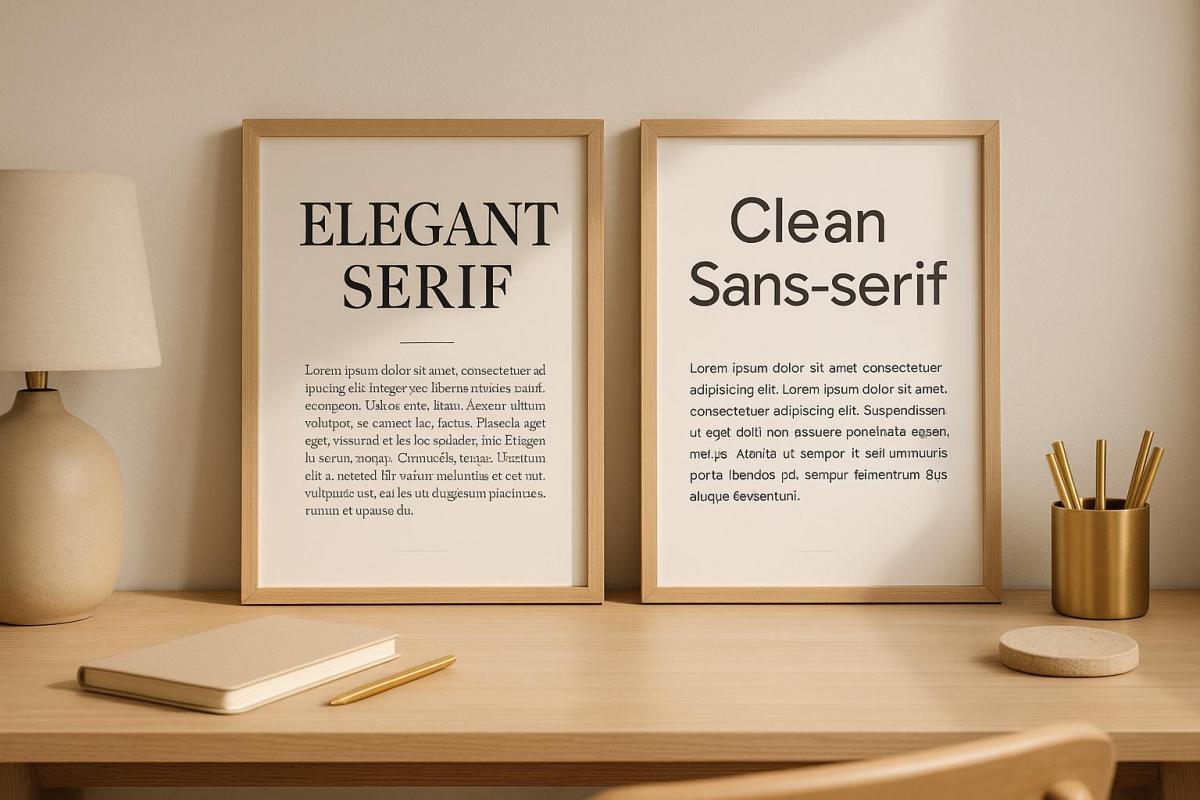
When deciding on the finish for recycled cardstock, consider the overall vibe and functionality you want for your project. A smooth finish is ideal for clean, professional prints and intricate details, while a matte finish minimizes glare, making it perfect for readability or handwritten notes. If you’re aiming for something with a bit more texture and character, explore options like vellum, linen, or felt finishes – these are excellent for artistic or upscale designs.
For projects that need bold, vibrant colors or sharp images, a glossy or satin finish can deliver that polished look. On the other hand, if you’re going for understated elegance, matte finishes often hit the mark. Just be sure to check that the finish you choose is compatible with your printer to ensure everything comes out as planned.
Related posts
- How to Choose the Right Paper for Custom Prints
- Pre vs Post-Consumer Recycled Paper: Key Differences
- Checklist for Choosing Recycled Paper for Printing
- How to Choose Recycled Paper for Folded Prints
https://app.seobotai.com/banner/banner.js?id=68a514943a9981f92620d731