Large format printing is used for creating large, attention-grabbing visuals like posters, banners, and architectural plans. Choosing the right paper is crucial as it impacts image quality, durability, and overall presentation. Here’s what you need to know:
- Glossy Paper: Shiny surface for vibrant colors; best for photos and marketing materials but prone to glare.
- Matte Paper: Non-reflective, ideal for text-heavy designs or art prints; offers a polished look but less color intensity.
- Satin Paper: A middle ground between glossy and matte; vibrant colors with reduced glare.
- Bond Paper: Affordable and durable; perfect for blueprints, CAD drawings, and technical documents.
- Canvas & Specialty Papers: Textured options for art reproductions or durable materials like polypropylene for outdoor use.
Key factors to consider include paper weight (measured in pounds or gsm), thickness (in mils), and finish type (glossy, matte, or satin). Heavier papers are more durable and suitable for long-term projects, while lightweight options work well for temporary displays.
For professional guidance, companies like Miro Printing & Graphics Inc. can help you select the best paper type, ensuring high-quality results tailored to your project’s needs.
Paper Guide: Paper Types for Printing – Choosing the Right One
Common Large Format Paper Types
Choosing the right paper type for large format printing can significantly impact the look and durability of your project. Each type of paper brings unique qualities to the table, making it suitable for specific uses. Below is an overview of the most common options and their ideal applications.
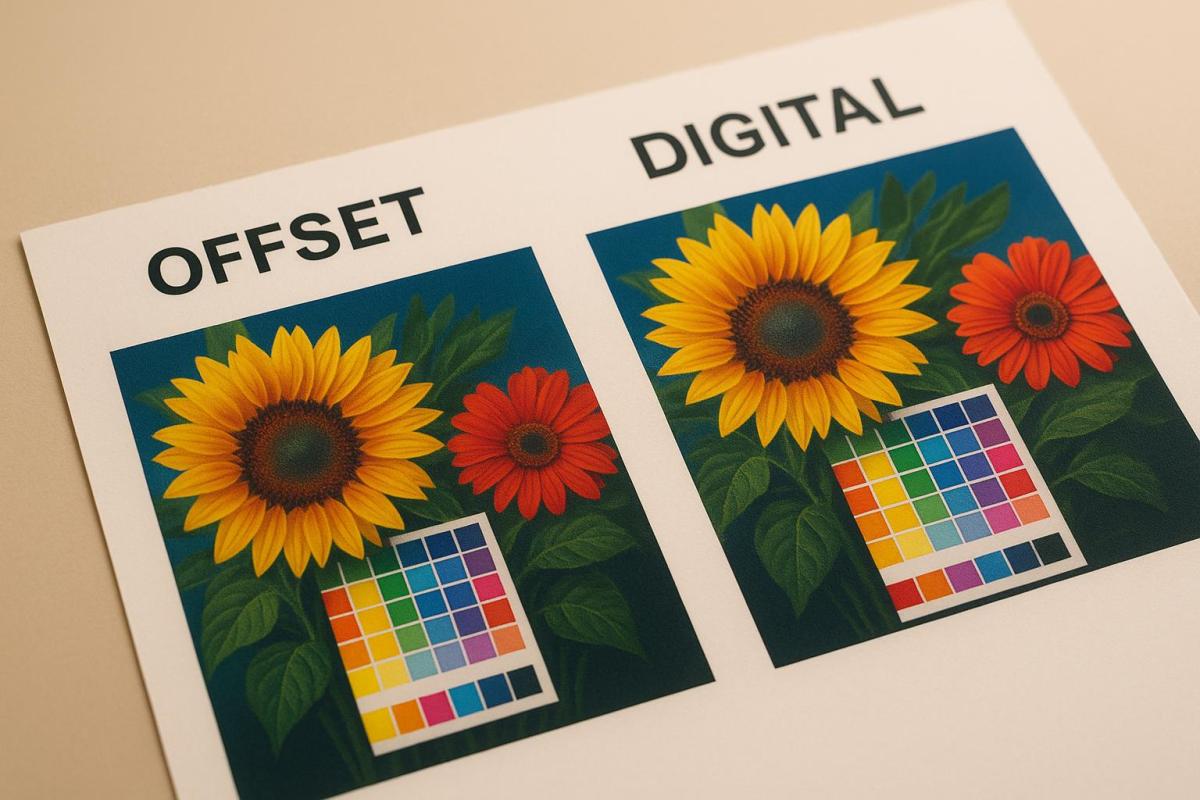
Glossy Paper
Glossy paper stands out for its shiny, reflective surface that enhances color vibrancy and sharpness. This finish makes it a go-to choice for photo prints, posters, and marketing materials like flyers. The rich, deep colors it produces are visually striking, but its reflective surface can create glare under bright lighting, which is something to consider depending on your display setting.
Matte Paper
Matte paper, with its non-reflective finish, offers a sleek and professional look. It’s perfect for applications like fine art prints, artwork, and presentations where a glare-free experience is essential. While matte paper may not deliver the same color intensity as glossy options, it excels in detail reproduction and provides a high-end feel.
Satin Paper
Satin paper strikes a middle ground between glossy and matte finishes. Its semi-gloss surface offers vibrant color reproduction without the harsh glare of glossy paper. This makes it an excellent choice for photo prints and display graphics, especially in environments with varied lighting conditions.
Bond Paper
Bond paper is a practical and budget-friendly option, known for its bright white surface and clarity, especially for line work and text. It’s widely used for blueprints, CAD drawings, and engineering or architectural documents. Available in weights ranging from 75–90 GSM (20#–24#) for everyday use to 90–110 GSM (24#–28#) for premium presentations, bond paper comes in widths like 24", 36", and 42", with roll lengths between 150 and 650 feet.
Canvas and Specialty Papers
Canvas and specialty papers cater to more creative and niche needs. Textured canvas paper is ideal for art reproductions, giving prints the look of traditional paintings. Specialty options like backlit film are perfect for illuminated displays, such as light boxes, retail signage, or architectural lighting, offering a glowing effect. Other materials, such as Tyvek, provide added water and tear resistance, while clear film works well for overlays in engineering and architectural projects.
| Paper Type | Best Applications | Key Benefits | Typical Cost Range |
|---|---|---|---|
| Glossy | Posters, marketing materials, photo displays | Vibrant colors, sharp details | Medium |
| Matte | Art prints, presentations, gallery displays | Glare-free, polished appearance | Medium |
| Satin | Photo prints, retail displays, trade shows | Balanced color with minimal reflection | Medium |
| Bond | Blueprints, CAD drawings, technical documents | Affordable, durable, clear text | Low |
| Canvas/Specialty | Art reproductions, backlit displays, overlays | Unique textures and specialized features | High |
Key Paper Attributes
Choosing the right paper type is just the first step. Understanding its technical attributes ensures your final print looks and performs exactly as you need.
Weight and Thickness
In the U.S., paper weight is measured in pounds per ream (500 sheets) or in grams per square meter (gsm). These factors directly impact both the print’s appearance and its durability. For large-format printing, weights can range from 20–24 lb (75–90 gsm) for everyday bond papers to 44 lb or more (300+ gsm) for heavyweight fine art papers.
Thickness, measured in mils, plays a crucial role in stiffness and rigidity. It affects printer feeding, curling, and whether the print shows through on the other side, which is especially important for double-sided printing. For canvas prints or similar applications, thicker, heavyweight papers are essential to handle stretching without tearing.
- Papers over 32 lb (120 gsm) feel sturdier, resist curling, and are excellent for client presentations, photography, and art reproductions.
- Medium-weight papers, typically 24–28 lb (90–105 gsm), are great for posters and general signage.
- Lightweight papers are ideal for high-volume projects where cost efficiency is a priority.
Finish Options
The finish of a paper determines how it reflects light and interacts with ink:
- Glossy finishes reflect the most light, producing vibrant colors and sharp details. However, they can cause glare in bright lighting.
- Matte finishes have a non-reflective surface, reducing glare and making them ideal for text-heavy documents or displays in well-lit areas.
- Satin finishes strike a balance, offering moderate color vibrancy while minimizing glare. This makes them versatile for professional photography and presentations.
Glossy papers typically use less ink since they absorb less, while matte papers may require specially formulated inks to prevent smudging.
Paper Comparison Table
| Attribute | Lightweight (20–24 lb) | Medium Weight (24–32 lb) | Heavyweight (32+ lb) |
|---|---|---|---|
| Thickness | Under 4 mils | 4–6 mils | 6+ mils |
| Best Finishes | Matte, Bond | Glossy, Satin, Matte | All finishes available |
| Durability | Basic handling | Good resistance to wear | Excellent durability |
| Ideal Applications | CAD drawings, drafts, blueprints | Posters, presentations, retail signage | Fine art, photography, premium displays |
| Curl Resistance | Low | Moderate | High |
Environmental factors also play a role in paper performance. Heavier papers are more stable in changing humidity, while lightweight papers may absorb moisture and ripple. For outdoor use or displays near windows, UV-resistant coatings can protect against sunlight and water damage, making them a smart choice for long-lasting projects.
sbb-itb-ce53437
Specialty Papers and Advanced Uses
When standard paper just doesn’t cut it for your project, specialty materials can offer exciting new possibilities. These premium substrates require a bit more care but deliver outstanding results, especially for high-end or creative applications.
Canvas and Art Papers
Canvas and art papers go beyond the basics, offering textured finishes and long-lasting durability that make them perfect for premium prints. Canvas paper, for example, stands out with its thick, textured surface – ranging from 10 to 24 mils – that mimics the look and feel of traditional paintings. This makes it ideal for gallery wraps and fine art reproductions, where the image extends around the edges of a frame, capturing the essence of the original artwork.
Not only does canvas paper provide a stunning visual impact, but its archival quality and stretchability also ensure that colors remain vibrant for decades. This durability makes it a favorite for gallery applications and professional art prints. Similarly, art papers offer a variety of textures and finishes. Some are smooth, making them great for detailed photographic work, while others have subtle textures that enhance artistic prints. Both options are excellent for high-end photography and fine art.
For projects requiring different features, films and synthetic materials provide unique advantages.
Backlit Film and Polypropylene
If your project needs to stand out with illuminated visuals or withstand outdoor conditions, films and synthetic materials are worth exploring. Backlit film is specifically designed for lightboxes, retail displays, and trade shows. Its translucent material ensures even light diffusion, making graphics vibrant and eye-catching.
Polypropylene, on the other hand, is a tough synthetic material that’s waterproof, tear-resistant, and UV-resistant. These properties make it an excellent choice for outdoor signage and banners, offering durability and cost-effectiveness for long-term use.
Finishing Options for Specialty Papers
After choosing the right specialty material, applying the proper finishes can take your project to the next level. Finishes like lamination add a clear protective layer, shielding prints from scratches, moisture, and UV light. UV coating, on the other hand, enhances color saturation and sharpness while preventing fading and discoloration.
Handling and storage are also crucial for specialty papers, especially textured options like canvas. Prints should be handled carefully to avoid scratches or creases that could compromise their appearance.
| Material | Best Applications | Key Properties | Durability Level |
|---|---|---|---|
| Canvas | Gallery wraps, fine art prints | Textured, archival quality, stretchable | High |
| Art Paper | Fine art, premium photography | Smooth or textured, archival properties | Medium-High |
| Backlit Film | Lightboxes, displays | Translucent, even light diffusion | Medium-High |
| Polypropylene | Outdoor signage, banners | Waterproof, tear-resistant, UV-resistant | Very High |
Choosing the right specialty paper and finishing options doesn’t just make your project look better – it ensures it lasts longer and leaves a professional impression.
How to Choose the Right Paper
Picking the right large format paper doesn’t have to be complicated. With a clear understanding of your project’s needs and a step-by-step approach, you can make smart choices that deliver high-quality results without breaking your budget.
Project Requirements Assessment
Start by evaluating the needs of your project. Think about where the final product will be displayed – indoors or outdoors – and how long it needs to last. Is it a temporary piece or something more permanent? Also, consider the desired image quality and your budget. Paper weight and thickness play a big role here, as they affect both durability and cost.
Paper Selection Process
Once you’ve outlined your project requirements, use the following guidelines to choose the right type of paper:
- Event posters and retail displays: Opt for heavier, coated papers to achieve vibrant colors and long-lasting durability.
- Technical drawings and blueprints: Lightweight coated or bond paper is ideal for clear details while keeping costs reasonable.
- Fine art prints: Go for canvas or premium art papers with archival properties to ensure longevity and precise color reproduction.
- Outdoor signage: Materials like polypropylene or vinyl are excellent for resisting tears, moisture, and UV exposure.
Before finalizing your choice, make sure the paper is compatible with your printer. Many wide-format inkjet printers designed for bond paper can only handle materials that are less than 9 mils thick. For critical projects, it’s a good idea to request test prints to confirm the final output meets your expectations.
How Miro Printing & Graphics Inc. Can Help
Even with a solid understanding of your needs, professional advice can make the process much easier. That’s where Miro Printing & Graphics Inc. comes in. With decades of experience, they specialize in helping clients navigate the balance between quality, durability, and budget.
"Let us know what type of project you are working on, and allow us to offer our expertise."
The team at Miro Printing & Graphics Inc. takes the time to understand your project, whether it’s a trade show display, architectural drawing, or fine art reproduction. They use real-world performance data to recommend the best paper options for your specific needs.
But their services go beyond just paper selection. Their Computer Layout & Design team ensures your artwork is perfectly tailored to the chosen paper type, while their in-house bindery offers finishing touches that enhance both durability and presentation. From scratch-resistant lamination to specialized mounting for gallery displays, they handle all the details to ensure a polished final product.
Miro Printing & Graphics Inc. also offers large format printing capabilities to accommodate various paper types and sizes. Whether you need standard U.S. architectural sizes like ARCH D (24 x 36 inches) or engineering sizes like ANSI E (34 x 44 inches), their flexibility ensures your project specifications are met.
For businesses managing large-scale distributions, their Mailing & Fulfillment Services provide a convenient, end-to-end solution. This approach saves time and guarantees consistent quality from printing to delivery.
"During the process, Miro Printing & Graphics Inc. will work with a professional, personal approach to better understand your company’s needs. The end result is a finished piece that exceeds your highest expectations but never your budget!"
Their attention to detail and customer-focused approach help avoid costly mistakes, ensuring your investment delivers exactly what you need. Clients often highlight their ability to handle complex projects while maintaining exceptional service and timely delivery.
Conclusion
Choosing the right large format paper can take your prints from ordinary to outstanding. The key is aligning paper characteristics – like weight, thickness, and finish – with the specific needs of your project. Whether it’s glossy paper for vibrant photo displays, bond paper for precise technical drawings, or polypropylene for weather-resistant outdoor banners, each material has a role to play.
Start by defining the requirements of your project: where the print will be displayed, how long it needs to last, and the visual impact you want to achieve. Glossy and satin papers enhance colors for photos, while bond and vellum are ideal for technical drawings. Outdoor projects demand tougher materials like vinyl or polypropylene to stand up to the elements.
Paper weight and thickness also influence print quality and cost. Most standard weights fall between 75 and 110 GSM (20# to 28#), with heavier papers offering more durability for tasks like mounting or stretching. However, keep in mind that many wide format inkjet printers can only handle materials under 9 mils thick. Always check your printer’s specifications before making a purchase.
For expert advice, you can rely on the decades of experience at Miro Printing & Graphics Inc. Their team can help you navigate the balance between quality, durability, and cost while ensuring your printer, paper, and ink work seamlessly together.
Additionally, their comprehensive services – spanning layout design, in-house bindery, and large format printing – provide a streamlined process from start to finish. This integrated approach ensures every detail is handled with care, delivering consistent results from the initial concept to the final product.
FAQs
How do I choose the right paper type – glossy, matte, or satin – for large format printing?
Choosing the right paper type for large format printing plays a big role in achieving the desired look and feel for your project. Glossy paper is known for its shiny, reflective surface that makes colors pop, making it an excellent choice for photographs or designs that need to grab attention. However, keep in mind that it can produce glare under bright lighting. Matte paper, on the other hand, has a smooth, non-reflective finish, ideal for text-heavy prints or artwork where clarity and a more understated appearance are key. If you’re looking for something in between, satin paper offers a soft sheen that enhances colors without the overly reflective quality of glossy paper, making it a versatile option for a variety of needs.
If you’re unsure which paper type is best for your project, the team at Miro Printing & Graphics Inc. in Hackensack, NJ, can provide expert guidance and deliver high-quality large format printing tailored to your needs.
How do paper weight and thickness influence the quality and durability of large format prints?
The weight and thickness of paper are crucial factors in determining the quality and durability of large format prints. Heavier, thicker paper offers greater resistance to tearing, creasing, and general wear, making it a smart choice for prints that will face frequent handling or need to last for extended periods.
For instance, if your print will be showcased in a busy area or exposed to outdoor conditions, opting for a sturdier paper stock can help preserve its look and extend its lifespan. Conversely, lighter paper might be better suited for short-term or budget-friendly projects where durability isn’t a top priority.
What are the benefits of using specialty papers like canvas or polypropylene for large format printing projects?
Specialty papers like canvas and polypropylene bring distinct benefits to large format printing, making them the go-to options for certain projects.
Canvas stands out for its textured, premium finish, making it an excellent choice for reproducing artwork, photography, or creating decorative prints. It’s not just visually appealing – it’s also durable and capable of showcasing vibrant colors, which is why it’s a favorite for both professional and personal uses.
On the other hand, polypropylene is a tough, tear-resistant material perfect for banners, signage, or outdoor displays. Its lightweight and water-resistant properties, combined with a smooth surface, allow for sharp, detailed prints that can hold up even in tough conditions.
The key to selecting the right paper lies in understanding your project’s specific needs – whether you’re prioritizing aesthetics, durability, or the ability to withstand environmental challenges.
Related Blog Posts
- Ultimate Guide to Paper Types for Business Printing
- How to Choose the Right Paper for Custom Prints
- Standard Print Sizes Explained
- Large Format Printing: DPI vs. PPI Explained
https://app.seobotai.com/banner/banner.js?id=68fd68819cea6427b3fdb0f2