How to Coordinate Print Projects with Vendors

Effective coordination with print vendors is essential to avoid costly mistakes and ensure high-quality outcomes in your print projects.

Want to avoid costly mistakes in your print projects? Coordinating with vendors effectively is key. From setting clear goals to ensuring file accuracy, every step impacts your timeline, budget, and final quality. Here’s what you need to know:

  • Define your project needs: Specify quantity, dimensions, materials, and colors to avoid miscommunication and get accurate quotes.
  • Choose the right vendor: Match your project (e.g., brochures, banners) with a vendor’s expertise (digital, offset, or large-format printing).
  • Set timelines: Work backward from your deadline, factoring in production times, proof reviews, and potential delays.
  • Submit print-ready files: Ensure proper file setup – CMYK color mode, 300 DPI resolution, and bleed/safe zones.
  • Communicate clearly: Designate points of contact, use detailed feedback, and consolidate input to streamline approvals.

How to create vendors

Know Your Print Project Requirements

Before contacting a vendor, it’s essential to have a clear understanding of your project needs. This step minimizes miscommunication, reduces the need for revisions, and ensures you receive accurate quotes right from the start.

Define Project Goals and Specifications

Start by outlining every detail of your print project. Be specific about the quantity, material type, dimensions, finishing options (like UV coating or embossing), and color requirements. Keep in mind that full-color printing or using Pantone colors can influence costs significantly.

Dimensions play a bigger role than you might think. For instance, a standard 8.5" x 11" brochure will cost differently than a custom 7" x 10" size, which may require additional cutting.

When it comes to color, decisions matter. Full-color (CMYK) printing is pricier than black and white, and incorporating Pantone colors can add even more complexity and expense. If maintaining brand consistency is a priority, specify exact Pantone shades instead of leaving it to guesswork.

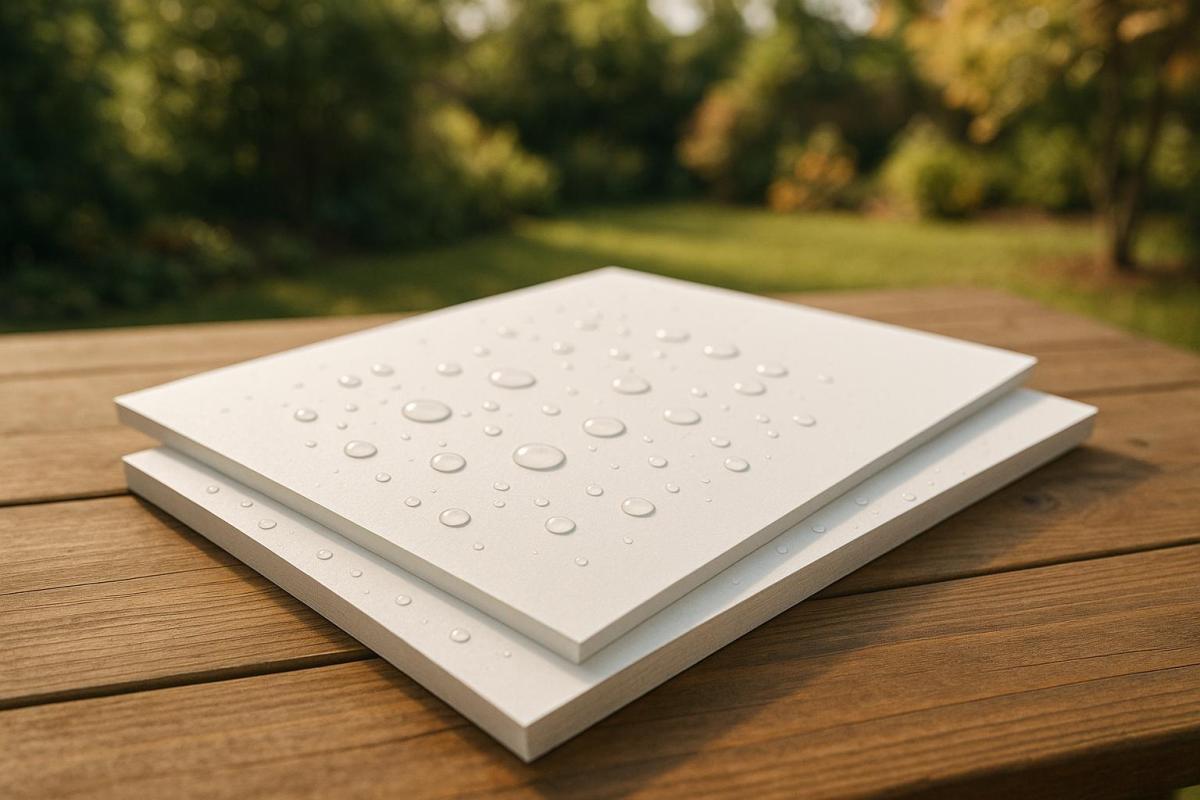
Also, think about the intended use of your materials. Outdoor marketing pieces need to be weather-resistant, while internal documents can often be printed on basic paper stock. Restaurant menus, for example, benefit from grease-resistant coatings, and business cards should be printed on thicker cardstock to create a more professional feel.

Once your specifications are clear, confirm that your chosen vendor can meet these exact requirements.

Check Vendor Capabilities

It’s crucial to match your project needs with a vendor who specializes in the required services. A company that excels in business cards might not be equipped to handle large-format banners, and a shop focused on offset printing may not provide the quick turnarounds possible with digital printing.

  • Digital printing is ideal for smaller quantities (usually under 1,000 pieces) and offers quicker turnarounds, often within 24 to 48 hours.
  • Offset printing is better suited for larger runs, offering more consistent color quality, but it requires longer setup times.
  • Large format printing is designed for oversized pieces like banners and signage, which demand specialized equipment.

Ask vendors about their equipment capabilities. Can they handle your required paper weight? Do they offer in-house finishing services like cutting, folding, or binding, or will they need to outsource these tasks? Outsourcing can introduce delays and quality control issues.

If your project has unique elements – like die-cut shapes, metallic inks, or uncommon paper stocks – make sure the vendor has the expertise and tools to bring your vision to life. Don’t hesitate to request samples of similar work they’ve done. This helps you assess their quality, including color accuracy, alignment, and finishing.

Working with a local vendor often brings additional advantages, as illustrated below.

Benefits of Local Vendors Like Miro Printing & Graphics Inc.

Local vendors, such as Miro Printing & Graphics Inc., provide in-person communication that simplifies the process of reviewing samples, finalizing finishing options, and making real-time adjustments. You can physically examine paper samples, discuss details face-to-face, and make decisions that keep your project moving efficiently.

Miro Printing & Graphics Inc. stands out by offering digital printing, offset printing, and large format printing all in one place. This means you can handle various marketing materials – like business cards, brochures, and banners – through a single vendor, streamlining your entire campaign. Their in-house bindery services, including perfect binding, comb binding, and plastic coil binding, eliminate delays and quality issues that often arise with outsourcing.

For clients without in-house design teams, Miro’s design services can be a lifesaver. They allow for quick adjustments and immediate feedback, saving time and ensuring the final product aligns with your expectations.

Local vendors also excel at providing faster turnarounds. Instead of waiting for files to be shipped across the country or proofs to arrive by mail, you can review everything in person and approve changes on the spot, keeping your timeline intact.

Additionally, local providers understand regional needs. They know which paper stocks perform best in your area’s climate, are familiar with local business preferences, and can often accommodate rush jobs or special requests that larger, distant companies might decline. This combination of technical expertise and personalized service makes local vendors like Miro Printing & Graphics Inc. a valuable partner for your printing needs.

Set Clear Timelines and Project Milestones

Coordinating a print project without a solid timeline is like trying to build a house without a blueprint – chaotic and prone to errors. A well-structured schedule keeps everything on track, minimizes stress, and ensures you meet your deadlines without compromising quality.

Create and Share a Project Timeline

Start by working backward from your final deadline. For instance, if you need 1,000 brochures ready for a trade show on March 15th, map out every step leading up to that date. This includes tasks like finalizing the design, submitting files, reviewing proofs, production, and delivery or pickup.

Break the project into clear phases, each with specific deadlines. For example:

  • Allocate 3–5 business days for design.
  • Allow 1–2 days per proof review cycle.
  • Factor in production times, which vary based on the printing method and quantity. Digital printing for small runs (under 500 pieces) can take just 24–48 hours, while offset printing for larger quantities (5,000+ pieces) might require 5–7 business days.

Share this timeline with everyone involved right from the start. Your vendor, team members, and other stakeholders need to know not only the final deadline but also the intermediate steps and their respective due dates. A simple email with the timeline, paired with a request for confirmation, ensures everyone is aligned.

To avoid confusion, create a straightforward document listing each milestone, its deadline, and the person responsible. For example:

  • "Logo finalization – Marketing Team – February 10th"
  • "First proof delivery – Vendor – February 15th"

This level of detail ensures accountability and prevents delays. Don’t forget to include buffer days between milestones to absorb minor setbacks without derailing the entire project. Adjust your timeline as needed to reflect vendor-specific lead times and any potential hiccups.

Plan for Vendor Lead Times and Delays

Understanding your vendor’s production timelines is crucial for avoiding last-minute scrambles. Rushed projects often come with higher costs and the risk of compromised quality, so careful planning saves both time and money.

Here’s a quick breakdown of typical lead times by printing method:

  • Digital printing: 1–2 business days for small runs
  • Offset printing: 3–5 business days (requires plate setup and press configuration)
  • Large format printing: 2–4 business days, depending on size and finishing needs

If your project involves specialty finishes like UV coating, embossing, foil stamping, or die-cutting, add 2–5 extra business days to your schedule. For example, creating business cards with an embossed logo and metallic foil could take at least a week after final approval.

Paper stock availability can also affect your timeline. Standard options like 80# gloss text are usually ready to go, but specialty papers or textured stocks might need to be ordered, adding 3–7 business days, especially for larger quantities.

Don’t forget to account for proof review cycles. Plan for 2–3 rounds of review, with each cycle taking 1–2 business days. Shipping and delivery logistics also play a role. If you’re picking up locally, you’ll save time, but shipping materials can add 3–5 business days for standard ground delivery within the continental US. Expedited shipping is faster (1–2 days) but comes with higher costs.

Unexpected factors like weather, equipment maintenance, and seasonal demand can throw a wrench into your plans. For instance, the weeks leading up to major holidays often see increased demand, leading to longer production times. While rare, equipment breakdowns can also cause delays. Staying in close contact with your vendor helps you anticipate and address these challenges before they escalate.

Prepare contingency plans for critical projects. For example, identify alternative pickup dates, consider splitting large orders into smaller, more manageable batches, or develop backup distribution plans. These strategies ensure you’re ready to adapt if something doesn’t go as expected.

Prepare and Submit Print-Ready Files

Submitting print-ready files correctly the first time ensures a smoother process, avoiding costly reprints or delays that can disrupt your project timeline. Proper preparation eliminates guesswork for your vendor and sets the stage for a successful print job.

Understand File Specifications

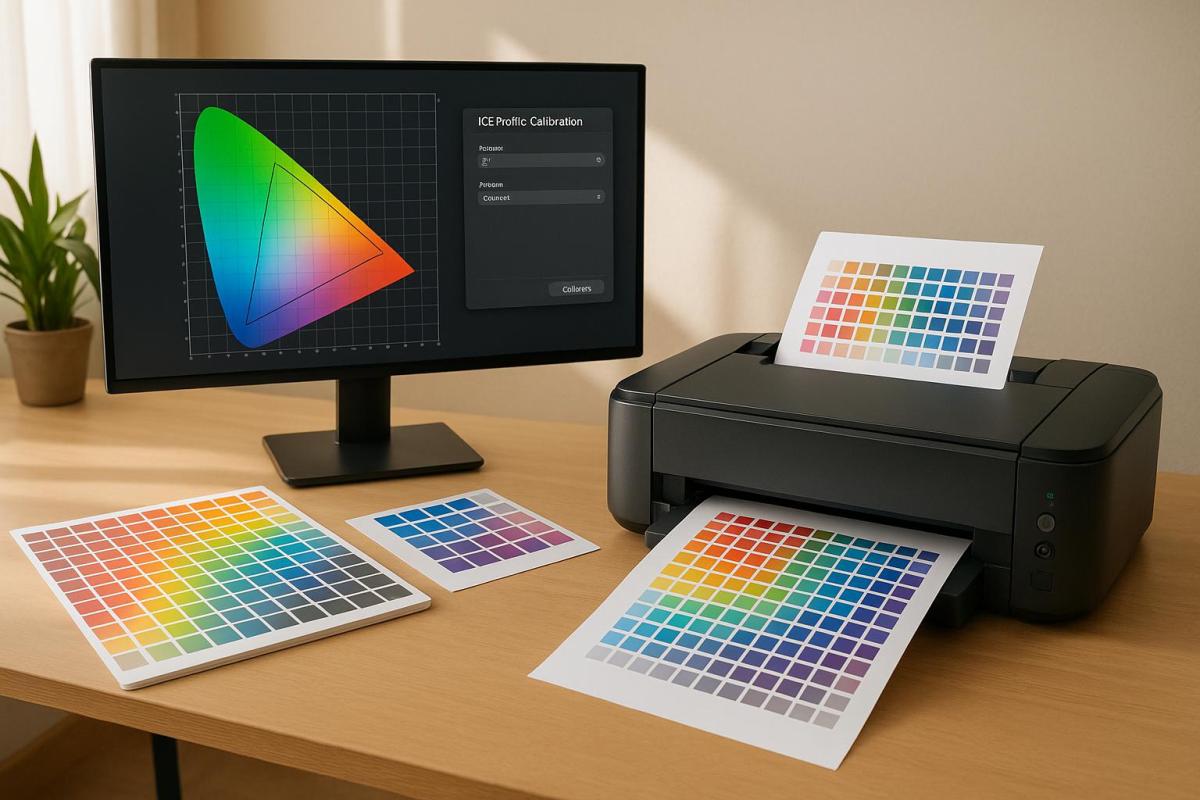
To ensure accurate printing, it’s crucial to meet your vendor’s technical requirements. Start with CMYK color mode, as printing presses use this format instead of the RGB mode your monitor displays. Submitting files in RGB can result in dull or distorted colors when printed.

Image resolution is another key factor. Make sure all images are at least 300 DPI at their final size to avoid pixelation. While 72 DPI might look fine on a screen, it won’t translate well to print, leading to blurry or unprofessional results.

Pay attention to bleed and safe zones to prevent issues during trimming. Bleed refers to extending your design 0.125" (1/8 inch) beyond the final trim size on all sides. For instance, an 8.5" x 11" flyer should have a design canvas of 8.75" x 11.25". The safe zone, on the other hand, is 0.125" inside the trim line, where all critical text and graphics should be placed to avoid being cut off.

Finally, consider the paper weight for your project. Standard 20# bond paper (75 gsm) is common for basic prints, while premium brochures often use 100# gloss text (148 gsm). For sturdier materials like business cards or postcards, thicker stocks such as 14pt cardstock (350 gsm) are ideal, though they may increase costs and require specialized printing methods.

Double-Check File Accuracy with Checklists

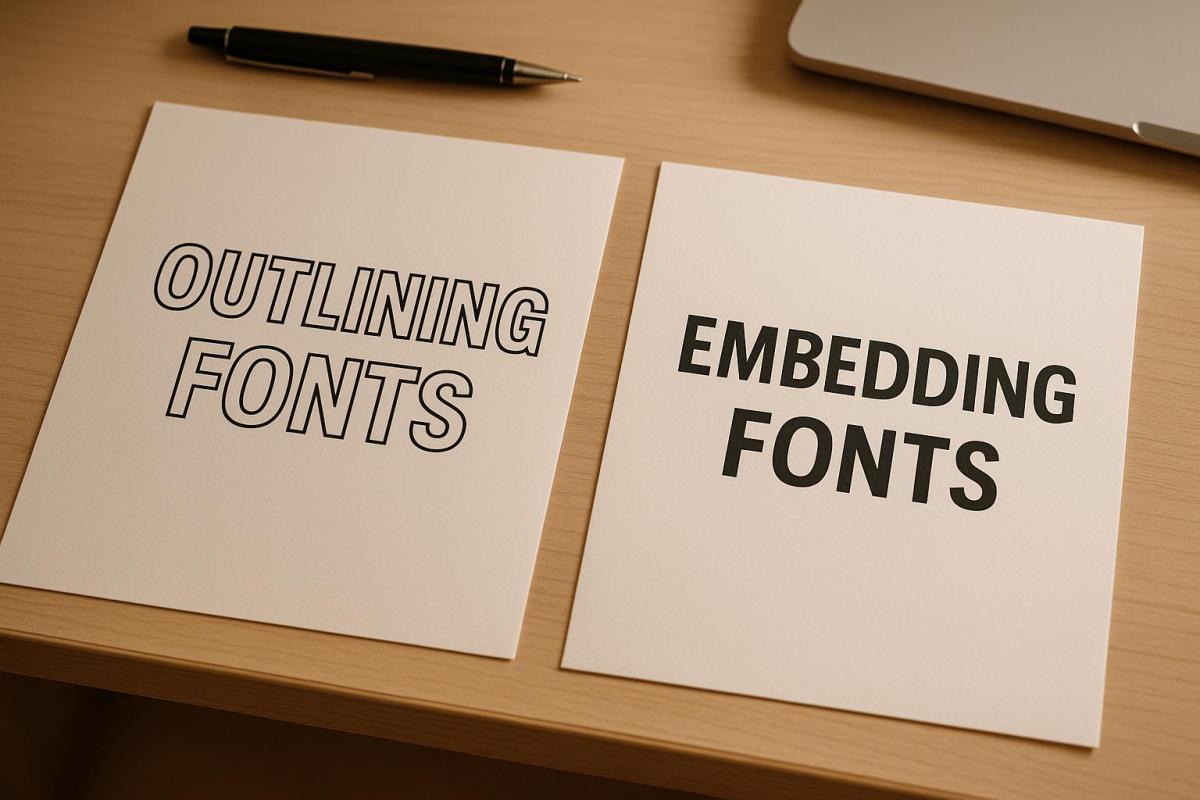
Using a checklist to prepare your files can catch errors before they reach your vendor, saving time and avoiding quality issues. Start with font embedding – if fonts aren’t embedded or converted to outlines, your design could appear entirely different when printed. In programs like Adobe Illustrator, convert text to outlines or ensure fonts are embedded when exporting PDFs.

Another common issue involves image linking. When you place an image in layout software like InDesign, it creates a link to the original file. If that file is moved or renamed, the link breaks, causing printing errors. Use tools like InDesign’s "Package" function to include all linked files, and flatten layers unless your vendor specifies otherwise. Hidden layers should also be deleted to avoid unexpected printing issues.

Be sure to review color specifications as well. If you’re using spot colors like Pantone, clearly label them and ensure consistent use. If combining CMYK and spot colors, double-check that each serves its intended purpose without duplicating colors.

Submit Files Correctly

For most print projects, PDF format is the gold standard. PDFs preserve layouts, embed fonts, and maintain consistent display across different systems. Save your files as "Press Quality" to ensure high resolution and accurate color reproduction. Avoid using web settings, which can degrade quality.

When sending your files, include both the final PDF and native design files (e.g., .indd, .ai, .psd) in a well-organized package folder. This folder should also contain all linked images and fonts to make tracking and version control easier.

File naming is another simple but important step. Use descriptive names that include details like version numbers and dates. For example, instead of "brochure_final.pdf", use something like "ABC_Company_Brochure_v3_Jan2025.pdf." This clarity helps everyone involved stay on the same page, especially when multiple revisions are involved.

For large files (over 25 MB), use a secure cloud storage service. Many print vendors, such as Miro Printing & Graphics Inc., offer upload portals to handle large files securely and maintain version control.

Create a submission checklist to ensure nothing is overlooked. Key points to include are: correct dimensions with bleed, 300 DPI resolution, CMYK color mode, embedded fonts, linked images packaged, layers flattened, and proper file naming. Share this checklist with your vendor to confirm all requirements are met.

Lastly, clear communication during file submission can save time and prevent misunderstandings. Include a note summarizing your project details, such as quantity, paper preferences, finishing options, and your timeline. Highlight any special instructions, like color matching or folding requirements, to help your vendor catch potential issues early and offer helpful suggestions.

sbb-itb-ce53437

Build Effective Communication and Feedback Loops

Once you’ve set clear timelines and prepared your files, keeping the lines of communication open is essential to ensure your project stays on track. Good communication with your print vendor not only helps avoid costly mistakes but also keeps the workflow smooth. When everyone is on the same page and connected throughout the process, potential issues can be identified early, leading to better outcomes.

Set Clear Communication Guidelines

Laying down communication protocols from the start helps eliminate misunderstandings and ensures that no important details slip through the cracks. Start by designating one main contact person from your team and confirming who your primary contact will be at the vendor’s end.

Decide on the best communication channels for your project. Use email for formal tasks like approvals, file submissions, and updates that need a documented trail. For urgent or complex issues, phone calls are often more effective. Some vendors also provide project management portals for real-time updates and communication, which can be a great tool for staying organized.

Establish a regular check-in schedule that aligns with your project timeline. For example, for a two-week project, you might check in every 2–3 business days. Tight deadlines may require daily updates, while longer projects might do fine with weekly check-ins. Be clear about what each update should cover – whether it’s production progress, obstacles, or confirmation of deadlines.

You should also map out a communication schedule that specifies when different team members need to be involved. For instance, your design team might need to review proofs within 24 hours, while executives may require 48 hours for final approval. Share these internal deadlines with your vendor to help them coordinate effectively and send the right materials to the right people at the right time.

Once these guidelines are in place, you can move forward with reviewing proofs collaboratively.

Work Together on Proof Reviews

Proof reviews are a critical step to catch errors before printing, but they’re only effective when approached systematically by both you and your vendor. Digital proofs are useful for checking layout, typography, and overall color appearance, but keep in mind that monitor settings can distort how colors look. On the other hand, hard copy proofs give a more accurate sense of color and paper texture, though they can add time and expense to the process.

Schedule collaborative proof review sessions where your team and a vendor representative can go over the proof together. This method helps catch errors that might be missed in back-and-forth emails. Make sure to review proofs under proper lighting conditions to ensure accurate color assessment.

To avoid conflicting input, limit the number of reviewers. Assign specific roles – designers can focus on layout and color, marketers on messaging, and compliance teams on regulatory text. Streamlining the review process in this way prevents delays caused by contradictory feedback.

Document proof approval workflows clearly. Decide whether all stakeholders need to approve each round of proofs or if specific team members can sign off on behalf of their departments. For complex projects, tools like digital markup software can allow multiple reviewers to provide comments without overwriting one another’s feedback.

Give Clear and Actionable Feedback

Vague feedback like "make it pop" or "something feels off" only creates confusion and leads to unnecessary revision cycles. Instead, offer specific and actionable instructions that the vendor can easily follow. For instance, instead of saying "the blue needs to be darker", specify, "the blue in the header should match Pantone 286 C."

When providing feedback, use tools like Adobe Acrobat to annotate digital proofs directly. For physical proofs, mark them up using pens in contrasting colors. Highlight the areas you’re referencing with circles or boxes, and use arrows to point out specific elements.

Prioritize your feedback by distinguishing between critical errors and minor tweaks. Critical issues might include spelling mistakes, incorrect contact details, or violations of brand guidelines. Minor adjustments, like slight spacing changes or subtle color tweaks, can be addressed if time allows. This prioritization helps your vendor focus on what’s most important.

Always explain the reasoning behind your feedback. For example, rather than simply asking to "make the logo bigger", clarify by saying, "the logo needs to stand out more for better brand visibility at trade shows." Providing context allows your vendor to suggest alternative solutions that might be more effective than your initial request.

Finally, consolidate feedback from all reviewers before sending it to your vendor. If multiple people provide conflicting suggestions, resolve those internally first. Create a single, organized document listing all changes by page or section so your vendor can address them efficiently.

Miro Printing & Graphics Inc. exemplifies this collaborative approach by working closely with clients during proof reviews. Their team not only explains technical considerations but also suggests ways to improve quality or cut costs – insights that clients might otherwise overlook. This partnership-driven process often leads to smarter, more cost-effective results.

Monitor Progress and Control Quality

After setting up effective communication and proof review systems, the next step is keeping a close eye on progress and maintaining quality throughout production. This phase relies on your established timelines and communication protocols to ensure everything stays on track. Regular monitoring helps catch potential issues early.

Start by defining clear baselines for your project’s scope, timeline, and budget. These baselines act as reference points for tracking progress. Set up a consistent reporting schedule that includes updates on task completion, milestone achievements, deadlines, bottlenecks, budget, and resource allocation.

To measure progress effectively, use performance metrics. For example:

  • Schedule Performance Index (SPI): Tracks whether tasks are completed on time.
  • Cost Performance Index (CPI): Monitors how well the project is staying within budget.
  • Work Completion Percentages: Show the status of specific deliverables at a glance.

For larger print campaigns, techniques like Earned Value Management (EVM) can provide a comprehensive view of performance, comparing actual progress to both time and cost expectations.

Keep your schedule updated and share changes promptly. This ensures everyone is on the same page and prevents misunderstandings.

Be alert for early warning signs, such as missed deadlines, delays in milestones, budget overruns, resource shortages, or quality concerns. When these issues arise, dig into the root causes and adjust schedules or resources as needed to address them.

Breaking your project into distinct milestone phases can also help. For instance, in a large catalog printing project, milestones might include completing file submissions, approving proofs, setting up the press, finishing the printing process, and delivering the final product. Each phase serves as a checkpoint, offering opportunities to assess progress and resolve any concerns. These checkpoints are key to ensuring quality remains consistent and the project is delivered successfully.

Conclusion: Key Steps for Successful Vendor Coordination

This guide has walked through the essential steps for effective vendor coordination, emphasizing three key pillars: planning, communication, and quality assurance. Together, these elements create the framework for achieving timely, cost-efficient, and accurate results.

Planning is the cornerstone of success. It begins with clearly defined project goals, a solid understanding of your vendor’s capabilities, and realistic timelines. For instance, working with local vendors like Miro Printing & Graphics Inc. can offer advantages such as in-person consultations and quicker turnaround times, which often lead to better outcomes. Once a solid plan is in place, the focus shifts to maintaining effective communication.

Consistent communication ensures everyone stays on the same page. Regular check-ins, standardized file submission processes, and clear feedback channels are vital for aligning expectations. The best results come when all parties are engaged in open dialogue from the start and maintain it throughout the project.

The third pillar, quality assurance, is just as critical. Quality assurance safeguards your investment by ensuring product safety, protecting your brand reputation, and meeting compliance standards. It also reduces the risk of defects and expensive reprints. Techniques like milestone tracking, performance metrics, and regular quality checks help identify and address issues early. Catching errors during proofing not only saves time and money but also ensures a polished final product.

Ultimately, vendor coordination thrives on collaboration. It’s not just a business transaction – it’s a partnership. By focusing on planning, communication, and quality control, you create a reliable roadmap for successful vendor coordination that will continue to deliver positive results for your projects.

FAQs

What are the advantages of working with a local printing vendor?

Working with a local printing vendor offers several perks that can make a big difference. For starters, you’ll enjoy quicker turnaround times and personalized attention, as local vendors are typically more accessible and responsive to your unique needs. Being able to communicate directly ensures your project stays on schedule and aligns with your vision.

On top of that, opting for a local vendor can help you cut down on shipping costs, support businesses in your community, and explore more customizable options for special projects. Partnering with someone nearby simplifies the process and helps you achieve top-notch results without unnecessary hassle.

What steps should I take to prepare my print files correctly and avoid delays?

To get your print files ready and avoid hiccups, make sure to follow these key steps:

  • Convert colors to CMYK to achieve consistent and accurate color results.
  • Use images with a resolution of at least 300 DPI to maintain sharpness and avoid pixelation.
  • Embed or outline all fonts to eliminate font-related issues during printing.
  • Add bleed and trim marks to account for any cutting at the edges.
  • Save your files in a print-friendly format like PDF or TIFF.

Before sending off your files, double-check that the dimensions align with the project specs, and confirm that every design element meets the printer’s guidelines. These precautions can help you sidestep common problems like blurry images, missing bleed, or incorrect color settings, making the printing process hassle-free.

What should I do if unexpected delays threaten my print project timeline?

If your print project hits an unexpected delay, the first step is to figure out what’s causing the issue. Once you pinpoint the problem, reach out to your vendor and any other key stakeholders immediately. Open and timely communication can help set expectations and avoid further setbacks.

Next, take a close look at your timeline and identify the most critical tasks. Create a backup plan that adjusts deadlines realistically while aiming to reduce disruptions as much as possible. Consider simplifying steps like file preparation or feedback rounds to make up for lost time. Staying adaptable and focused on solutions can help keep things moving forward.

For added support, teaming up with a dependable print vendor like Miro Printing & Graphics Inc. can make all the difference. Their skilled team is ready to tackle challenges and ensure your project is handled with care and professionalism.

Related Blog Posts

https://app.seobotai.com/banner/banner.js?id=68c8b69fc8ad31793ff87061

How to Add Metallic Foil to Awards

Learn how to elevate awards with metallic foil, enhancing their prestige through thoughtful design, material selection, and printing techniques.

Metallic foil can transform ordinary awards into polished, professional pieces that stand out. By focusing on key design elements like logos, names, and borders, you can create an upscale look. Pairing foil with the right materials, such as matte or silk-finish paper, ensures durability and a clean finish. Hot foil stamping works best for precision, while digital foiling is ideal for smaller, customizable runs.

Key Tips:

  • Highlight logos, titles, or decorative borders with foil.
  • Choose foil colors (gold, silver, rose gold) to match the award’s tone.
  • Use paper weights of 18pt–24pt for durability and quality.
  • Opt for matte or silk-finish paper for better foil adhesion.
  • Ensure clean, simple designs to let the foil shine.

For flawless results, work with professional printers who can guide you through material selection, proofing, and application methods.

HOT STAMPING CERTIFICATE- Gold Hot Stamping Red Seal- Full Colour Certificate Printing

Design Tips for Adding Metallic Foil

Smart design choices can elevate awards by emphasizing key elements without sacrificing readability or aesthetic appeal.

What to Highlight with Foil

When deciding where to apply metallic foil, focus on elements that naturally draw attention. Logos and emblems are excellent candidates since they carry strong brand recognition and add a polished touch to the design. Similarly, highlight award titles, recipient names, or standout phrases like "Certificate of Excellence" instead of covering large text blocks.

Foil also works beautifully for borders and decorative patterns, creating an elegant frame for your content. For best results, use thin metallic borders of at least 1pt for clean, precise application. Gloss metallic foil, which reflects light dramatically, enhances intricate designs and decorative elements. However, avoid pairing large foil areas with fine details – breaking up solid blocks reduces issues like dust or air pockets that can disrupt the finish.

Picking the Right Foil Color

The color of the foil you choose can significantly influence the perception of your award. Each hue carries its own unique vibe:

  • Gold: Adds a timeless, premium feel.
  • Silver: Offers sharp contrast, especially on dark backgrounds.
  • Copper: Brings a warm, candlelit glow.
  • Rose Gold: Delivers a sleek, modern aesthetic.
  • Red: Creates bold, dramatic accents.
  • Blue: Suggests trust and professionalism.
  • Green: Evokes calm, emerald tones – ideal for environmental themes.
  • Purple: Conveys luxury and sophistication.
  • Black Chrome: Stands out with a refined, unique look.
  • Holographic: Adds a dynamic, rainbow-like effect.

Keeping Designs Simple and Clean

When it comes to metallic foil, less is often more. Clean and uncluttered layouts allow the foil to shine without competing with other design elements. Prepare your artwork in vector format, using 100% black for foil areas, and ensure line weights are at least 1pt. Avoid gradients or gray tones, as they can result in unusable dies.

The contrast between foiled and non-foiled elements naturally creates a sense of hierarchy. Simple typography, ample white space, and carefully placed foil accents often yield the most striking results. Keep in mind that gloss metallic foils reflect light intensely, making even small applications pop, while satin metallic foils offer a softer, brushed effect reminiscent of aluminum. Choose the finish that aligns best with your design and the setting where the awards will be displayed.

Next, we’ll explore how to select the right materials for flawless foil application.

Selecting Materials for Foil Application

The secret to a striking foiled award starts with selecting the right materials. The type of paper you choose plays a crucial role in determining foil adhesion, the vibrancy of the design, and the overall polished appearance of the award.

Paper Types and Finishes

Uncoated, matte-finish papers are often the go-to choice for foil applications. Their porous surface ensures the foil bonds securely under heat and pressure, resulting in vibrant, precise foil coverage. These papers also create a noticeable contrast between the foil and the background, enhancing the design.

Silk-finish papers are another excellent option. Their subtle sheen provides a refined backdrop for metallic foils, striking a perfect balance between the bold contrast of matte finishes and the potential adhesion issues often encountered with glossy surfaces.

On the other hand, glossy or standard coated papers can pose challenges. Their smooth, sealed surface can make it harder for the foil to adhere properly, leading to patchy coverage or peeling over time. If you prefer a coated stock, look for varieties specifically designed for foil application, though they may come with a higher price tag.

For something more textured, linen or laid-finish papers can create unique visual effects. The foil settles into the paper’s grooves, leaving raised areas untouched, resulting in a sophisticated two-tone effect. However, heavily textured papers might lead to uneven foil coverage, so it’s always a good idea to test samples first.

For awards that will be handled frequently, cotton-blend papers offer both durability and a premium feel. If longevity is a priority – such as for high-end or prestigious awards – consider using museum board or conservation-grade papers for a truly lasting impression.

Why Paper Weight Matters

The weight of the paper impacts both the look and feel of the award, as well as the foil application process. 14pt to 16pt cardstock is the minimum recommended weight for a professional appearance; anything lighter might feel flimsy and detract from the award’s perceived quality.

For most awards, 18pt to 24pt cardstock is ideal. This range offers a substantial, high-quality feel without being overly cumbersome. The added thickness also helps the paper withstand the heat and pressure of foil application, ensuring a smooth and vibrant finish.

For the most prestigious awards, consider using 32pt cardstock or thicker. Ultra-thick cardstock not only exudes a premium quality but also supports stable foil application. The extra thickness allows for higher heat and pressure settings, which can enhance foil adhesion and create a more striking metallic effect.

Heavier papers (24pt or more) are also better suited for additional finishing techniques like embossing or debossing, as they resist cracking or tearing during the process. However, keep in mind that heavier papers may increase shipping costs for bulk orders.

When working with heavier papers, you’ll need higher temperatures and longer dwell times to achieve optimal foil adhesion. Lighter papers, on the other hand, require careful temperature control to prevent scorching while still ensuring a strong bond. Selecting the right weight not only enhances the durability of the award but also ensures the foil application looks polished and professional.

For expert advice and high-quality printing services, reach out to Miro Printing & Graphics Inc., a trusted full-service print shop based in Hackensack, NJ. Their team can guide you through material selection and professional foil application to achieve the perfect result.

sbb-itb-ce53437

Metallic Foil Printing Methods

Selecting the right foil application method can make a big difference in how your award project turns out. It’s not just about the foil itself – it’s about how it works with your materials and design to create a polished, unified look. Two main techniques – hot foil stamping and digital foiling – each bring their own strengths, depending on what your project requires.

Hot Foil Stamping vs. Digital Foiling

Hot foil stamping involves using heated dies to press foil onto a surface. The combination of heat and pressure transfers the foil, with curing happening instantly or within seconds for larger designs. This method is ideal for projects that demand precision and a high-quality finish.

On the other hand, digital foiling skips the need for dies entirely. Instead, it applies foil over pre-printed layers of ink, varnish, or toner. This makes it a great choice for smaller production runs or projects that require personalization, offering flexibility without compromising on style.

For expert guidance and professional foil application, reach out to Miro Printing & Graphics Inc.. They can help you choose the best method for your project.

Quality Control and Delivery

Achieving impeccable foil awards starts with thorough digital proofing and quality checks. By carefully reviewing your digital proofs, you can ensure the final product aligns perfectly with your vision. Here’s a breakdown of the essential proofing steps to guarantee flawless foil application.

Proofing and Quality Checks

Digital proofs are a key tool in the process. They display foil areas as solid black on a white background, while the print layer excludes any foil details. To get a clear production reference, request a composite file that combines both the print and foil layers.

For optimal results, design elements should extend at least 1mm beneath the foil zone. This helps account for any slight shifts during production. If your design includes areas where print and foil meet, overlap them slightly to mask any minor misalignments.

When working with foiled borders, position them at least 4mm from the edges of your design. Additionally, ensure that all foil and adjacent areas have a minimum thickness of 0.5pt. These precautions help prevent issues like misapplication or uneven finishes.

Finally, take advantage of file check services. These can identify potential problems, such as foil thickness inconsistencies or overly tight kerning, early on – saving you time and ensuring your design shines as intended.

Conclusion: Take Your Awards to the Next Level with Metallic Foil

If you’re looking to make your awards truly stand out, adding metallic foil is a game-changer. This simple yet effective enhancement transforms ordinary certificates into elegant, premium awards that recipients will cherish. The gleaming finish of metallic foil delivers a sense of prestige and value, ensuring your recognition program leaves a lasting impression.

As discussed earlier, success lies in combining thoughtful design with quality materials. Metallic foil works best when applied to key elements like recipient names, logos, or border details. Keeping the overall design clean and uncluttered amplifies the foil’s impact, creating awards that feel polished and professional. Don’t forget the importance of using the right paper – an 80 lb. cover stock or heavier adds the weight and durability that matches the upscale look of foil.

Of course, expert printing is key to achieving flawless results. Proper foil registration, material selection, and quality control are critical, and that’s where Miro Printing & Graphics Inc. excels. Their expertise ensures your awards are finished to the highest standard.

Whether you’re ordering a single certificate or preparing for a large event, metallic foil elevates your awards into timeless symbols of achievement. It’s the perfect way to enhance recipient satisfaction and make your recognition efforts unforgettable.

FAQs

What’s the difference between hot foil stamping and digital foiling, and how do I decide which one to use for my awards?

Hot foil stamping and digital foiling offer two different ways to add metallic finishes to awards, each suited to specific needs.

Hot foil stamping involves using a metal die and heat to press foil onto the surface, creating a raised, textured effect. This technique is great for larger quantities or when aiming for a luxurious, high-end appearance. However, it requires more setup time, making it less practical for smaller runs.

Digital foiling, by contrast, skips the need for a die. Instead, foil is applied through an additional printing pass, resulting in a smooth, flat finish. This method is perfect for smaller projects, quick turnarounds, or situations where personalization is key. It’s also more budget-friendly for short runs.

When deciding between the two, go with hot foil stamping for large batches and an embossed, premium aesthetic. Digital foiling is the better choice for flexibility, customization, or when you’re working on a tighter schedule.

What’s the best way to apply metallic foil to certificates for a polished, professional look?

To create a sleek and professional metallic foil finish on certificates, begin with premium-quality foil and paper specifically made for foil stamping. Pay close attention to the heat and pressure settings during the process to ensure the foil adheres evenly without any flaws. Keep the stamping plate clean by wiping it regularly with a lint-free cloth to prevent residue buildup, which can interfere with the final result. If you notice problems like over-stamping or uneven coverage, fine-tune your settings accordingly. By following these steps, you can produce certificates that stand out with a polished, professional appearance.

How do I choose the right metallic foil color to match the theme of my awards?

When choosing a metallic foil color, it’s important to think about the theme and mood you want your awards to reflect. Timeless options like gold, silver, and bronze exude elegance and celebrate achievement. If you’re aiming for something more modern or bold, holographic or brightly colored foils can add a striking, creative twist.

To make your design pop, pick foil colors that either contrast sharply with the background for better visibility or blend harmoniously for a unified look. Also, keep in mind the emotions tied to different colors – gold is often linked to success, silver suggests sophistication, and vibrant tones like red or blue can bring a sense of energy and excitement. Matching the foil color to the award’s purpose and audience will result in a design that’s both impactful and meaningful.

Related Blog Posts

https://app.seobotai.com/banner/banner.js?id=68c88eddc8ad31793fc09a0d

Lamination vs Coating: Which Offers Better Protection?

Explore the differences between lamination and coating to determine the best protection for your printed materials based on durability, cost, and use.

When deciding how to protect printed materials, lamination and coating are two popular options. Both methods shield prints, but they differ in durability, cost, and application.

  • Lamination applies a plastic film for strong protection against moisture, wear, and heavy handling. It’s ideal for menus, ID cards, and outdoor signage.
  • Coating uses a liquid layer that hardens directly on the paper. It offers a sleek finish with moderate protection, making it suitable for brochures, business cards, and indoor marketing materials.

Each method has its strengths, so your choice depends on factors like exposure to elements, handling frequency, budget, and desired appearance.

Quick Comparison

Feature Lamination Coating
Moisture Protection High (waterproof) Moderate
Durability Strong (resists tears, wear) Moderate (scratches, smudges)
Thickness Added Noticeable Minimal
Flexibility Limited High
Cost Higher Lower
Best For Outdoor use, heavy handling Indoor use, light handling

For long-lasting durability in harsh conditions, choose lamination. For a cost-effective solution with a polished look, coating is the way to go.

UV Coating vs Lamination

What Is Lamination

Lamination is a finishing technique that involves bonding a thin plastic film to printed materials. This film acts as a protective layer, shielding documents, photos, or marketing items from wear, moisture, and frequent handling. Once applied, the film becomes a permanent part of the material.

This method is widely used in commercial printing because it helps extend the life of printed items. Let’s take a closer look at how the process works.

How Lamination Works

Lamination relies on heat and pressure to activate an adhesive on the plastic film. During the process, printed materials pass through heated rollers (typically between 180°F and 300°F), which activate the adhesive and create a strong bond between the film and the paper.

There are two primary methods for applying lamination:

  • Hot lamination: This uses heat to activate the adhesive and is the most common option for commercial purposes.
  • Cold lamination: Instead of heat, this method relies on pressure-sensitive adhesives, making it ideal for heat-sensitive materials like photographs.

Laminating films come in various thicknesses, usually ranging from 1.5 to 10 mils (0.0015 to 0.01 inches). Thicker films offer greater rigidity and protection, while thinner films are more flexible and budget-friendly for basic needs.

Now that we’ve covered the process, let’s dive into the different finishes and their uses.

Lamination Types and Uses

  • Gloss lamination: This finish provides a shiny, reflective surface that enhances color vibrancy, making it perfect for marketing materials like brochures, book covers, and presentation folders. It also offers excellent moisture protection.
  • Matte lamination: With a smooth, non-reflective finish, matte lamination reduces glare and gives a polished, professional look. It’s a popular choice for business cards, menus, and educational materials, especially where readability is key. Plus, it hides fingerprints better than gloss finishes.
  • Soft-touch lamination: This finish adds a velvety, luxury feel to printed materials while still offering durability. It’s a go-to for high-end brochures, premium product packaging, and book covers. The soft texture also provides a better grip, making items easier to handle.

Lamination is commonly used for ID cards and badges, as it ensures durability and adds security. Restaurant menus benefit from its spill resistance and easy cleaning, while outdoor signage gains protection from UV rays and weather. In classrooms, educational materials like charts and guides are laminated to withstand frequent handling.

This process is ideal for materials that need to endure heavy use or exposure to the elements, combining durability with a polished, professional appearance.

What Is Coating

Coating involves applying a liquid solution that hardens into a protective layer over printed materials, enhancing both their appearance and durability without adding noticeable thickness. This makes it particularly effective for items that require flexibility, such as brochures, direct mail pieces, and multi-page documents. Additionally, many coatings are designed to be recyclable and produce lower levels of volatile organic compounds (VOCs), offering environmental benefits.

Let’s take a closer look at how this process turns a liquid into a durable finish.

How Coating Works

The coating process begins with a liquid solution that penetrates the paper fibers and then cures – using heat, air, or ultraviolet (UV) light – into a protective layer. The curing method depends on the type of coating being used.

  • UV Coating: This method uses ultraviolet light to cure the liquid almost instantly, typically within 0.1 to 0.3 seconds. The UV light triggers a chemical reaction that solidifies the coating into a durable surface, allowing for immediate handling and further processing.
  • Aqueous Coating: This water-based solution dries through heat and air evaporation. Known for its environmentally friendly properties, it emits low levels of VOCs and is recyclable.

Both methods bond with the paper, becoming part of the material rather than sitting on top of it. The performance and applications of these coatings depend on their specific properties, as explained below.

Coating Types and Uses

Each type of coating serves different purposes, offering distinct benefits and limitations.

  • UV Coating: Known for its exceptional resistance to scratches, moisture, and UV damage, this coating is available in finishes like high-gloss, matte, satin, and textured. Recognized by the EPA as a "Best Available Control Technology" (BACT), UV coatings help reduce VOCs, CO₂ emissions, and energy use. Tests have shown that UV-coated materials retain their quality even after three years of use. This makes it ideal for business cards, catalogs, retail packaging, and food packaging – particularly for items subjected to frequent handling or moisture exposure. However, UV coatings are less flexible and may crack when folded, limiting their use for materials that require creasing.
  • Aqueous Coating: This eco-friendly option provides protection against fingerprints and minor abrasions. Its standout feature is flexibility – aqueous coatings remain pliable even after drying, making them perfect for brochures, folded menus, and direct mail pieces that need to be scored or folded. Additionally, they are biodegradable and can be recycled without requiring separation from the paper. While not as durable as UV coatings, they still offer sufficient protection for many applications.
Coating Type Best Applications Benefits Limitations
UV Coating Business cards, retail packaging, catalogs, food packaging Instant curing, high durability, multiple finish options May crack on folds, higher cost
Aqueous Coating Brochures, folded menus, direct mail, multi-page documents Flexible, eco-friendly, cost-effective Less durable than UV coating

Choosing between UV and aqueous coating depends on factors like durability needs, budget, and whether the material will be folded or creased. Each option has its strengths, tailored to specific use cases.

sbb-itb-ce53437

Protection and Durability Comparison

When deciding between lamination and coating, it’s important to weigh their protective qualities to determine which finish aligns best with your project’s needs. Each option has its strengths, depending on how much protection is required and the purpose of your printed materials.

Protection Levels

Lamination wraps your prints in a plastic film that shields them from moisture, tears, and heavy wear. In contrast, coating bonds directly with the paper, offering resistance to fingerprints, light scratches, and minor moisture exposure.

If your project involves items like outdoor signage, restaurant menus, or materials that are frequently handled, lamination tends to provide a more durable solution. Coating, on the other hand, works well for print pieces that need a more natural paper feel and flexibility, such as brochures or marketing materials used in controlled settings. Let’s explore how these finishes handle environmental challenges.

Weather and UV Resistance

Both lamination and coating offer UV protection, but lamination provides stronger moisture resistance, making it better suited for outdoor use. The plastic film not only blocks moisture but also minimizes UV penetration, creating a robust waterproof barrier. Coatings, while effective at preventing color fading, offer limited moisture protection.

Temperature changes also impact these finishes differently. Laminated materials may become less flexible in colder conditions and expand slightly in heat, though the protective layer remains intact. Coated materials, however, retain their flexibility across temperature ranges but may lose durability if exposed to extreme conditions over time.

Side-by-Side Comparison

Here’s a quick breakdown of the key differences between lamination and coating:

Feature Lamination Coating
Moisture Protection Fully waterproof Light moisture resistance
Resistance to Physical Damage Excellent for tears and heavy use Moderate protection against scratches and wear
UV Resistance Strong with UV-resistant films Effective, but less moisture protection
Flexibility Can become rigid in cold or crack with sharp folds Maintains flexibility
Thickness Added Noticeable bulk Minimal change to paper feel
Environmental Impact Can complicate recycling Often easier to recycle
Cost Higher due to materials and labor More budget-friendly
Processing Time Takes longer due to additional steps Quicker with UV curing
Best Applications Outdoor signs, ID cards, high-use materials Brochures, business cards, marketing materials
Longevity Ideal for heavy use and long-term durability Better for lighter, short-term use

Ultimately, your choice between lamination and coating will depend on the level of protection you need, your budget, and how the materials will be used. Each option has its place, so consider these factors carefully to make the best decision for your project.

How to Choose the Right Finish

When deciding on the best finish for your project, it all comes down to specific needs like how often the material will be handled, exposure to the elements, budget, desired look, and production timelines.

What to Consider

Handling Frequency plays a big role. If your materials will be touched often – think restaurant menus, ID cards, or reference guides – lamination is your go-to. The protective plastic film shields against oils, smudges, and repeated folding, keeping everything intact. On the other hand, coating works well for items like brochures or flyers that won’t see heavy use.

Environmental Exposure is another key factor. For outdoor materials, such as signs, parking permits, or event banners, lamination provides excellent waterproofing and UV protection. Indoor items like business cards, presentation folders, or marketing brochures can rely on coating for lighter protection since they’re less exposed to harsh conditions.

Budget Constraints are important to weigh. Coating is generally more affordable because it involves less complex processes and materials. It’s a great choice for large print runs where durability isn’t the top priority, offering a polished look without breaking the bank. However, keep in mind that materials needing frequent replacement due to damage may end up costing more in the long run compared to investing in lamination upfront.

Appearance Preferences depend on how you want your project to look and feel. Lamination adds a glossy shine and thickness, giving off a high-end vibe, but it can make writing on the surface difficult. Coating, on the other hand, maintains the paper’s natural texture while subtly enhancing colors. Your choice depends on whether you need lamination’s durability and shine or coating’s understated, flexible finish.

Timeline Requirements can also influence your decision. UV coating cures quickly, making it ideal for tight deadlines. Lamination, while offering more durability, involves extra steps that can extend production time.

Custom Solutions with Miro Printing & Graphics Inc.

Miro Printing & Graphics Inc. specializes in both lamination and coating finishes, helping businesses make the right choice based on their unique needs. With in-house bindery services, they offer a wide range of finishing options tailored to your project’s requirements and budget.

Their team carefully evaluates each project, considering factors like usage, exposure, and longevity, to recommend the most effective finish. They’ve worked with a variety of industries, from healthcare facilities needing durable signage to restaurants looking for waterproof menus.

Thanks to their advanced digital and offset printing capabilities, Miro Printing & Graphics Inc. ensures a seamless process from start to finish. Whether you’re creating business cards that benefit from coating’s sleek look or outdoor banners needing lamination’s weatherproofing, their expertise ensures consistent quality.

For projects with unique needs – like die-cut designs, specialty materials, or high-volume production – Miro Printing & Graphics Inc. adapts their finishing methods to meet your goals. They help determine when investing more in lamination makes sense for long-term durability versus choosing coating for an affordable, quicker option. Their approach ensures your finish aligns with both immediate and future project demands.

Conclusion

Choosing between lamination and coating comes down to your specific needs – how much protection you require, how often the material will be used, and your budget. Lamination stands out for its durability and ability to shield materials from weather and frequent handling, making it a great choice for items like menus or outdoor signage. On the other hand, coating offers a polished look with moderate protection, making it a cost-effective option for lighter, indoor use.

The key is to align the finish with the material’s purpose and expected lifespan. Lamination is perfect for items exposed to moisture or heavy handling, while coating works well for enhancing the appearance of materials used in less demanding environments.

At Miro Printing & Graphics Inc., we’re here to help you make the right choice. Our In-House Bindery services provide a wide range of finishing options, from durable laminated signs to various coating techniques. With extensive Post-Press & Bindery services, including cutting, creasing, folding, and binding, we deliver customized solutions tailored to your project’s needs. Whether you prioritize lamination’s toughness or coating’s sleek finish, our expert team ensures top-quality results that fit your budget.

FAQs

How do I decide between lamination and coating for my printed materials?

When choosing between lamination and coating, think about how much protection and durability your project needs. Lamination adds a thicker, sturdy layer that shields against water, UV rays, and scratches. This makes it a solid option for items like menus, business cards, or other materials that get handled a lot. Plus, it offers a sleek, polished finish that holds up over time.

Coating, on the other hand, is a thinner, more budget-friendly solution. Options like UV or liquid coatings provide decent protection while enhancing the look of your prints with finishes like glossy, matte, or soft-touch. Coatings work well for short-term projects or materials where appearance and fast production are key.

Your decision should come down to factors like how the material will be used, how durable it needs to be, your budget, and the overall look you want for your printed pieces.

What’s the difference in environmental impact between lamination and coating?

Lamination tends to have a greater environmental impact than coating, largely because most laminates are made from non-biodegradable plastics like PET. These materials can take hundreds of years to decompose and are a major contributor to plastic pollution. On the other hand, coatings – particularly water-based ones – are often seen as a more eco-friendly option. They are typically biodegradable and easier to recycle.

While there are newer laminates made from sustainable, recyclable, or biodegradable materials, traditional plastic laminates still present significant environmental challenges. In comparison, coatings generally leave a lighter environmental footprint, making them a more environmentally conscious choice for many printing applications.

When should you choose lamination over coating, or vice versa?

Lamination stands out as the go-to option when you need long-lasting durability and top-tier protection. It’s perfect for items like packaging, ID cards, or materials that will endure frequent handling, spills, or even exposure to UV light. Beyond its protective qualities, lamination adds a polished, professional touch that elevates the look and feel of your project.

Coating, on the other hand, shines in projects that demand a fast turnaround, enhanced color vibrancy, or specific finishes such as gloss or matte. It’s an excellent choice for short-term or less demanding applications, offering an affordable way to protect your materials while keeping design and production flexible.

Related Blog Posts

https://app.seobotai.com/banner/banner.js?id=68c78f53119e7220d7f06356

Outlining Fonts vs Embedding Fonts for Print

Explore the differences between font outlining and embedding for print, including their benefits, drawbacks, and best use cases.

When preparing files for professional printing, font management is key. You have two main options: font outlining and font embedding. Each has its pros and cons based on your project needs.

  • Font Outlining: Converts text into vector shapes, ensuring perfect visual consistency across all systems. Best for final designs like logos or business cards. However, it makes text uneditable, increases file size, and impacts accessibility.
  • Font Embedding: Includes font data within the file, keeping text editable and accessible. Ideal for editable documents like brochures or reports. But it can face licensing restrictions and compatibility issues with older printers.

Quick Comparison

Factor Font Outlining Font Embedding
Editability Not editable Editable
Searchability Not searchable Searchable
Accessibility Not compatible with screen readers Fully compatible
File Size Impact Larger file size Slight size increase
Best Use Cases Logos, business cards, finalized files Brochures, reports, collaborative work

Choose outlining for fixed designs and embedding for editable, collaborative projects. Always save an editable version of your file before outlining to allow future updates.

Embedding and Outlining your Fonts in your Artwork

What is Font Outlining?

Font outlining is the process of converting text into vector shapes rather than keeping it as editable text. When you outline fonts in design software like Adobe Illustrator, each letter is transformed into a mathematical path, turning the text into fixed vector shapes. This ensures your text displays exactly the same on any system, regardless of whether the original font is installed.

This approach guarantees consistency. Since the text is now a series of paths instead of characters, it will appear exactly as you designed it, even if the printer or recipient doesn’t have the font installed.

"Font outlining ensures absolute visual consistency at print time." – Ewan Printing

Font outlining is especially useful when working with specialty typefaces or custom fonts that might not be widely available. By outlining fonts, you eliminate the risk of font substitution, ensuring your design remains intact during the printing process.

Benefits of Font Outlining

The primary advantage of outlining fonts is consistency. Your text will print exactly as designed, without the risk of font substitution or rendering differences between systems. This is especially important for brand-critical designs like logos or marketing materials.

Outlining fonts also avoids licensing issues. Since you’re distributing vector shapes instead of font files, you sidestep potential copyright concerns. This is particularly relevant for premium or restricted fonts with strict licensing terms.

"Sometimes, you may need to outline fonts in PDF files, especially if you are using custom or licensed fonts that cannot be embedded due to copyright or technical reasons." – Heatherbank Print

Another advantage is universal compatibility. Outlined text works seamlessly across different platforms and software versions. Whether the printer uses a Mac or PC, or older or newer software, your outlined text will display exactly as intended. This reliability minimizes unexpected printing problems.

Outlining is also a common requirement for final print files, especially for PDF/X compliance. It acts as a safeguard, ensuring maximum fidelity for designs that no longer require text edits.

Drawbacks of Font Outlining

Despite its advantages, font outlining has some drawbacks. Once text is outlined, it becomes permanently uneditable. This means you can’t make quick spelling corrections or adjust the wording without reverting to the original file. For documents that may need frequent updates, outlining is not ideal.

Another downside is that outlined text increases file size. Each letter is converted into a detailed vector shape, which can make files significantly larger, especially with intricate fonts or large amounts of text.

Outlined text is also non-searchable and inaccessible to screen readers, which can be problematic for digital accessibility. Users won’t be able to copy text from the document, and search engines or document management systems won’t be able to index the content.

Additionally, outlined text loses its semantic meaning, which can affect discoverability and organization in digital environments.

When to Use Font Outlining

Font outlining is essential for vector file formats like Adobe Illustrator (.AI) or Encapsulated PostScript (.EPS). These formats require outlined text to prevent font substitution during printing.

"If you’re sending vector files (like AI or EPS), make sure to outline all fonts to avoid font substitution issues." – Replica Printing Services

Outlining is also a must when using custom or licensed fonts with embedding restrictions. Many premium fonts don’t allow embedding due to licensing agreements, making outlining the most reliable option for printing.

It’s best suited for short-form content like business cards, logos, or simple flyers, where text edits are unlikely once the design is finalized. However, always save a backup of the original editable file before outlining, so you can make future revisions if needed.

In the next section, we’ll explore font embedding as an alternative to outlining.

What is Font Embedding?

Font embedding involves including the exact font data directly within a document file. This ensures your text appears as intended, no matter if the viewer or printer has the specific font installed. Unlike outlining – which transforms text into vector shapes – embedding keeps the font data intact, allowing the text to remain editable.

When you embed fonts in formats like PDFs, the font files are packaged within the document. This ensures proper rendering, even if the recipient doesn’t have the font installed. It’s particularly useful for complex documents where maintaining formatting is crucial, as it preserves details like kerning, ligatures, bullet points, underlines, and numbering. This makes font embedding an excellent choice for projects like booklets, magazines, or multi-page brochures where design consistency and text functionality are key.

Font embedding not only ensures your design looks the same across devices but also allows for future edits and accessibility, unlike font outlining, which locks the text into a fixed shape.

Benefits of Font Embedding

Font embedding offers several advantages:

  • It keeps text fully editable, searchable, and accessible while retaining advanced typography features like kerning and ligatures. This is especially helpful for collaborative editing or when maintaining precise design details.
  • Embedded fonts ensure compatibility with screen readers, preserving the semantic meaning of the text. This makes the document accessible for users relying on assistive technologies.
  • It allows team members to work on the document with the correct fonts, even if they don’t have the original font files or licenses, streamlining collaboration across projects.

Drawbacks of Font Embedding

Despite its benefits, font embedding does have some downsides:

  • Older software or certain printers may struggle with rendering embedded fonts, leading to potential issues during printing.
  • Font licensing restrictions can be a hurdle. Some fonts, especially premium or commercial ones, are marked as "non-embeddable" due to copyright rules set by the font creators.
  • Embedding fonts can increase the file size of your document. Although the size increase is generally minor, it could become an issue for large files or when strict file size limits are in place.

When to Use Font Embedding

Font embedding is the go-to choice for projects that require both a polished visual presentation and the ability to make edits later. It’s particularly well-suited for long-form documents like catalogs, reports, brochures, and magazines, where maintaining consistent formatting across devices is crucial.

It’s also ideal for projects requiring accessibility compliance, such as those needing to meet ADA standards. Embedded fonts help maintain the text’s semantic structure, ensuring compatibility with screen readers and other assistive tools.

When working with standard fonts that allow embedding – such as most system fonts and many commercial ones – embedding is a reliable option for professional printing. However, always check the font’s license to confirm embedding permissions before finalizing your files.

For collaborative projects, embedding can prevent font substitution issues, maintain brand consistency, and offer the flexibility needed for future updates. It’s a practical solution that balances design integrity with functionality.

sbb-itb-ce53437

Font Outlining vs Font Embedding: Direct Comparison

When preparing files for printing or sharing, the choice between font outlining and font embedding comes down to their distinct approaches to ensuring fonts display correctly across different systems. While both methods address the same challenge, they do so in unique ways.

Font outlining transforms text into vector shapes, essentially converting each letter into a fixed graphic. This ensures the text appears exactly as designed, no matter where it’s viewed, but it also makes the text uneditable. Font embedding, on the other hand, incorporates the font data directly into the file. This keeps the text editable while ensuring it displays accurately, even if the recipient doesn’t have the font installed.

Each method has its strengths. Outlining is perfect for designs that won’t need further editing, such as logos or finalized marketing materials, and it sidesteps font licensing concerns. Embedding, however, is ideal for documents that need to remain editable or accessible, as it retains typographic features and supports assistive technologies. Below is a detailed comparison to help guide your decision.

Comparison Table

Factor Font Outlining Font Embedding
Text Editability Converts text to uneditable vector shapes Keeps text fully editable
Searchability Text cannot be searched or selected Text remains searchable and selectable
Accessibility Incompatible with screen readers Fully compatible with assistive technologies
File Size Impact Smaller or reduced file size Slightly larger due to embedded font data
Typography Features Preserves appearance but loses functionality Retains advanced features like kerning and ligatures
Print Compatibility Works seamlessly with all printers May encounter issues with older printers
Font Licensing No licensing concerns after outlining Must adhere to font embedding permissions
Future Modifications Requires original files for changes Editable directly in the final document
Best Use Cases Logos, headlines, final print files Multi-page documents, collaborative projects, accessible content

At Miro Printing & Graphics Inc., professionals often recommend tailoring your choice to the specific project. For static designs like business cards or flyers, outlining ensures flawless compatibility. For more dynamic projects like catalogs or reports, embedding offers flexibility and preserves the integrity of the typography.

Ultimately, the right method depends on your priorities – whether it’s locking in the design or keeping the file editable for future updates. Choose the approach that best aligns with your project’s goals to ensure a smooth and professional printing process.

Best Practices for Print-Ready Files

Producing high-quality print materials requires careful attention to detail, especially when it comes to managing fonts and preparing files. A smooth print process often hinges on following proven steps to avoid common errors that can lead to costly reprints.

Font Handling Guidelines

Start with fonts designed for print. Always choose fonts that are legally licensed for commercial use and check their terms of use before downloading. Some fonts that look great on a screen might not hold up in print, particularly at smaller sizes.

Keep an editable version of your file. Before you outline fonts or flatten elements, save an unaltered version of your file. This ensures you can make future revisions without starting from scratch.

Understand when to outline and when to embed fonts. For files heading straight to print production, outlining fonts removes the risk of font substitution. However, if files need to be shared for review or collaboration, embedding fonts keeps text editable while maintaining proper formatting. Think about who will handle the files and adjust your approach accordingly.

Check font readability at the final print size. A font that looks clear on your monitor might not be legible when scaled down for print, especially on small items like business cards. Always test your fonts at the actual size they’ll appear in print, particularly for fine details like contact information or disclaimers.

These steps lay the groundwork for successful file exports, which are vital for achieving professional results.

Exporting Files for Print

Export using PDF/X standards in CMYK mode with bleed and crop marks. To ensure precision, use PDF/X-1a or PDF/X-4 formats. These industry standards are tailored for print production, handling key aspects like color management, font embedding, and image resolution. Be sure to include a 0.125-inch bleed, crop marks, and high-resolution images (300 DPI) for the best results.

Once exported, it’s important to address potential font-related issues before submitting your files.

Common Font Issues to Avoid

Avoid font substitution. This is one of the most frequent problems in print production. If fonts aren’t handled correctly, the printer’s software may replace them with alternatives, potentially disrupting your layout or causing text to overflow.

Confirm font licensing. Double-check that all fonts are licensed for commercial use before finalizing your project. Overlooking this step can lead to legal complications or delays.

Run preflight checks on your files. Preflight tools, available in most professional design software, can identify missing fonts, low-resolution images, and other technical issues before printing. This step can save both time and money.

Limit the number of font families. Using too many fonts in a single project can complicate file preparation and increase the risk of errors. Stick to two or three font families, ensuring they’re all properly licensed and included in your files.

Test special characters and symbols. Not all fonts include the same range of special characters. If your design includes accented letters, symbols, or multilingual text, verify that your chosen fonts support them.

Choosing the Right Font Method for Your Print Project

When deciding on a font method for your print project, the choice often comes down to outlined fonts for fixed designs and embedded fonts for editable, collaborative work. The nature of your project will guide you toward the best option.

For finalized designs like business cards, brochures, banners, or anything using decorative or specialty fonts, outlining is the way to go. It ensures your typography prints exactly as intended, regardless of the printing system. This eliminates the risk of font substitution, saving you from potential delays or costly reprints.

On the other hand, if your project involves collaboration or client approvals, embedded fonts provide the flexibility you need. Marketing agencies often use this method for sending proofs to clients, as it allows for last-minute text changes without compromising the overall design. Embedded fonts make it easier to maintain editability while keeping the font appearance intact, simplifying the revision process.

For campaigns spanning multiple formats, such as projects that need both print and digital versions, embedded fonts are ideal during the development stage. You can work from a single master file with embedded fonts and then create outlined versions for final print production. This approach keeps file management straightforward while ensuring each version is optimized for its specific use.

Consider your timeline and the likelihood of revisions. If you expect several rounds of edits, embedded fonts are more practical. However, for tight deadlines where print compatibility is critical, outlined fonts eliminate potential technical issues that could slow things down. It’s also worth noting that while outlining fonts can increase file size, embedded fonts keep files lean and easy to render.

At Miro Printing & Graphics Inc., our prepress team is skilled in handling both outlined and embedded font files. From consultation to final print, we ensure your project aligns with your needs. Discussing your goals with us early on helps streamline production and ensure the best results.

FAQs

What should I consider when choosing between outlining and embedding fonts for printing?

When choosing between outlining and embedding fonts for a print project, it’s crucial to balance the need for future edits with ensuring visual consistency.

With embedding fonts, the text remains editable and searchable, which is ideal for drafts or files that might need revisions later. Plus, as long as the file is opened on a system with the right font support, the text will display as intended.

On the flip side, outlining fonts transforms text into vector shapes, locking in the design’s appearance. This eliminates any concerns about font licensing or software mismatches, making it the go-to option for final print files. While you lose the ability to edit the text, outlining ensures the design stays consistent across all systems. For professional-grade results, print shops often prefer outlined fonts to prevent font-related hiccups during production.

How do font licensing rules affect the decision to outline or embed fonts for print?

Font licensing rules are a crucial factor when deciding whether to outline or embed fonts in print files. Some licenses place restrictions on embedding fonts to prevent them from being shared or reproduced without permission. Ignoring these restrictions and embedding a font could potentially lead to legal trouble.

Outlining fonts offers a workaround. By converting text into vector shapes, outlining removes the need to embed the font entirely. This approach is typically permitted under most font licenses, making it a safer option when embedding isn’t allowed. That said, it’s always wise to carefully check the terms of the specific font license to ensure you’re following the rules.

Can fonts be outlined in digital documents while keeping them accessible and searchable?

When working with digital documents, outlining fonts can hinder accessibility and make text less searchable. To keep your content readable and functional, stick to using clear sans-serif fonts such as Arial, Verdana, or Open Sans. These are easier to read on screens. Also, ensure your font size is at least 12 points to improve readability, and always maintain strong contrast between the text and background.

To further improve accessibility, implement proper tagging, use logical heading structures, and steer clear of overly decorative or complex fonts. These steps will help keep your documents user-friendly, searchable, and aligned with accessibility standards.

Related Blog Posts

https://app.seobotai.com/banner/banner.js?id=68c75e6b119e7220d79b9807

How to Assess Image Sharpness for Printing

Learn how to evaluate and enhance image sharpness for professional-quality prints, ensuring clarity and detail in your final products.

When preparing images for printing, sharpness is critical for achieving high-quality results. Sharpness ensures details like text, edges, and textures appear clear and defined, avoiding blurry or unpolished prints. Here’s how to check and optimize image sharpness for professional prints:

  • Resolution Matters: Aim for at least 300 PPI for clear prints. Check file resolution in Photoshop or similar tools.
  • Inspect Details: Zoom in to 100% to evaluate edges, textures, and text clarity. Look for halos or noise that may indicate over-sharpening.
  • Test Print: Print a small section of your image to check sharpness on the intended paper type and printer settings.
  • Tailored Sharpening: Apply sharpening adjustments based on the paper and print size. Glossy paper retains sharpness better than matte or textured materials.
  • Use Tools: Software like Photoshop or Capture One helps refine sharpness with features like Unsharp Mask, High Pass filters, and noise reduction.

Sharpness issues, such as oversharpening or low resolution, can significantly affect the final print. Testing and proper adjustments ensure your prints meet expectations, whether for personal projects or professional use.

Soft Proofing, Image Sharpening and Sizing for Print by Joshua Holko

Image Sharpness Basics

Getting the sharpness of an image just right is a key step in achieving professional-quality prints.

What Is Image Sharpness?

At its core, image sharpness is all about how well-defined the edges and contrasts are in a photo. When someone refers to an image as "sharp", they’re usually talking about how clearly the boundaries between different elements stand out. This clarity is crucial for details to appear crisp and precise under ideal conditions.

Sharpness hinges on how quickly tones shift from light to dark at the edges of objects. A sharp edge will show a sudden transition between light and dark, while a softer edge will have a more gradual change, often with gray tones blending in between. This is why sharp images make fine details – like strands of hair, fabric textures, or the clean edges of text – stand out so vividly.

While resolution determines the maximum amount of detail an image can hold, focus decides which parts of the image appear crisp. For instance, an image captured at 6,000 x 4,000 pixels will showcase far more detail than one taken at 2,000 x 1,500 pixels, assuming both are printed at the same size. However, even with high resolution, poor focus can leave an image looking soft and lacking that sharp edge definition essential for professional prints.

What Affects Image Sharpness

A variety of factors come into play when determining how sharp a printed image will appear. Understanding these elements can help you make informed choices throughout your editing and printing process.

  • Equipment quality: High-end cameras and lenses, especially when used at their optimal aperture settings, capture finer details with minimal noise.
  • Image editing: Post-processing can either enhance or harm sharpness. Over-sharpening can create unnatural halos around edges, while under-sharpening leaves the image looking dull. File formats matter too – RAW files retain full sharpness, while lower-quality JPEGs can soften details due to compression.
  • Print size and viewing distance: The sharpness you see depends on the relationship between print size and resolution. For example, an image that looks sharp at 4" x 6" might lose clarity if enlarged without enough pixels per inch (PPI).
  • Printing methods and materials: Smooth, glossy papers used in digital printing tend to preserve fine details, while textured materials or certain printing methods can soften edges.
  • Output sharpening: This final step involves applying sharpening tailored to the specific print process and paper type, ensuring the image looks its best in its final form.

Tools and Methods for Checking Image Sharpness

When it comes to professional prints, ensuring image sharpness is non-negotiable. To capture every detail and maintain quality across various formats, you need the right mix of tools and techniques.

Technical Measurement Tools

If you’re after precision, Modulation Transfer Function (MTF) is the gold standard. It measures how well an imaging system reproduces contrast at different spatial frequencies. Essentially, MTF charts break down sharpness into percentages – 100% means perfect contrast, while anything less highlights areas of blur.

Another method involves slanted-edge algorithms, which analyze the transition between light and dark areas along diagonal edges in test images. The sharper the transition, the crisper the image looks.

For a more comprehensive approach, Imatest software is a favorite among photography studios and print shops. It not only measures MTF and noise levels but also generates detailed quality reports. This ensures consistency across cameras and printing workflows, making it a go-to for professionals.

While these tools provide objective metrics, pairing them with visual assessments gives a fuller picture.

Visual Inspection Methods

Start with a calibrated monitor to ensure what you see on the screen matches what will appear in print. An uncalibrated display can hide subtle sharpness issues or lead to unnecessary tweaks that might degrade quality.

Inspect images at 100% zoom or use digital magnifiers to evaluate edge clarity. This level of detail helps you spot halos, blending, or any lack of definition in critical areas. For instance, fine textures like fabric or individual hairs should be distinct and clean.

To refine your evaluations further, specialized software can make a big difference.

Software for Sharpness Assessment

Adobe Photoshop is a powerhouse for sharpness checks. Its tools like Unsharp Mask and Smart Sharpen let you preview adjustments in real time. The High Pass filter is particularly handy for isolating contrast transitions, making it easier to spot areas that need improvement. Plus, the Print Preview feature simulates how your image will look on different paper types.

For those seeking free alternatives, GIMP offers similar tools. Its Unsharp Mask and High Pass filter functions allow you to identify and address soft areas effectively.

If you’re working with RAW files, Capture One is a standout choice. Its Clarity and Structure adjustments enhance local contrast without introducing artifacts. The Focus Mask overlay is another useful feature, highlighting sharp areas in color to confirm that key subjects are in focus.

Many professional print services also use specialized software that integrates these methods. These tools automatically flag images that don’t meet sharpness requirements for specific print sizes and paper types, ensuring consistent quality across large projects.

Step-by-Step Guide to Check Image Sharpness for Printing

Follow these steps to ensure your images are sharp and ready for professional-quality printing.

Check Image Resolution and File Details

Start by examining your image’s resolution and file details. On Windows, right-click the file and select "Properties." On a Mac, choose "Get Info." This will show the pixel dimensions and file size – larger file sizes typically indicate higher resolution.

For precise measurements, open your image in Adobe Photoshop and navigate to Image > Image Size. Here, you’ll find the pixels per inch (PPI) value. For printing, aim for at least 300 PPI.

If you’re using GIMP, go to Image > Print Size to check the pixel dimensions and PPI. If the PPI is below 300, you’ll need to resize the image or find a higher-resolution version.

Also, don’t overlook the color mode. While many printers handle RGB files, converting your images to CMYK is often recommended for consistent color reproduction in print.

Examine Details at 100% Zoom

Once the resolution is confirmed, inspect your image visually by zooming in to 100%. This gives you a clear view of fine details. For portraits, focus on features like the eyes and hair. For landscapes, check the edges of trees, buildings, and horizon lines. If your image includes text, ensure the edges are sharp and well-defined.

Look closely at edge transitions. Sharp images will have clean, crisp edges, while soft or blurry edges could indicate focus issues or excessive processing. Keep an eye out for digital artifacts, such as halos around high-contrast areas, which could signal over-sharpening.

Tools like Photoshop’s Navigator can help you quickly move around the image while maintaining the 100% zoom level.

After this digital check, move on to a physical test print to confirm the sharpness translates well to paper.

To ensure your image looks as sharp in print as it does on screen, create a test print. Select a section of the image that includes fine details or text and print it at actual size using your intended paper and printer settings. Different paper types can impact how sharp the image appears, so testing with your chosen materials is crucial.

Inspect your test print under good lighting, such as natural daylight or high-quality LED lights. Use a magnifying glass or loupe to check for clean edges and retained detail. If the print appears softer than expected, consider applying output sharpening based on the paper type and intended viewing distance.

For critical projects, professional print services like Miro Printing & Graphics Inc. can provide test printing options. This allows you to evaluate sharpness across various paper stocks and printing methods before committing to a full print run.

High-resolution images for printing typically require a minimum of 300 PPI.

sbb-itb-ce53437

Common Sharpness Problems and How to Fix Them

When it comes to printing, achieving sharp and professional-looking images can be tricky. Various factors can impact sharpness during the printing process, but understanding these challenges – and knowing how to address them – can help you consistently produce crisp, high-quality results.

Oversharpening and Digital Artifacts

Oversharpening can ruin an image by creating unnatural halos around high-contrast edges and introducing noise that becomes glaringly obvious in print. Bright edges may develop dark outlines, and dark edges can gain bright halos, resulting in prints that look artificial. To prevent this, try sharpening your image in smaller, gradual steps rather than applying heavy adjustments all at once. In Photoshop, the Unsharp Mask filter is a great tool – set the Amount between 50-150%, Radius between 0.5-2.0 pixels, and Threshold between 0-5 levels. For output sharpening, Smart Sharpen is another solid option, especially with noise reduction enabled.

If sharpening reveals digital noise – grainy textures in smooth areas like skies or skin tones – reduce noise before sharpening. Photoshop’s Camera Raw filter provides excellent noise reduction tools to clean up your image.

Also, watch out for edge artifacts, which can appear as jagged or uneven edges around text and graphics. If you spot these, lower the sharpening amount or increase the threshold to protect smoother areas from over-enhancement.

Lastly, ensure your file’s resolution is adequate – poor resolution can limit sharpness no matter how well you edit.

Low-Resolution Files

Low-resolution images (below 150 PPI) tend to look soft and pixelated when printed. While upsampling – increasing the resolution – can sometimes help, it’s not a magic fix. Photoshop’s "Preserve Details 2.0" algorithm works well for photos, while "Bicubic Smoother" is better for illustrations or graphics. However, remember that upsampling can’t add detail that wasn’t there to begin with.

The quality of your source file plays a huge role. A sharp, well-exposed image at 200 PPI will often outperform a blurry 300 PPI image. Additionally, file compression can reduce sharpness. JPEGs with high compression lose fine details and develop visible artifacts, so whenever possible, work with uncompressed TIFF files or save JPEGs at maximum quality settings.

For critical projects, starting with a higher-resolution capture or scan is often a better approach than trying to salvage a low-resolution file.

How Print Materials Affect Sharpness

Your choice of print material significantly impacts how sharp your images appear. For instance, paper finishes make a big difference – glossy papers reflect light and enhance detail and contrast, while matte papers absorb light, softening the image but also masking minor sharpness issues.

Paper texture and ink absorption also play a role. Smooth, coated papers like photo paper preserve fine details, while textured or uncoated papers allow ink to spread, softening the edges. Coated papers keep ink on the surface, resulting in sharper prints.

Don’t forget about viewing distance. Prints meant for close-up viewing benefit from glossy papers that highlight every detail, while images displayed on walls can use matte papers without any noticeable sharpness loss.

Before committing to a final print, test your image on the paper stock you plan to use. A print that looks sharp on glossy paper might require extra sharpening for matte paper, and an image that seems oversharpened on gloss might look just right on a textured surface. Testing ensures your final product meets your expectations.

Adding Sharpness Checks to Your Print Workflow

Image sharpness plays a key role in delivering professional-quality prints. By integrating sharpness checks into your workflow, you can maintain consistent quality from the digital file to the final print, avoiding costly mistakes and reprints. When sharpness becomes a standard part of your process rather than an afterthought, you’ll save time and see better results. These checks complement earlier steps, like verifying resolution and inspecting images on-screen, ensuring your work transitions smoothly to the printing stage.

Creating Standard Sharpness Checks

A consistent sharpness protocol helps you achieve reliable and repeatable results. Start by creating a checklist to guide your process. For example:

  • Confirm a minimum resolution of 300 PPI at the final print size.
  • Inspect image details at 100% zoom to catch any issues.
  • Look for oversharpening or artifacts that could degrade quality.

It’s also helpful to document the optimal sharpening settings for different project types. For instance, smaller prints like business cards may require stronger sharpening, while larger formats like banners benefit from a more subtle approach.

Using standardized test strips can also streamline your workflow. These strips act as a reference point, letting you quickly compare your current project to a benchmark with proven sharpness.

Another useful practice is naming files to reflect the sharpening applied and the intended print material (e.g., "BusinessCard_Sharp_Gloss.tif"). This makes it easy to identify the file’s preparation at a glance.

Lastly, enable soft proofing in your editing software. This feature simulates how your image will look on specific paper types, providing a more accurate preview than a standard RGB display. It’s an effective way to spot potential sharpness issues before printing.

Working with Professional Print Services

Once you’ve established internal sharpness standards, collaborating with professional print services can elevate your results even further. An experienced print shop, like Miro Printing & Graphics Inc. in Hackensack, NJ, offers a range of services – digital, offset, and large-format printing – along with expert advice on optimizing sharpness for different materials and methods.

Professional printers bring a level of expertise that’s hard to match. They understand how various inks interact with different paper stocks and how specific printing processes can affect sharpness. By communicating your sharpness requirements clearly, you can benefit from their tailored recommendations. Many print shops can even handle output sharpening as part of their workflow, ensuring your images look just as crisp on paper as they do on screen.

Following your printer’s file preparation guidelines – covering aspects like resolution, color space, and sharpening techniques – can reduce guesswork and improve your final results. Additionally, post-press processes like binding, cutting, and finishing can influence the perceived sharpness of your product, so understanding these interactions is crucial.

Partnering with a professional print service is often a worthwhile investment. It minimizes waste, enhances the quality of your prints, and saves you the time and effort of troubleshooting sharpness issues on your own. When image clarity is essential to your project’s success, working with experienced professionals is the best way to ensure your prints stand out.

Conclusion: Getting Sharp Images for Professional Prints

Creating sharp, professional-quality prints isn’t just about capturing a high-resolution image. It’s about understanding how sharpness transitions from your screen to the printed page and carefully managing every step of the process.

The steps outlined earlier ensure that your digital file is ready to meet the demands of printing. Paper absorbs ink, which can soften images and blur fine details. An image that looks crisp on your screen at 72 PPI might appear pixelated or lack clarity in print. This makes sharpness a key factor in distinguishing a professional print from one that falls short.

FAQs

What mistakes should I avoid when sharpening images for printing?

When preparing images for printing, there are a few common pitfalls to steer clear of:

  • Over-sharpening: This can lead to halos around edges and amplify noise, leaving the image looking artificial and harsh.
  • Using the same sharpening settings for all images without accounting for their individual characteristics and needs.
  • Skipping the step of resizing the image to the correct resolution before sharpening. This misstep can result in prints that are either too soft or overly sharp.

For the best outcomes, always view your image at 100% zoom while fine-tuning the sharpening settings. Tailor these adjustments to the specific image and its intended print size to produce sharp, professional-quality prints without any distracting artifacts.

How does the type of paper impact the sharpness of a printed image?

The paper you select can significantly impact the sharpness and clarity of your printed images. Coated papers, such as those with gloss or satin finishes, have smooth surfaces that absorb ink efficiently. This reduces ink spread, resulting in crisp, detailed prints – perfect for projects where precision and sharpness are key.

In contrast, uncoated or textured papers absorb more ink, which can soften edges and reduce detail. While these papers offer a distinctive, artistic feel, they might not be ideal for prints that demand high levels of detail. Choosing the right paper ensures your prints align with both your quality expectations and aesthetic preferences.

Can Photoshop or similar tools help preview how sharp an image will look when printed?

When preparing images for print, tools like Photoshop can be incredibly helpful for previewing and fine-tuning sharpness. Features like Unsharp Mask and Smart Sharpen are designed to enhance edges and bring out fine details, giving you a good idea of how the final print will look.

For even better accuracy, try using soft proofing. This feature lets you simulate how your image will interact with your specific printer and paper type, helping you ensure the sharpness meets your expectations. Keep in mind that resolution and print size are also key factors in achieving the desired level of sharpness.

Related Blog Posts

https://app.seobotai.com/banner/banner.js?id=68c5f27b119e7220d7dda8b5

Benefits of Using Bagasse Paper for Printing

Explore the benefits of bagasse paper as an eco-friendly alternative to traditional printing paper, reducing waste and resource use.

Bagasse paper is a practical alternative to wood-based paper, offering a way to reduce waste and use resources more efficiently. Made from sugarcane byproducts, it turns agricultural leftovers into high-quality paper suitable for printing. Here’s why it matters:

  • Eco-friendlier production: Requires less energy, water, and chemicals compared to traditional paper manufacturing.
  • Reduces deforestation: Repurposes sugarcane waste, cutting down on the need for wood pulp.
  • Reliable for printing: Maintains durability and supports both digital and offset printing methods.
  • Cost-effective: Delivers quality results without inflating costs.

Bagasse paper is gaining popularity for business materials like brochures, business cards, and packaging. It’s a smart choice for companies aiming to reduce their impact while maintaining professional results.

What Is Bagasse Paper? – Graphic Design Nerd

Graphic Design Nerd

Problems with Traditional Printing Paper

The production of conventional printing paper takes a heavy toll on the environment, relying on methods that consume significant resources and contribute to ecological harm.

Deforestation and Loss of Wildlife Habitats

Every ton of traditional paper requires cutting down about 17 trees. This not only reduces forest cover but also disrupts ecosystems, eliminating critical habitats for countless species.

High Resource Use and Pollution

Creating a single ton of standard paper demands an enormous amount of resources: 7,000 gallons of water and 6,500 kWh of energy. On top of that, the process involves numerous chemicals, further contributing to water and air pollution.

Carbon Emissions from Paper Production

The carbon footprint of wood-based paper is substantial. The energy-intensive manufacturing process, combined with the use of harmful chemicals, leads to significant greenhouse gas emissions, amplifying its environmental impact.

These challenges highlight the urgent need to explore more sustainable options for paper production.

How Bagasse Paper Solves These Problems

Bagasse paper offers a clever solution to the twin challenges of deforestation and resource overuse by turning sugarcane residue into a practical alternative to traditional paper.

Made from Agricultural Waste

Bagasse, a byproduct of sugarcane processing, is already partially refined before it even reaches the paper-making stage. This makes it an efficient resource to repurpose. By using this abundant agricultural waste, we can cut down on the need for wood pulp, easing the strain on forests. Plus, bagasse’s natural properties make the production process smoother and more efficient.

Conserves Energy and Water

Bagasse paper production doesn’t just save trees – it also minimizes energy and water use. Since bagasse undergoes partial processing during sugar extraction, it requires fewer steps to turn it into paper. The pulping process is also more resource-friendly, operating at lower temperatures and using fewer chemicals due to the reactive lignin in bagasse. These factors combine to significantly reduce the environmental footprint of manufacturing bagasse paper.

sbb-itb-ce53437

Benefits of Bagasse Paper for Commercial Printing

For businesses looking to make eco-conscious choices, bagasse paper is becoming a popular option for commercial printing. Made from sugarcane byproducts, it helps reduce waste while offering dependable print quality. Let’s dive into why bagasse paper stands out in commercial printing.

Durable and Reliable for Printing

Bagasse paper is crafted to deliver sharp, consistent prints. Its sturdy composition ensures that materials like business cards, brochures, and flyers retain their professional look, even with frequent handling.

Compatible with Multiple Printing Methods

One of the standout features of bagasse paper is its flexibility. It works well with both digital and offset printing, making it a reliable choice for a wide range of projects – think catalogs, magazines, or promotional materials. No matter the method, the results remain consistent and polished.

Cost-Effective and Environmentally Friendly

By using less wood and repurposing agricultural waste, bagasse paper supports eco-friendly practices. And the best part? It does so without straining budgets, offering an affordable way to align with sustainable business goals.

Using Bagasse Paper in Custom Printing Projects

Bagasse paper is making waves in custom printing projects, combining sustainability with reliable print quality. Made from sugarcane waste, this eco-friendly alternative is gaining traction across industries looking to reduce their environmental footprint without compromising on results.

Marketing and Business Material Applications

Bagasse paper shines in marketing and business materials. For direct mail campaigns, items like postcards, flyers, and promotional pieces benefit from its durability and unique texture, making a lasting impression.

When it comes to corporate stationery, such as business cards, letterhead, and envelopes, bagasse paper offers a smooth surface that ensures sharp text and vibrant logos. It’s also a fantastic choice for event materials and packaging elements like hang tags or product information sheets – perfect for businesses and events aiming to highlight eco-conscious values. Beyond functionality, using bagasse paper in these applications reinforces a commitment to sustainable practices while showcasing creative possibilities.

Printing Services by Miro Printing & Graphics Inc.

For those seeking sustainable printing options with high-quality results, Miro Printing & Graphics Inc. in Hackensack, NJ, offers a wide range of services tailored to diverse project needs. Their expertise includes digital printing, offset printing, large format printing, in-house bindery, computer layout and design, and mailing & fulfillment services. While eco-friendly materials like bagasse paper aren’t explicitly listed in their offerings, their extensive capabilities allow clients to explore various substrates, including sustainable options.

If you’re interested in incorporating bagasse paper into your project, the team at Miro Printing & Graphics Inc. can help ensure your design and quality goals align with your environmental values. Discussing your specific needs with their experts can open up creative and sustainable possibilities for your next printing project.

Conclusion: The Future of Green Printing

Bagasse paper stands out as a game-changer in the journey toward greener printing practices. Made from sugarcane waste, this eco-friendly alternative requires less energy and water during production, which helps cut down on carbon emissions. It’s a smart way to turn agricultural waste into something both practical and sustainable.

What’s even better? Bagasse paper performs exceptionally well. It provides crisp text and vibrant colors, whether you’re using digital or offset printing methods. Its smooth surface and durability make it perfect for a wide range of uses, from corporate stationery to marketing materials and packaging. Plus, it offers businesses the chance to reduce costs while enhancing their reputation among environmentally conscious consumers.

As production methods improve and more companies embrace this option, bagasse paper is poised to offer a competitive edge. It allows businesses to shrink their environmental footprint without sacrificing quality or professionalism. By adopting bagasse paper, companies can align their branding with sustainability – a win-win for both the planet and their bottom line.

The future of printing is all about finding solutions that meet business needs while respecting the environment. Bagasse paper transforms waste into top-notch printed materials, proving that eco-friendly choices don’t have to mean compromising on quality. With its growing appeal, bagasse paper is set to become a leading option in the printing industry.

FAQs

How does bagasse paper perform in printing compared to traditional wood-based paper?

Bagasse paper provides an eco-conscious alternative to traditional wood-based paper, though it does come with some unique characteristics. Its fibers are shorter, and the paper often has a lower brightness level, which can slightly affect the sharpness and vibrancy of printed designs. While it may not offer the same durability or polished finish as premium wood pulp paper, it remains a practical option for a variety of printing projects.

By using the right inks and printing methods, bagasse paper can produce impressive results. It’s an excellent choice for businesses and individuals aiming to prioritize sustainability without sacrificing usability or functionality.

What are the environmental advantages of using bagasse paper instead of traditional paper?

Bagasse paper stands out as a greener alternative to traditional paper. Crafted from sugarcane fibers – a byproduct of sugar production – it not only cuts down on waste but also encourages the reuse of natural materials that might otherwise go unused.

Producing bagasse paper uses less energy and water, which means it leaves behind a smaller carbon footprint. Plus, it breaks down quickly, making it an excellent compostable option for businesses aiming to minimize their environmental impact. Opting for bagasse paper is a step toward a cleaner, more resource-conscious printing solution.

Is bagasse paper suitable for all types of printing projects, or does it have specific limitations?

Bagasse paper offers a more environmentally conscious choice for various printing needs, though it does have a few drawbacks. Its surface tends to be slightly rough, and the fibers can be distributed unevenly. These factors might impact the quality of prints that require a high-gloss finish or intricate details. Another consideration is that bagasse pulp contains elements like silicon dioxide, which, if not properly processed, could potentially damage printing equipment.

For everyday printing tasks, bagasse paper performs reliably and comes with the added benefit of being a greener option. However, it might not be ideal for projects demanding perfectly smooth surfaces or exceptional image precision. It’s always a good idea to check with your printer to see if bagasse paper suits the needs of your project.

Related Blog Posts

https://app.seobotai.com/banner/banner.js?id=68ae4e2ab36f318d4f10bee3

5 Steps to Use ICC Profiles for Accurate Colors

Learn how to achieve precise color management in printing using ICC profiles for consistent results across devices.

Want your printed colors to match what you see on screen? ICC profiles are the key. These files ensure color consistency across devices like monitors, printers, and scanners. Without them, your prints may look drastically different from your digital designs.

Here’s a quick breakdown of how to use ICC profiles for precise color management:

  • Set Up Your Workflow: Organize your workspace, turn off automatic color management, and ensure consistent lighting.
  • Calibrate Your Monitor: Use tools like X-Rite i1Display Pro to match your screen’s colors to real-world standards.
  • Print and Measure Charts: Print color targets, let them dry, and measure with a spectrophotometer.
  • Install and Apply Profiles: Save and apply custom ICC profiles for your specific printer, ink, and paper setup.
  • Soft Proof and Adjust: Preview prints on your screen, make adjustments, and test final prints under proper lighting.

How to DIY ICC Printer Profile Making – Uncover the Secrets with X-Rite i1 Profiler

What You Need Before Starting

Getting accurate colors with ICC profiles starts with the right tools and a properly calibrated setup. Here’s what you’ll need to ensure precise color management.

Required Equipment and Software

First, make sure you’re using a calibrated monitor. If your display isn’t showing colors correctly, any adjustments you make will be based on flawed data. Look for monitors that cover at least 99% of the sRGB color space; for professional work, monitors with Adobe RGB coverage are even better.

You’ll also need a spectrophotometer or a colorimeter to measure colors accurately. These devices are essential for creating ICC profiles. Popular tools include the X-Rite i1Display Pro for monitor calibration and the i1Pro series for printer profiling.

For software, Adobe Photoshop and Illustrator come with built-in color management tools. However, specialized programs like X-Rite i1Profiler or ColorMunki Photo are ideal for creating custom ICC profiles tailored to your specific equipment and materials.

Keep in mind that each printer and paper combination requires its own ICC profile. For example, a profile designed for glossy photo paper won’t work correctly on matte cardstock or canvas.

Monitor Calibration Requirements

Calibrating your monitor regularly is crucial. Over time, monitors "drift" as backlights age and components wear down, so aim to recalibrate every 2–4 weeks. Even brand-new monitors can be far from accurate straight out of the box.

Ambient lighting in your workspace plays a big role in color perception. Set up consistent, neutral lighting with a color temperature of 5000K to 6500K. Avoid working near windows where daylight changes or under fluorescent lights, as these can throw off your color judgment.

For print work, set your monitor’s white point brightness to 120 cd/m². This level closely matches typical print viewing conditions. While higher brightness settings might look good on-screen, they can result in prints that appear darker than expected.

Use a gamma setting of 2.2, which is the standard for most printing workflows. This ensures your screen preview aligns with how the final prints will look. Following these calibration steps will help your display show true colors, ready for profile creation.

Selecting the Right ICC Profile

Each printer, ink, and paper combination needs its own ICC profile. For example, a profile made for an Epson printer with Canon photo paper won’t work properly with HP paper, even on the same printer. Ink absorption, surface texture, and coatings all impact how colors appear.

The generic profiles that come with printers are only a starting point. These profiles are created under controlled lab conditions, which rarely match your real-world setup. Custom profiles, on the other hand, take your specific environment into account – factors like humidity, temperature, and even the age of your ink cartridges. Using custom profiles ensures that what you see on your screen matches the final printed output.

If you’re working with a professional print shop, ask about their ICC profile library. Many established shops maintain profiles for a wide range of paper and ink combinations. For instance, at Miro Printing & Graphics Inc., clients are provided with the exact ICC profiles used for their projects, ensuring consistency between screen and print.

Make it a habit to update your ICC profiles every 3–6 months or whenever you change ink suppliers, switch paper batches, or notice color shifts in your prints. Even environmental changes, like fluctuations in humidity, can affect your printer’s behavior enough to require new profiles.

Finally, consider the viewing conditions for your prints. A profile optimized for indoor office lighting will produce different results than one designed for outdoor signage. Always match your ICC profile to the environment where your prints will be displayed.

With your tools ready and profiles selected, you’re now prepared to move on to setting up your workflow.

5 Steps to Use ICC Profiles for Accurate Colors

Once you’ve got your equipment ready, it’s time to incorporate ICC profiles into your workflow. Follow these five steps to move seamlessly from setup to final color checks.

Step 1: Set Up Your Workflow

Begin by ensuring your workspace and equipment are properly organized. Connect your printer via USB to minimize any communication delays. Let your printer warm up for at least 30 minutes before starting – this helps maintain steady ink flow and temperature.

In your printer settings, turn off automatic color management. Automatic adjustments can conflict with your custom ICC profiles, so set the printer driver to "No Color Management" or "Application Managed Colors."

Keep your ICC profiles organized in folders based on printer model, paper type, and date. For example: "Epson_SureColor_P800/Canvas_Matte/Profile_Aug2025." This system is especially helpful when handling multiple profiles for various projects.

Lastly, make sure your workspace has consistent ambient lighting conditions for accurate color assessment.

Step 2: Calibrate Your Monitor

Use your monitor calibration software to achieve accurate color display. Tools like the X-Rite i1Display Pro will guide you through the process. Set your white point to D65 (6500K), gamma to 2.2, and luminance to 120 cd/m² – these are standard settings for print work.

During calibration, the software will display color patches on your screen while a colorimeter measures the output. This process takes about 15-20 minutes and creates a profile tailored to your monitor’s specific characteristics. A properly calibrated monitor ensures your ICC profiles work as intended.

Save the monitor profile with a descriptive name, such as "Dell_U2718Q_Aug26_2025." Most calibration tools will set this as your system default, but double-check in your operating system’s display settings.

To test your calibration, open an image with known color values. Many professionals use the Datacolor SpyderCHECKR target image, which includes precise color squares you can compare against a physical reference card.

Step 3: Print and Measure Color Charts

Download or create a color target chart suitable for your profiling software. The IT8.7/4 target, with its 288 color patches, is a popular choice for covering the full spectrum of printable colors. If you’re using X-Rite i1Profiler, select the "Large Gamut" target for comprehensive profiling.

Print the chart using the exact paper and ink combination you’ll use for your final prints. Choose the highest quality print settings, such as "Photo" or "Fine Art" mode, and ensure no color management is applied – your printer should still be set to "No Color Management" from Step 1.

Let the print dry completely before measuring. Glossy paper typically needs 30 minutes, while canvas may require up to 2 hours. Wet ink can lead to inaccurate color readings.

Using a spectrophotometer, measure each color patch carefully. Align the device precisely over each square to avoid overlapping onto adjacent patches. With tools like the X-Rite i1Pro 3 and an automated scanning ruler, you can measure an entire IT8 chart in about 8-10 minutes.

Step 4: Install and Apply ICC Profiles

After completing the measurements, your profiling software will generate a custom ICC profile. Save it with a clear, detailed name that includes the printer model, paper type, ink set, and creation date. For example: "Canon_PRO1000_Hahnemuhle_PhotoRag_CanonInk_Aug2025.icc."

Install the profile in your operating system’s color profile directory. On Windows, copy the .icc file to "C:\Windows\System32\spool\drivers\color". On Mac, place it in "/Library/ColorSync/Profiles/" for system-wide use or "~/Library/ColorSync/Profiles/" for user-specific access.

In Adobe Photoshop, set your working space (e.g., "North America General Purpose 2") and select your custom ICC profile when printing.

Test your profile by printing a small section of your color chart again. Compare this print to the original measured chart – the colors should align much more closely after applying your custom profile.

Step 5: Soft Proofing and Final Adjustments

Activate soft proofing in your image editing software to preview how your prints will look. In Photoshop, go to View > Proof Setup > Custom, select your printer profile, and choose "Relative Colorimetric" as the rendering intent – this is ideal for photographic work. Soft proofing helps confirm that your ICC profile is working as expected.

Check for out-of-gamut colors that your printer can’t reproduce. Photoshop can highlight these areas, allowing you to make selective adjustments to bring colors into the printer’s range.

Print a test image that includes a variety of colors, skin tones, and neutrals. Print it at the actual size you plan to use for your final output, as color perception can shift with different dimensions.

Evaluate the test print under the same lighting conditions where the final prints will be displayed. Compare it to the soft-proofed preview on your monitor. You may need to tweak your image files slightly, especially for tricky colors like deep blues or bright reds. Keep a record of these adjustments for future reference.

sbb-itb-ce53437

Common Problems and Solutions

Even with a well-calibrated workflow, challenges can still pop up. Knowing how to identify and address these common issues will help you maintain consistent and accurate colors throughout your printing process.

Fixing Common Issues

One frequent problem is double color management. This happens when both your printer driver and your image editing software try to apply color corrections at the same time. The result? Prints that look muddy, overly saturated, or have strange color casts.

To fix this, check your settings in both your editing software and printer driver. For example, in Adobe Photoshop, make sure you’re selecting your custom ICC profile in the print dialog under "Color Management." Letting the printer handle colors automatically can lead to these unwanted results, so ensure only one system is managing color corrections.

Aging equipment is another challenge. Over time, your monitor’s color accuracy can shift due to backlight aging or component wear. Similarly, printers may start producing inconsistent colors as printheads age or ink formulations vary between batches. You might notice subtle but noticeable differences in prints made with the same ICC profile just a few months apart.

Environmental factors like temperature and humidity also play a big role. A temperature shift of just 10°F or a humidity change of more than 20% can affect ink flow, drying times, and how paper behaves. To avoid these issues, keep your workspace within 68-72°F and maintain 45-55% relative humidity.

Another issue to watch for is profile corruption, which can occur during file transfers or updates. Corrupted profiles may cause extreme color shifts or banding in your prints. Likewise, mismatched inks or paper types can lead to unreliable results. To avoid this, maintain dedicated profiles for each specific printer, ink, and paper combination. Always keep backup copies of your profiles and test them periodically by printing small color patches to ensure they’re functioning correctly.

By addressing these problems promptly and taking preventive steps, you can maintain consistent color accuracy over time.

Maintaining Color Consistency

Once immediate issues are resolved, focus on proactive measures to keep your workflow steady.

Regular calibration is key. Monitors, even high-quality LED models, gradually shift over time. Stick to a consistent calibration schedule based on your monitor type and usage.

Update your printer profiles whenever you switch paper brands, receive a new ink batch, or notice a change in lighting conditions. Professional print shops often create new profiles every quarter or whenever they get a new shipment of paper.

Environmental stability is also crucial. Use a digital hygrometer to monitor temperature and humidity in your workspace. Sudden environmental changes can lead to color shifts in both your monitor display and print output. Document these conditions in your profile names to make troubleshooting easier in the future.

Make profile validation a habit. Print the same reference image every month using your existing profiles and compare it to previous prints. Store these test prints in a dark, dry place to prevent fading. If you notice any shifts, it’s a sign to recalibrate your equipment or create new profiles.

Proper paper storage can also make a difference. Keep paper in its original packaging, sealed with plastic bags and silica gel if humidity levels are high. Paper that absorbs moisture from the air won’t interact with ink the same way, throwing off the accuracy of your ICC profiles.

Finally, keep detailed records of your workflow. Track calibration dates, profile creation dates, environmental conditions, and any issues you encounter. This documentation will help you spot patterns and avoid repeating mistakes. Make notes about which paper batches work best with certain profiles and how long those profiles remain accurate under specific conditions.

Be mindful of software updates as well. Updates to your operating system, printer drivers, or editing software can sometimes reset your color management settings or alter how profiles are applied. After any update, double-check your settings and test-print a reference image to ensure everything is still working as it should.

Key Takeaways

Here’s a quick recap of the essential steps for achieving precise and predictable color management in your printing workflow. By properly using ICC profiles, you can shift from guesswork to consistent results. The five-step process – setting up your workflow, calibrating your monitor, printing and measuring color charts, installing profiles, and soft proofing – forms the foundation for maintaining color accuracy across all your projects.

One crucial point to keep in mind: ICC profiles aren’t a “set it and forget it” solution. Over time, equipment like monitors and printers naturally change. This means profiles need periodic updates to account for factors like monitor drift or printer wear. Regular updates ensure your colors stay true to your expectations.

Creating a stable workspace is also vital. Environmental factors, like lighting, can influence the performance of your calibrated system. Using proper calibration tools not only reduces waste but also boosts client satisfaction. Professional print shops, for instance, often update profiles whenever consumables change or equipment conditions shift. This proactive approach prevents costly reprints and ensures consistent quality.

Additionally, system updates can sometimes overwrite monitor profiles without warning.

As Berntsen, a Community Expert, advises, "Calibrate and maintain devices regularly to ensure optimal performance."

To avoid setbacks, always check your profiles after software updates and keep backup copies of your working profiles.

It’s also worth noting that each printer and paper combination needs its own dedicated profile. A profile that works perfectly for one setup won’t necessarily deliver the same results with another, as manufacturing differences between devices can impact color reproduction.

These takeaways summarize the best practices covered in this guide. The key to long-term success in color management lies in viewing it as an ongoing process. Regular calibration, monitoring your environment, and keeping detailed records will ensure your workflow stays smooth and your colors remain accurate. At Miro Printing & Graphics Inc., these methods are part of our promise to deliver exceptional print quality every time.

FAQs

How do ICC profiles help maintain consistent colors between monitors and printers?

ICC profiles serve as color interpretation guides, ensuring colors remain consistent and accurate across various devices like monitors and printers. Every device has its own unique color range, known as a gamut, and ICC profiles describe these characteristics to make sure colors are rendered properly.

With ICC profiles, colors are fine-tuned to match the specific capabilities of each device. This means the final output – whether displayed on a screen or printed – closely aligns with the original design. In short, they help ensure that the colors you see on your monitor are a reliable preview of the printed result, maintaining dependable color accuracy.

Why don’t my prints match the colors on my screen, even after following all the steps?

If your prints still don’t match the colors on your screen, the issue might lie in calibration or how ICC profiles are being used. Start by confirming that the ICC profile for your specific printer and paper type is installed correctly and assigned within your color management settings.

Also, make sure your monitor is properly calibrated to display colors as intended. Use the appropriate ICC profiles in your design software for both soft proofing and printing. If the mismatch continues, try recalibrating your monitor and updating your ICC profiles. Even small tweaks in your workflow can greatly improve color accuracy.

How often should I recalibrate my ICC profiles and equipment to ensure accurate color management?

To keep color management consistent and accurate, it’s a good idea to recalibrate your ICC profiles and equipment every 1 to 3 months. In settings where precise color accuracy is essential – like professional printing or design – more frequent recalibration, such as weekly adjustments, might be necessary. This is especially true if factors like temperature, humidity, or lighting conditions fluctuate.

By recalibrating regularly, you can ensure your prints turn out exactly as intended, minimizing inconsistencies and maintaining high-quality results. For any project that relies on precise color reproduction, this step is crucial.

Related posts

https://app.seobotai.com/banner/banner.js?id=68acfd105d4c81d674964d43

Weatherproof Cardstock for Custom Outdoor Projects

Explore the best weatherproof cardstock options for outdoor projects, focusing on durability, water resistance, and eco-friendliness.

When creating outdoor materials, regular cardstock doesn’t hold up to harsh weather. Weatherproof cardstock is specifically designed to withstand rain, UV rays, temperature changes, and frequent handling. Options range from synthetic and PVC-based materials to coated paper and eco-friendly alternatives. Here’s a quick breakdown:

  • Synthetic Cardstock (e.g., Yupo): Durable, water-resistant, tear-proof, and UV-stable. Ideal for long-term outdoor use but less eco-friendly.
  • PVC/Plastic-Based Cardstock: Fully waterproof, strong against UV exposure, and tear-resistant. Requires special printing methods.
  • Coated Paper Cardstock: Budget-friendly with water and UV-resistant coatings. Best for short-term outdoor projects.
  • Eco-Friendly Options: Includes stone paper, bamboo fiber, and recycled materials. Sustainable but pricier.
  • Heavy-Weight Cardstock: Thicker and sturdier for windy or demanding conditions.
  • All-Weather Printer Paper: Lightweight, moisture-resistant, and compatible with standard printers.

Choosing the right option depends on your project’s durability needs, budget, and environmental concerns. Each type offers unique strengths, from long-lasting synthetic materials to affordable coated paper for temporary use. Below, we’ll explore these materials in detail to help you make the best choice for your next outdoor project.

Printing water resistant posters without lamination

1. Synthetic Cardstock (e.g., Yupo)

Yupo

For outdoor projects that need to stand up to the elements, synthetic cardstock, like Yupo, is a standout option. Made from polypropylene film, it takes durability to the next level compared to traditional paper. While paper can absorb moisture and break down, synthetic cardstock holds up under tough conditions.

Water Resistance

One of its key features is its non-porous surface, which effectively repels water. Whether it’s rain, snow, or high humidity, synthetic cardstock keeps its structure and printed designs intact, making it a reliable pick for outdoor use.

Tear Resistance

Its film-based construction gives synthetic cardstock impressive tear resistance. The polymer material distributes stress evenly, making it tough enough to handle strong winds or frequent handling without ripping.

UV/Fade Resistance

Synthetic cardstock also offers solid protection against UV exposure. The polypropylene base helps prevent printed inks from fading, even under prolonged sunlight. This makes it a dependable choice for outdoor signs or displays that need to maintain their quality over time.

The smooth, non-absorbent surface of synthetic cardstock is ideal for digital printing. Latex and UV-curable inks adhere well, ensuring vibrant and durable results. For offset printing, specialized inks designed for non-porous surfaces may be required to achieve the best performance.

Environmental Considerations

While synthetic cardstock isn’t biodegradable, it is recyclable at facilities that handle plastic films. Plus, its long lifespan means fewer replacements, which can help offset some environmental concerns over time.

2. PVC and Plastic-Based Cardstock

PVC and plastic-based cardstock are built to handle tough conditions where standard paper would fall short. Designed for durability and protection, these materials shine in demanding environments. Let’s break down how PVC cardstock performs in key areas.

Water Resistance

PVC cardstock doesn’t just resist water – it’s fully waterproof. This makes it perfect for outdoor menu boards, construction site signs, or even marine settings where materials might face constant moisture or submersion.

Thanks to its non-porous surface, water simply rolls off, leaving prints dry and intact. Unlike other materials, PVC won’t warp, swell, or peel when exposed to water.

Tear Resistance

When it comes to strength, PVC cardstock is hard to beat. Its plastic-based structure spreads force evenly, making it extremely tear-resistant. This makes it ideal for temporary outdoor setups that require repeated handling, like signs or banners.

PVC’s flexibility also plays a role here. It bends without cracking or breaking, unlike rigid materials that can snap under pressure.

UV and Fade Resistance

PVC cardstock offers impressive resistance to UV rays, keeping colors vibrant and intact for the long haul. When paired with UV-resistant inks, it’s a great option for outdoor signs, vehicle wraps, or any project that requires lasting color.

Because it resists fading, businesses can save on replacement costs while maintaining a consistent brand image in outdoor settings.

Printing on PVC cardstock requires specialized methods to ensure the ink adheres properly. UV-curable inks work particularly well, creating a durable bond that won’t flake or peel. Solvent-based inks are another option, though they require careful ventilation during the process.

The smooth surface of PVC allows for sharp, vibrant prints, but it’s worth noting that standard water-based inks used in home printers won’t stick. For the best results, professional printing services are a must.

Environmental Considerations

PVC cardstock does come with some environmental concerns. While it’s recyclable through specific programs, it’s not biodegradable and can linger in the environment if improperly discarded.

That said, its durability means it lasts longer, reducing the need for frequent replacements. For projects where weather resistance is a priority, the long lifespan of PVC might outweigh its environmental drawbacks.

Price Range (USD)

PVC cardstock is a premium option, typically priced between $0.75 and $2.50 per square foot, depending on thickness and quality. While it’s more expensive than paper-based materials, its durability and extended lifespan often make it a cost-effective choice for long-term outdoor use. Bulk orders can help lower the cost, making it a smart option for larger projects or businesses with ongoing outdoor printing needs.

3. Coated Paper Cardstock (Weatherproof Coatings)

After considering fully synthetic and plastic-based materials, coated paper cardstock presents a more budget-friendly option. This material combines the familiar feel of paper with added durability through specialized coatings. By starting with a paper base and applying weather-resistant coatings, coated cardstock achieves a balance of outdoor performance and affordability. This makes it a practical choice for a variety of outdoor projects.

Water Resistance

The weatherproof coatings on this cardstock create a barrier that helps repel water. Depending on the type of coating, the level of water resistance varies:

  • Aqueous coatings: Provide protection for 2–4 weeks in moderate conditions.
  • UV-cured coatings: Extend durability to 6–8 weeks.
  • Laminated coatings: Offer the longest-lasting protection, typically 3–6 months.

While coated cardstock handles light to moderate moisture well, prolonged exposure to heavy rain or humidity can lead to warping or delamination.

Tear Resistance

In addition to moisture protection, coatings also enhance the material’s structural durability. Heavier paper stocks, such as 14–16 pt, paired with laminated coatings, offer better tear resistance, making them suitable for outdoor use.

Among the available options, laminated coatings provide the highest tear resistance. The plastic film bonds tightly to the paper, creating a composite material that resists punctures and tearing along the grain. This makes laminated coated cardstock a strong candidate for outdoor signs that might endure wind or accidental handling.

UV and Fade Resistance

Coated cardstocks with UV-resistant finishes can greatly prolong the vibrancy of printed colors when used outdoors. Here’s how different coatings compare:

  • Standard aqueous coatings: Offer minimal UV protection.
  • Specialized UV-resistant coatings: Block up to 95% of harmful UV rays, keeping colors vibrant for months instead of weeks.

The durability of colors depends on the pairing of ink and coating. For instance, digital prints using UV-cured inks combined with protective coatings resist fading much better. Conversely, offset prints with conventional inks may begin fading after 4–6 weeks of direct sun exposure, even when coated.

Coated cardstock works well with both digital and offset printing, ensuring sharp, vibrant results. It also supports finishing processes like cutting, scoring, and folding, provided these steps are completed before the coating fully cures. This flexibility makes it a versatile option for a range of printing needs.

Environmental Friendliness

Compared to plastic-based materials, coated paper cardstock has an edge in environmental considerations due to its renewable paper base. However, the coatings themselves can complicate recycling:

  • Aqueous coatings: Can often be recycled through standard paper recycling systems.
  • Plastic-based coatings: May require separation, making recycling more challenging.

While the shorter outdoor lifespan of coated cardstock may lead to more frequent replacements, it can still strike a reasonable balance for projects lasting under three months, offering a blend of functionality and eco-consciousness.

Price Range (USD)

Coated paper cardstock is priced between standard paper and synthetic materials, making it accessible for many budgets:

  • Aqueous-coated cardstock: Costs range from $0.15 to $0.35 per square foot.
  • UV-cured coatings: Typically priced between $0.25 and $0.50 per square foot.
  • Laminated options: Fall between $0.40 and $0.80 per square foot.

This moderate pricing makes coated cardstock an appealing choice for short-term outdoor campaigns, seasonal signage, or projects where enhanced durability is needed without the higher cost of synthetic materials. Up next, we’ll look at eco-friendly and heavier-weight options for outdoor printing projects.

4. Eco-Friendly Weatherproof Cardstock (PVC-Free, Tree-Free)

Growing environmental awareness has led to new, sustainable options for weatherproof cardstock designed for outdoor use. These materials avoid traditional tree-based paper and harmful PVC, instead opting for alternatives like stone paper, bamboo fiber, and recycled ocean plastics. While these choices may come at a higher cost, they provide a responsible way to minimize environmental impact. Let’s break down how these materials deliver water and tear resistance, UV protection, and print compatibility.

Water Resistance

One of the standout features of eco-friendly weatherproof cardstock is its natural resistance to water. Unlike traditional options that rely heavily on chemical coatings, these materials are inherently water-resistant. Stone paper, for example, naturally repels water, making it a strong choice for wet environments. Bamboo fiber offers moderate moisture protection, while recycled ocean plastic is highly effective at resisting water exposure.

Tear Resistance

Durability is another key factor. Stone paper is particularly strong when it comes to tear resistance, making it ideal for projects requiring longevity. Bamboo cardstock provides moderate tear strength, with heavier weights performing better. Recycled ocean plastic, on the other hand, is engineered for high durability, standing up to significant wear and tear.

UV and Fade Resistance

When it comes to UV protection, each material has its own strengths. Stone paper contains natural minerals that reflect UV rays, offering built-in defense against sunlight without needing extra treatments. Bamboo cardstock may require eco-friendly UV coatings to maintain its color and integrity under prolonged sun exposure. Recycled ocean plastic is specifically designed to resist fading, helping preserve print quality even in bright conditions.

Printing on eco-friendly cardstock is generally straightforward, though some materials may need specific settings. Stone paper works well with digital printing methods like latex and UV-cured inks. Bamboo cardstock is versatile, accommodating both digital and offset printing techniques. Recycled ocean plastic, however, often requires specialized digital printing adjustments to achieve fine details.

Environmental Friendliness

These materials are crafted with sustainability in mind. Stone paper uses fewer production resources compared to traditional paper, bamboo benefits from its fast-growing nature, and recycled ocean plastic helps reduce waste in marine ecosystems. These eco-conscious features make them appealing for projects that prioritize green practices.

Price Range (USD)

It’s true that eco-friendly weatherproof cardstock tends to be more expensive than conventional options. However, the combination of durability and reduced environmental impact can make the investment worthwhile. Prices vary depending on the material and its quality, so it’s important to balance your project needs with your budget.

Up next, we’ll dive into heavy-weight cardstock options for even greater durability.

sbb-itb-ce53437

5. Heavy-Weight Weatherproof Cardstock (e.g., 100# YouLLin)

YouLLin

Heavy-weight weatherproof cardstock, like 100# YouLLin, stands out for its ability to work seamlessly with various printing methods – making it a go-to choice for custom outdoor projects. This type of cardstock strikes a fine balance between durability and print quality. Its sturdy build provides a reliable surface for producing sharp, vibrant prints, while also holding up to the challenges of outdoor use. However, achieving the best results often requires some adjustments to printing settings, as outlined below.

This cardstock is well-suited for both digital and offset printing. Its thicker composition enhances ink adhesion and ensures rich, saturated colors. That said, adjustments to printer pressure and drying times are necessary to avoid issues like ink bleeding. With these tweaks, 100# YouLLin becomes a dependable option for outdoor projects where durability and crisp print quality are essential.

6. All-Weather Printer Paper (e.g., Rite in the Rain)

Rite in the Rain

If you’re looking for a dependable option to tackle the demands of outdoor use, all-weather printer paper is a solid choice. Designed to withstand tough conditions, this type of paper combines strength with resistance to moisture and physical wear, making it ideal for outdoor signage or fieldwork. Unlike heavier cardstocks, it’s crafted to work seamlessly with standard printers for quick and efficient use.

Water Resistance

One of its standout features is a special coating that keeps it resistant to water. This means you can write on it with a pen – even in damp or rainy conditions – without smudging or losing clarity.

Tear Resistance

Built tough, this paper resists tearing, ensuring that your printed materials stay intact even when subjected to frequent handling or harsh outdoor environments.

All-weather printer paper is designed to work with most common printers, including laser, inkjet, and copiers. For the best results, follow any specific print settings recommended by your printer.

This type of paper strikes a balance between the practicality of regular paper and the durability needed for outdoor applications.

Price Range

The added durability and performance come at a higher price, which can vary depending on the sheet size, quantity ordered, and the supplier.

Pros and Cons

When choosing weatherproof cardstock, it’s important to weigh factors like water resistance, tear strength, UV protection, print compatibility, and sustainability. The table below breaks down the key advantages and drawbacks of various options to help you decide.

Cardstock Type Key Strengths Limitations
Synthetic Cardstock (e.g., Yupo) Exceptional water resistance with flexible and durable properties Petroleum-based, less eco-friendly, and more expensive
PVC/Plastic-Based Strong water and tear resistance with built-in UV protection Requires specialized printing settings and is difficult to recycle
Coated Paper Cardstock (Weatherproof Coatings) Water-repellent surface and works well with standard printers Limited durability in extreme conditions; coating quality affects performance
Eco-Friendly Weatherproof Cardstock Made from sustainable materials with moderate weather resistance Durability and water resistance depend on material composition
Heavy-Weight Weatherproof Cardstock (e.g., 100# YouLLin) Thick build provides extra strength and durability May require printer adjustments due to its thickness
All-Weather Printer Paper (e.g., Rite in the Rain) Designed for moisture resistance and reliable print results Synthetic coatings can impact recyclability and long-term durability

Each option has its trade-offs, so your choice should align with your project’s specific needs. For example, synthetic and PVC-based options excel in harsh outdoor conditions but are less eco-conscious and costlier. In contrast, coated paper cardstocks are often more affordable and printer-friendly but may struggle in extreme weather.

Ultimately, consider factors like durability, environmental impact, print compatibility, and budget to find the right balance for your project.

Weatherproof Cardstock Solutions by Miro Printing & Graphics Inc.

Miro Printing & Graphics Inc.

At Miro Printing & Graphics Inc., we specialize in creating durable, weatherproof cardstock solutions tailored for outdoor signage and displays. These services are designed to ensure both longevity and performance, aligning with the high standards discussed earlier. Here’s how we optimize every step of the outdoor printing process to deliver exceptional results.

Digital and Offset Printing Capabilities

Whether you need a small batch or a large-scale campaign, we’ve got you covered. For short- to mid-size runs, our digital printing services provide vibrant, high-quality prints with precision. If your project involves thousands of pieces, our offset printing capabilities ensure consistent results while keeping costs manageable. We’ll recommend the best method based on your project’s size, deadline, and budget.

Large Format Solutions for Outdoor Applications

Our expertise doesn’t stop at standard sizes. We excel in large-format printing, producing outdoor materials like banners and signs that pair perfectly with weatherproof cardstock. These oversized solutions maintain their durability and visual appeal, making them ideal for projects that demand a bold, lasting impression.

Complete In-House Bindery Services

With our in-house bindery services, we handle cutting, creasing, scoring, and drilling to ensure your weatherproof cardstock maintains its integrity. This attention to detail ensures your materials are ready to withstand outdoor conditions without compromising on quality.

Design and Pre-Press Support

Durable materials are just one part of the equation. Our design and pre-press team offers comprehensive support, including logo creation, color adjustments, layout optimization, and photo retouching. Using industry-standard tools, we make sure your project looks its best, even in challenging outdoor environments.

Integrated Project Management

To simplify the process, we also offer integrated mailing and fulfillment services. By managing everything in-house, we maintain strict quality control and streamline workflows, ensuring your outdoor projects are completed efficiently and effectively.

Conclusion

Picking the right weatherproof cardstock for your outdoor project boils down to finding the right mix of durability, cost, and environmental responsibility. If you’re looking for something that can handle extreme weather and last for years, synthetic options like Yupo or PVC are your go-to. These materials are tough, water-resistant, and perfect for permanent outdoor signage or displays that need to stay sharp across multiple seasons.

On the other hand, if your project needs moderate weather protection without breaking the bank, coated paper cardstock is a solid choice. It’s a great fit for temporary outdoor displays, event signage, or seasonal promotions – offering reliable performance at a more budget-friendly price compared to synthetic materials.

For many businesses, sustainability is a growing priority. Eco-friendly weatherproof cardstocks provide a greener alternative that aligns with corporate responsibility goals. Additionally, the weight and thickness of your cardstock matter. Heavier options, like 100# cardstock, stand up better to wind and resist curling, making them ideal for tougher outdoor conditions. Lighter weights, however, may work just fine for short-term use or in more protected outdoor spaces.

Don’t forget about print compatibility – some synthetic materials need specific inks or printing techniques to ensure vibrant, long-lasting results. It’s always a good idea to consult with printing experts to get the best outcome for your project.

While premium weatherproof materials might seem costly upfront, they often save money in the long run by reducing replacement needs and keeping your signage looking professional over time. Think about factors like water resistance, tear strength, and UV stability when making your decision.

Outdoor conditions like temperature swings, UV exposure, humidity, and physical handling can all affect how well your cardstock performs. Take the time to assess your environment and match the material to your specific needs. By aligning the properties of your cardstock with the demands of your project, you’ll set yourself up for professional, lasting results.

FAQs

What should I consider when selecting weatherproof cardstock for outdoor projects?

When selecting weatherproof cardstock for outdoor projects, prioritize durability, water resistance, and environmental impact. Synthetic options, such as polypropylene or polyethylene, stand out for their toughness – they’re tear-resistant, water-repellent, and built to last, making them a solid choice for long-term outdoor use. PVC-based cardstock also offers strong durability and water resistance, though it comes with the downside of being less eco-friendly since it’s not biodegradable.

If sustainability is a key concern, look into eco-friendly cardstock crafted from natural fibers or biodegradable materials. While these options might not match the durability and water resistance of synthetic alternatives, they’re a thoughtful choice for projects that aim to minimize environmental impact. Ultimately, weigh the specific requirements of your project to strike the right balance between performance and sustainability.

What’s the best way to ensure high-quality and durable prints on weatherproof cardstock for outdoor projects?

To produce durable and high-quality prints on weatherproof cardstock, start by selecting a water-resistant or waterproof material, like synthetic paper or coated cardstock. These materials are specifically designed to handle exposure to water, grease, and outdoor conditions without degrading. Laser printing works especially well with these surfaces, as it creates a strong bond that ensures your prints last longer.

For even greater resilience, you might want to add a UV coating or laminate. This extra layer of protection guards against fading, scratches, and general wear – making it ideal for outdoor use where sunlight and harsh weather can take a toll. Choosing the right combination of materials and finishes will help your prints remain vibrant and durable over time.

Are there eco-friendly weatherproof cardstock options with strong water and UV resistance?

Yes, there are weatherproof cardstock options that are also eco-friendly, offering solid water and UV resistance while being mindful of the environment. Some synthetic papers are specifically made to handle outdoor conditions and are designed to be recyclable or environmentally conscious. They’re tough, tear-resistant, and ideal for outdoor projects where durability and sustainability go hand in hand.

For example, some waterproof and UV-resistant cardstocks are crafted from recyclable materials or synthetic fibers, combining strength with environmental care. These are great choices for creating weatherproof signage, menus, or other outdoor items while keeping their environmental impact to a minimum.

Related posts

https://app.seobotai.com/banner/banner.js?id=68ac7240237382efb191f143

Ultimate Guide to Large Format Printing Resolution

Learn how to optimize large format printing resolution considering viewing distance, file formats, and image quality for professional results.

Large format printing resolution is all about balancing sharpness, file size, and viewing distance to ensure high-quality prints. Here’s what you need to know:

  • Resolution Basics: Higher resolution means clearer prints, but it also increases file size. For close-up prints, aim for 150–300 PPI. For distant viewing, 50–100 PPI is often enough.
  • DPI vs. PPI: DPI refers to the printer’s ink dot density, while PPI measures the pixel density of your digital image. Both work together to determine print quality.
  • Viewing Distance: The farther away the print is viewed, the lower the resolution required. For example, billboards can use 30–50 PPI, while trade show displays need 200–300 PPI.
  • File Formats: Use vector formats like PDF or EPS for logos and text. For photos, TIFF is best due to its lossless quality. Avoid JPEG for large prints as it compresses and loses detail.
  • Common Issues: Pixelation happens when low-resolution images are enlarged. Always start with high-res files and check designs at 100% zoom.

Quick Tips:

  • Match resolution to viewing distance to avoid oversized files.
  • Use CMYK color mode for accurate printing.
  • Work with professional print services to optimize files and avoid errors.

Proper resolution and file preparation ensure your large format prints look sharp and professional.

Viewing Distance and Resolution for Large Format Graphics

Factors That Determine Large Format Print Resolution

Several factors play a role in determining the right resolution for large format printing, guiding decisions about DPI settings and file preparation.

How Viewing Distance Affects Resolution Requirements

The distance from which a print will be viewed significantly impacts the resolution it needs.

For prints meant to be seen up close (2–3 feet), a resolution of 150–300 PPI is ideal. This ensures fine details and crisp edges are visible to the viewer.

When the viewing distance extends to 4–10 feet, a resolution of 100–150 PPI strikes a good balance between image quality and manageable file size.

For prints viewed from even farther away, such as outdoor banners or building signage (beyond 10 feet), resolutions as low as 50–100 PPI can still deliver clear visuals. The increased distance naturally reduces the need for intricate detail while maintaining the overall impact.

Next, let’s explore how the size of the print further influences resolution choices.

The size of a print directly affects the resolution it requires. Larger prints, often viewed from a distance, can function well with lower PPI. For instance, a standard poster designed for close inspection may need a resolution of 200–300 PPI, but that same design scaled up for a large outdoor banner can maintain quality with a much lower resolution.

Additionally, larger print sizes can increase production time and costs. Adjusting resolution based on viewing distance and the type of visual content – such as detailed text versus simple graphics – ensures both high-quality results and efficient production.

How File Formats Affect Image Quality

The choice of file format is another critical factor in determining the final quality of large format prints. Some formats handle enlargement better than others, and the wrong choice can lead to issues like pixelation, color distortion, or compression artifacts.

Vector-based formats like EPS, SVG, and PDF are excellent for logos, text, and simple graphics. These formats use mathematical descriptions to represent shapes, which means they can be scaled infinitely without losing clarity or sharpness.

TIFF files are ideal for large-scale printing and fine art projects because they use lossless compression, preserving accurate colors and subtle tonal details. While TIFF files tend to be larger in size, they are invaluable for projects that require precise color reproduction and smooth gradients.

On the other hand, JPEG files, which use lossy compression, are generally unsuitable for large format printing. The compression process removes fine details, often leading to visible artifacts and blurry edges when enlarged. While JPEGs are practical for web use, they fall short when it comes to high-quality print production.

Here’s a quick comparison of popular file formats:

Format Best Use Advantages Disadvantages
TIFF Photos/Fine art Lossless compression; accurate colors Large file sizes
EPS Logos/Vector graphics Infinite scaling; sharp edges Limited to simple graphics
PDF Mixed content Versatile; supports text and images May include compressed elements
JPEG Web-based images Smaller file sizes Lossy compression causes artifacts

PNG files also use lossless compression and are well-suited for digital graphics. However, their large file sizes and limitations in handling high-resolution images make them less practical for print. Similarly, GIF files, designed primarily for web use, should be avoided for print projects.

For raster images like photographs, ensure they are set to 150–300 PPI at the final print size to maintain quality. For vector graphics, exporting them as PDF, TIFF, or EPS ensures sharpness and scalability. Starting your project with print-specific formats helps preserve quality while streamlining production workflows for large format printing.

Resolution Guidelines for Common Large Format Projects

When working on large format projects, choosing the right resolution is key to balancing quality and file size.

For outdoor banners and large displays, resolutions between 100–120 DPI strike the perfect balance between clarity and manageable file sizes.

  • Vinyl Banners (4’×8′ and larger): These banners look sharp at 100 DPI when viewed from 15–20 feet. The lower resolution reduces file size, making it easier to handle design files and speeding up the printing process.
  • Building Wraps and Billboards: These massive displays typically use 72–100 DPI. For instance, a 20-foot-wide building banner can appear crisp at 72 DPI when viewed from across the street.
  • Mesh Banners: Designed for outdoor durability, mesh banners work best at 90–100 DPI. The texture naturally softens fine details, so higher resolutions don’t add much visual value.

For indoor projects, where viewers examine details up close, higher resolution settings are essential.

Poster and Photo Print Resolution

Indoor posters and photographic prints require higher resolutions to maintain sharpness and vibrant colors.

  • Indoor Posters (Retail and Presentations): These should be printed at 150–200 DPI, ensuring text is crisp and images look polished from 3–6 feet away.
  • Photo Enlargements and Fine Art Prints: For preserving subtle details and smooth color transitions, resolutions of 200–300 DPI are ideal. For example, a 24"×36" photo print at 240 DPI captures the fine details expected in close-up viewing.
  • Retail Displays and Menu Boards: These often combine text and images viewed at arm’s length, making 150 DPI a suitable choice for sharp text and manageable file sizes.
  • Trade Show Graphics and Presentation Boards: Bright exhibition lighting highlights any flaws, so 180–200 DPI ensures a professional finish.

For projects requiring even more precision, such as trade show displays or technical drawings, the resolution needs to be even higher.

Trade Show Display and Technical Drawing Resolution

Trade show displays and technical materials demand the highest resolution settings to ensure clarity for close-up viewing.

  • Pop-Up Displays and Retractable Banners: Resolutions of 200–250 DPI keep text, logos, and product images sharp, especially when viewers stop to read detailed information.
  • Technical Drawings and Schematics: Architectural plans and engineering drawings should be printed at 250–300 DPI to preserve fine lines, dimensions, and annotations. This ensures accuracy when converting CAD drawings for large format printing.
  • Fabric Displays and Tension Systems: These work well at 200–220 DPI, as the fabric’s texture naturally smooths minor imperfections while keeping text and graphics clear.
  • Backlit Displays: Printed at 180–200 DPI, these displays benefit from added illumination, which enhances contrast but can also make lower-quality images appear pixelated.

When preparing files for professional trade show printing, remember that higher resolutions result in larger file sizes, which may require more processing time. By carefully planning resolutions during the design phase, you can ensure your large format prints not only look outstanding but also streamline production.

At Miro Printing & Graphics Inc., we help you achieve professional-quality results for banners, posters, and trade show displays, ensuring your business stands out.

How to Prepare High-Resolution Files

Creating high-resolution files for large format printing requires attention to detail. Proper preparation ensures your digital designs look flawless when printed, avoiding costly mistakes and preserving the integrity of your work.

Image Scaling and Editing Methods

Avoid upscaling low-resolution images. Stretching a 72 DPI web image to fit a banner will result in pixelation, no matter the software tricks you try. Always start with high-resolution source files to maintain clarity.

Keep the original aspect ratio of photographs intact – stretching an image distorts its proportions. If you need to adjust dimensions, crop the image thoughtfully or use background elements to fill the space.

When resizing images, choose interpolation methods carefully. For smooth gradients, use bicubic interpolation; for sharp-edged graphics, opt for nearest neighbor. While most professional tools automatically select the best option, manual control gives you greater precision.

For scalable designs, work with vector files like AI, EPS, or SVG. Vector graphics can be resized infinitely without losing quality, making them perfect for logos and other elements that need to appear at various sizes.

Lastly, apply sharpening sparingly and only at the final stage of editing. A subtle sharpening filter can enhance details, but overdoing it can create unsightly halos that become more visible in large prints.

Software and Tools for Large Format Design

Adobe Photoshop is a go-to tool for working with high-resolution raster images and performing detailed photo edits. Set your document to the actual print size and resolution right from the start to avoid scaling issues later.

Adobe Illustrator is ideal for designs that mix text, logos, and graphics. Since it’s vector-based, artwork created in Illustrator remains crisp at any size, making it perfect for banners and signage. If you’re adding raster images to your Illustrator designs, ensure they’re already at the correct resolution for the final print size.

Professional RIP (Raster Image Processor) software used by print services can handle tasks like color conversions and print-specific adjustments. To make the process smoother, set your color profiles correctly from the beginning. Always work in CMYK mode for print projects, as RGB colors, while vibrant on screens, don’t translate accurately to print.

Using templates with the correct size, resolution, and bleed can also simplify your workflow and help avoid errors, especially when deadlines are tight.

Working with Professional Print Services

Collaborating with professional print services can significantly enhance your final output. Pre-press teams are experts at optimizing files for specific materials, inks, and printing processes. They also understand how lighting conditions and viewing distances can affect color perception.

Pre-press consultations can save you time and money. Experienced professionals can identify potential problems early, such as colors that won’t print accurately or text that’s too small to read from a distance.

"A professional printing company will be able to spot any issues with your artwork before going into production."
– Stan Tan, Digital Marketer, Selby’s

These services perform thorough checks on resolution, color profiles, bleed areas, and overall image quality. They can catch issues like missing cut lines, transparency problems, or incorrect dimensions before production starts, avoiding costly reprints or delays.

Professional printers also offer file optimization services to reduce file sizes without compromising quality. Large format files can be massive – sometimes several gigabytes – but RIP software can process them efficiently while applying necessary print adjustments.

"PrimeCenter saves me, depending on the workload, from 20 minutes to 2-3 hours per day, by not having to set things up manually."
– Mike Kasold, PrimeCenter User, MK Signs

Test prints and proofs are invaluable for checking colors and quality before committing to a full production run. Professional print services can provide small-scale proofs or print sections of your design to verify critical details, like skin tones in photos or brand colors in logos.

At Miro Printing & Graphics Inc., our pre-press team meticulously reviews every large format file to ensure top-notch print quality. We assist with resolution settings, color management, and file preparation, ensuring your project transitions seamlessly from design to installation.

Clear communication throughout the process is key. Professional printers can explain how your design will look on specific materials and suggest adjustments to enhance the final result – all while staying true to your creative vision.

sbb-itb-ce53437

Common Problems and How to Fix Them

Even seasoned designers encounter resolution challenges when working on large format printing projects. Tackling these issues early can save time, money, and ensure a polished, professional result.

Building on the file preparation guidelines, here’s how to address common resolution and compatibility problems before they compromise your print job.

Preventing Pixelation and Blurry Prints

Start with high-resolution images – this is non-negotiable. Enlarging small, low-resolution images will lead to pixelation, and no amount of editing can recover the lost quality.

A quick check: view your image at 100% zoom in your design software. If it looks blurry or pixelated at actual size, it will print exactly the same way.

Maintain consistent resolution throughout your project. If you’re combining multiple images, ensure every element meets the target resolution. Even a single low-resolution logo can ruin the overall look of an otherwise flawless design.

For best results, work in uncompressed formats like TIFF or PSD instead of saving repeatedly as JPEGs, which degrade quality over time. Also, make sure fonts are properly sized for readability from the intended viewing distance. A safe rule: font height should be at least 1 inch for every 10 feet of viewing distance. Stick to clean, sans-serif fonts like Arial or Helvetica for better clarity in print, especially over decorative or thin-stroked typefaces.

Fixing File Compatibility and Resolution Issues

Convert RGB files to CMYK early in the design process to avoid unexpected color shifts during printing. Embedded color profiles can behave unpredictably across different software programs, so ensure all applications are using the same settings to maintain color consistency.

Simplify designs with transparency effects. Transparency layers sometimes don’t translate well to print, resulting in issues like white boxes or missing elements. Flatten transparency or convert layers to solid colors to ensure your file prints correctly.

Large file sizes slowing down your workflow? Use linked files instead of embedding them. This keeps your project manageable without sacrificing image quality.

When mixing vector graphics and raster images, confirm that the raster elements meet the resolution requirements for your project. Vector graphics like text and logos will always appear sharp, but photographs and bitmap graphics need to match the overall resolution to avoid looking blurry.

Once you’ve resolved these issues, use the checklist below to double-check your file settings before sending it to print.

Pre-Print File Checklist

  • Verify dimensions and bleed: Ensure your file dimensions are correct and include a 0.125-inch bleed on all sides as per the print specifications.
  • Match resolution to viewing distance: For outdoor banners viewed from 20 feet away, 100-150 DPI is sufficient. For closer viewing, such as trade show displays, aim for 200-300 DPI.
  • Ensure format compatibility: PDF files with embedded fonts and images are the most reliable for print services. If submitting native files (e.g., AI or PSD), include all linked images and fonts in a packaged folder.
  • Test print a small section: Use a desktop printer to check colors and text readability. While not an exact match for large format output, this step can reveal glaring issues like missing fonts or color errors.
  • Review text and details: Zoom in to 100% magnification to ensure all text is sharp and readable. Double-check critical details like phone numbers, website URLs, and logos for accuracy.
  • Address software alerts: Look for warnings about RGB images, missing fonts, or low-resolution elements in your design software. Fix these issues before submitting the file to avoid delays or quality problems.
  • Save backups: Keep a copy of your original design file with layers intact, as well as a flattened, print-ready version. This makes it easier to make edits without starting from scratch.

At Miro Printing & Graphics Inc., our pre-press team follows this checklist to ensure every print meets the highest standards of quality and professionalism.

Key Points to Remember

When it comes to achieving success with large format printing, a few critical factors can make all the difference. Let’s break them down.

The resolution of your large format print hinges on three things: viewing distance, print size, and image quality. Prints meant for close-up viewing need higher resolution, while those viewed from a distance can get by with less. For example, a highway billboard only requires 30-50 DPI since it’s seen from hundreds of feet away. On the other hand, a trade show banner demands 150-300 DPI because people will examine it up close. Defining your display context and viewing distance before designing saves time, money, and potential headaches.

File preparation is another cornerstone of success. Always work in CMYK color mode, include the correct bleed, and save a layered backup of your design. Before sending your file to print, inspect it at 100% zoom to catch issues like pixelation, missing fonts, or color inconsistencies. Keep in mind that vector elements, such as logos and text, will always print sharply, but raster images like photographs must meet the required resolution. Running a small test print on a desktop printer can help you spot any problems before committing to the final, full-size version.

Best Practices for Large Format Print Success

Now that the technical essentials are clear, let’s look at practical steps to ensure your large format print turns out exactly as you envision.

  • Use high-resolution source images and scale them appropriately based on the viewing distance.
  • Simplify your file structure by flattening transparencies and converting text to outlines.
  • Save your design in PDF format with embedded fonts and images for consistent results across different printing systems.

Clear communication with your print provider is equally important. Share details about your display’s purpose, viewing distance, and any special requirements upfront. This eliminates guesswork and reduces the chance of costly errors. For example, at Miro Printing & Graphics Inc., their pre-press team carefully reviews every file to catch potential issues before the printing process begins, ensuring a professional finish.

Investing in quality from the start pays off. Professional large format printing delivers consistent and polished results when you follow the right resolution guidelines and work with experienced providers who understand the technical nuances.

Ultimately, the difference between a print that looks amateurish and one that stands out comes down to getting the basics right: appropriate resolution, thorough file preparation, and attention to detail. These fundamentals ensure your message is sharp, clear, and impactful every time.

FAQs

What’s the difference between DPI and PPI, and why do they matter for large format printing?

DPI vs. PPI: What’s the Difference?

DPI (dots per inch) measures how many tiny ink dots a printer lays down in a single inch of printed material. This directly affects how sharp and detailed your printed image looks. The higher the DPI, the crisper and more refined the print – especially important for large format prints that people might view up close.

PPI (pixels per inch), on the other hand, relates to the resolution of a digital image. It tells you how many pixels are packed into each inch of the image. A higher PPI means more detail, which translates into better quality when the image is printed.

For large format printing, 100 DPI is typically enough to produce a quality result. However, for prints intended to be viewed closely, like photographs or fine art prints, 300 DPI is the gold standard for sharpness. Starting with a high-resolution file is key – images with less than 100 PPI can look blurry or pixelated when printed, which can ruin the professional look of your project.

How does viewing distance affect the resolution needed for large format prints?

Viewing distance is a key factor in deciding the resolution needed for large format prints. The closer someone will view the print, the higher the resolution must be to ensure it looks sharp and clear. For prints meant to be seen up close, a resolution between 180 and 300 PPI works best. On the other hand, prints viewed from several feet away can typically maintain clarity with a resolution around 150 DPI, since the human eye struggles to pick up fine details from a distance.

Striking this balance ensures great visual quality without creating unnecessarily large file sizes or driving up production costs. By factoring in viewing distance, you can create large format prints that look impressive and professional.

Why is selecting the right file format crucial for large format printing, and which formats work best?

Choosing the right file format plays a key role in ensuring high-quality large format prints. It directly affects how sharp, vibrant, and properly detailed your images appear – qualities that are essential for professional-grade results.

Best File Formats for Large Format Printing

  • PDF and TIFF: These formats are excellent for large format printing as they support high-resolution images and are highly compatible with professional printing systems.
  • EPS and SVG: Ideal for vector graphics, these formats maintain crisp, scalable designs without losing quality.
  • JPEG: Works well for photographs, but be mindful of compression, which can reduce image quality.

Choosing the correct format ensures your banners, posters, or other large-scale designs come out looking polished, clear, and visually striking.

Related posts

https://app.seobotai.com/banner/banner.js?id=68aba8172fcc51307e6d8e66

How Supplier Negotiations Lower Printing Material Costs

Learn effective strategies for negotiating supplier contracts to reduce printing material costs while enhancing quality and service.

Want to cut printing costs without sacrificing quality? Supplier negotiations can help you save money on materials like paper, ink, and toner. Here’s how:

  • Understand Your Spending: Analyze 12 months of purchase data to identify high-cost items and seasonal trends.
  • Negotiate for Better Deals: Use volume discounts, competitive quotes, and long-term contracts to secure lower prices and better terms.
  • Go Beyond Price: Ask for perks like free shipping, extended payment terms, or priority delivery.
  • Build Strong Relationships: Reliable suppliers often offer better pricing and early access to new materials when treated as partners.

At its core, successful supplier negotiations combine preparation, clear communication, and a focus on long-term benefits. These strategies not only cut costs but also improve efficiency and strengthen supplier relationships.

8 Rules of Supplier Price Negotiation

Know Your Printing Material Needs and Current Costs

To negotiate effectively, you need a clear understanding of the printing materials you purchase – what you buy, how much, and when. While most printing businesses track expenses, many don’t analyze their material costs deeply enough to uncover the best opportunities for savings.

Start by identifying the specific paper, ink, and other materials you use, including their exact types, quantities, and timing. Then, dig into your spending patterns to find areas where you can cut costs.

Review Your Material Usage and Spending Patterns

Begin by collecting 12 months of purchase data for all your printing materials. This timeframe captures seasonal trends and provides a solid foundation for negotiations. Use invoices, purchase orders, and inventory records to create a comprehensive overview.

Organize your spending by material category, not just by supplier. For example, group similar items like coated papers, uncoated papers, digital inks, offset inks, specialty substrates, and finishing materials. This approach helps you see exactly where your money is going.

Take note of seasonal trends in your material usage. Many print shops, for instance, experience higher paper consumption during back-to-school season or increased demand for specialty substrates around the holidays. Recognizing these patterns can help you negotiate better volume discounts.

Evaluate your order frequency and timing. If you’re placing small, frequent orders for the same materials, you’re likely paying more per unit and missing out on bulk discounts. Frequent small orders can also indicate to suppliers that your inventory management might need improvement.

Determine your average monthly spend for each material category. These numbers will serve as a strong starting point during supplier discussions and help you decide which materials to prioritize in negotiations.

Also, assess waste or spoilage patterns. For instance, if a particular paper stock frequently causes jams or color-matching issues, this information can be useful when negotiating quality standards or replacement policies with suppliers.

Find Your High-Volume and High-Cost Items

To maximize savings, focus on materials with the greatest potential for cost reductions. These typically fall into two categories: items you purchase in large quantities and items with high per-unit costs.

Paper stocks often present the largest savings opportunity for print shops. For example, cutting the cost of 50,000 sheets per month by just $0.02 could save you $1,000 annually. Identify your top five most-used paper grades and calculate the potential savings from a 5-10% price reduction.

Ink and toner prices can vary widely between suppliers, especially for specialty colors or large-format printing. Digital printing shops, in particular, often save significantly by purchasing toner cartridges directly from manufacturers instead of distributors.

Specialty substrates like vinyl, canvas, or metallic papers often have higher supplier margins, making them excellent candidates for price negotiations. Suppliers may have more flexibility on pricing for these items.

Look beyond the unit price and consider the total cost impact of each material. For example, a substrate costing $2.00 per square foot but requiring special handling may end up being more expensive overall than a $2.50 option that runs smoothly through your equipment.

Explore opportunities to consolidate orders. If you’re buying similar paper weights from multiple suppliers, consolidating with one can increase your order volume and strengthen your negotiating position.

Focus on materials with predictable, steady demand. Suppliers value customers who can commit to consistent order volumes. For instance, if you know you’ll need 10,000 business cards made from 14pt cardstock every month, that consistency can be a powerful bargaining tool.

Don’t overlook smaller items like binding materials, adhesives, or finishing supplies. While they may seem minor, these costs can add up significantly over the course of a year. Including them in your analysis ensures you don’t miss out on potential savings.

Research and Prepare for Supplier Negotiations

Using your material usage data as a foundation, let your spending insights guide your supplier research. By combining detailed usage analysis with a clear understanding of market prices, you’ll be better equipped to approach negotiations with confidence and secure more favorable pricing and terms.

Research Market Prices for Printing Materials

Knowing the current market rates is key to avoiding inflated prices during negotiations. Start by gathering quotes from at least three suppliers for your high-volume materials. This will give you a solid baseline for comparison and provide concrete figures to reference in discussions.

When reaching out to suppliers, ask for detailed pricing tiers based on volume and terms. Be sure to request specifics, such as quantities, delivery timelines, and quality standards. Many suppliers offer discounts for bulk purchases or extended payment terms, so understanding these options can help you identify the best deal.

Industry trade publications like Printing Impressions and Print+Promo often publish reports on paper and ink pricing trends. These resources can offer insights into market fluctuations and help you stay informed.

Additionally, consider contacting paper mills and ink manufacturers directly. While these options may require larger minimum orders, the per-unit cost savings can make it worthwhile for high-volume operations.

Another strategy is joining buying groups or industry cooperatives. These organizations often negotiate group purchasing agreements, allowing members to benefit from collective buying power and gain access to better pricing.

Once you’ve established competitive pricing benchmarks, the next step is evaluating supplier reliability.

Check Supplier Reliability and Performance

Price is only part of the equation – reliability is just as important. A supplier offering low prices but failing to deliver on time or maintaining consistent quality can end up costing you more in the long run through lost revenue or rework.

Look for suppliers with a solid track record in the printing industry. Companies with decades of experience – especially those that have weathered economic shifts and technological advancements – tend to be better equipped to meet the unique demands of print shops.

Assess their capabilities. Suppliers that offer a range of services, such as digital and offset printing, bindery, design, large-format printing, mailing, and fulfillment, can simplify your workflow by reducing the need to juggle multiple vendors.

Ask for references and speak directly with their current customers. Inquire about delivery reliability, quality consistency, and how they handle issues like defective materials or late deliveries. Print shops with similar needs can provide valuable insights into a supplier’s performance.

Finally, observe their customer service during your initial interactions. Suppliers who respond quickly, provide detailed quotes, and show genuine interest in your needs are more likely to maintain high service standards throughout the relationship. Reliable suppliers also take responsibility for problems and address them promptly, ensuring smoother operations for your business.

Proven Methods for Negotiating Better Deals

When it comes to cutting costs on printing materials, a little preparation goes a long way. By using market research and supplier data, you can approach negotiations with a clear strategy that prioritizes long-term value over short-term savings.

Use Volume Discounts and Long-Term Contracts

Suppliers often reward consistent, high-volume orders with better pricing. Instead of placing sporadic orders, consider negotiating a contract based on your regular consumption. For example, if you know your typical monthly needs, you can lock in tiered pricing by committing to a longer-term agreement. Bulk orders for non-perishable items not only reduce shipping and administrative costs but also strengthen your bargaining position.

When structuring a long-term contract, make sure to include terms that lock in rates for a specific period, giving you budget stability. At the same time, build in some flexibility in case your volume requirements change. These types of agreements often open the door to additional perks, like faster delivery or priority service.

Negotiate Beyond Price: Look for Added Value

Price is just one piece of the puzzle. To reduce overall expenses, negotiate for added benefits that can make a big difference. For instance, ask for free shipping on orders above a certain amount, extended payment terms to help with cash flow, or priority rush delivery when you’re in a pinch.

Other value-added services – like technical support, staff training, or free samples of new materials – can also enhance your operations without inflating your budget. These extras can often be secured with a bit of negotiation and can provide significant benefits over time.

Use Competitive Quotes to Strengthen Your Position

Once you’ve laid the groundwork with volume commitments and added benefits, bring competitive quotes into the mix. Instead of simply asking for a price match, highlight the overall terms and advantages offered by other suppliers. For example, mention that other proposals include perks like complimentary shipping or extended payment options – without naming competitors directly.

Timing is key here: introduce this information only after building a strong rapport with your supplier to keep the conversation collaborative. Keep detailed records of competing offers to ensure you can objectively compare service quality, delivery terms, and other factors. Once you’ve identified the best deal, act quickly to secure it.

These strategies can help print shops achieve meaningful cost savings without sacrificing quality. For instance, Miro Printing & Graphics Inc. in Hackensack, NJ, has successfully used these methods to manage material expenses while maintaining excellent service levels. With the right approach, better deals are well within reach.

sbb-itb-ce53437

Structure Contracts for Long-Term Savings

Once you’ve secured better pricing through negotiations, the next step is to lock in those benefits for the long haul. Well-structured contracts not only ensure long-term savings but also provide predictability for budgeting and managing cash flow.

Negotiate Payment Terms and Discounts

Payment terms can have a big impact on cash flow, so it’s worth negotiating beyond the usual net 30 days. For instance, extending terms to net 45 or net 60 gives you more time to collect payments from your own customers before paying suppliers. This extra breathing room can be especially helpful for managing large projects. When pushing for extended terms, highlight your consistent payment track record and the strength of your business relationship.

Early payment discounts are another great way to save. Take a common example: a 2/10 net 30 term means you save 2% if you pay within 10 days. On a $10,000 order, that’s $200 saved each month, adding up to $2,400 annually.

Suppliers may also offer volume-based or prompt payment discounts, so don’t hesitate to ask. Seasonal payment arrangements can also be useful if your business has predictable slow periods. For instance, you could negotiate deferred payments that align with your cash flow during off-peak times.

These adjustments to payment terms not only improve savings but also set the stage for including contract clauses that protect you from unpredictable market changes.

Add Clauses for Market Changes

Raw material costs can fluctuate due to factors like fuel prices, trade policies, or supply chain disruptions. To guard against these uncertainties, consider adding market-sensitive clauses to your contracts.

One option is a price ceiling clause, which limits how much costs can rise during the contract period. This provides budget stability while still giving suppliers some flexibility. Another approach is to use market adjustment triggers, which tie price changes to measurable indicators like commodity indexes. This adds transparency and reduces the chance of arbitrary price hikes.

Supply chain disruption clauses are also worth considering. These can outline steps to address issues like shortages or delays, such as securing alternative sourcing options or requiring advance notice of potential problems. Annual price review mechanisms can help both parties reassess terms based on current market data, keeping agreements fair and up-to-date.

Other useful clauses might include minimum order adjustments or force majeure provisions to handle changing business needs or unforeseen events.

The key to effective contracts is balancing protection with flexibility. Contracts that are too rigid may fail you if market conditions shift dramatically, while overly loose agreements might not offer enough control over costs. By collaborating with suppliers to create agreements that safeguard your interests while fostering a cooperative relationship, you can achieve long-term savings and pricing stability. For example, Miro Printing & Graphics Inc. (https://bergencountyprinters.com) uses structured contract terms to effectively manage printing material costs and support steady business growth.

Build Strong Supplier Partnerships

Establishing solid relationships with your suppliers goes beyond standard contracts and pricing negotiations. True partnerships can bring down costs while improving service quality. When suppliers view you as a key partner instead of just another customer, they’re more likely to offer perks like better pricing, faster service, and early access to new materials that could drive your costs down.

This kind of trust lays the groundwork for collaboration and fresh ideas.

Maintain Open Communication and Collaboration

Regular communication with your suppliers is critical. Schedule periodic reviews to discuss their performance, your future needs, and projected order volumes. Being transparent allows suppliers to plan ahead, potentially offering you better prices and reserving production capacity for your orders.

Timely and clear feedback is another key element. By addressing quality concerns or other issues as they arise, you build mutual respect and encourage suppliers to prioritize your business.

When unique challenges come up – tight deadlines or special material requirements, for example – work with your suppliers to find solutions. Their expertise might uncover cost-effective alternatives you hadn’t considered. For instance, they might recommend a different paper weight that meets your standards but lowers costs.

It’s also smart to build relationships with multiple contacts within a supplier’s organization, such as account managers, production leads, and customer service reps. This ensures faster issue resolution and keeps you in the loop on important updates.

Such open communication can also lead to discovering new material solutions that improve quality and efficiency.

Work with Suppliers on New Printing Materials

Suppliers often have first access to new materials that could help reduce your costs. Partner with those who actively invest in research and development and are eager to share insights about trends in the printing industry.

During your regular meetings, ask suppliers to present new materials. They might introduce eco-friendly paper options that match the performance of traditional ones while appealing to environmentally conscious customers. Or they may suggest synthetic materials that are more durable, cutting down on reprint costs for outdoor applications.

Before committing fully to new materials, collaborate on small-scale tests to ensure they meet your needs. This approach not only validates quality but can also lead to discounted pricing during the trial phase and better rates if you decide to adopt the material long-term.

Stay connected to industry trends through your supplier network. Suppliers working with multiple print shops often spot emerging materials or potential supply chain issues early, giving you a competitive edge.

If a supplier offers a unique material that could set you apart in the market, consider negotiating priority access or even regional exclusivity. Such arrangements can secure your competitive advantage while strengthening your supplier relationship.

Investing time and effort into building strong supplier partnerships pays off in more ways than one. Beyond cost savings, these relationships bring stability, innovation, and competitive advantages that can make a real difference to your business. Companies like Miro Printing & Graphics Inc. demonstrate how these partnerships translate into consistent service and competitive pricing.

Conclusion: Lower Costs Through Smart Supplier Negotiations

Lowering costs through supplier negotiations isn’t just about driving hard bargains – it’s about preparation, clear communication, and long-term planning. By analyzing your printing material needs and staying informed on market prices, you create a solid foundation for productive discussions with suppliers. These efforts can lead to savings that directly improve your bottom line.

Negotiating effectively goes beyond simply reducing prices. Adjusting payment terms, incorporating market-based clauses, or securing additional services can bring long-term benefits. Building strong partnerships with suppliers often unlocks opportunities to streamline operations and improve efficiency in ways that go beyond cost.

Supplier relationships should be viewed as investments. Regular communication, constructive feedback, and collaboration help ensure stability, even during market shifts or supply chain challenges.

For businesses in Hackensack, NJ, seeking a reliable partner to implement cost-saving strategies, Miro Printing & Graphics Inc. offers a tailored solution. With a personalized approach to printing, they leverage long-standing supplier relationships to secure competitive pricing. Their services cover everything from digital and offset printing to large-format projects and mailing fulfillment, making them a one-stop shop for cost-effective printing needs.

Smart supplier negotiations aren’t just about saving money – they’re about creating sustainable partnerships that enhance efficiency, maintain quality, and support long-term success.

FAQs

Understanding seasonal trends in printing material usage can give businesses a real edge. During slower periods, suppliers are often more willing to offer discounts or flexible contract terms to attract buyers.

By timing your purchases to match these low-demand seasons, you can negotiate bulk discounts or secure better pricing, helping to cut costs significantly. Plus, this strategy ensures you’re stocked up and ready for busy periods without having to pay premium prices for materials.

How can I negotiate supplier contracts to gain more value beyond just lowering costs?

To get more out of supplier contracts, aim to create a partnership that works for both sides. Start by outlining your objectives clearly and pinpointing ways the supplier can bring extra value – like faster delivery, better product quality, or added services.

Do your homework by understanding the supplier’s strengths and potential hurdles. Go into negotiations with a spirit of collaboration. Rather than focusing only on cutting costs, look for ways to achieve long-term benefits. Options like flexible payment plans, bundled services, or discounts for larger orders can help lower expenses while also building a stronger, more reliable relationship with the supplier. This approach benefits everyone involved and sets the stage for better results.

How can strong supplier relationships help reduce printing material costs and provide access to new materials?

Building solid relationships with suppliers can be a game-changer when it comes to cutting printing material costs. When there’s trust and collaboration, suppliers are often more inclined to provide better deals, like volume discounts or early payment perks. These connections can also open doors to priority access to new materials or advancements, giving your business a leg up on the competition.

On top of that, good supplier relationships can help minimize supply chain hiccups, making it easier to negotiate terms that work in your favor. With open communication and a focus on long-term partnerships, businesses like Miro Printing & Graphics Inc. can stay on top of industry shifts, ensuring they have cost-efficient access to top-quality materials.

Related posts

https://app.seobotai.com/banner/banner.js?id=68aa565f7407e20dea5540f3