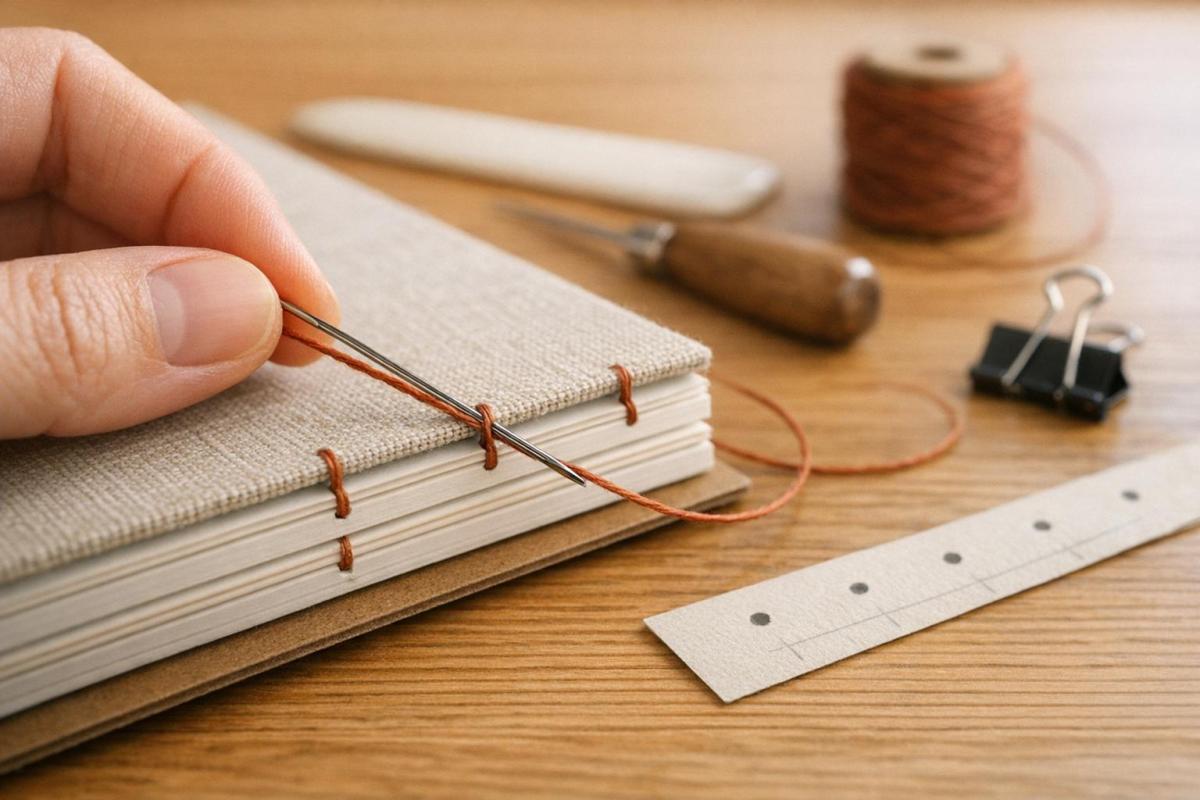
Japanese stab binding is a simple, thread-based technique to bind loose sheets without glue or folding. It’s perfect for creating sketchbooks, journals, or portfolios with a decorative stitched spine. You’ll need basic tools like a ruler, awl, needle, and waxed thread, along with lightweight paper for pages and sturdy material for covers. The process involves:
- Creating a hole template for precise stitching.
- Punching aligned holes through your paper stack.
- Using a 4-hole stitch to secure the pages.
This method works well for flat sheets and offers endless stitching pattern possibilities for customization. Follow these steps to produce durable and visually appealing handmade books.
Japanese Stab Binding Step-by-Step Process Guide
4-Hole Japanese Bookbinding Tutorial
sbb-itb-ce53437
Materials and Tools Needed
Getting your materials ready beforehand makes the binding process much easier. Japanese stab binding doesn’t call for fancy tools, but picking the right supplies can make a big difference. Let’s go over the paper, cover materials, and tools you’ll need to create a clean and durable book.
Paper and Cover Materials
For the inner pages, lighter weight paper works best. Options like drawing paper, sketchbook paper, or standard text-weight paper are all good choices. For the covers, go with something sturdier – heavy cardstock, thick handmade paper, or decorative options like traditional Chiyogami paper are excellent.
One key detail to keep in mind is the grain direction of the paper. It’s important to ensure your paper is grain short (the grain runs parallel to the spine). You can check this by gently bending a sheet; the direction that bends more easily indicates the grain. As Talas Online explains:
Make sure your paper is grain short; this will ensure that the pages open and lay flat properly without cracking.
If the grain runs perpendicular to the spine, the pages will resist opening and might even crack over time.
Binding Tools
To punch holes through your stack of paper, you’ll need a punching tool. A standard awl works fine for thinner stacks, but if you’re working with thicker materials or plan to bind regularly, a Japanese screw punch is a better option. It creates cleaner, circular holes with less effort.
For stitching, use a needle with a round eye and pair it with waxed linen thread or hemp twine. According to Susan from Bound by Hand, linen thread is ideal for exposed spine sewing. You’ll need to cut your thread to about five times the height of your book. So, for a book that’s 5 inches tall, you’ll need approximately 25 inches of thread.
Other useful tools include:
- A ruler and pencil for precise measurements
- A cutting mat and craft knife for trimming
- A heavy object to keep your stack steady
- A bone folder for flattening the final knot (or any smooth object as a substitute)
If your thread isn’t waxed, you can easily fix that. Just run it across a block of beeswax twice to prevent tangling and help it glide smoothly through the holes. Having these tools on hand will set you up for success.
Step-by-Step Binding Process
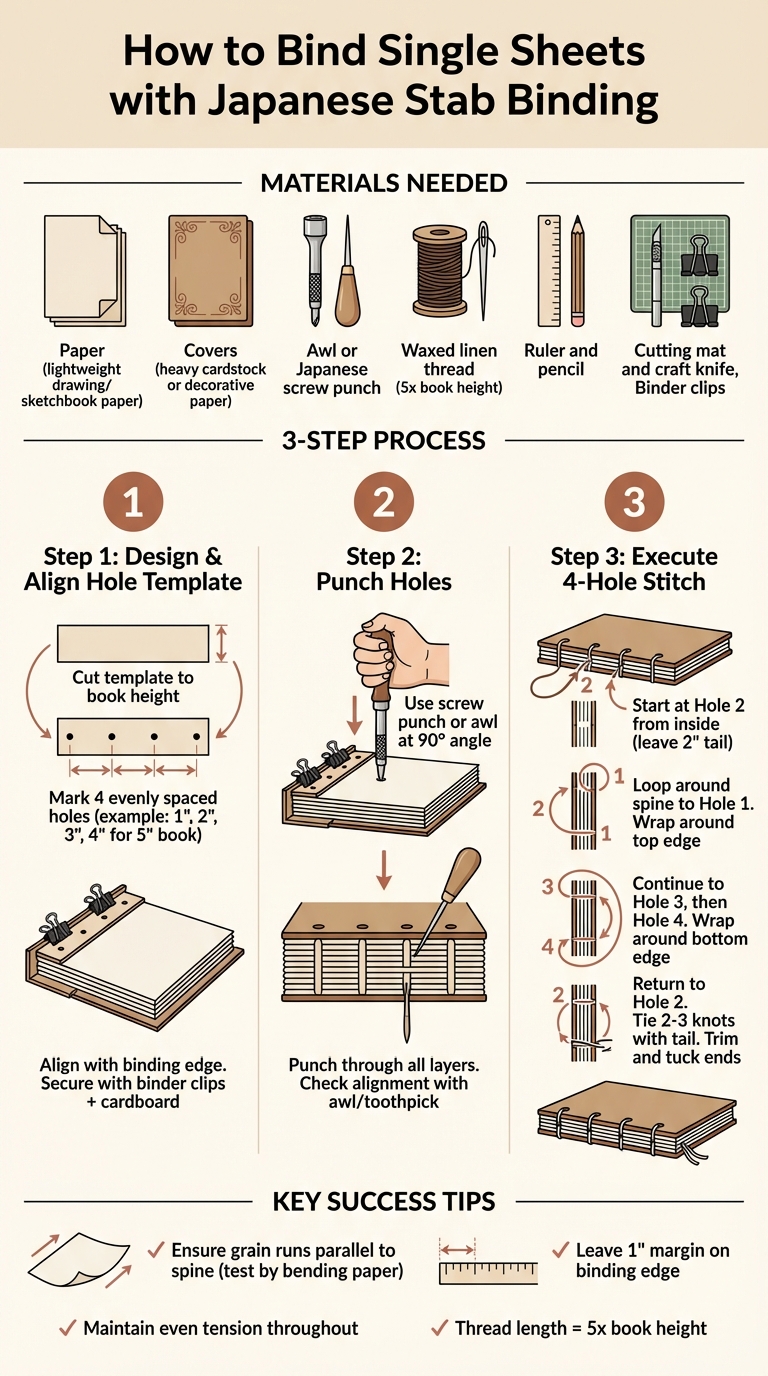
Follow these three key steps to complete your Japanese stab binding: designing a hole template, punching the holes, and stitching. Each step requires care and precision to create a strong and lasting binding.
Designing and Aligning the Hole Template
Start by making a template from scrap paper, cutting it to match the height of your book. Use a ruler and pencil to mark four evenly spaced holes along one edge (for a 5-inch book, mark at 1", 2", 3", and 4"). These marks should be centered along the spine area. Once the template is ready, align it with the binding edge of your stacked pages and covers. Secure everything firmly in place. A helpful tip from Tigerpetal Press is to use binder clips with a piece of spare cardboard between the clip and the paper. This prevents pressure marks on the cover.
Punching Holes Through the Stack
Punching the holes accurately is crucial for clean stitching. With your stack secured and the template aligned, use a Japanese screw punch or an awl to create the holes. Make sure to hold the tool at a strict 90-degree angle to ensure the holes remain straight through all layers. To stabilize your stack further, place a heavy object on top while working. Tigerpetal Press offers this insight:
"Using an awl is possible, but it will push the excess paper through and out the back, leaving a slight lump."
After punching the holes, carefully remove the clips. Use an awl or a toothpick to check that all the holes are perfectly aligned before moving on to stitching.
Executing the 4-Hole Stitch
Divide the stack and thread your needle, starting from the inside of the second hole. Leave a 2-inch tail for tying off later. The stitching involves wrapping the thread around the spine at each hole, with additional loops around the top and bottom edges for reinforcement.
Begin at Hole 2, loop the thread around the spine, then move to Hole 1 at the top. Wrap around the spine and the top edge before proceeding to Hole 3. Continue to Hole 4 at the bottom, wrapping around the spine and bottom edge. Finally, return to Hole 3 and bring the thread back to Hole 2, where you’ll tie a double or triple knot with the tail left earlier. Trim any excess thread and tuck the ends neatly inside the book. Keep the tension consistent throughout to avoid warping the covers.
Once the stitching is complete, you’re ready to secure the binding and add the finishing touches.
Finishing Touches and Variations
Securing the Binding and Trimming Threads
Once you’ve finished stitching and returned to the starting hole, open the stack halfway to reveal the thread tail. Tie the working thread to this tail two or three times to make sure the binding stays secure. As Talas Online advises:
Tie a secure knot – two or three times is best – and trim the thread.
After tying the knot, trim the excess thread close to it, leaving a tiny tail for tucking. Use an awl or needle to push the trimmed ends into the hole or between the pages. Tigerpetal Press offers this tip:
From the inside, tie off the inner thread as close as possible to the inner seam of the book, trim off the excess, then use your awl or needle to slide the knot and thread into the seam.
This approach keeps the knot hidden, giving your book a polished, clean look both inside and out.
Before tying off the final knot, double-check the tension of your stitching. The thread should be tight enough to hold the pages securely but not so tight that it distorts the cover or makes the book hard to open. If you’re working with thicker covers that resist opening, tie the knot near the final hole on the outside and use an awl to carefully push it inside.
Alternative Stitching Patterns
The 4-hole pattern you’ve just mastered – known as Yotsume Toji – is the starting point for Japanese stab binding. However, there are several traditional variations that can enhance durability or add a decorative flair to your work. For example:
- Noble Binding (Koki Toji): This pattern includes two additional holes near the corners, creating a stronger and more formal design.
- Hemp Leaf (Asa-no-ha): A decorative option that forms intricate geometric patterns with diagonal stitches.
- Tortoise Shell (Kikko): Features hexagonal designs that symbolize longevity and resilience.
While each pattern has its own unique hole spacing and threading technique, the core principles remain consistent: maintain even tension, create clean holes, and hide knots for a tidy finish. Start with the 4-hole method to build confidence, then branch out into these advanced designs as you gain experience. For thicker books (over 0.5 inches), calculate your thread length by multiplying the spine measurement by five.
Next, dive into practical applications and key takeaways to bring your project to completion.
Practical Applications and Summary
Applications for Japanese Stab Binding
Japanese stab binding stands out for projects that emphasize craftsmanship and individuality. It’s a go-to choice for creating portfolios, community cookbooks, and handmade journals because it combines affordability with an elegant finish. Photographers often use it to bind large-format prints, while independent authors turn to this technique for self-publishing without needing costly equipment. Organizations use it for items like annual reports and textile stitch samplers, while individuals craft wedding guest books or memory books to preserve children’s artwork. As professional bookbinder Susan points out:
The great advantage of stab stitch styles is that they do not require any complicated page layout or imposition.
Unlike traditional folded-signature binding, this method works beautifully with unconventional materials, such as heavy cardstock or delicate rice paper, making it ideal for mixed media projects. Just keep in mind that you’ll need to leave extra-wide margins – about 1 inch – on the binding edge to account for the space lost when the pages curve open.
These versatile uses highlight why Japanese stab binding remains such a popular and adaptable technique.
Key Takeaways
Japanese stab binding delivers polished, adhesive-free results with just a few tools. The process, from crafting a precise hole template to mastering the 4-hole stitch, ensures both durability and visual appeal. The basic 4-hole pattern (yotsume toji) serves as a solid starting point, while more intricate styles like Noble binding (Kangxi) or Hemp Leaf binding (asa-no-ha-toji) add decorative complexity as you refine your skills.
Three key elements are crucial for success: aligning the paper grain with the spine, maintaining even tension while stitching, and ensuring precise hole placement. Waxed linen thread helps secure the stitches without tearing the paper, and the exposed spine transforms into a design feature rather than something to conceal. Whether you’re creating a single prototype or crafting handmade gifts, this method strikes a perfect balance between simplicity and artistry.
FAQs
How many pages can I stab bind at once?
When it comes to Japanese stab binding, the number of pages you can bind largely depends on the thickness of the paper and the tools you’re using. Typically, it’s best to stick with 20 to 50 sheets. This range helps ensure the binding remains sturdy and the holes stay intact, giving you a clean and durable result without compromising the structure.
Why don’t my pages open flat after binding?
Japanese stab binding, while beautiful and functional, can sometimes cause pages to resist lying flat. This issue arises from the sewing technique, which can create tension or a slight curve in the pages. Overly tight stitches or misaligned holes are common culprits. To address this, focus on maintaining even sewing tension and avoid pulling the thread too tight. Additionally, properly spacing and aligning the holes during the binding process can make a noticeable difference, helping the pages rest more naturally once bound.
How do I keep the stitching tight without warping the covers?
To keep your stitching snug and prevent warping the covers during Japanese stab binding, focus on maintaining steady, even tension as you sew. Avoid pulling the thread too tightly, as this can cause distortion. Make sure the covers are lying flat and are well-supported throughout the process. Tighten the stitches gradually, pausing often to check your progress and ensure the tension remains balanced. This careful approach will help you achieve clean, professional results.
Related Blog Posts
- How Binding Choices Impact Print Durability
- Japanese Stab Binding for Business Projects
- What Is Smyth Sewing in Book Binding?
- 10 Binding Mistakes to Avoid
https://app.seobotai.com/banner/banner.js?id=69dd875509e6c77f4f7ae52d
