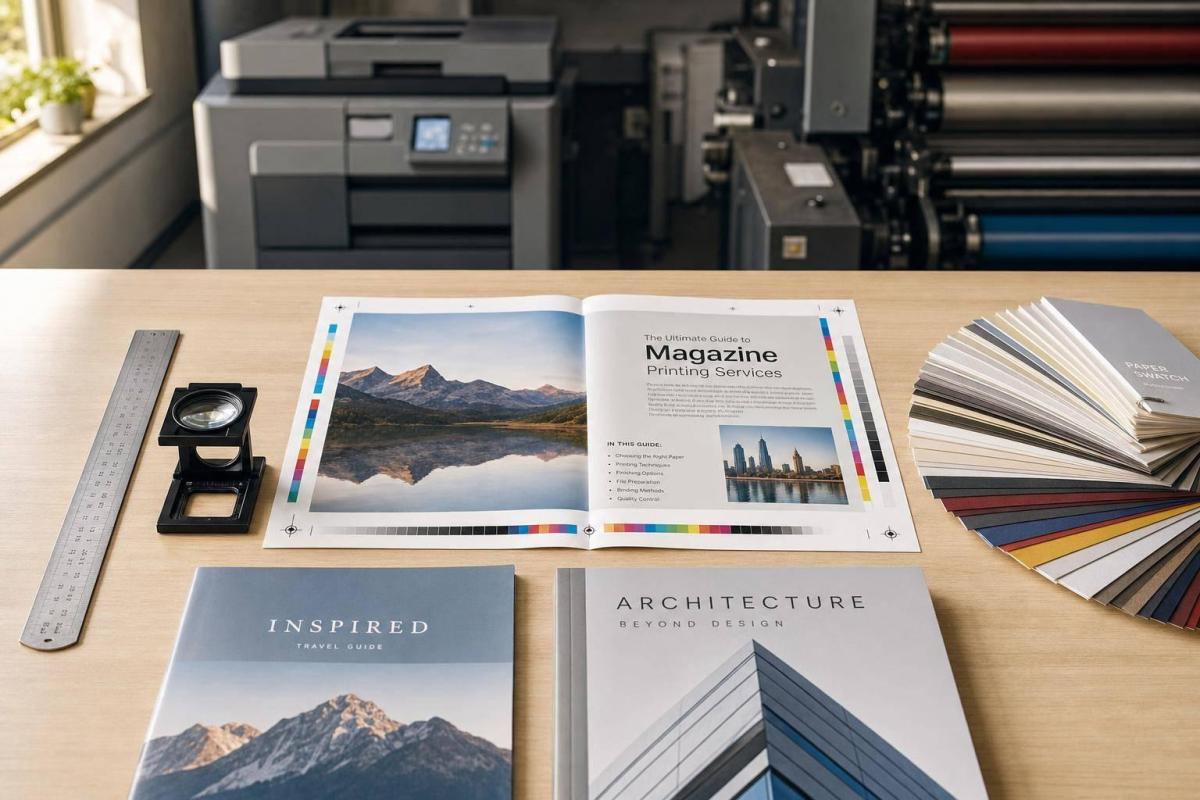
Printing a magazine comes down to a few core choices: size, page count, paper, binding, print method, and delivery. If you lock those down early, you can avoid file problems, control costs in U.S. dollars, and keep your schedule on track.
Here’s the short version:
- Most magazines use trim sizes like 8.5" × 11" or 5.5" × 8.5"
- Page counts must be in multiples of 4
- Bleed is usually 0.125", and safe margins for text are 0.25" to 0.375"
- Images should be 300 dpi at final size
- Files should be CMYK, not RGB
- Digital printing often fits short runs and fast turnarounds
- Offset printing often fits runs above 2,000 copies
- Saddle stitch often works for 8–64 pages
- Perfect binding often works for 28–300+ pages
- Proofing, finishing, mailing, and shipping all affect the final timeline and cost
In other words: if I’m planning a magazine, I need to think past the design. I need a print-ready file, the right production method, and a printer that can handle proofing, binding, and delivery without confusion.
A few details drive most of the outcome:
- Page count affects paper use, binding, and price
- Trim size affects layout and mailing
- Paper stock changes how photos and text look
- Binding affects durability and spine space
- Prepress checks help catch low-res images, missing fonts, and wrong color modes before printing
- Delivery planning matters if copies need to arrive before an event, launch, or mailing date
If I had to boil the article down to one point, it’s this: magazine printing works best when the specs, files, proofing, and delivery plan all match from the start. The rest of the guide walks through how to do that in a clear order.
How to Plan and Design a Print-Ready Magazine
Build the flatplan, page count, and layout grid
Once the issue structure is locked, the next step is page planning. Start with a flatplan. Map every page, lock in the cover and ad positions, and then place feature stories across clean spreads. That takes the editorial plan and turns it into a working page order before you touch the layout itself.
Page count has a direct effect on cost. Printers price jobs based on total pages and quantity, so even a small shift, like 64 pages vs. 72 pages, can change the budget in a noticeable way at higher print runs. A 64-page magazine built in 16-page signatures is more efficient than a 62-page magazine that needs filler pages.
For the layout grid, a 3- to 5-column system works well in most cases. Photo-led magazines often lean on 2 to 3 columns. Text-heavy trade publications usually work better with 3 to 4 columns, which helps keep line length comfortable and easier to read. Set margins around 0.5" to 0.75", and give the inside gutter a bit more room, about 0.75" to 1" for perfect-bound magazines, so text doesn’t disappear into the spine.
Set trim size, bleed, safe area, and image standards
Your file needs three clear zones: trim, bleed, and safe area. The trim line is the final cut edge. The bleed area extends past that edge. The safe area is where text, logos, and other must-keep items should stay.
In U.S. commercial printing, the standard bleed is 0.125" (1/8") on all sides for any item that runs to the page edge. Keep text and logos at least 0.25" to 0.375" inside the trim on every side. That extra room matters because even a slight shift at trimming can cause headaches.
| Specification | Standard Value |
|---|---|
| Bleed | 0.125" beyond trim on all sides |
| Safe area (text/logos) | 0.25"–0.375" inside trim |
| Image resolution | 300 dpi at final print size |
| Color mode | CMYK (not RGB) |
A simple example helps here. If you have a full-page photo with a caption, let the photo run 0.125" past the trim. But keep the caption at least 0.25" inside the trim so it doesn’t get clipped if the cut shifts a little.
Images should be at least 300 dpi at final print size. Anything lower can look soft or pixelated on press. Convert images and artwork to CMYK before export. If you leave files in RGB, color can shift when the printer converts them at the RIP. It’s safer to use a standard profile such as U.S. Web Coated SWOP v2 and check for out-of-gamut colors before the file leaves your hands.
Choose software and export settings for print
Adobe InDesign is the main tool for magazine layout. It handles multi-page documents well, and its master pages, paragraph styles, and built-in preflight tools make the job a lot smoother. Most teams also use Adobe Photoshop for image retouching and Adobe Illustrator for vector graphics and infographics.
Before exporting, run a preflight check. InDesign’s preflight panel can catch missing fonts, low-resolution images, RGB objects, and overset text. Those are the kinds of problems that can slow production or cause trouble on press.
Export the file as PDF/X-1a or PDF/X-4, with bleed turned on and compression set to keep 300 dpi. If the printer gives you a PDF preset, use it. That’s usually the safest path for a clean handoff to prepress.
sbb-itb-ce53437
File Preparation and Production Specifications
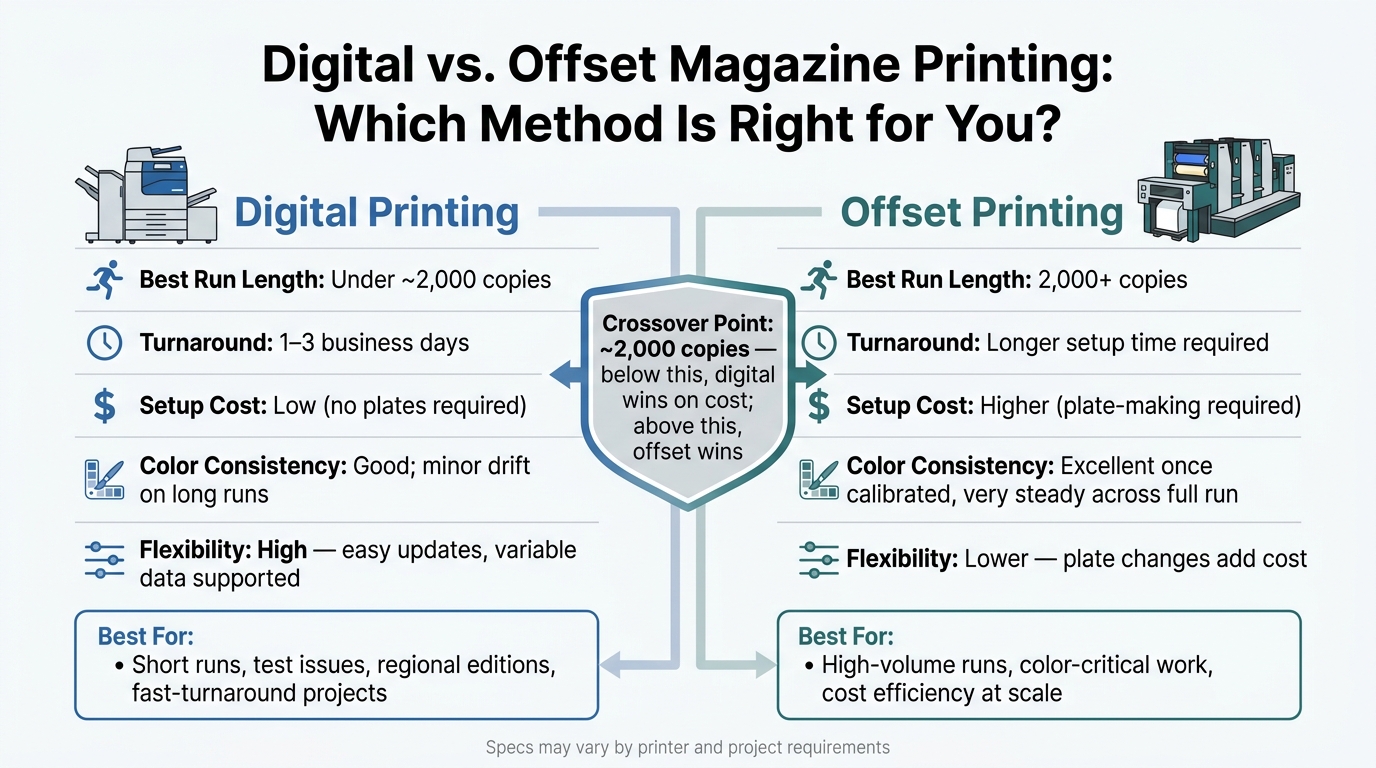
Digital vs. Offset Magazine Printing: Which Method Is Right for You?
Prepress checklist for clean, accurate files
Once the layout is exported, the job moves into prepress and print planning. This is the stage where a finished design becomes a press-ready file. In plain English: prepress checks whether the file will print the way you expect, without nasty surprises.
A good final review is easier when you group checks by type:
- Fonts and links: Embed or outline fonts, and package or embed linked assets
- Images and color: 300 dpi at final size, CMYK only, and use the printer’s ICC profile if one is provided
- Page setup: 0.125" bleed, safe area respected, single pages unless spreads are requested, and page count and order checked
- Output controls: Crop marks only if required, with overprint checked before export
If the file clears preflight, export it using the printer’s preferred PDF standard. Use PDF/X-1a for flattened output or PDF/X-4 for live transparency, based on the printer’s workflow. If you’re not sure which one to send, ask before exporting.
For black usage, the rule is simple. Use rich black for large solids and headlines. Use K:100 black for body text and small type.
Proofing also matters more than people think. Use a soft proof for layout review and general color checks. Use a contract proof when color needs to match closely, especially for brand work or photo-heavy pieces.
| Proof Type | Best For |
|---|---|
| Soft proof (calibrated monitor) | Layout review and general color checking |
| Contract proof | Brand colors, photography, and press reference |
After proof approval, the print method shapes the schedule, cost, and run length.
Offset vs. digital printing for magazines
The printing method changes the math on cost, timing, and color consistency. The right fit usually comes down to run length, deadline, and how often the content changes.
Digital printing skips plate-making, so setup costs stay lower and turnaround is faster – often 1–3 business days. That makes it a good fit for short runs, test issues, regional editions, or projects where content changes often.
Offset printing takes more time up front, but once the press is calibrated, color stays very steady across the full run. It also tends to make more financial sense above about 2,000 copies, while digital is usually the lower-cost option below that mark.
| Factor | Digital | Offset |
|---|---|---|
| Best run length | Under ~2,000 copies | 2,000+ copies |
| Turnaround | 1–3 business days | Longer setup |
| Setup cost | Low (no plates) | Higher (plate-making required) |
| Color consistency | Good; minor drift on long runs | Excellent once calibrated |
| Flexibility | High (easy updates, variable data) | Lower (plate changes add cost) |
Once the print method is set, paper and binding shape the final piece in a more physical way – how it looks, how it feels in the hand, and how well it holds up over time.
Paper stocks and binding methods that match the project
Stock and binding should line up with how the magazine will be used, handled, and stored. The two main paper categories are coated and uncoated stock.
Coated paper holds ink closer to the surface, which leads to sharper dots and brighter color. That’s why it’s often used for photography-heavy editorial work. Within coated stocks, gloss gives you a bright, reflective finish, while matte and satin cut glare and feel a bit more polished. Uncoated paper absorbs ink more, which gives pages a warmer, more tactile look. It tends to work well for text-heavy or literary magazines. Cover stock is usually heavier than the interior pages, which helps with durability and gives the magazine a stronger first impression.
| Paper Finish | Image Quality | Common Use |
|---|---|---|
| Gloss coated | Sharpest, most vivid | Photo-driven consumer magazines |
| Matte/satin coated | Sharp, low glare | Premium lifestyle, trade publications |
| Uncoated | Softer detail | Literary, text-heavy, niche publications |
For binding, saddle stitching works for 8–64 pages. Perfect binding fits 28–300+ pages and adds a printable spine. It does cost more, but if the magazine is meant to sit on a shelf or be kept as a reference, that extra spend usually makes sense.
Miro Printing & Graphics Inc.‘s in-house bindery can keep this part of the job under one roof. Once files, stock, and binding are set, the printer can quote the project and schedule it with much less guesswork.
Working With a Printer From Proof to Delivery
Request estimates, proofs, and production schedules
Once your file is press-ready, the work moves into estimating, proofing, finishing, and delivery. Start with a written estimate that spells out the run size, setup fees, quantity breaks, and total cost in U.S. dollars. It also helps to ask for two or three quantity options so you can compare the numbers before you commit.
After you approve the estimate, the printer sends a proof. Digital PDF proofs usually show up within 24–48 hours, while physical proofs are used for color-critical work. As you review the proof, check the copy, page order, bleeds, safe areas, and brand color values. This is one of those moments where a small miss can turn into a headache later.
Use one point person to collect feedback and give final approval. That keeps the process clean. If changes come in after approval, costs can go up and the timeline can slide.
Build the schedule by working backward from your final delivery date. In most cases, the timeline runs through prepress, proofing, printing, finishing, shipping, and carrier transit. The page count, binding method, and print method all affect how long each part takes, so those early choices matter more than they may seem at first. If the magazine needs to land before an event or product launch, add 2–3 business days as a cushion for proof edits or prepress fixes.
Finishing, bindery, mailing, and fulfillment services
After printing, finishing turns stacks of printed sheets into an actual magazine. That work can include trimming, folding, collating, scoring, die cutting, and coating. You can also add cover treatments like UV coating, foil stamping, and laminating for extra durability and a stronger shelf look, especially if the magazine will be handled a lot or handed out at events.
For U.S. distribution, many printers also handle mailing and fulfillment. That often includes addressing, list processing, USPS sorting, and bulk mail entry. Smart postage setup and Marketing Mail batching can cut costs in a noticeable way. Running NCOA (National Change of Address) updates against your list also helps reduce undeliverable mail before anything goes out the door.
| Stage | Key Tasks | Typical Timing |
|---|---|---|
| Design & Prepress | Layout, file checks, color profiles | Varies by project |
| Proofing & Approval | PDF or hard-copy proof, stakeholder sign-off | Usually a short turnaround |
| Printing | Offset or digital press run | Varies by project |
| Bindery & Finishing | Trim, fold, bind, coat, score | Included in the production window |
| Mailing & Fulfillment | Address, sort, USPS entry, ship | Depends on list size and transit time |
When a full-service shop simplifies magazine production
When all of those steps happen in one place, scheduling tends to get easier and fewer errors slip in. Splitting design, printing, bindery, and mailing across different vendors creates more handoffs. And every handoff is another chance for something to go sideways.
Miro Printing & Graphics Inc. in Hackensack, NJ offers that kind of all-in-one workflow, taking a magazine project from design through distribution without sending it outside the facility. For teams working with tight deadlines and lean staff, that setup helps keep recurring issues in line and the schedule easier to manage.
Conclusion: Choosing the Right Magazine Printing Service
Every choice in a magazine project affects the next one. Trim size changes paper cost. Page count shapes binding. Binding can change postage. Magazine printing works like a connected system, not a set of separate tasks. That’s why the planning stage is the best time to control cost, print quality, and timing.
Before you ask for estimates, lock down the core specs:
- trim size
- page count
- binding
- cover and text stock
- final file specs
Then send press-ready files that match the printer’s requirements. Once those details are set, the next call is the print method.
Match the print method to the run: digital for short, fast jobs; offset for higher-volume work. One isn’t always better than the other. A printer with experience in both can help you pick the most cost-effective fit for your job. After that, workflow matters just as much as the press.
Choose a printer that can manage prepress, printing, finishing, and delivery in one workflow. For magazine projects, Miro Printing & Graphics Inc. offers digital and offset printing, in-house bindery, design, and mailing & fulfillment – which helps keep the project moving with fewer handoffs from proof to delivery.
The best magazine printer is the one that keeps specs, production, and delivery aligned from start to finish.
FAQs
How do I choose the right magazine size?
Choose the right magazine size by balancing your content, budget, and how you plan to distribute the magazine. Start with your trim size – the final physical size of the printed magazine – and set up your document at those exact dimensions from the start.
Standard North American sizes like Letter (8.5 x 11 inches) or Tabloid (11 x 17 inches) are often more cost-effective. Custom sizes, on the other hand, can help your magazine stand out on the shelf. It also helps to think through binding, mailing costs, and readability before you lock in the format.
When should I use digital instead of offset printing?
Use digital printing for small print runs and rush projects. It needs very little setup and often turns around in 1 to 2 business days, which makes it a smart choice when there’s no minimum order quantity.
Use offset printing for large-volume jobs. It usually takes 5 to 7 business days and is often a better fit for premium paper stocks and high-end finishing.
What files do I need to send to the printer?
Miro Printing & Graphics Inc. recommends print-ready PDF/X-1a files.
Set your file up at 300 DPI, switch all colors to CMYK, and make sure the document matches the final trim size. Add a 0.125-inch (1/8") bleed and include crop marks.
You should also embed or outline all fonts and flatten transparencies. Before you send the file, check it in Adobe Acrobat Professional.
Related Blog Posts
- Post-Press Quality Control Checklist
- Proofing Process: From Screen to Print
- Ultimate Guide to Proofing and Feedback
- Top 5 Factors for Choosing Printing Methods
https://app.seobotai.com/banner/banner.js?id=6a752c30d642d19a97926ade

